


Three Things That Would Have Made My First Ever Composite Better
Most people know me as the guy who does Photoshop Tutorials on YouTube. But in the last year, I’ve been extremely fortunate to have been involved in several compositing projects that I am very proud of.
Photoshop User magazine featured one of my favorite composites in the 2016 July/August edition.

But probably my most notable composite last year was a composite that Adobe commissioned me to do for their Make A Masterpiece campaign.
I was one of five artists who worked on that campaign where we each had to recreate a painting that has been lost or destroyed.
The only rules were that I had to use Adobe Stock images and Photoshop to recreate the painting.
Here is a side-by-side comparison of the painting that I was assigned (The Just Judges) and my recreation.
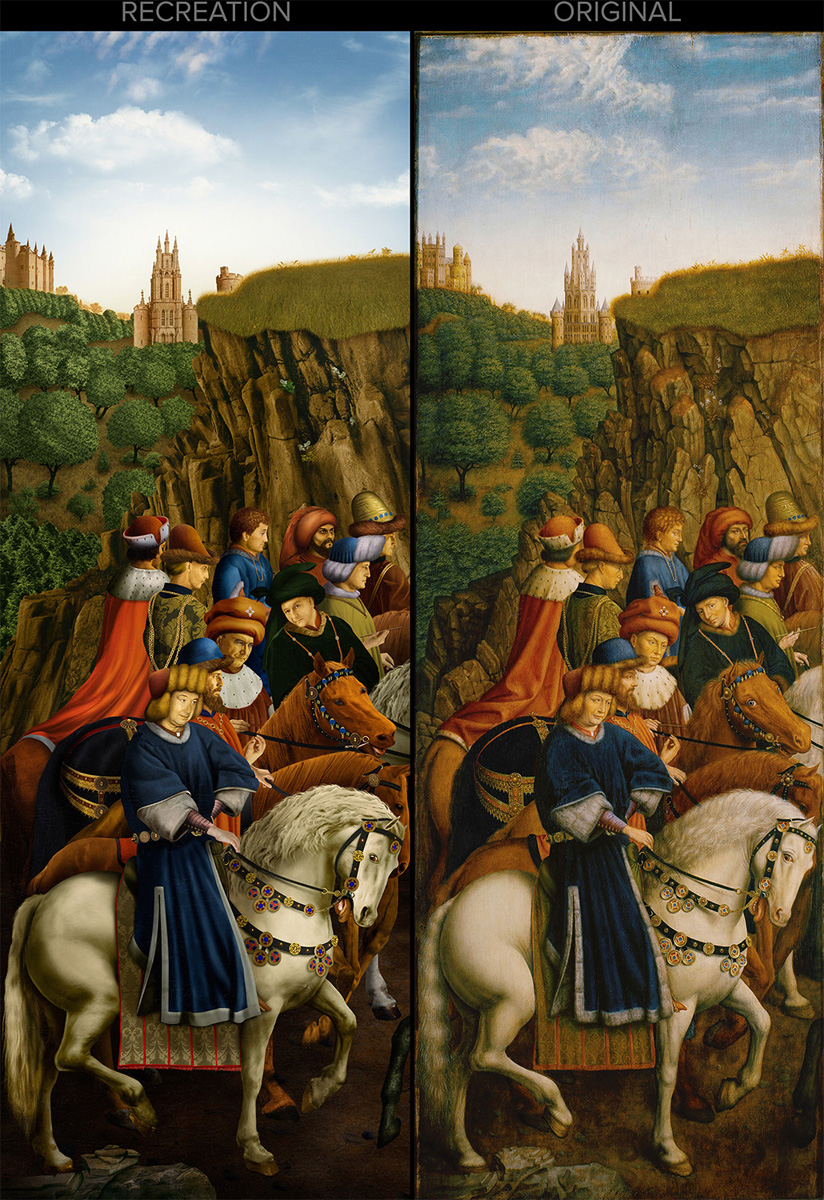
I presented my composite at the Adobe MAX 2016 conference. The final image used 115 Adobe Stock images, and it took over 80 hours of work to complete. The final Photoshop document was 4.7 GB, and it contained over 1,500 layers.
You can check out my Behance page to see my interview with Adobe and to see more about this project.
As you might imagine, I did not always have the skill to pull off composites like this.
I recently was going through an old hard drive, and I came across my very first composite, which I made in 2003.
It was a composite where I tried to make it seem as if I was feeding a giant dog. But clearly, there was a lot wrong with my composite.

I had not seen this composite in many years, and by looking at it now with the experience that I have, I can clearly see all the mistakes and the things that I didn’t know about compositing when I made it.
Throughout the years I have learned that a composite is a lot more than a collage of photos and that you cannot expect great results by just throwing photos on top of each other.
To make a realistic composite, you need to consider the differences of each element, and in Photoshop, figure out how to reduce those disparities to create a cohesive image.
Right off the bat, I can think of three things that would have made this composite a whole lot better!
Unfortunately, I can’t go back in time and fix these problems. But I can tell you what they are, and hopefully, they can help you in your composites.
The concepts that I am going to talk about are not Photoshop hidden tips and tricks. There are no hidden buttons or menus that will automatically make your composites better.
What my composite was missing were the art principals that make composites look real.
1) Matching Perspective
Perspective is perhaps both the most overlooked compositing principal and the most important. In my dog composite, I paid absolutely no attention to perspective, which is why it seems like such a cheap cut-and-paste job.
I did a good job on the masking, but that is just not enough. Perspective must always be the priority of any realistic composite. Everything else could go right, but if the perspective is off, then the composite will still feel off.
Put simply, to match the perspective of two images you must make sure that the horizon line of both your photos matches. The horizon line is where the ground plane meets the sky, and where the converging lines meet up at a vanishing point.
In this graphic, you can see how all the parallel converging lines of the cubes end up on a vanishing point in the horizon line. The cubes don’t seem out of place, and they look like they are sitting on the ground.
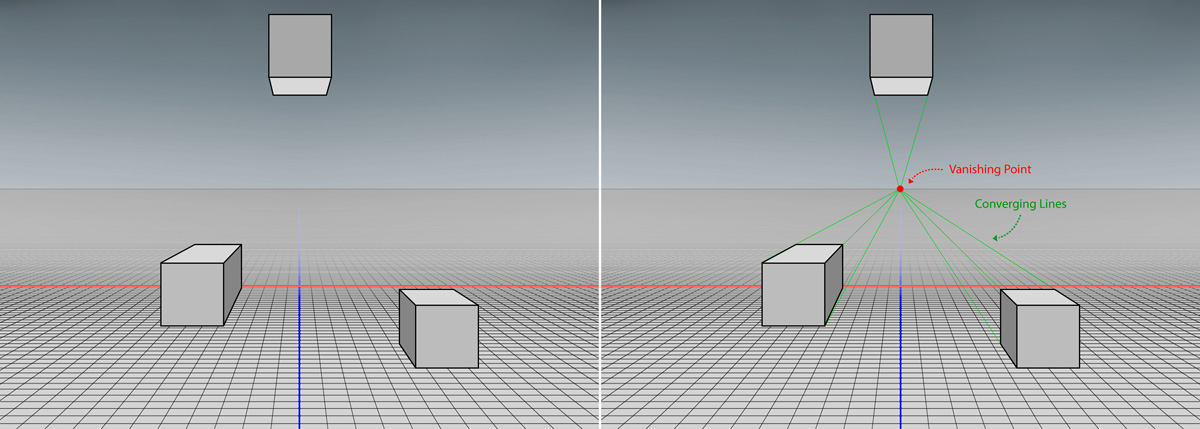
If we bring in a cube and place it randomly in the scene, it will not match. You will get the feeling that something is wrong just by looking at the image.
This feeling is probably the same feeling that you had when you have looked at your own composites and knew that something was off, but you didn’t really know what. Most of the time, when you get that feeling of something being off, it is the perspective that it is not matching.
What you need to do to solve this issue is find the horizon line of the object that you are trying to composite in (the foreground). You can find the horizon line by looking at the original image and figuring out where the ground plane meets the sky.
One way of doing this is by following the converging parallel lines until they meet. The place where they meet will be the vanishing point, which lays on the horizon line.
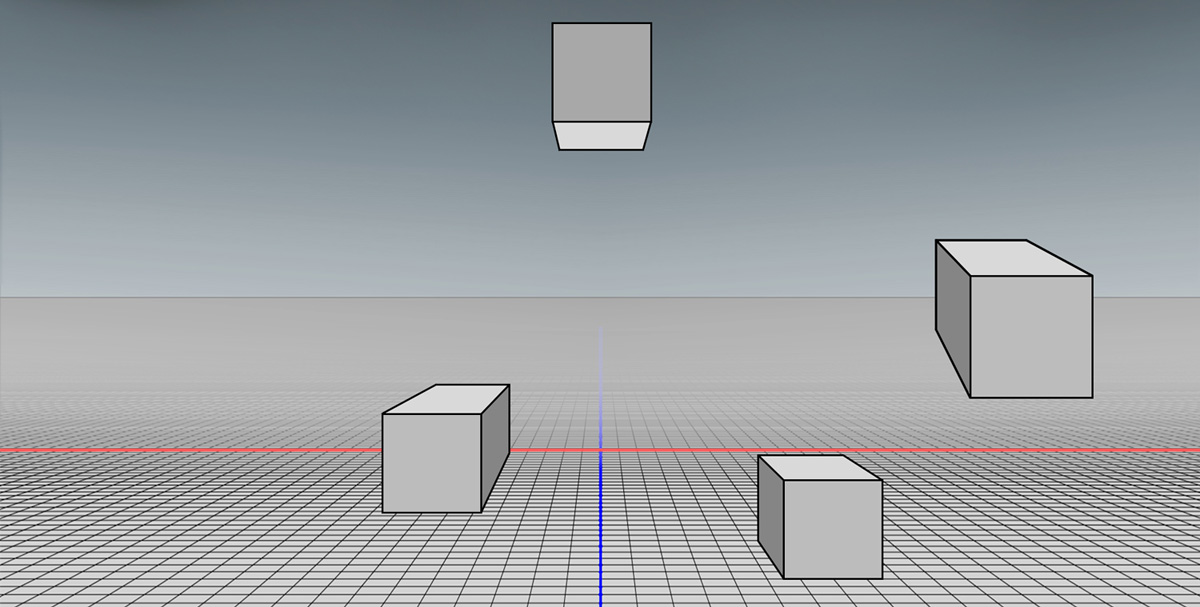
Once you determine the horizon line, you can move your object so that the parallel converging lines meet up anywhere on the new background’s horizon line. It does not matter where they meet, as long as it is on the horizon line.

Notice now that I’ve moved the cube, the horizon lines match, and the cube looks like it belongs in the scene. Even though they have different vanishing points, they have the same perspective.
You do not need to be 100% precise when matching horizon lines, but the further that they are from each other the more noticeable it is that the two images don’t belong together.
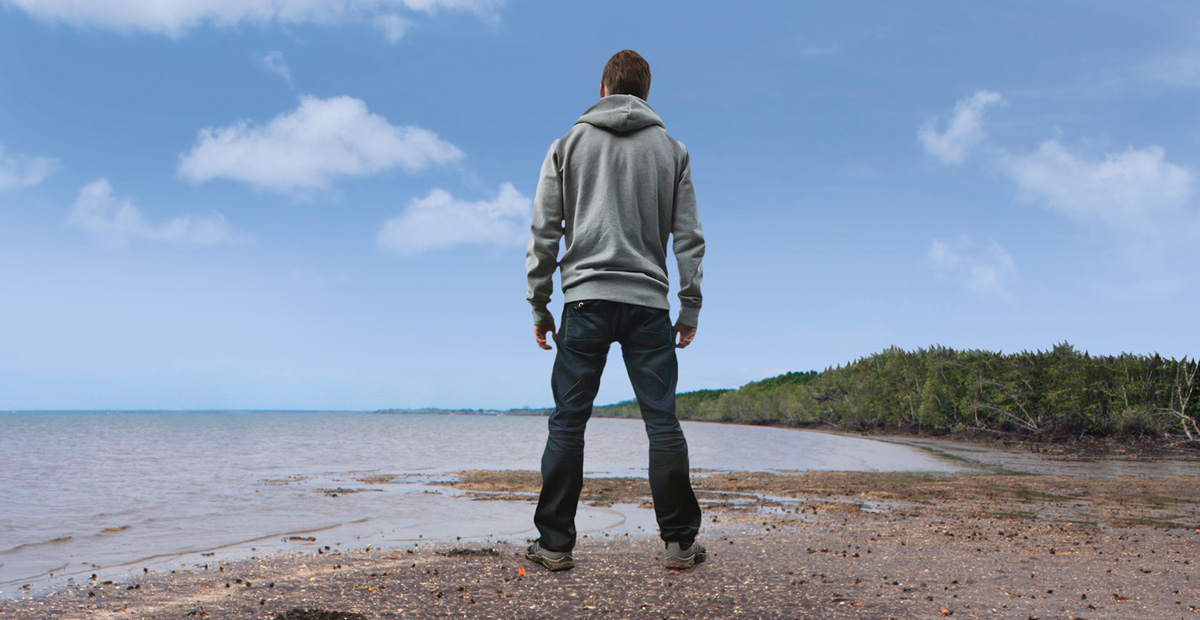
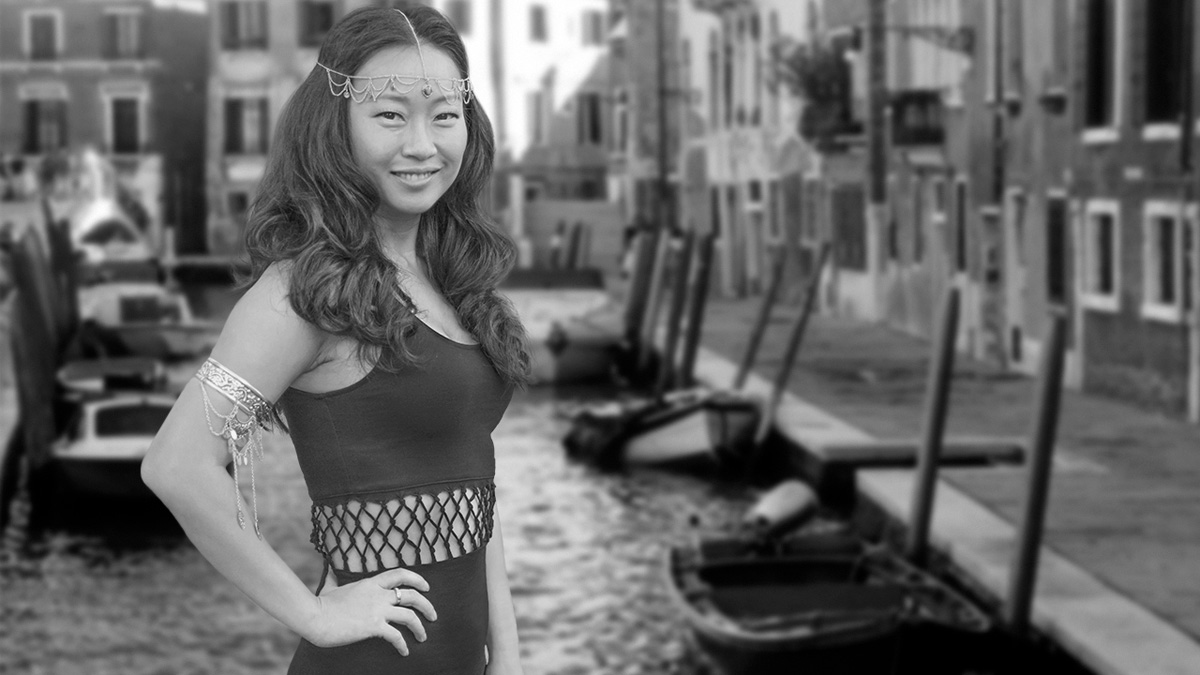
The same would be true if we were using photos. In the example below, you can tell that the person standing by the beach does not belong there. Sometimes it almost seems right, but something inside tells you that there is something wrong with the image.

Even though the lighting, contrast, color, and everything else matches, your eye is still telling you that something is off.
Notice that the horizon line for the background is high up on the image. Almost on the top edge of the photo. That’s where the ground plane (the water) meets the sky.
By disabling the Layer Mask on the model, you will see that the original photo of the man standing has the horizon line (where the ground plane meets the sky) just above his knees.

In the composite, the horizon line was above his head. This mismatch is what makes the composite not work.
To correct this mismatch, you will have to move the background image down to try to match the foreground, or use an entirely different background image.
Sometimes the discrepancy in perspective is so vast that you cannot composite two images together and get realistic results. But in this case, I could bring the background down, and match the horizon lines.
Notice that once the horizon lines match, the perspective matches, and we have a composite that is much more realistic.
In my dog composite, the perspective was too different, and I would not have been able to correct that discrepancy.
Knowing what I know now about perspective, I would have shot the photos differently so that the resulting images would have similar perspectives to make it easy to composite them in Photoshop.
If you want to learn more about perspective check out this tutorial on YouTube:
2) Matching Luminosity and Contrast
Another huge problem with my dog composite is that the luminosity and contrast of the two photos do not match. Notice that the background is a lot brighter than the foreground and it also has less contrast.
If this were a real photo, then the contrast and luminosity of all the objects in the scene would match.
In some cases, it the difference is not obvious. It is difficult to compare the contrast and luminance values of each object in your composite with the naked eye.

The color in the image may be distracting, and you will not be able to see the differences. But by desaturating the image, the differences become more apparent.
You can use a Black and White adjustment layer to desaturate a composite temporarily. If there is a mismatch in contrast and luminance between your images, then it will become more apparent.
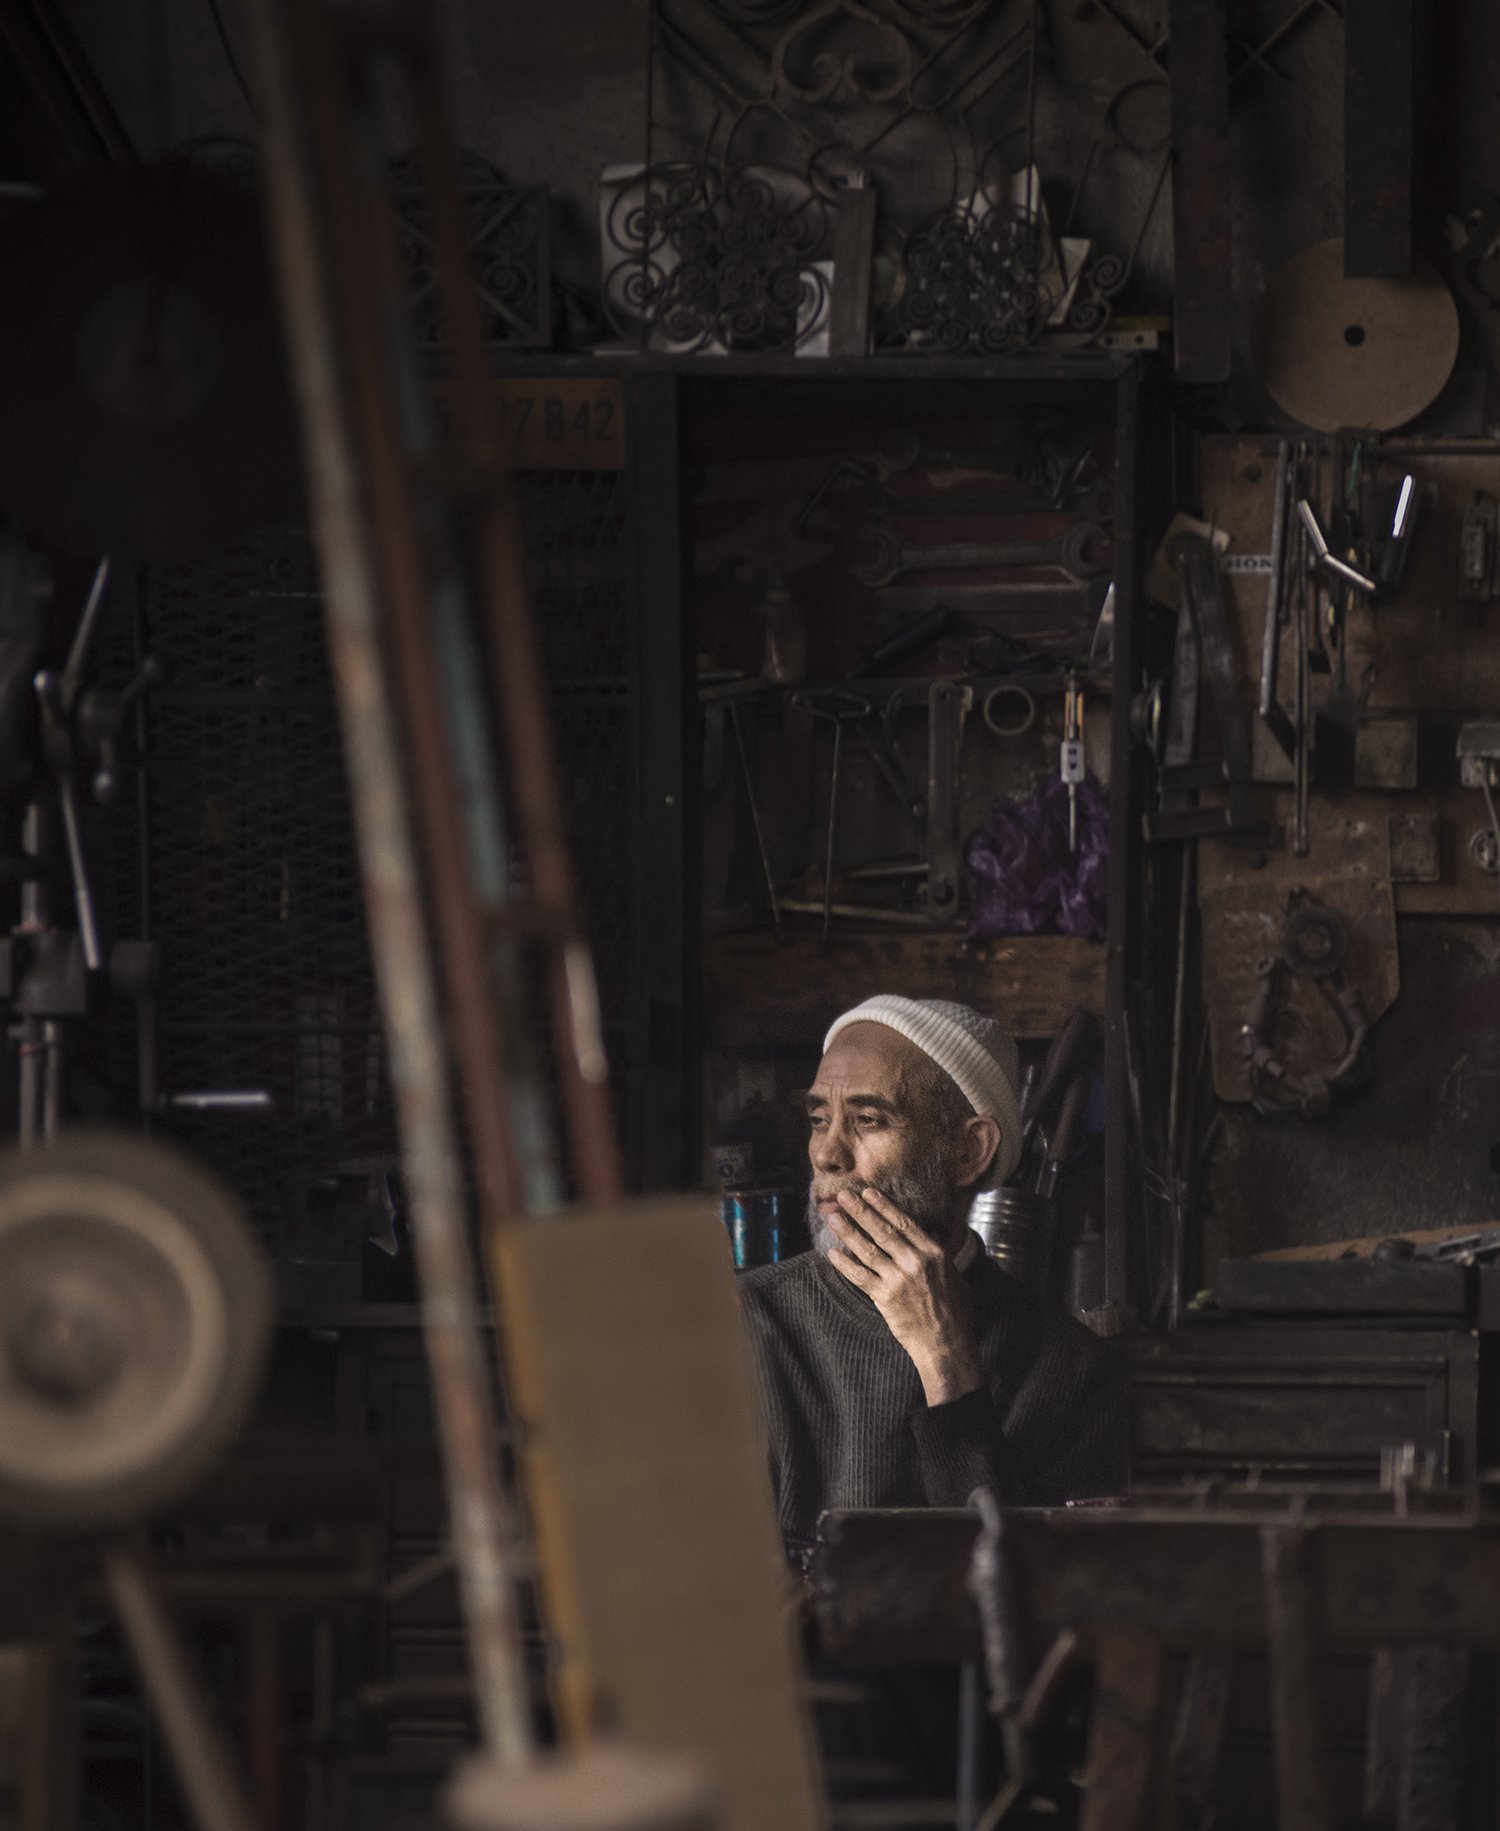
In the example below, you can see that the model is much brighter than the background.
You can use a clipped Levels adjustment, to adjust either the foreground or background. In this example, I made the foreground element darker and gave it more contrast to match the background.

Once the contrast of the foreground and background are similar, you can delete the Black and White adjustments layer to reveal a composite that looks much more realistic than the original version.

In my dog composite, I would have probably done the opposite and darkened the background since it was too light. But the idea is the same. You must make sure that all objects in a scene have similar contrast.
In some cases, you must also think of how “deep” in the scene the object is. The further back you go, the less contrast it has. This effect is known as atmospheric perspective.
Atmospheric perspective is not a problem in my dog composite, but it is a common problem that you may come across.
I have a tutorial that it is all about atmospheric perspective and how you can use it to make better composites in Photoshop.
3) Image Quality – Blur, Noise, and Pixilation
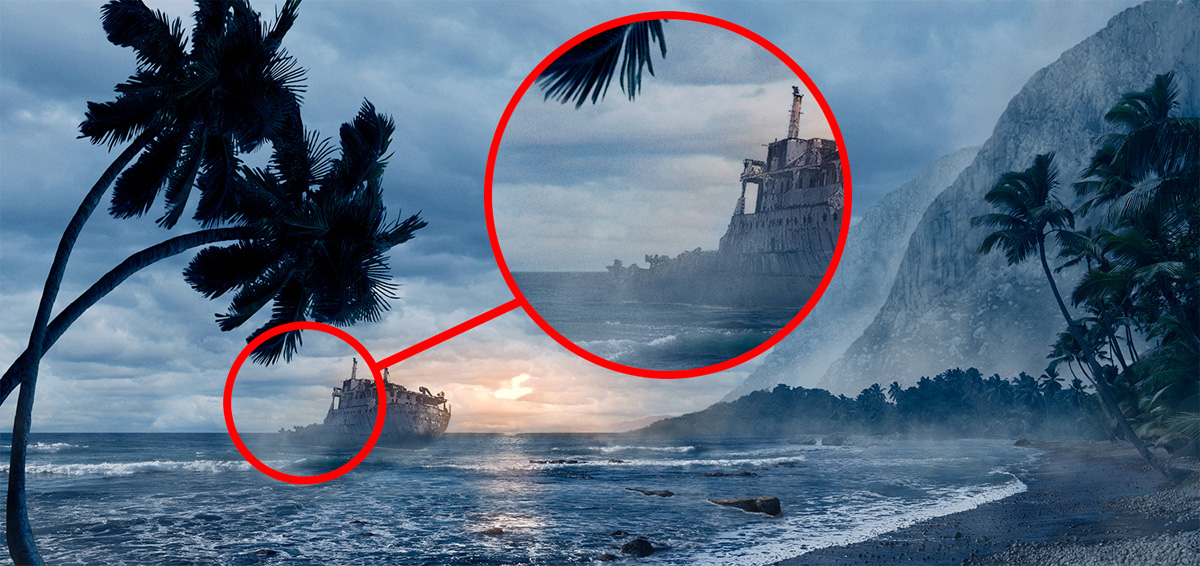
For my dog composite, I used images that were of vastly different qualities. The background image is out of focus, and it has a lot of scratches. The foreground image is not perfect, but it is a better photo.
In a perfect world, all the images that you use for a composite should be of high quality. If you must use images of lower quality, you will have to match all pieces in your composite to the lowest quality piece. This is especially important if the lowest quality piece is an essential element of the composite.
In my dog composite, the lowest quality piece was the background. So, I would need to blur the foreground and add scratches to the photo.
In some cases, you may need to add pixelation, or even noise to a photo to make the elements match.
A technique that I often use when I finish a composite is to add just a tiny bit of noise to the entire image to help make the composite more cohesive.
I think that with those three things my composite would have been much better. I can’t go back and fix my composite (I lost the PSD!), but I hope that these tips help you improve your work!
If you would like to learn more about compositing, then join me in Orlando at Photoshop World 2018! I’ll be leading a session on compositing!
https://photoshopworld.com/schedule
Also, check out this playlist with my best Photoshop tutorials!
Jesús Ramirez is a digital graphics expert, speaker, and educator specializing in Adobe Photoshop. Jesús is best known as the founder of the Photoshop Training Channel, one of the most popular Photoshop YouTube channels in the world. Jesús has been a speaker at Adobe MAX, Adobe SUMMIT, Adobe MAKE IT, CreativeLive, CreativePro and many other conferences and industry events.
You can find Jesús on Instagram, Behance, Twitter, and Facebook!
Thanks for sharing your expertise in composting truly helpful to those of us in the basic learning phase….I have one question related to your 1500 layer photoshop document …. What format are you using to save that file? I’m having a difficult time saving anything over 2gigs.
Thanks
George
Great Post!