

Creative Studio Lighting: Constant, Strobe Mix “Dress on Fire’
Light gives you such control in the studio. You have the control to flatter your subject, set the mood, and even create ‘special effects’. When I first began photography I spent years trying to master traditional lighting including my desire to really understand the direction of light, quality of light, and how to flatter my subject. Eventually, however, I wanted to get a bit more creative and advanced.
Seeking to take my lighting up a notch, I start to research advanced tutorials or creative lighting and I really didn’t find very much.
This is why I’ve spent the last several months to create my brand new ebook, The Creative Studio Lighting Guide with 30 creative studio setups. Whether you have one light, 4 lights, or unusual modifiers, it is going to help introduce you to entirely new worlds in the studio.
For this article I’d like to share one of the lighting setups you can find in this guide, and how mixing constant light and studio strobes can create stunning results. This setup is in the sample section of the guide that has 5 completely free creative lighting tutorials to get you started on your path to creativity in the studio!
Lighting Gear Used:
- 2 Profoto D1 Air 500 Watt
- Light 1 – Profoto Softlight Reflector (beauty dish) + Grid
- Light 2 – Profoto zoom reflector with barn doors + gels (modeling light only)
Other Gear Used:
- Rosco gel kit
- Avenger D600 mini boom arm
Distance of Subject to Background:
- Not Applicable
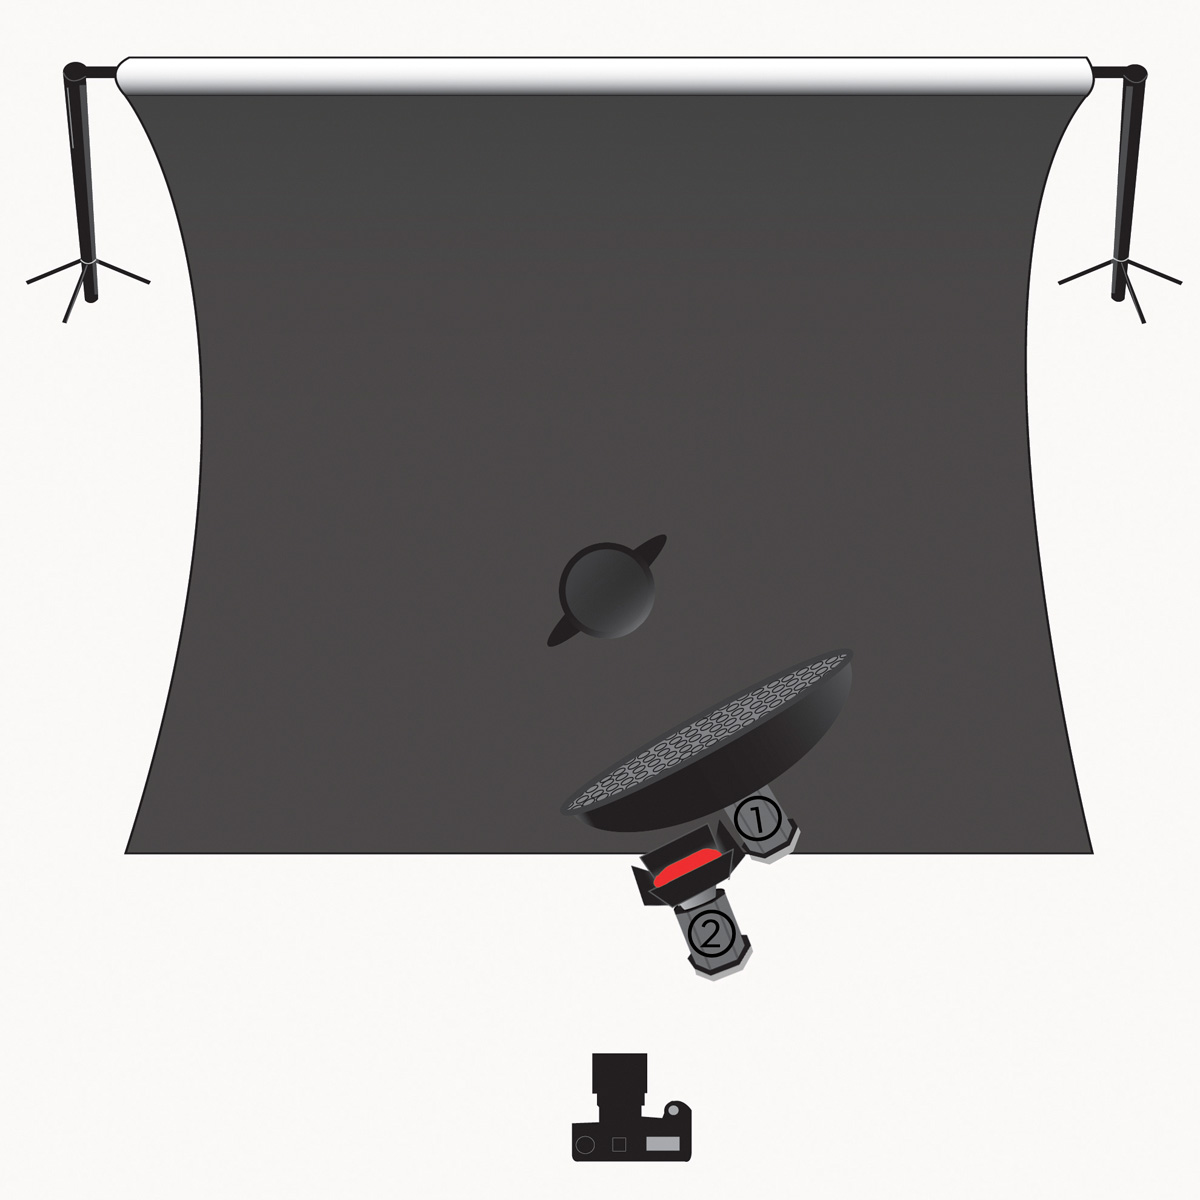
SETUP
Light 1:
- Distance from subject: 32 inches
- Distance off center: 9 inches
- Height above eye level: 12 inches
- Power (Fstops): F/9
Light 2:
- Distance from subject: 52 inches
- Distance off center: 20 inches
- Height above floor: 24 inches
- Power (Fstops): F/3.5
Camera Gear & Settings:
- Camera: Canon 5D III
- Lens: Canon 24-70mm 2.8 II at 24mm
- ISO: 100
- Shutter Speed: 1/4 sec
- Aperture: F/9
- WB: Flash
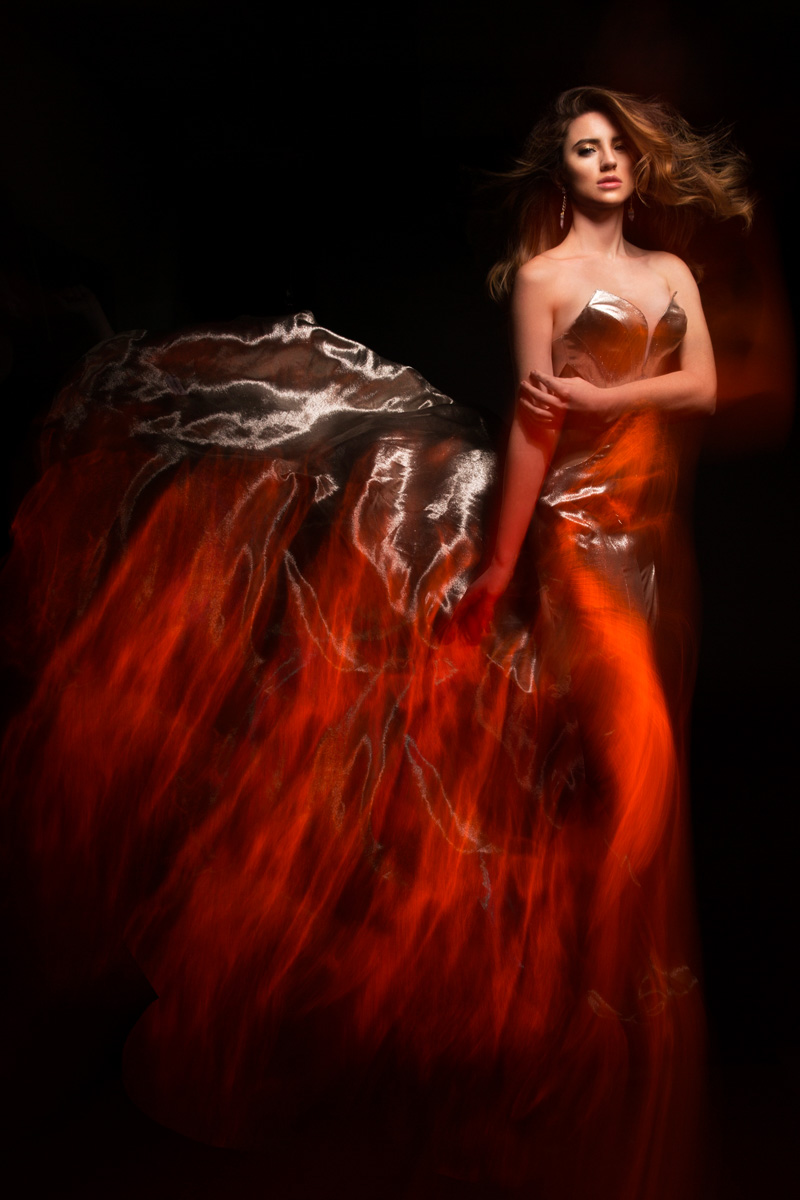
The goal of this studio lighting setup is to infuse energy and motion into the frame by mixing one constant light, one studio strobe and a long exposure. The end result will help this dress and the scene to come to life, making the dress appear as if on fire!
Let’s take a look step-by-step at considerations for building this two-light setup filled with movement and drama!
Step 1:
You’ll want to begin by completely removing all ambient light in the shooting space. Be sure no light is coming through the windows and that overhead lights are turned off. This will affect the look of the final photograph.
Step 2:
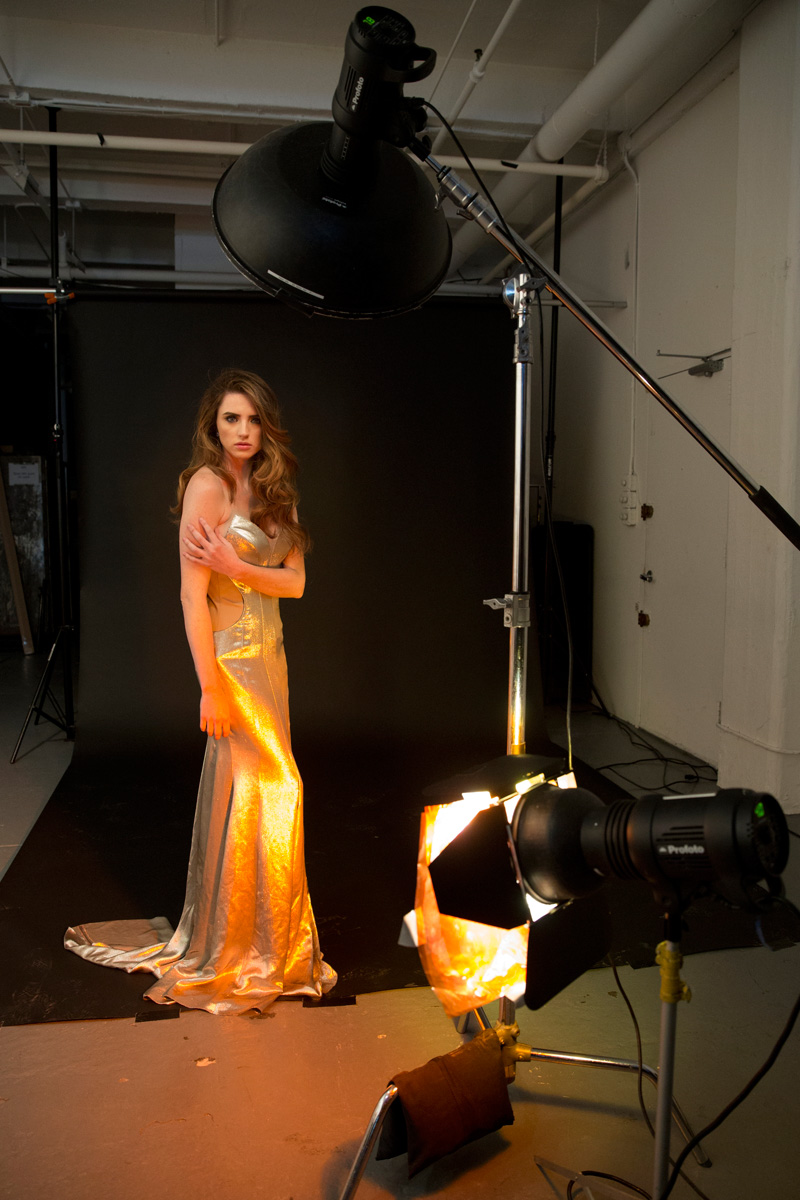
Next, you’ll start with your main light. Place a strobe with a beauty dish with a grid as the main light illuminating your subject’s face. The beauty dish will create crisp but glowing light on the face. The grid will focus the light primarily around the subject’s face and torso.
As you can see in this image, by adding the grid the entire lower half of her body is completely in shadow. Since grids focus light and create more rapid fall-off of light, this is going to be perfect for adding the next element of the scene.

Step 3:
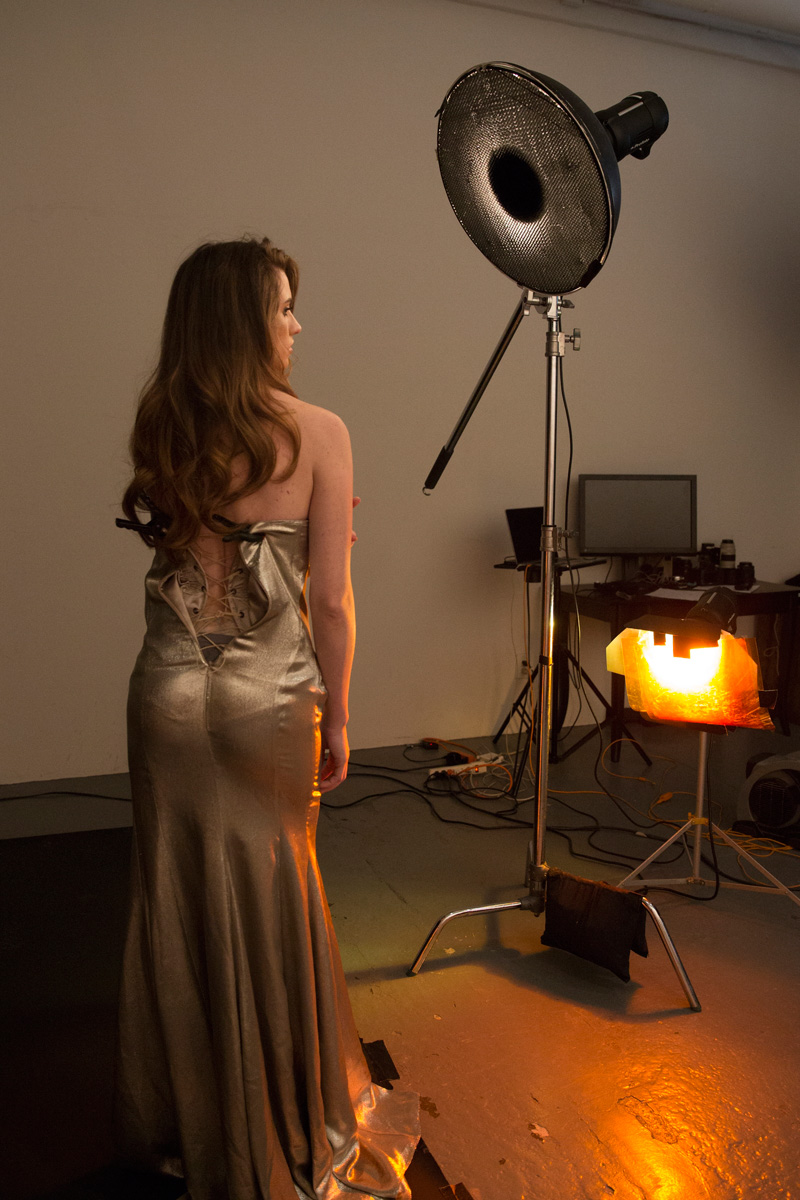
Next, you need to add a second light pointed at the lower half of the subject’s body. For this light you will turn OFF the strobe capabilities and only use the modeling light. Here I have used a zoom reflector with barn doors and a red gel for creative effects. This light will be used to illuminate the dress, and I use the barn doors to make sure this light does not hit the subject’s face. This is one of the benefits of placing gels on barn doors: you can control the spill of light more precisely.
Now that the strobe capabilities are turned off and the ambient light in the room is eliminated, be sure the modeling light of this second light is turned up to its fullest power.
If you take a photograph while shooting at a ‘normal’ studio shutter speed (around 1/200 sec) you will see almost no light added to the bottom of the dress. This is because your exposure does not let in enough ambient light to record the color of the dress. In the next step, we will change this.

Step 4:
In order to achieve see color/detail on the bottom of the dress, you will need to use a long shutter speed (aka ‘dragging the shutter’) to allow the background light to register in your exposure.
By using a longer shutter speed, in this case 1/4sec or 1/8sec, you leave the shutter open long enough to pick up the light from the modeling light.
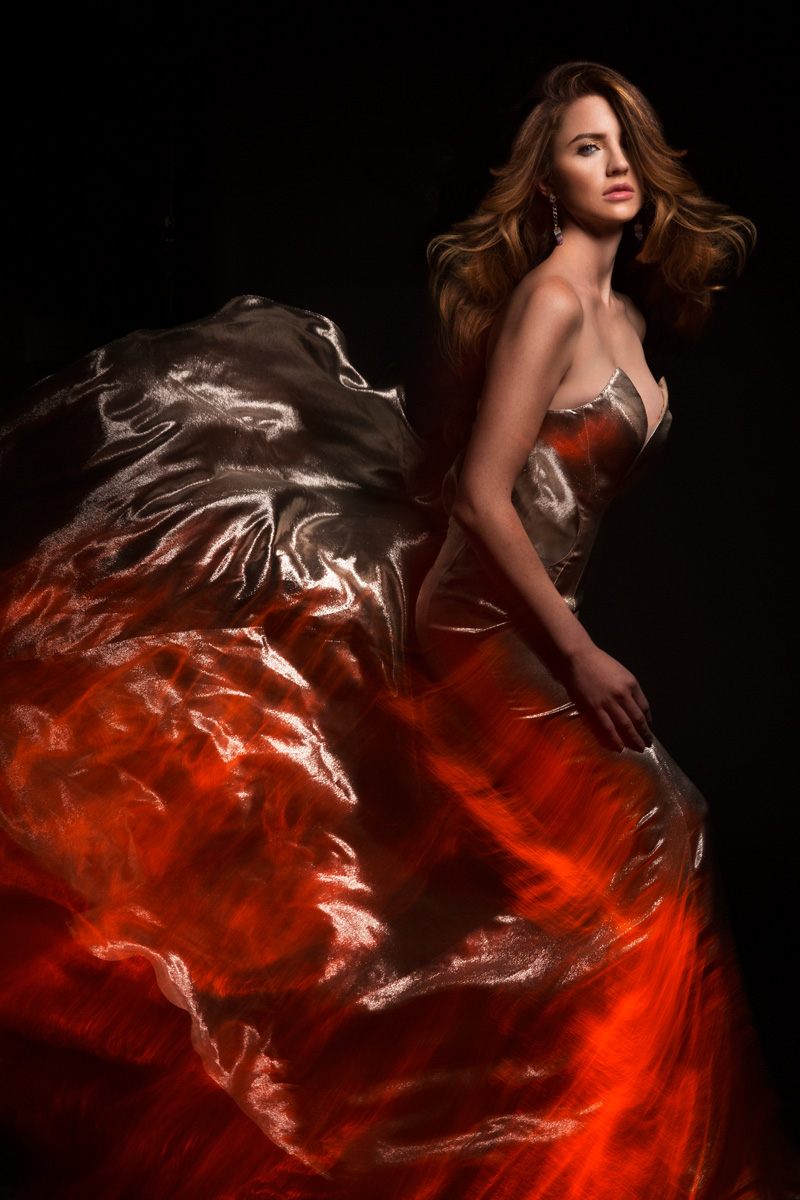
With the longer exposure in this image you can see the red illumination registering on the bottom of the dress.

Step 5:
Now is the time to get creative in this shot. Because of the long exposure, you now have the opportunity to add movement to your scene. In these examples I have thrown the dress in the air to create movement in the frame that registers through the long exposure. The moving fabric combined with the red gel results in a fiery appearance for the dress. Also try zooming your lens in or out, moving your camera left and right, or physically moving your body in and out during the long exposure. Each will produce different creative results.
Tip:
Once you get all your settings right, you may want to turn off the modeling light on the beauty dish. During the long exposure the constant light from the modeling light may register on the subject’s face and create unwanted motion blur.
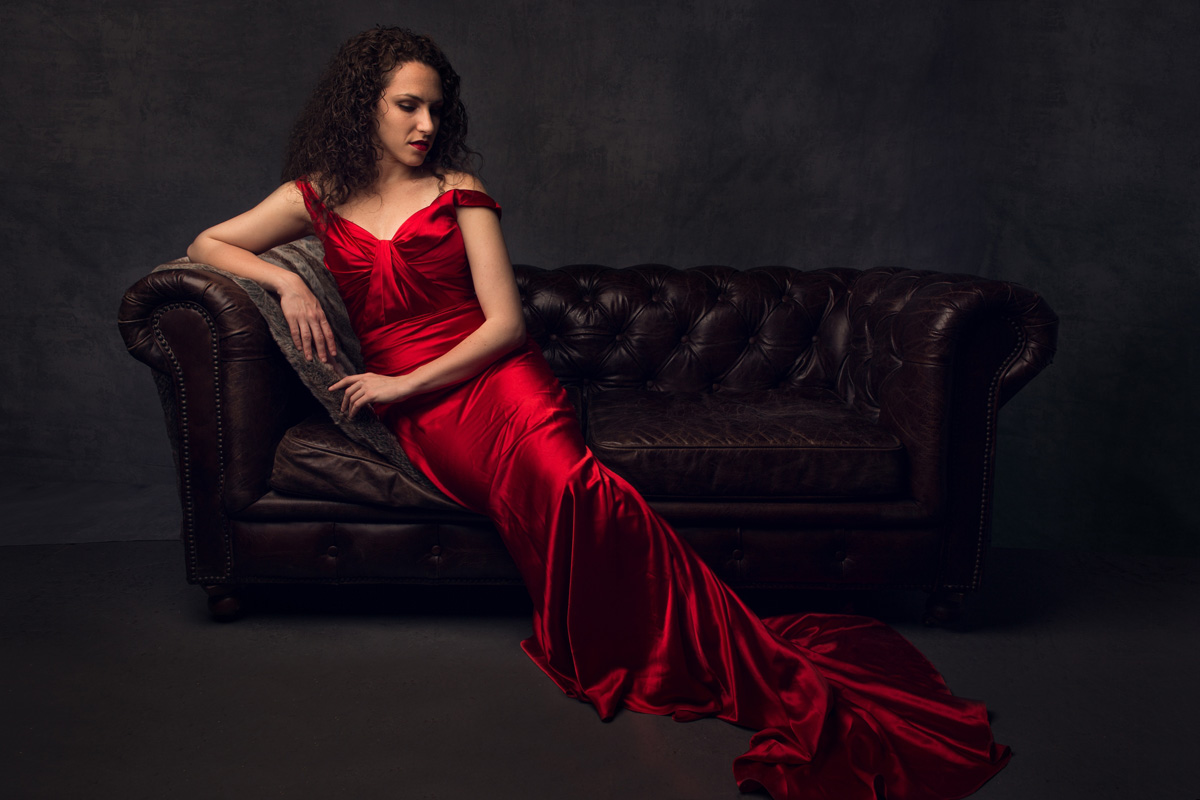
One thing to keep in mind for this shoot is that the subject’s wardrobe choice will make an impact on the final image. The subject will need to be wearing a clothing/items to pick up the light from the constant light (modeling light). In this case a shimmery dress is perfect for the effect. You’ll want to avoid dark colors or matte fabrics. Sequins, light colored clothing, or anything that shimmers will best showcase this effect.
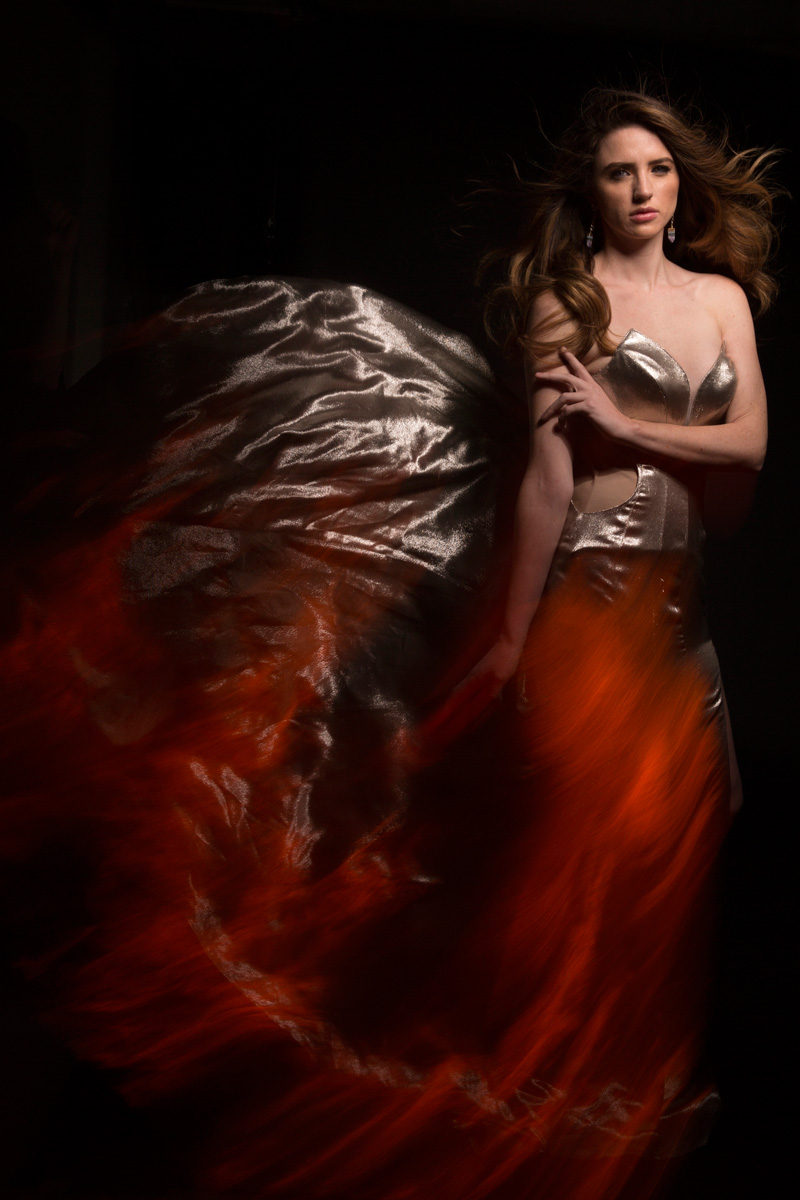
Takeaways:
By combining the constant light of a modeling light, a studio strobe, and a long exposure you can create truly striking and creative studio results. By dragging your shutter you are able to move your camera and/or subject to create interesting blurs and shimmers to your images that open up endless creative opportunities with just two light sources.
If you’d like to see more from my Creative Studio Lighting Guide, definitely check out the link to download 5 FREE setups or check out the full guide of 30 creative studio setups available at http://learn.lindsayadlerphotography.com/creative-studio-lighting-guide.
You can see more of Lindsay’s work at LindsayAdlerPhotography.com, and follow her on Instagram, Facebook, and Twitter. You can also see her live in Las Vegas at Photoshop World from July 18-21!
1 comment