

The Tension Between Creating Art and Getting the Job Done
My name is Mike Hagen, and I am a professional photographer working out of Gig Harbor, Washington. A big thank you to Scott and Brad for inviting me to write for this week’s guest blog.

I love photography. Like others who have chosen photography as an avocation, I eat, sleep and drink photography. As a working shooter, I don’t specialize in any one photographic genre; rather I point my lenses in quite a few directions. In the last 12 months, I’ve photographed commercial jobs, wildlife, portraits, events, architectural jobs, written two books, operated photo trips around the world, and have taught numerous classes and workshops.


Nature and outdoor photography got me into the world of professional photography, but over the course of two decades in the business, I’ve added a number of skillsets to my photographic repertoire. In this day and age, I feel strongly that you have to keep learning in order to keep earning a living. This blog article details a different aspect of professional photography that you might not have considered in the past. I hope it gives you a neat behind the scenes look and that it challenges you to consider a new perspective.

Getting The Shot
I really enjoy exercising my creativity. However when I’m shooting for a paying client, I struggle with the tension between creating art and simply getting the job done to meet the client’s expectations.

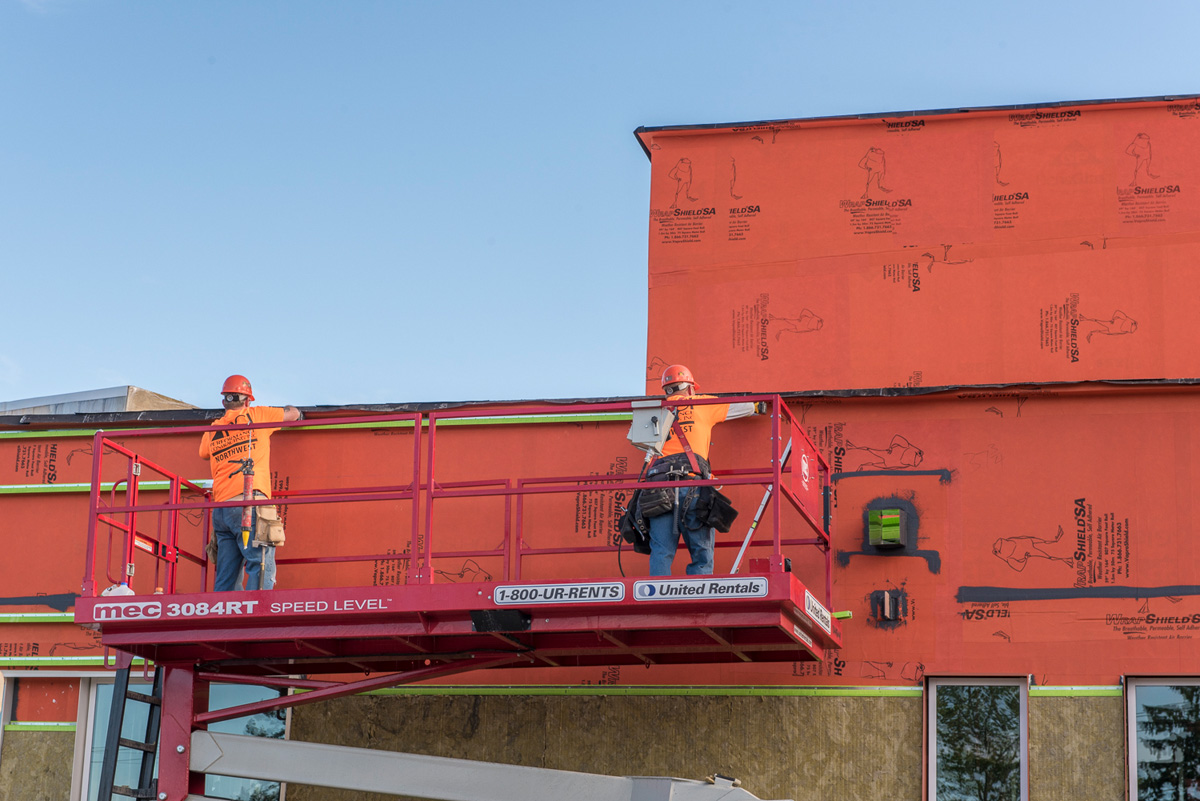
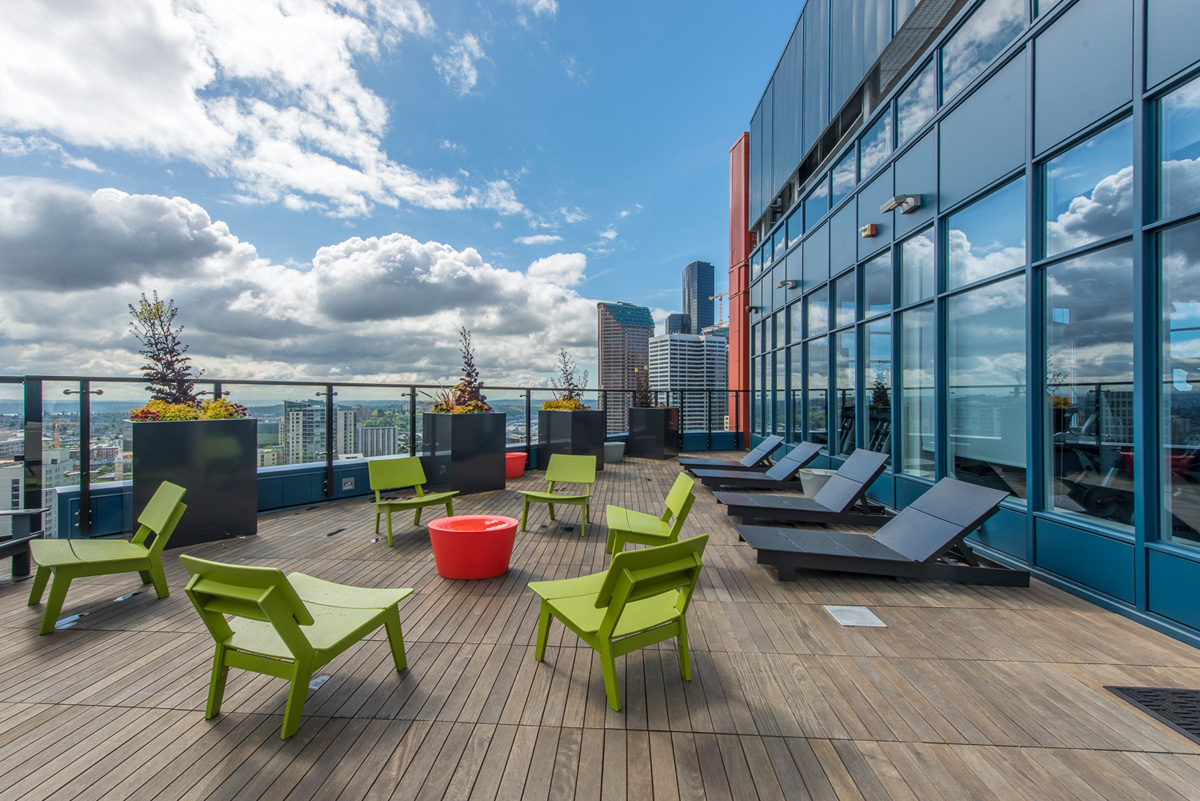
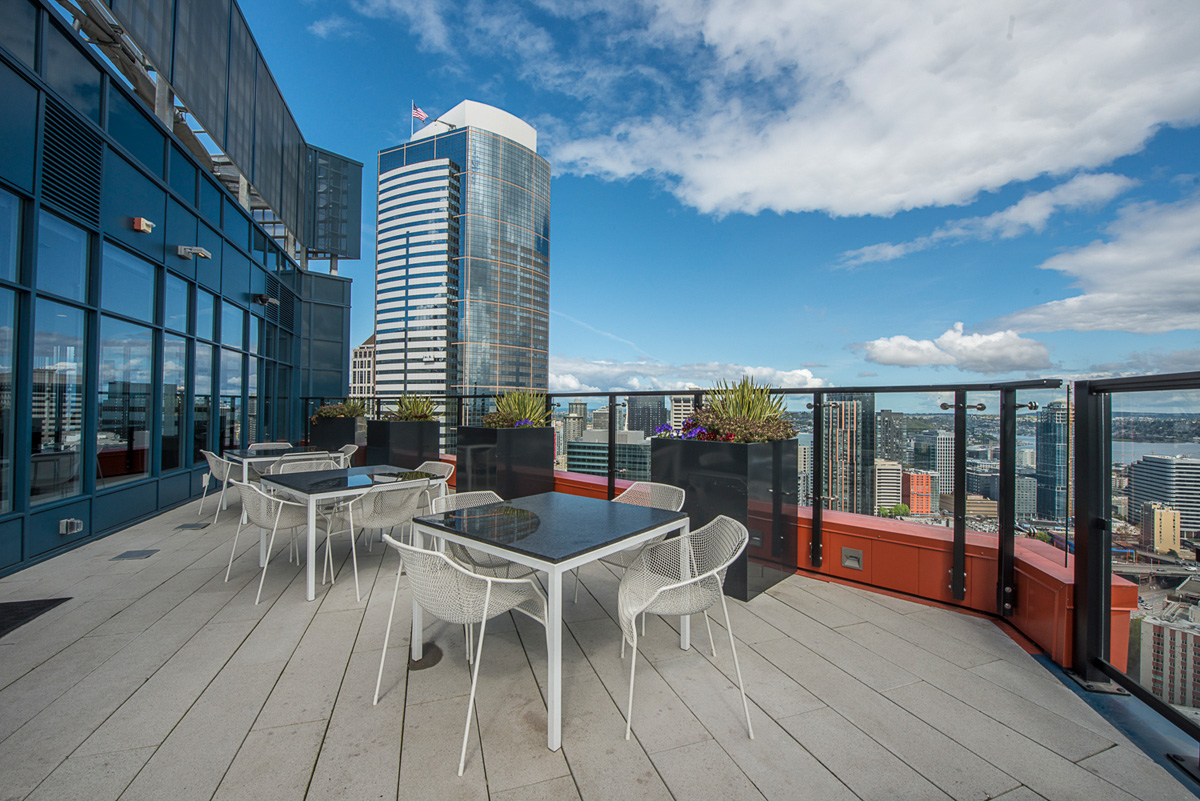
One of the subjects I regularly shoot in my business is commercial construction for building product manufacturers. For these jobs, I contract with a manufacturer to photograph their materials on high profile construction projects. For example, a deck & railing manufacturer will hire me to photograph their products on high-rise buildings in big cities. Or, a moisture barrier wrap company will hire me to photograph their materials on buildings during the construction phases of the project.

My client’s photographic needs are never as simple as, “photograph the building.” Rather, they hire me to demonstrate their product on a building as it is being used in the real world.
My clients use these images for a wide variety of purposes including advertising, websites, customer training, trade show booths, employee training, corporate office wall art, catalog imagery, trade magazine articles and even social media posts. Most of the time, these images have to be very straightforward to show things like how the product is fastened to the building or how the product overlaps a substrate material like brick or wood. In these cases, there’s no room for artistic interpretation as a photographer. I need to get the specific shot the client requires for their end purposes.

Is This Type of Photography Fulfilling?
I know some photographers would wither and die if asked to shoot this type of work. But, the truth is, I find this type of photography very fulfilling. The client has a specific need and I’m able to provide high quality, professional imagery that serves that need. I really enjoy serving others through my business by giving them images that they can use to improve their business.

What most people don’t understand is the entire process of creating professional architectural and construction imagery is actually quite involved. There’s a technical aspect to architectural photography that requires detailed knowledge of specific photographic techniques. Also, there’s a significant relational aspect that requires working closely with the client, the construction site, unions, bosses, laborers, cities, employees, managers and property owners.

This type of photography is very different than other genres like fashion, landscape, portraiture or wildlife. For example, with wildlife photography, I’m always looking for a compelling gesture in beautiful light with a perfect background. In portrait photography, I’m working my studio lights to create a beautiful arrangement that showcases my model’s face while also capturing the perfect expression and pose.
These other styles of photography give me total freedom to be expressive and creative. But, in my architectural and building product work, I have a very specific priority … demonstrate how the product works on the building so the client can sell more product. My second, and much lower priority, is to do something creative with the imagery.
What The Heck Are Those?
I remember a job I photographed a few years back for a construction client in Seattle, Washington. After shooting all the required photos, I circled back through the construction site and took a few abstract images of the project. The shots were reflections of their product in an adjacent building’s windows. I submitted a couple of those images to the client to see if they’d use them in any way. They loved the straight imagery from the job, but when it came to the abstract images, they asked me, “What the heck are those?”
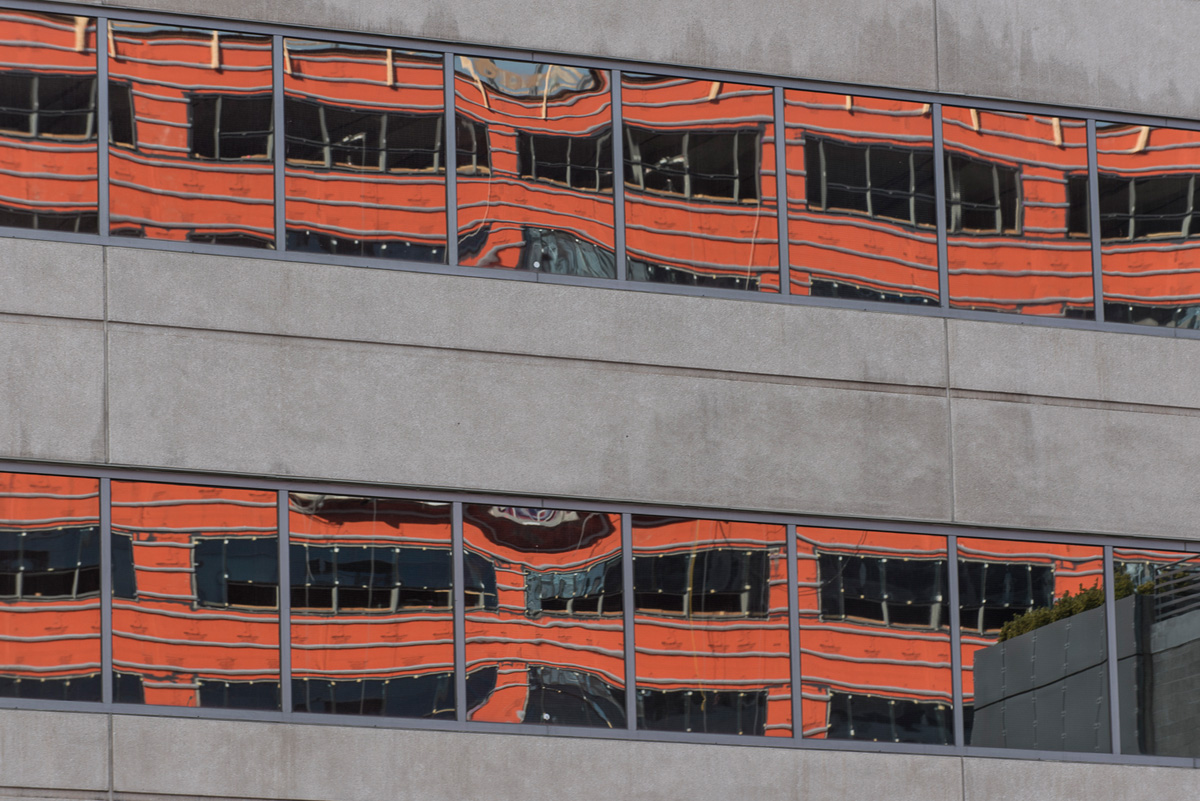
It was a good reminder that my job as a photographer is to give the client exactly what they want, not my interpretation of what they want. They didn’t object to having the abstract photographs, they just didn’t have a use for them in their campaigns.
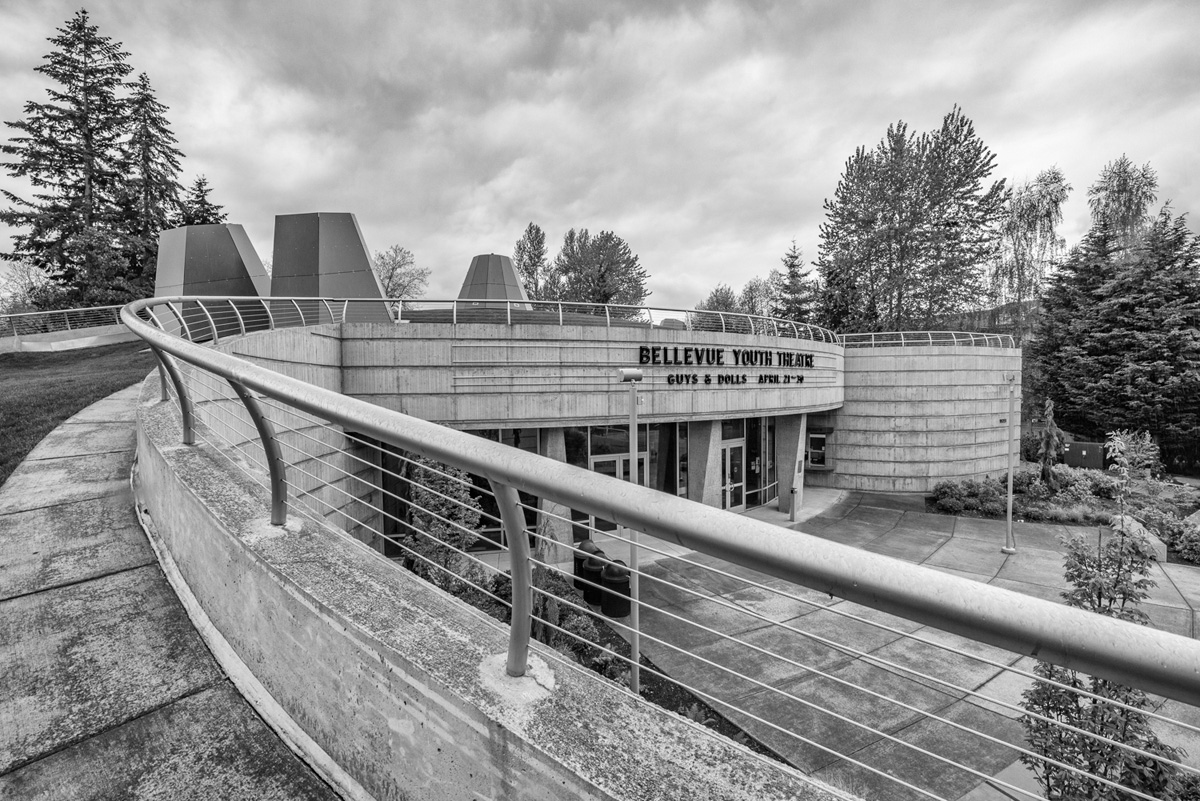
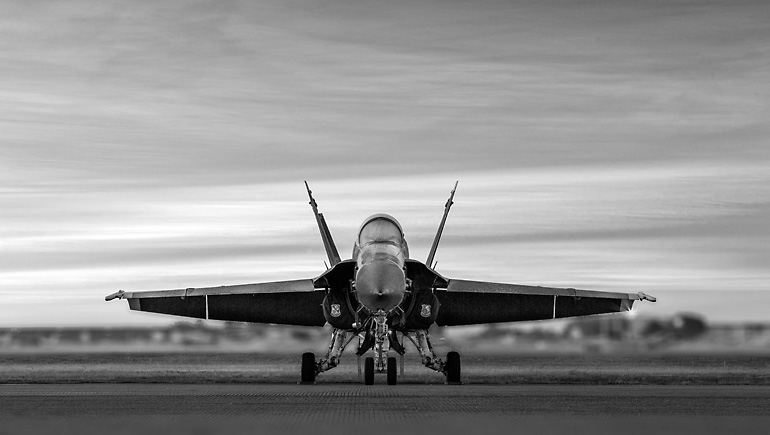
My inner artist won’t give up though. I still try giving every job a little bit “more” in terms of creative flair. I’d call it, “conservative creativity.” I don’t go over the top with wild compositions or crazy post-processing, but always produce some very nice imagery on each job that’s a bit different than the traditional architectural or construction imagery such as:
- Black and white versions
- Tightly cropped details
- Repeating patterns of their products
- Reflections of their product on an outdoor table or from water on the street
- Large panoramas showing their building in the larger cityscape.
Logistics And Planning Considerations
For those interested in the techy bits, here are some behind the scenes details of how I shoot these jobs.

Client Meeting
Before the shoot, I always have a detailed discussion with the client so I fully understand what they need from a photography perspective. This is either in person or via teleconference. I want to make sure we both know what to expect so that there are no surprises at the end of the project.
Preliminary Contact
Most of this type of work takes place on construction sites, at commercial buildings, and on private property, so I almost always have to arrange my photography session well in advance. Figuring out whom the right company or agency to work with is often complicated. On many building projects, there’s a lead company that manages the entire building project. They will frequently have an office on-site with a project manager and they are typically the main gatekeepers. I have to get initial authorization (verbal or written) from them.
Many larger construction projects have mandatory safety meetings that I’ll need to attend and get signed off before I can even set foot on the property. Basically, I have to prove to them that I won’t be a liability on site. I also have to show that I understand where the danger spots are and that I won’t fall into a big hole in the ground! Forcing them to shut down the project because of my mistake isn’t good for business (theirs or mine).
Next, I have to get authorization from the subcontractors who are installing the product I’m there to photograph. The subcontractor site manager needs to give me approval to photograph their employees, and sometimes, even their equipment.
On completed construction jobs, I often work with the building manager and also with their maintenance teams. On a recent high-rise shoot, the only way to access the top floor was to have a member of the building’s staff travel with me and provide access to the restricted areas. The staff member wouldn’t give me access until the building manager gave permission for me to complete the photo job.
The most important thing in planning these shoots is always having a big smile and always being positive. On a job I photographed a few weeks ago, I did all my preliminary coordination, I received authorizations from the owner, building manager and worked with the maintenance staff while on site. During the shoot, I was nearly shut down by a resident who was very angry that I was photographing the building. The resident was convinced that I was using my photos for nefarious reasons and angrily stated, “You know better than to photograph our building!” A smile and a handshake go a long way in those situations to diffuse the tension.
Safety Gear
In addition to all my camera gear, I need to be prepared with safety gear when I visit a job site. This includes a full component of PPE – Personal Protective Equipment. My basic PPE kit includes steel-toed boots, hardhat, safety glasses, earplugs, earmuffs, high visibility clothing, vests, and gloves.

If I don’t bring my own gear and wear the gear while I’m on site, then I can’t access the site for photography. I’ll typically wear a pair of Carhartt Work Pants and a button-down flannel. As crazy as it sounds, it is important to look the part when doing these jobs. If I showed up on a construction site with penny loafers and tailored pressed slacks, I’d be chased down the street by big dudes in welding masks!
PHOTOGRAPHY GEAR
Tripod
I use tall Gitzo carbon fiber tripods with a professional ball heads and Arca Swiss plates. For detailed panoramas, I’ll sometimes bring along a nodal slide tripod plate.
Cameras
I’m a Nikon shooter, so I’ll generally use the highest resolution DSLRs in my kit for my architectural photography. Currently, those include 36 MP and 24 MP Nikon bodies. Whenever the newest high-resolution Nikon comes out (hopefully 42 to 50 MP), I’ll upgrade to that for my architectural work. I shoot full-frame sensors since I extensively use super-wide lenses.
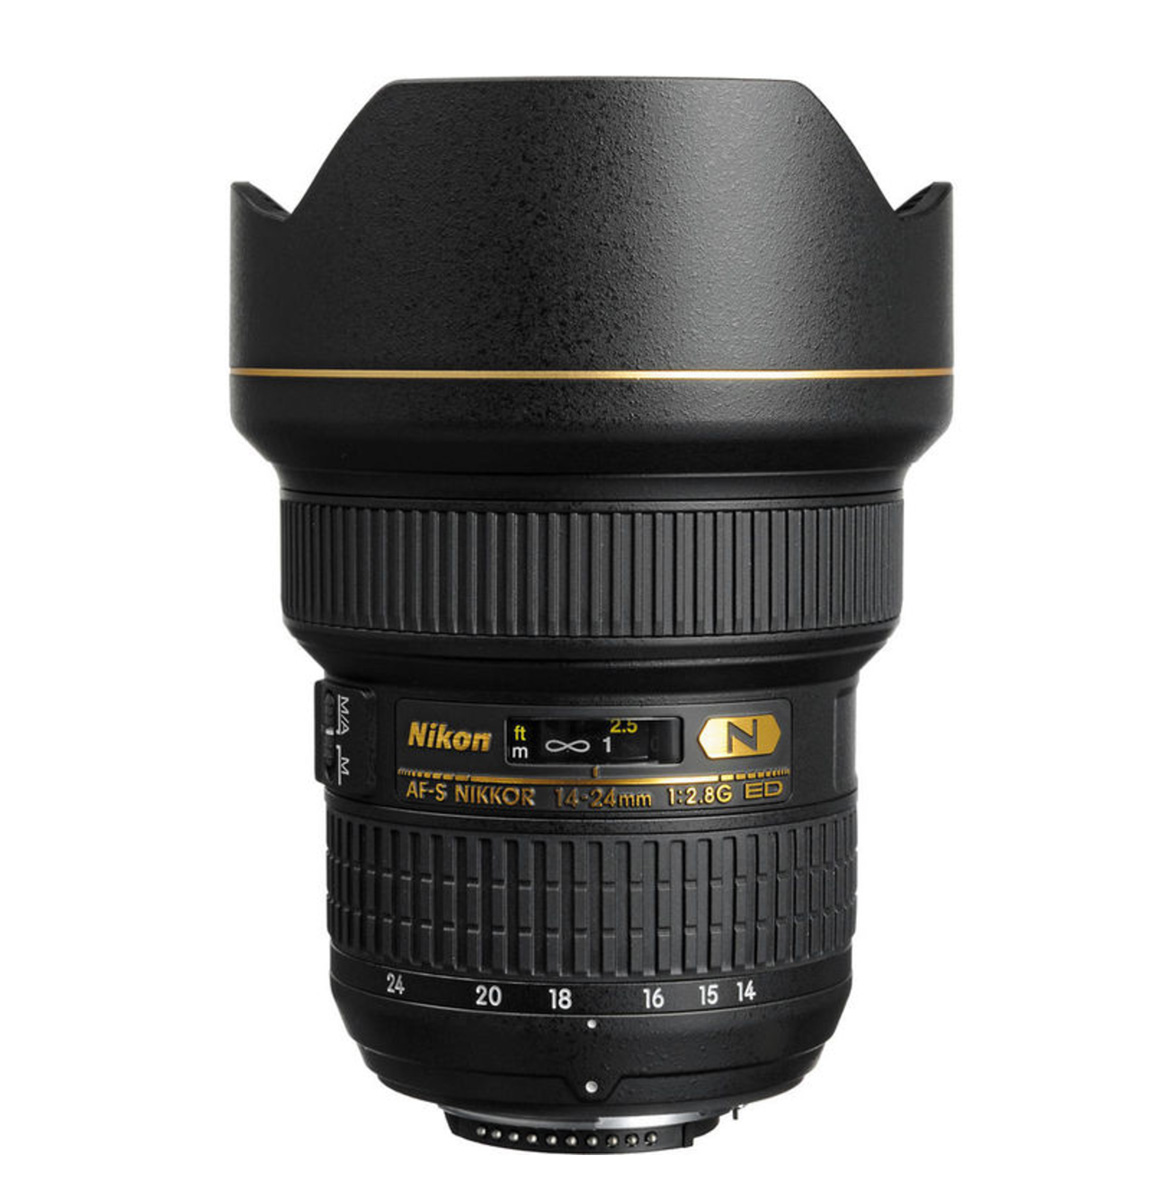
Lenses
My favorite lens for this work is the Nikon 14-24mm f/2.8. The 14-24mm is best used in close quarters or on city streets when you can’t get far away from the structure. I probably use this lens for over half of my architectural images, but find that I have to be very careful when using it to keep the camera level. Otherwise, anything vertical will keystone (tilt). The best architectural pictures have all the vertical lines straight up and down. No tilting!
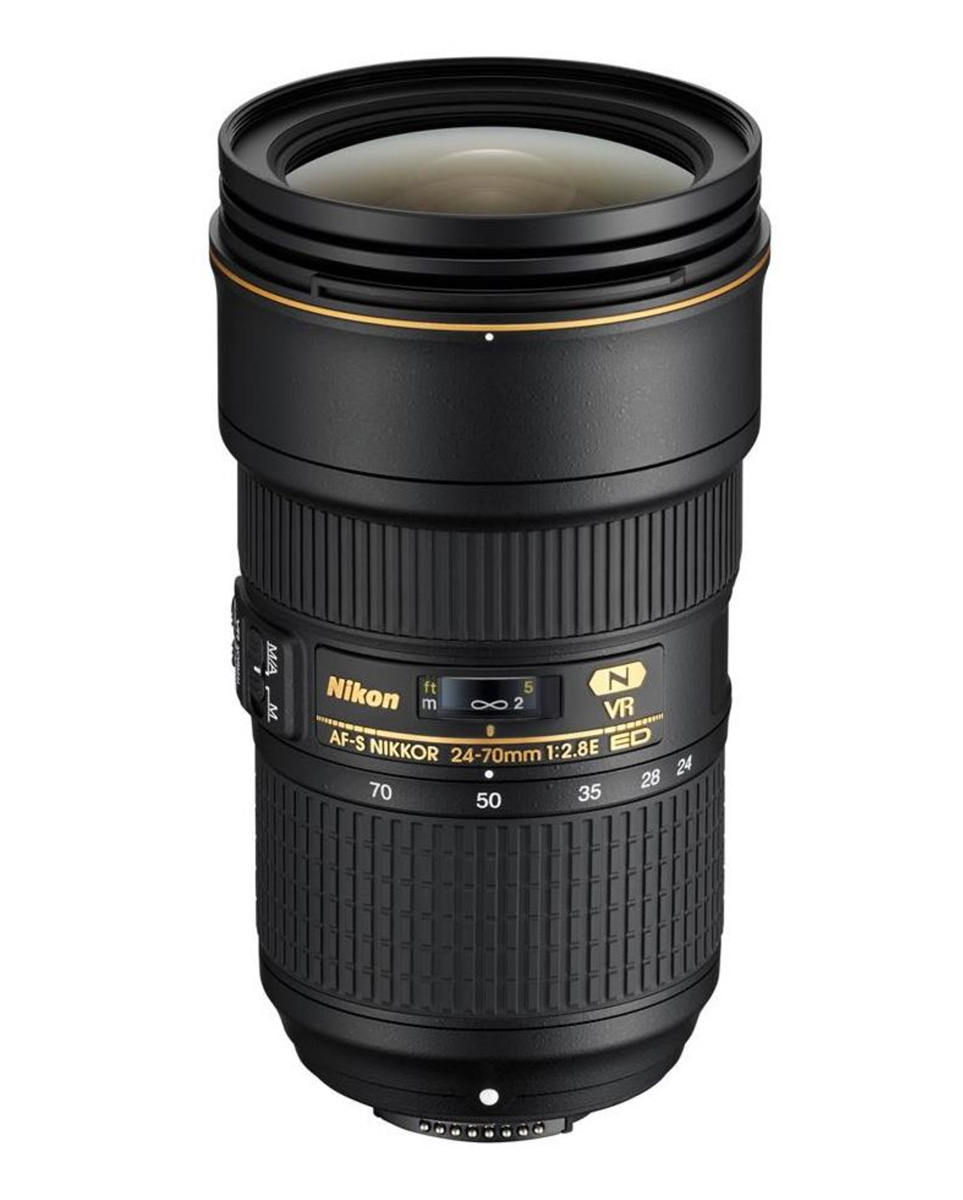
The next lens I use for this work is the 24-70mm. I use it for medium shots, doors, railings, balconies, etc. It can also be used for some close-proximity shots where I’m photographing a construction worker installing my customer’s products.
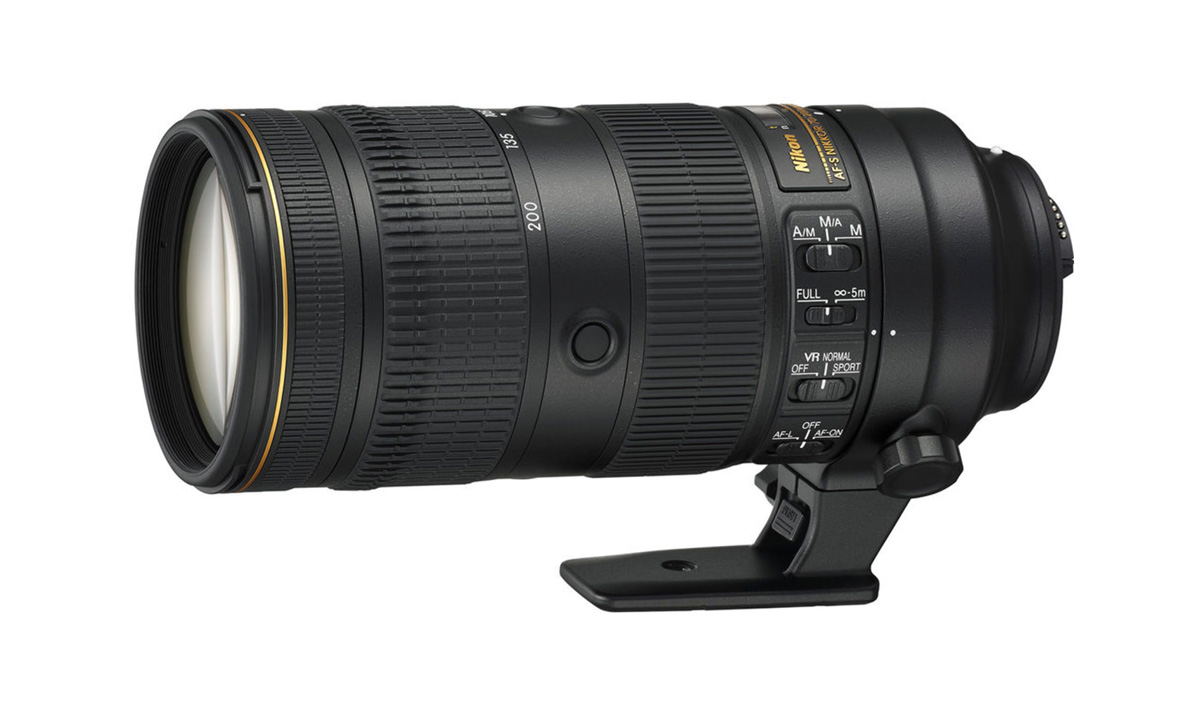
Finally, I use the 70-200mm lens for detail images of the buildings including shots of construction workers installing the product. I also try to take images of the construction site from a long distance away, so I often use the 70-200mm to isolate the building from the surrounding city.
Post-Processing
When I return to my office, I ingest everything onto my 32TB OWC ThunderBay 4 RAID drives, import into Lightroom CC and begin the culling process right away. On a typical shoot, I’ll capture anywhere from 500 – 2000 images. My goal is usually to submit 50 – 100 finished pics to the client, so I edit fairly aggressively.
Culling Images
In Lightroom, I mark my initial “selects” with a red label (keyboard shortcut 6). Then, after I have my initial selects, I’ll filter out the unselected images and go through the selects a second time with a critical eye. Here, I begin developing them and when I’m finished working on them in the develop pane, I mark them as “approved” with a green label (keyboard shortcut 8).

Post-processing takes a significant amount of time, so I always have to plan for that when I’m bidding the job. Early in my career when I shot film, I never had to worry about post-processing since I’d send the film out to be developed. Now, my post processing takes almost as much time as my time in the field taking photos, so I need to financially budget for that. I also make sure that my clients understand what exactly my rate entails and what they are paying for.
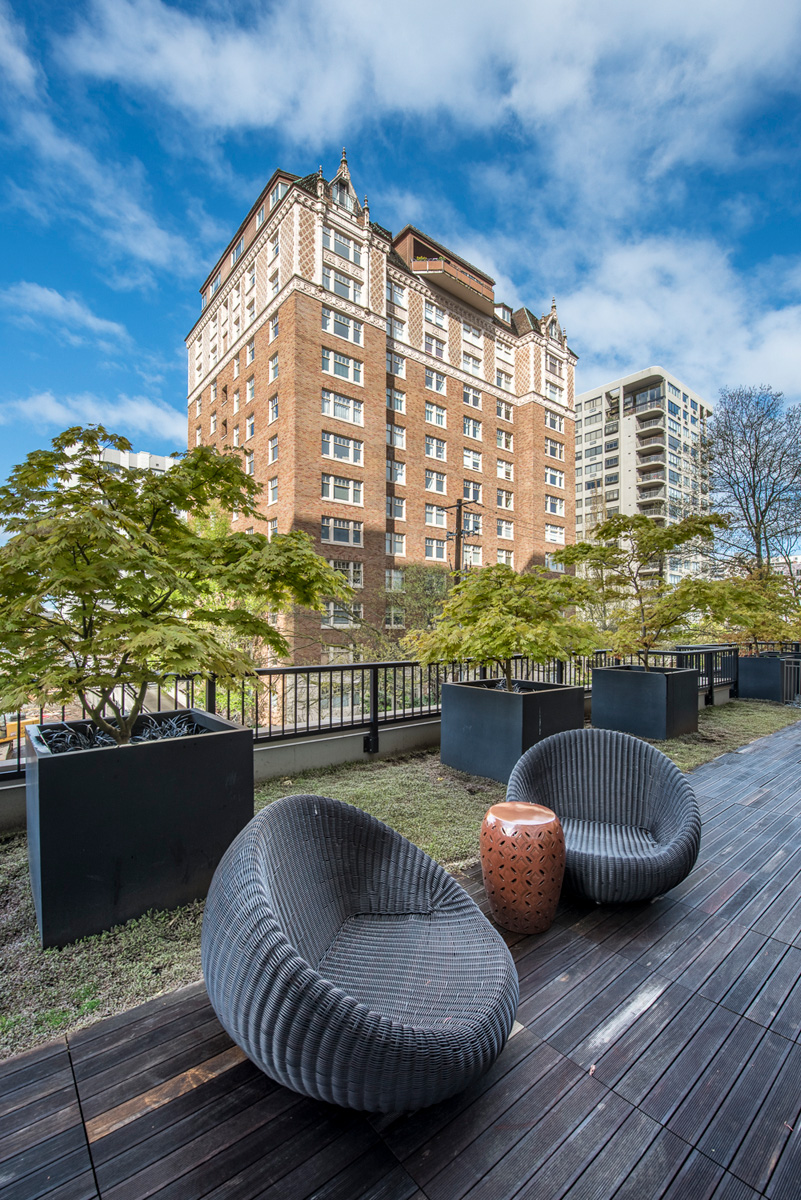
Lightroom’s Transform Panel
Because I’m shooting architectural work, I have to make sure my buildings don’t have significant keystoning or perspective shifts. Therefore, I use the Transform panel in Lightroom for almost every photograph. For about half of my images, the Auto or Vertical buttons quickly get the building vertical. For the other half, I need to manually adjust the sliders to achieve what I’m after.
![]()
One of the keys to getting architectural images to look upright is being diligent in the field to keep your camera level. If your camera is pointed up or down, then the building will keystone (tilt). Therefore, I endeavor to keep the camera as level as possible in all three directions: pitch, yaw, and roll.
Sometimes this is impossible to do, so you have to live with keystoning. My mantra is to either keep the building absolutely vertical/horizontal or to tilt it significantly enough so it looks like I intended it that way. Sometimes I fail, sometimes I succeed. That’s part of the process.

Panoramas
I do a lot of panoramas for this kind of work. For simple panos taken with lenses longer than 50mm, I will typically stitch the panoramas together in Lightroom. For more complicated panos, like those taken with a 14-24mm lens, I will stitch those in Photoshop since there’s more capability to fine-tune the overlap between frames. I often will use the layer masks to select/deselect areas in each of my photos. Also, I use the Transform and Warp tools to bend distorted areas of the frame back into shape.

Submitting Files
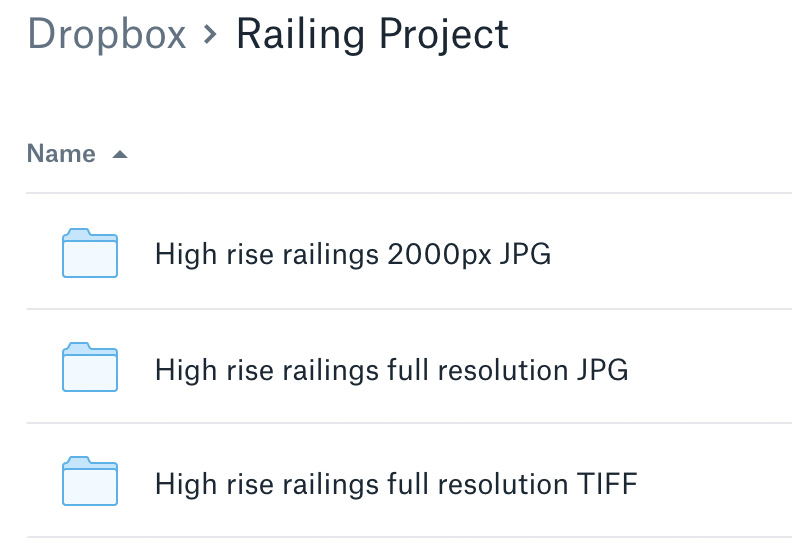
After developing all the images, I export two or three resolutions and file types for the client:
- Full-resolution TIFFs. I only provide TIFFs if my client specifically requests them for print work. They are big files and most of my clients don’t need this file format for their purposes.
- Full-resolution JPGs. Clients actually use JPGs most often for their print campaigns, trade show booth imagery, and wall art. The JPG format works great for them in most situations.
- 2000-pixel-wide JPGs. I also create another smaller set of JPGs for them to use on their website and in their social media campaigns.
Next, I upload all the images to a Dropbox folder and share it with the advertising agency, the manufacturer, and their associate staff. They typically download the images to their local computer system and then I remove them from the Dropbox folder about a week later.
Finally, after everyone reviews the imagery and I’m sure everyone is happy, I send an invoice.
Conclusion
There is always a struggle between meeting the needs of the client and exercising our desire to be creative, especially when shooting this style of imagery. As a professional photographer, the needs of the client must always come first.
Hopefully, I’ve encouraged you to think about photography from a slightly different perspective. I’d love to hear your story. When have you had to hold back your artistic vision to meet the needs of someone you’re photographing? Share your stories here in the comments or reach out to me on social media. I’d love to be in conversation with you.
Best,
Mike Hagen
Mike Hagen owns and operates Visual Adventures. He’s written eight books on photography with two more on the way. His 9th book is scheduled to arrive in June 2017 – The Nikon Autofocus System 2nd Edition. His 10th book will be available in December 2017 – The Enthusiast’s Guide to DIY Photography. He runs photo trips each year to Iceland, Cuba, Galapagos, and Tanzania and is a prolific educator, having taught hundreds of photo workshops around the world.
You can see more of Mike’s work at VisAdventures.com, and follow him on Instagram, Facebook, Twitter, and YouTube.
Mike, any reason why you don’t use tilt shift lenses for architecture?
No particular reason. They are great and do a very good job. I’ve found that if I keep the camera level, I can get very good results with the 14-24 since it is a rectilinear lens. The Nikon 19mm f/4 PC is $3,400!
Are you using a bubble level on the camera or are you relying on one built into the ball head/tripod?
I have a bubble level on my ballhead to get close. I also use my in-camera artificial horizon as necessary. The most important thing you can do is to make sure all the vertical lines in the photo look vertical in the viewfinder.
Great reminder that there are still profitable markets out there other than the usual suspects for professionals to pursue and thrive/survive. Thanks Mike!
Thanks Steve!