


Food Photography in Motion!
Have you ever wondered how dynamic food and liquid splashes can be captured in a home studio setting with both basic and more advanced techniques and gear? When I began photographing splashes and crashes in my first home studio, I spent a majority of my time cleaning the ceiling and cursing at my strobes for not freezing the motion. In this post, I will walk you through my most recent image and how I now avoid the mistakes I made early on.
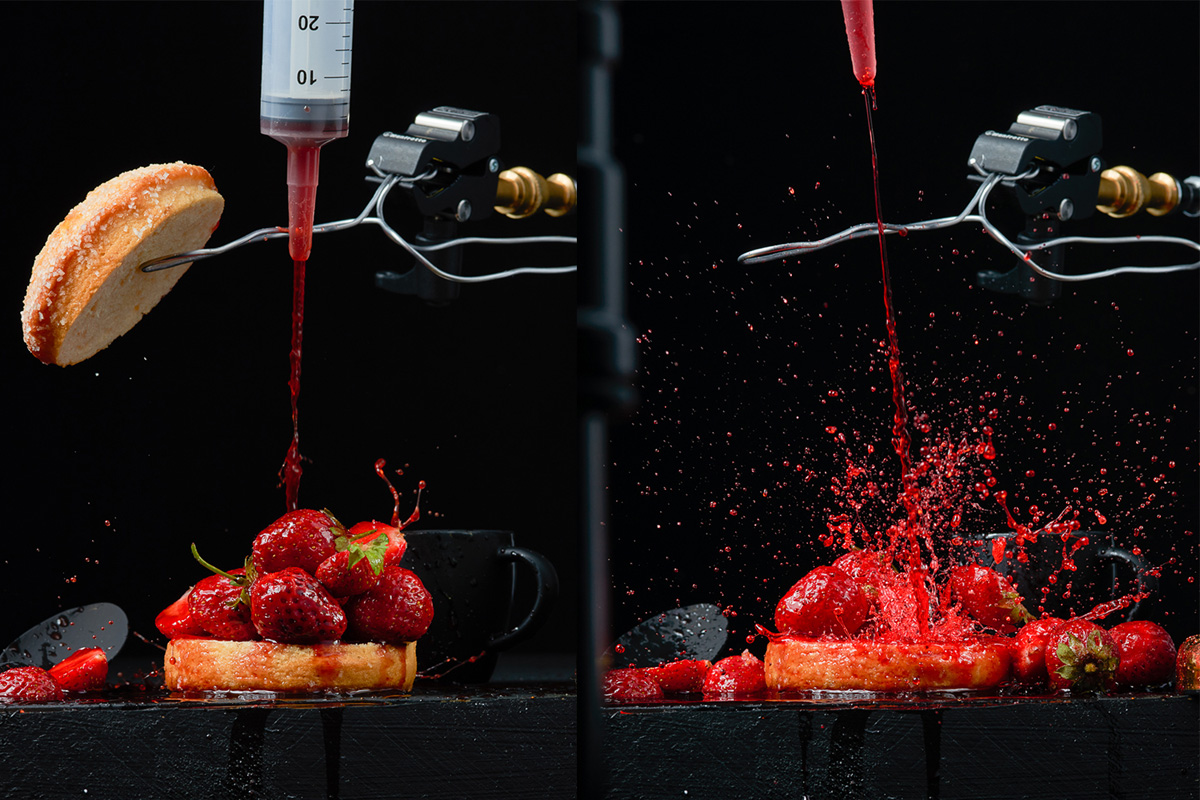
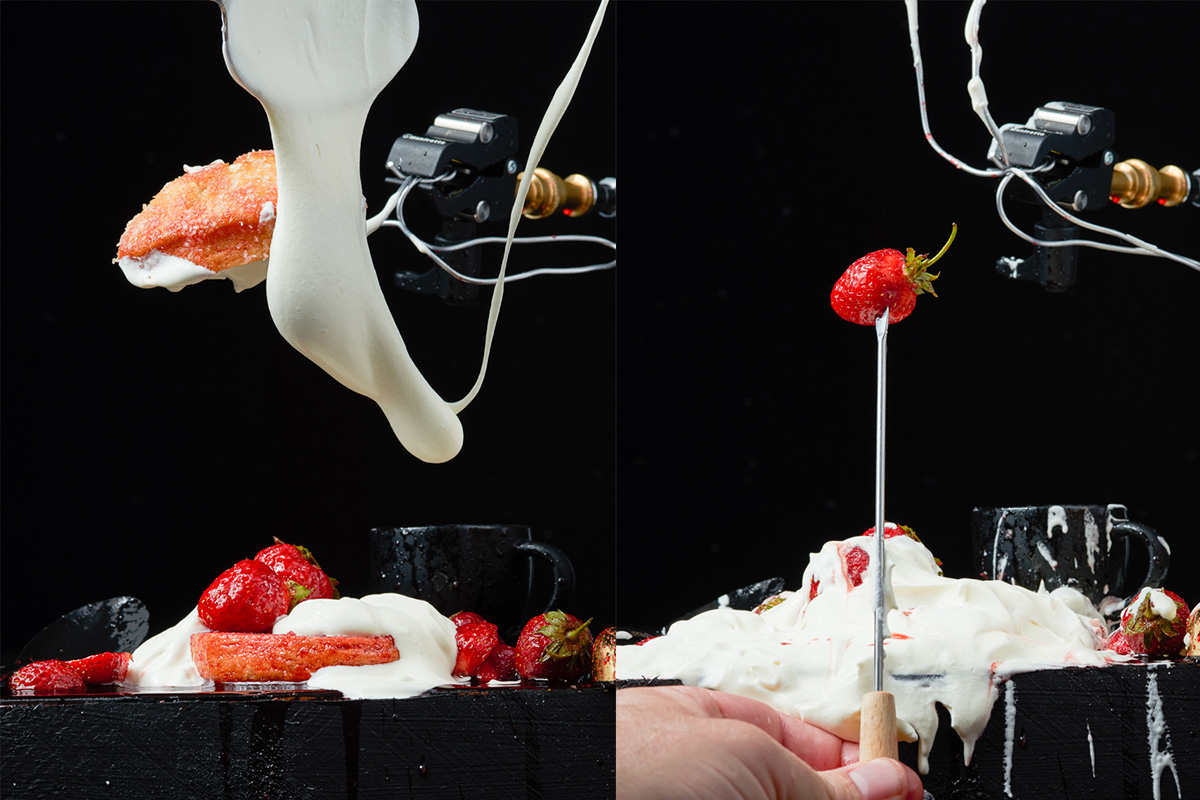
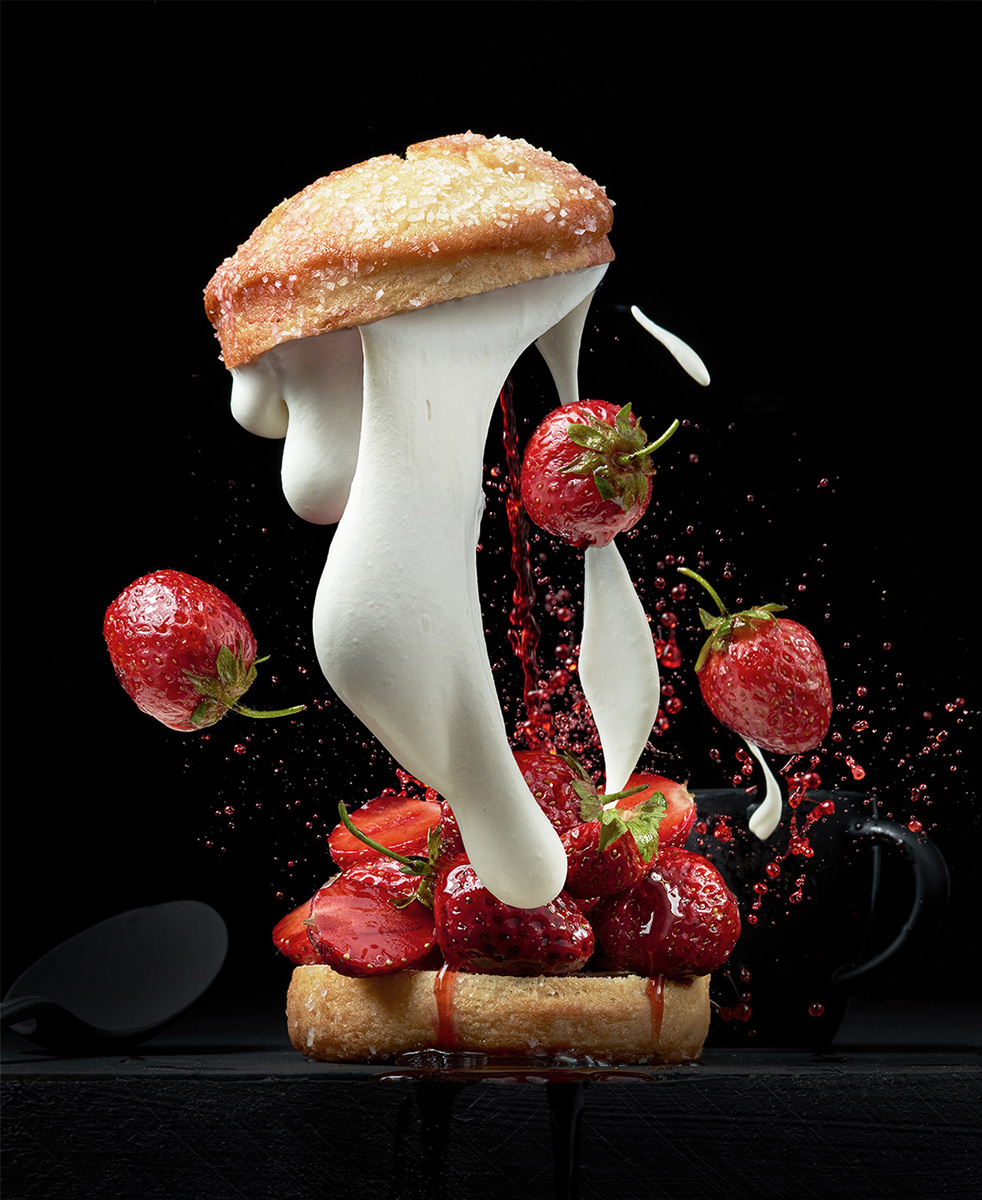
For this shot my goal was to create an image of strawberry shortcake being pulled apart so the viewer could see this common dessert in a more unique way. Here are a few tips that made it come together.
- Use a flash with a short flash duration. I prefer 1/10,000 of a second which can typically only be found in higher end strobes. For this reason, I recommend you rent a strobe for a weekend and plan a variety of images to make the best use of your time. When I was first starting out I rented a Broncolor pack and modifiers for a few hundred for the full weekend. High-end strobes often come up in the used market as well for a fraction of their purchase price. With a little finesse, speed lights will also capture this scene equally well given the proper settings.
- Have a clear concept and attempt to capture the image in as few shots as possible. When I first began compositing my images in Photoshop, I would shoot each component individually and combine them in post-production. The only issue with this process is that food has a variety of nuances, textures, and color casts that make a splash captured in a few shots much more believable and exciting that an image that was forced to come together. The best splash images I have ever created happened in three or fewer shots.
- Light food like an athlete! I often place two medium strip lights on each edge of the scene. This not only creates nice highlights, it enhances the textures in the front of the subject while also lighting liquids and other translucent objects slightly from behind creating a nice glow.
Once you have all of the components captured, it’s simply a matter of finding a base image to start from and blending the remaining images in using layer masks. Using a black background allows you to blend things in using a soft brush instead of making complex selections and I will often use the lighten blend mode on fine powders or other high frequency details to avoid complex selections as well.
I hope this as taken at least a bit of mystery out of the process and will allow you to make the leap to create some fun and intriguing food images.
Happy shooting!
Steve Hansen is a commercial food and product photographer in Seattle. You can see more of his work at SteveHansenVisuals.com, and follow him on Instagram and Twitter.

Awesome image as always Steve! I really dig your work, great stuff man