


Try The TDN Single-Layer Sketchy Technique
Hey.
Now I’m not going to break with guest-blog tradition in my opening paragraphs, so before introducing myself and delving into the topic of my post, I’d like to say a massive thank you to Scott for having me over to guest on the blog, as well as to my good mate (and @vectorgenerians co-host) Dave Clayton for arranging it.
So, I’m Tony Harmer, a.k.a The Design Ninja (#TDN); a Specialist Solutions Consultant at Adobe UK, looking after the design/mobile ideation segments. In my day-job (I’m also an author for LinkedIn Learning and a YouTuber in my spare time) and as far as Photoshop is concerned, I’m about 20% Photographer, 50% Illustrator/Digital Artist, 25% Designer and 5% 3D (actually, at the moment I’m too 3D for my liking, but that’s another story); so I deal with most of the designery, paintery, brushy, filtery stuff, in short.
What I’m most about however, is efficiency—my thinking is that people should perhaps spend their time more on meaningful, creative decisions than on fighting with the tools, and hopefully this will also make them more profitable, too. So I spend at least 15-30 minutes of every single day looking at techniques and tutorials, seeing what people want to do, how others are teaching it and asking myself, “Can this be done faster, and ideally better?”
And so another TDN tutorial is born.
Enough already—Let’s Dive In:

And that brings us to what I would like to share with you today—what I call the TDN Sketch Technique; it is my recipe for an effect that pops up every now-and-then: turning a photo into something that resembles a pencil sketch or piece of hand-drawn art; there are over three-quarters of a million videos on YouTube showing ways to do this, so I’m guessing it’s at least a bit popular (anyway hear me out—it’s my first time here).
As I’m only a little bit photo (and a whole lot rock ‘n’ roll—pardon me) I have decided that for this article, that a bit of stock imagery will save me from any potential embarrassment in the face of such an esteemed audience, so I have selected some images from Adobe Stock:

- File #103142589 “Rothaarige Frau” (“Red-haired Woman”) By drubig-photo
- File #38908186 “Closeup man” by CURAphotography
- File #15354239 “Rusted Abandoned Car in Desert” by ASP Inc
- FILE #100684757 “Abandoned Shipwreck in the Bay” by swoodie
And that’s the first thing you should look at. Not every photo lends itself to becoming a sketch-like image immediately; connect with your inner-Leonardo and be critical; for example, sketches do not often have really busy backgrounds around the subject—sometimes there’s an indication of an environment, but keep it simple—so you may have to work your image a little, but you’ll see suggestions for that towards the end of the article.
The Basic Technique
All of the techniques that I’ve found use at least two layers, the most prevalent usually with a duplicate of the original that’s blurred, inverted and colour-dodged, or similar. So what’s wrong with that method? Well, technically nothing—it works perfectly well—but it’s inflexible, and potentially destructive, which means if you are working on a series then you will have to do each one manually; the TDN technique is infinitely flexible, and is ultimately based on one, simple thing: working on a smart object (and that means this uses one layer).
Stage 1: Blur and Divide
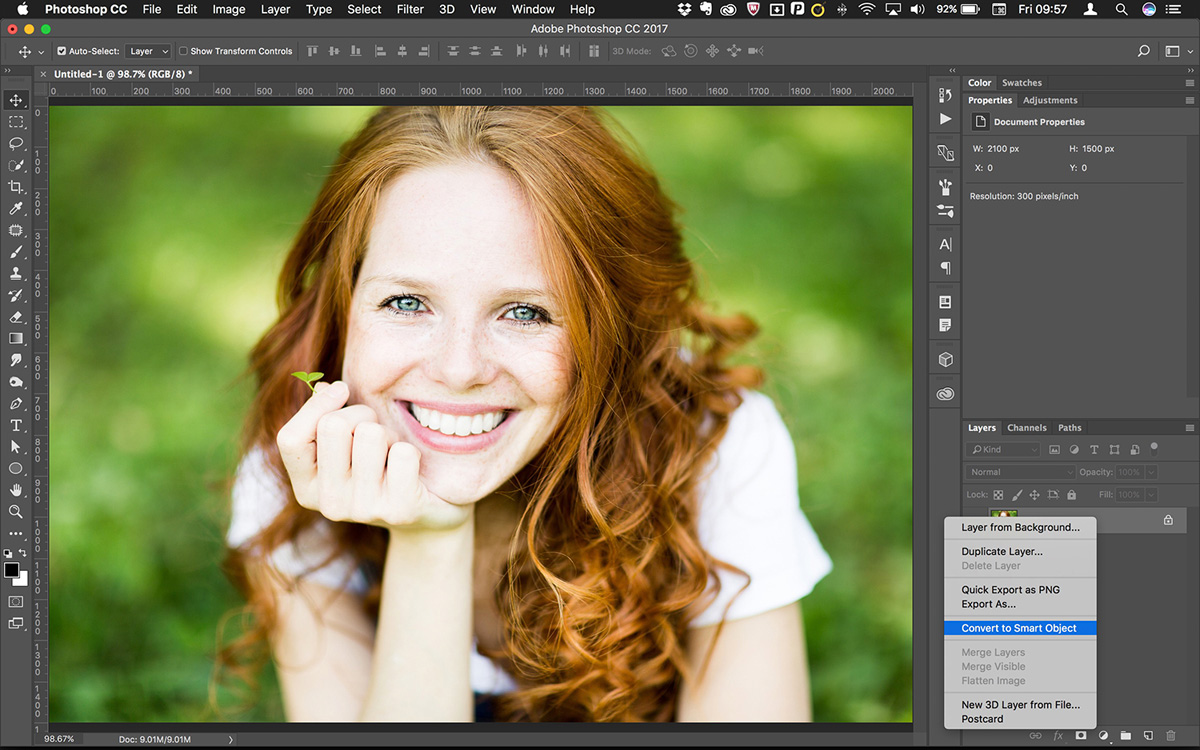
So we have this image to begin with and of the many ways to create a smart object, I’m going to right-click on the background in the Layers panel and choose Convert to Smart Object.
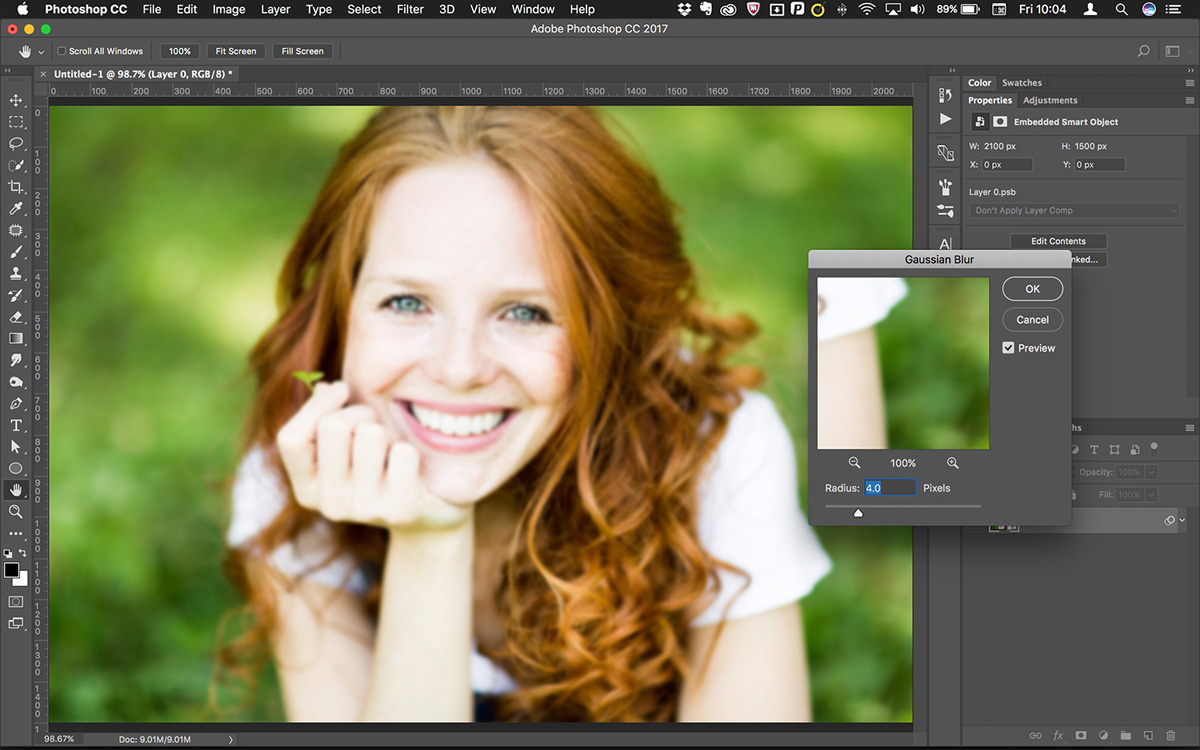
Then select Filter > Blur > Gaussian Blur and go for a value of around 4 or 5 to start with—it’s of no consequence though as you can revisit and tune it as many times as you like afterwards—so relax and apply the filter.
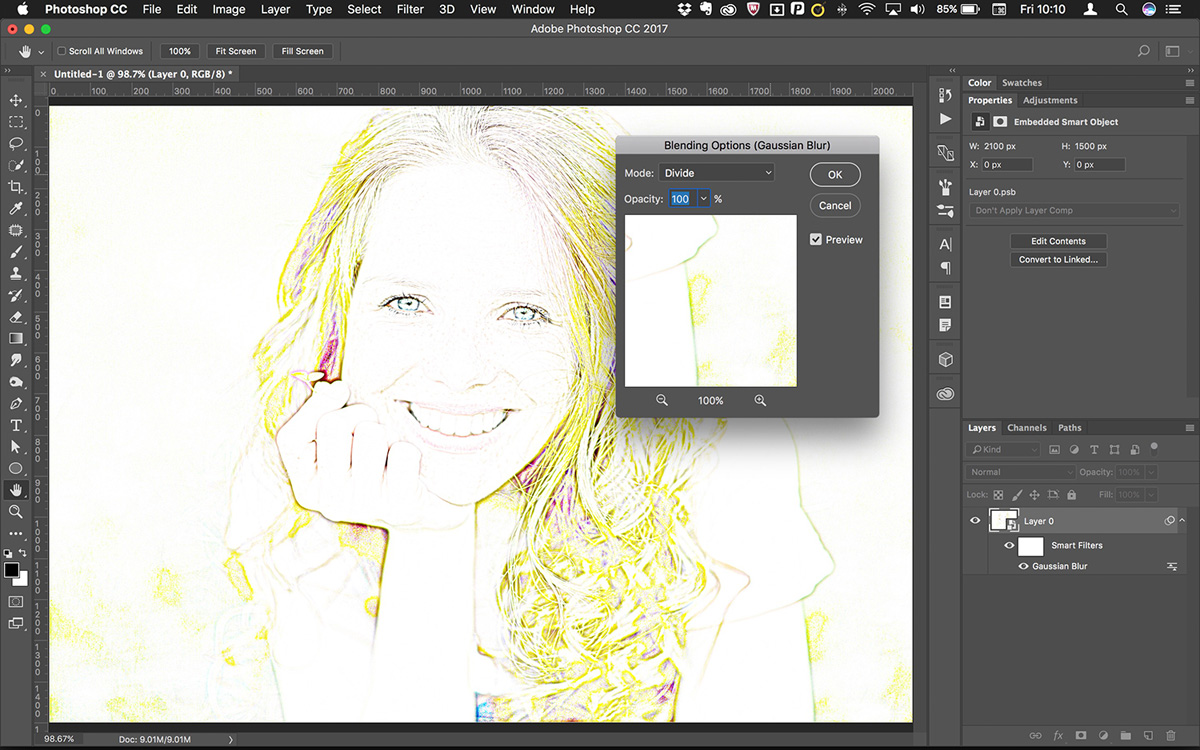
Here’s the bit that does the magic—changing the blending options for the filter you’ve just applied; go to the filter in the Layers Panel and double-hit the sliders icon just to the right of the filter name; change the blending options to Divide, then hit OK.
The Divide blending mode divides pixel values between the target and blending layers (or as in this case, the target object and the filter) and works using simple arithmetic: any value divided by itself will equal 1, which with 0 being black, means white. Now, hopefully you can see where the blur comes in, and you can double-hit the gaussian blur filter effect in the Layers Panel and tune your blur, if you wish; don’t worry about the colours right now—we’ll deal with them in the next stage.
Stage 2: Raw Power
Now invoke the Camera Raw Filter: Filter > Camera Raw Filter… or SHIFT+CMD+A (SHIFT+CTRL+A on Windows) and the mini-application launches in dialog form; if you like, tap F on your keyboard to make it full-screen.
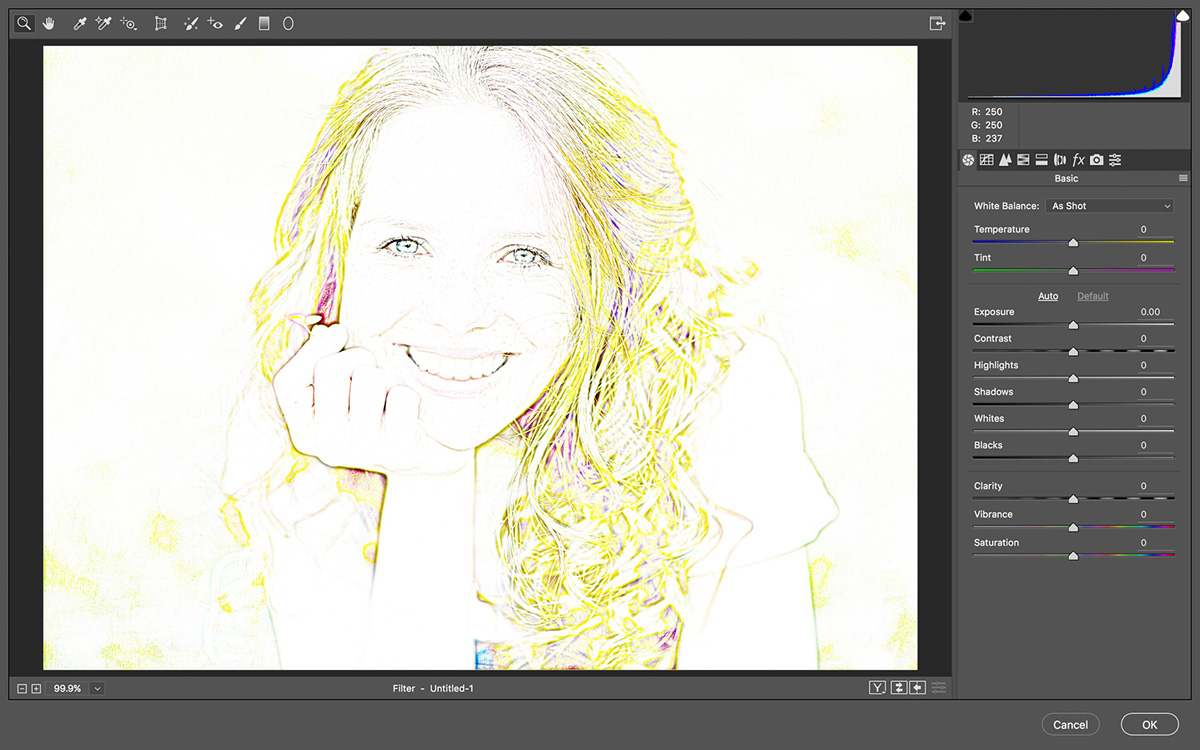
You can now use the power of the ACR (Adobe Camera Raw) engine on your smart object; in my opinion this is the most powerful thing to have arrived in Photoshop since layers, and it is truly magnificent. From hereon in, you can pretty much create almost infinite variations to suit your image, but we’ll take a look at what’s been used in this example, starting with the Basic tab:
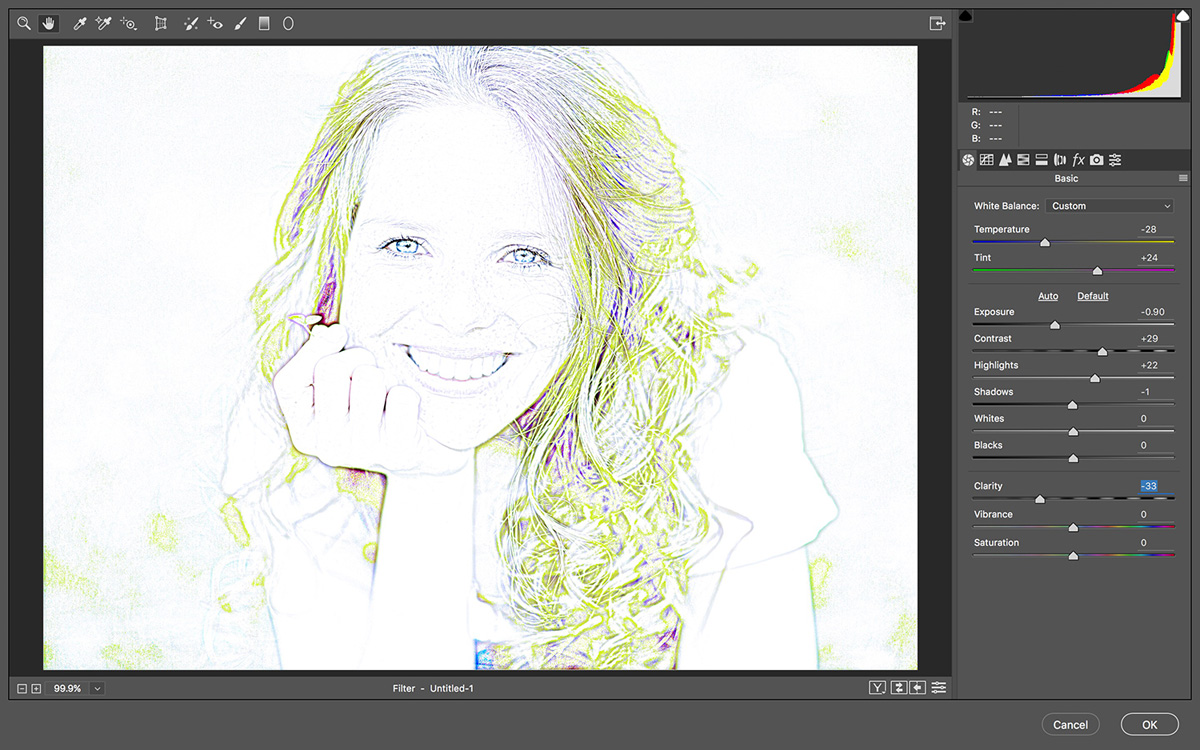
- The image temperature has been cooled down quite a bit (that lovely sloping histogram all the way over to the right is just what we’re after with this technique)
- There’s a lot of green in the image so the tint has been moved in the opposite direction
- The exposure has been lowered, and the contrast increased
- Some negative clarity brings removes some definition, but we’ll improve that further momentarily
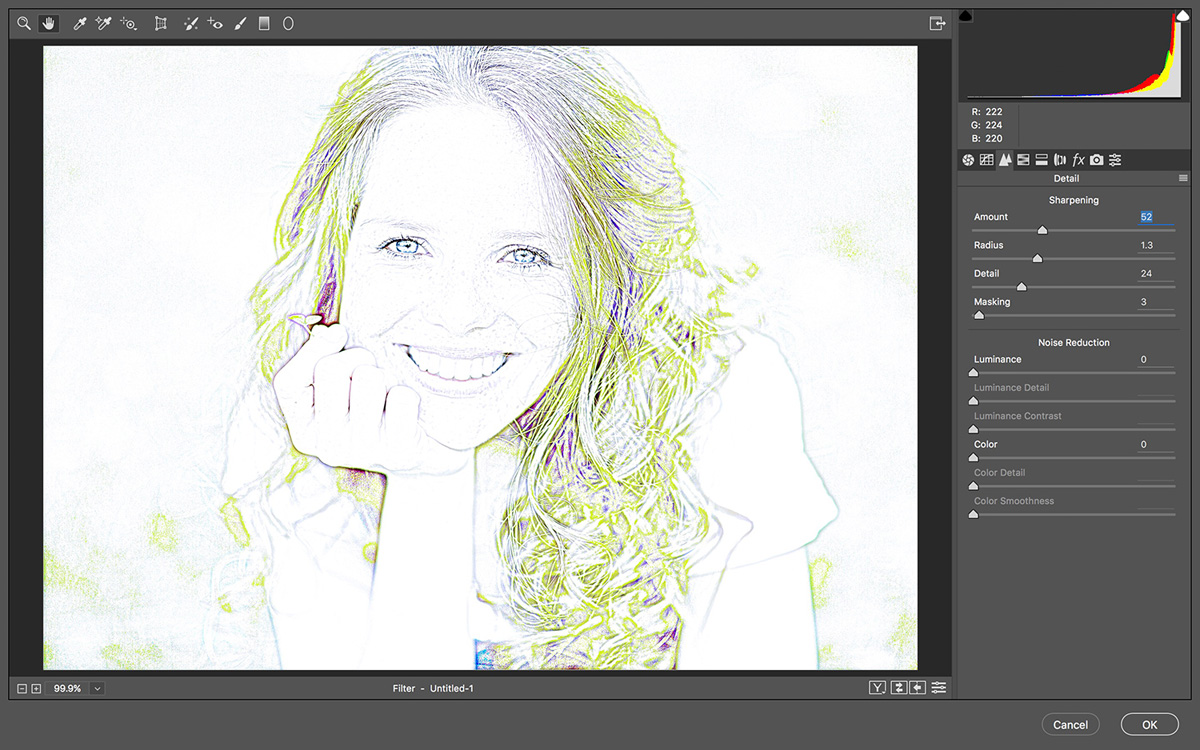
Now moving to the Sharpening tab, a little tuning there may be helpful, as it is here; if you want an accurate preview, don’t forget to make sure you’re zoomed in to 100% or more
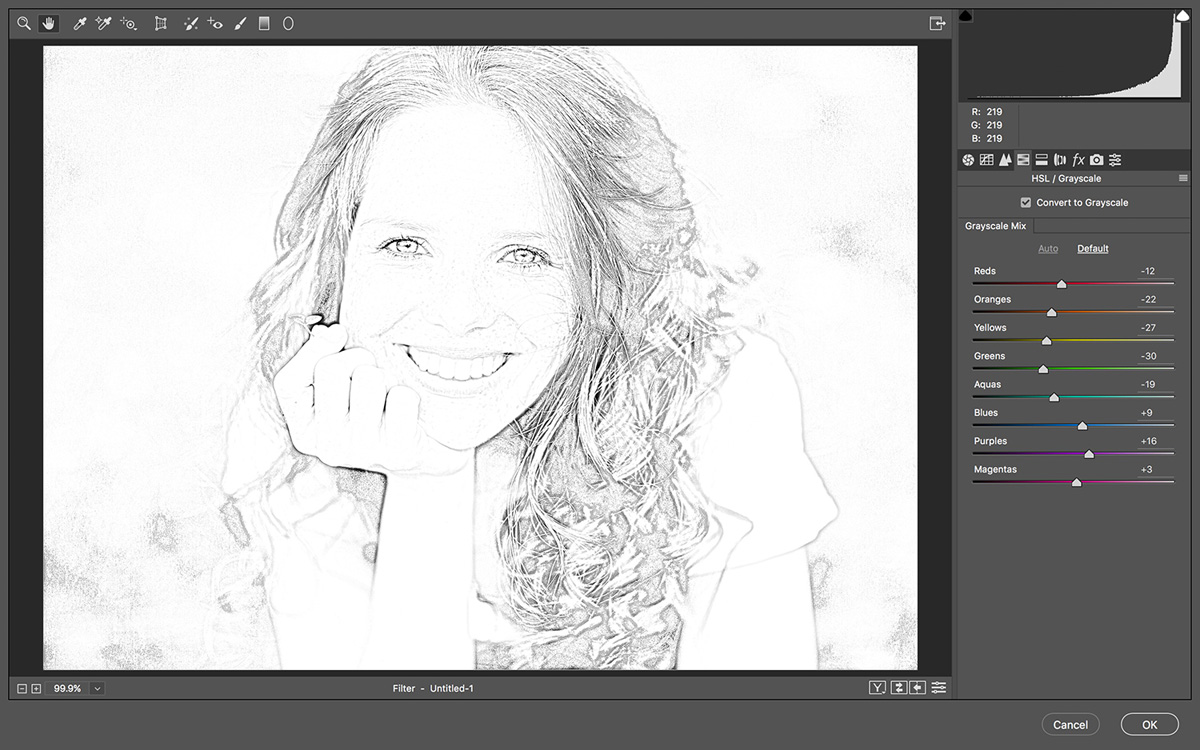
Then on to the HSL / Grayscale tab, and check the Convert to Grayscale box (Boom!)
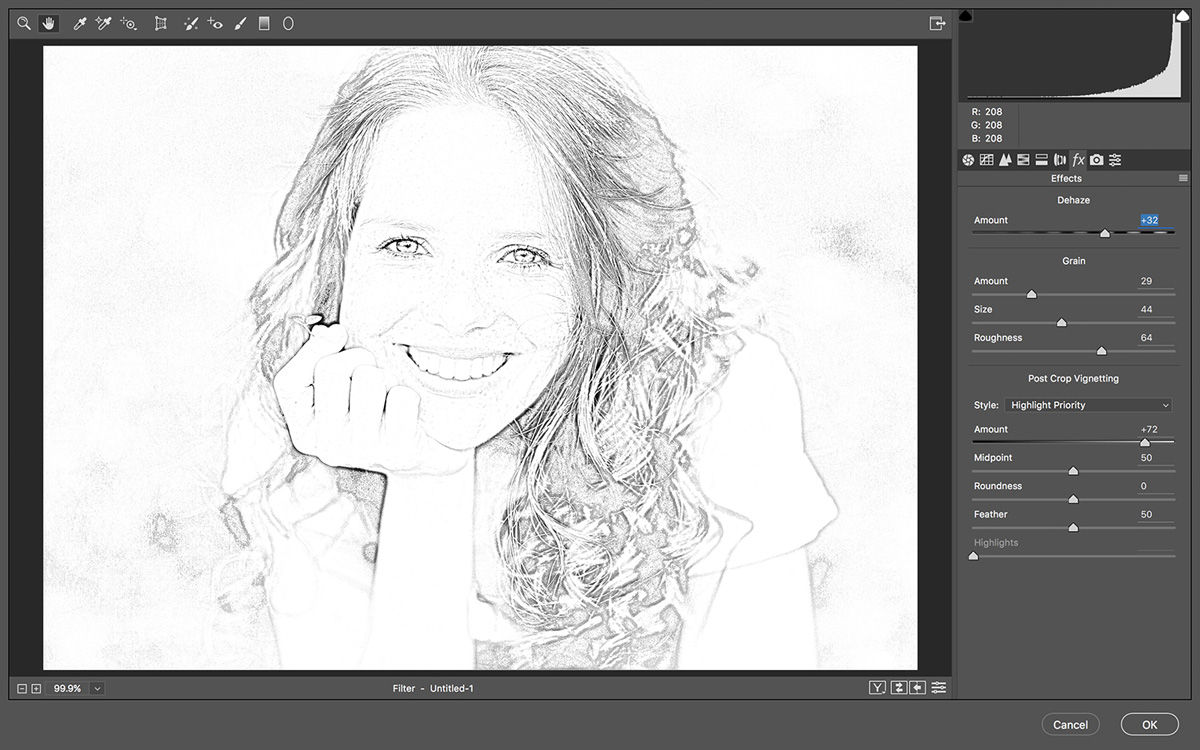
The Fx tab enhances what we have already:
Dehaze brings back some contrast and detail, if required
Grain can enhance the sketchiness, especially with clumpier roughness
Some positive vignetting lightens the edges of the image, where not a lot of drawing takes place often in a real sketch
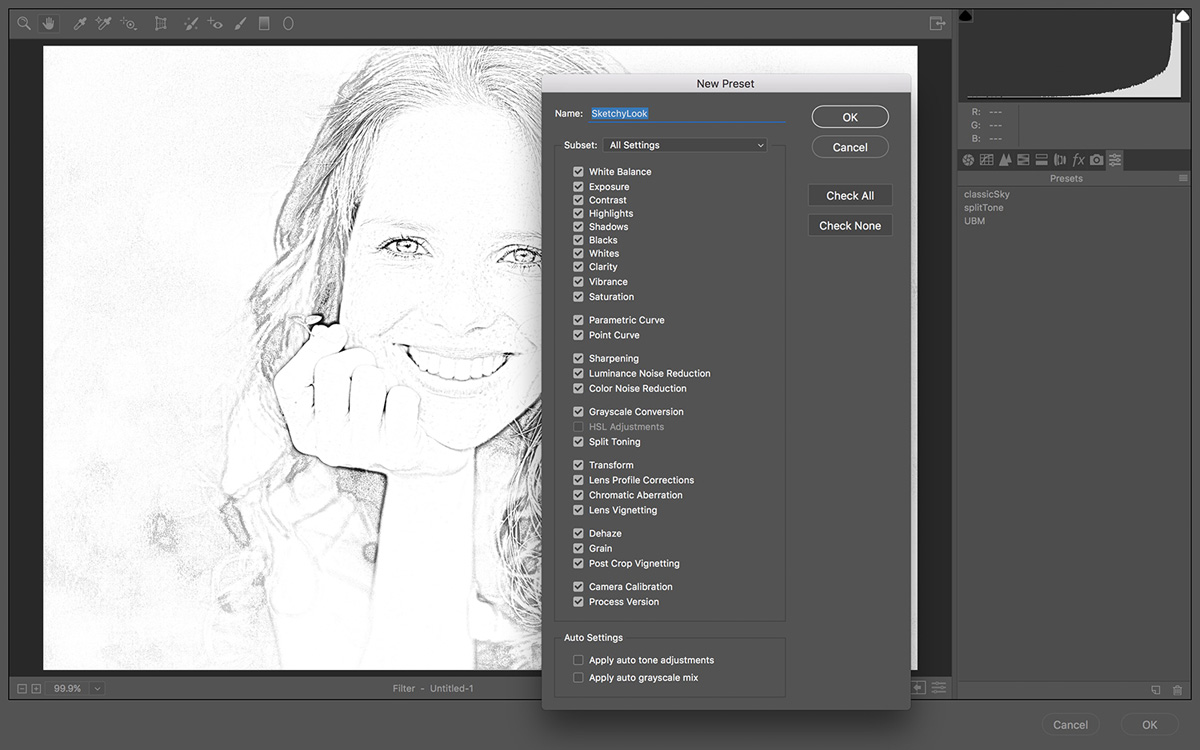
If you wish to apply these settings to other images with one-click, then go to the Presets tab and create your own preset based on those settings; hit the icon at the bottom of the tab and in the resulting dialog, name your preset and choose which settings you want included in it. This is a smart move, and if nothing else it gives you a springboard to getting the technique done even faster next time you use it.
You can revisit any step in the Camera Raw filter now and tune as desired; hit OK once you’re done.
Optional Stage 3: Filter Gallery
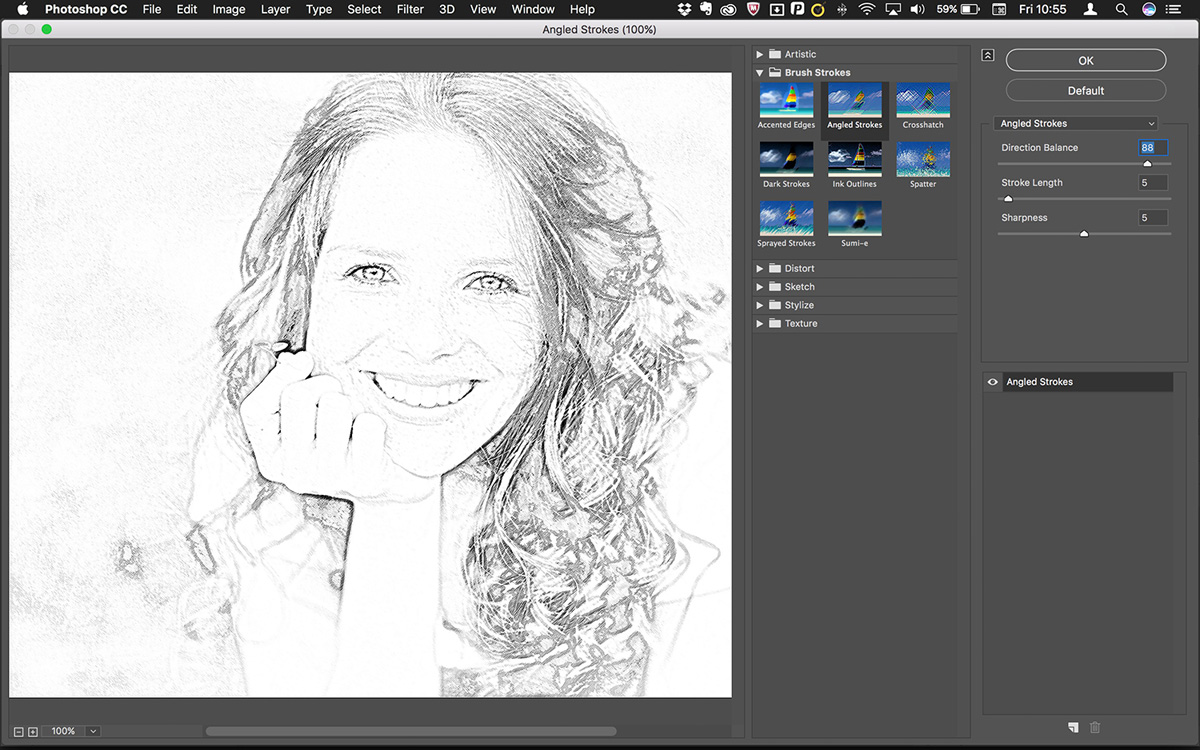
At this stage, you may well be happy with your results, but the final tweak that often clinches the effect for me is to add some slight tuning using an effect from Filter > Filter Gallery… and using something like Angled Strokes from the Brush Strokes set, as has been done here, shown in the image above.

Optional Stage 4: Colouring In
My favourite application of this technique is that of an image dissolving into (or maybe out of) a sketch, and that is easily achieved by using the layer mask that is automatically added to your smart filters. In the example above, a brush with some cool dynamics has been used at a reduced opacity to reintroduce some of the original image (the brush used here is from the Aaron Blaise Hair and Fur set) but I urge you to experiment (it’s fun, anyway).
The TDN Technique: The Movie
If you’d like to see a variation on this technique in movie form, you’ll be pleased to know that Steven Spielberg, Ryan Reynolds and Halle Berry teamed up to make a movie just for you (okay, it was just me, really) and you can watch that here:
Cranking It Up a Notch (Bam!)
All right. That’s all good for the folks in the cheap seats, but I know I’m dealing with some hardcore NAPP folks here so you’re going to want a bit more, and I have plenty but you can start with these three:
- Replace the Gaussian Blur with Filter > Other > Maximum; this can actually help a lot with some images
- Add a second instance of the Camera Raw Filter if you’re reaching limits in the first

- Use the local adjustments in the Camera Raw Filter, and selectively fine-tune your results
- If you’re working on a design project—rather than your own photography—and using Adobe Stock, you can work with this on the preview image until it is approved, then license the image and all your edits are transferred to the full-resolution unwatermarked asset without any effort on your part!


Wrapping Up
We’re done for this time, but I really hope you’ve enjoyed looking at this technique; as I suggested at the start, it doesn’t perhaps come out of the box too often, but at least when you next need it, you know there’s a much faster, and flexible way to achieve it.
Columbo Moment
Oh, one more thing; the TDN Technique can be applied to video smart objects, too—with the exception of local Camera Raw Filter adjustments—so I’ll be interested to see if there’s a resurgence of A-Ha “Take on Me” videos in the near future.
Tony Harmer is a Specialist Solutions Consultant at Adobe. His specialism is in interoperability and he has a massive enthusiasm for the integration of mobile tools with design workflows. With more than 160 technical certifications , Tony has presented and delivered training related to graphic production across the EU and US.
Tony offers tips, tricks and techniques weekly on YouTube.com/TheDesignNinja, and you can see more of his work at TonyHarmer.expert.
I LOVE this tutorial!! Thanks so much Tony!! I am going to use this in my Photography classes (I teach HS photography in Jakarta, Indonesia) if that is ok with you??
Hey! Thanks, and yes of course please do use it! I’m really pleased that you liked it, and thank you so much for taking the time to comment—it’s appreciated!
:)
Tony
Great tutorial! I’m going to give the process a go for sure – nice tool to have in one’s bag.
On a lighter note: would you be so kind and use your fantastic Ninja techniques to sketch a KelbyOne Band’s PhotoShopWorld London performance into the AdobeUK’s calendar please? We spoke about it briefly during Adobe Photography Jam last year (I’m sure you won’t remember)… :)
Thank you! It’s a handy technique, and I’m glad you enjoyed it. On your lighter note, it’s something I’d like to see but sadly outside of my sphere of influence, these days. I do have a vague recollection and apologise that it doesn’t immediately fully jump to mind, but as you can no doubt understand quite a lot of event requests come my way. I do promise that if I get the chance to have any input on photography events, that I will do my best.
:)
Tony
I tried this technique this afternoon on 2 variations of the same image, one in color and one already in grayscale. Results? Outstanding…and my wife really liked the results (= success!). Thanks!
Another technique in your toolkit—excellent! Really pleased that you got results that you—and your wife—are pleased with!
Tony
Awesome tutorial! I tried this using a photo of my granddaughter and I love the results. I also wanted to do Step 4 to add color…but I get a message that the Smart Object must be Rasterized…masks always did confuse me, so I am sure it is “user error”! I will keep working on it. Thanks again for this great sketching method!
The technique was very effective, I did have one problem – on “Optional Stage 3: Filter Gallery” when I went to add the brush strokes the pull down for filters was “grayed out” and I was unable to select. More detail and how to make this selection….. Thank you – I’m 80% photographer and 10% Photoshop!