ONLY SHOW YOUR BEST WORK
It is an honor to be back here on Scott’s blog. The last time I was here the guest blogger idea was in it’s infancy and a lot has happened since then…. but some things have stayed the same.
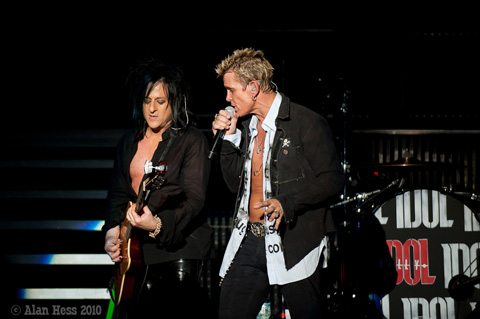
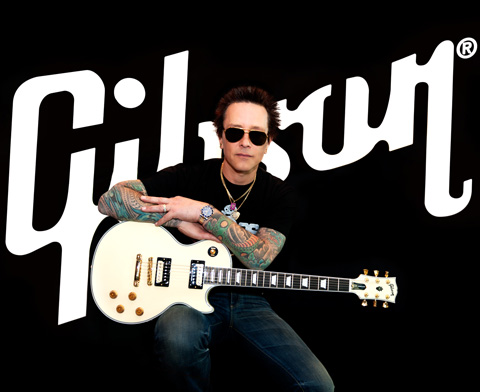
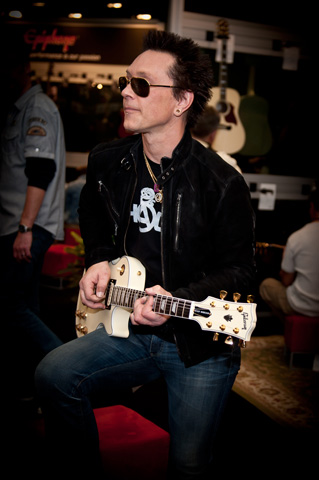
My guest blog post in 2008 was centered around shooting Billy Idol in concert, so I though it would be cool to share the experiences I’ve had with them since then. I have been lucky enough to shoot Billy Idol five times in 2010. This blog post has to do with how that became possible and how it led to being able to photograph Billy Morrison at the release of his signature Gibson Les Paul at NAMM this last weekend.
It really is a very simple concept. I only show my best work.
It sounds easy enough in theory, but in reality it can be real tough to do. It’s tough to step back from the time and energy involved in shooting and just pick out the best image from the show. Now, if I am shooting for a wire service or a music website or magazine, I will submit more than one image depending on what was asked for. This one shot is the image that I will try to get to the musician. I am looking for the image that they will like, that will get a reaction from them. Musicians see a lot of photos of themselves, what I want to do is make sure that the image they see from me stands out.
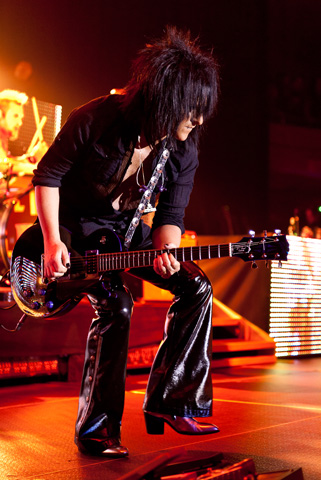
Before I get in the actual editing process, I want to talk about Billy Idol, Steve Stevens and Billy Morrison. In 2008 I was able to photograph the opening night of the Billy Idol tour in San Diego. After the show was over, I edited my images and sent a few of the very best to the person who got me the photo pass. These included a shot of Billy Idol and one of Steve Stevens. These images were then shown to the band members and the next thing I knew, Steve Stevens (Billy Idol’s lead guitar player and collaborator on some of his biggest hits) was inviting me to photograph the band again in Hollywood later that year (which was the subject of the previous guest post). Since that time I have kept in contact with Steve, and when Billy went back out on the road in 2010 I was able to photograph the Southern California dates.
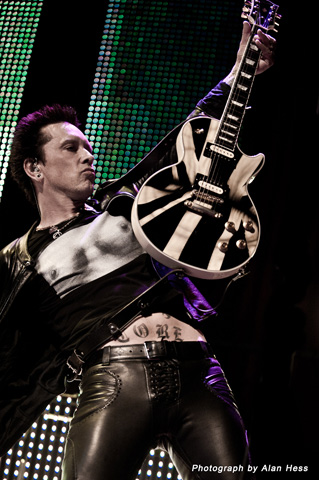
During the summer of 2010 I shot three shows, and the first thing I noticed was that this was not the same band I shot in 2008. There were some additions to the band, most noticeable to me was Billy Morrison on rhythm guitar. The really enjoyable thing about photographing a band like Billy Idol is that it is so visual. Each member has a great look and are not afraid to act like rock stars. After the shows were over, I made sure to send the best photos on to Steve and asked that he share them with the band. The images made their way to Billy Morrison and he had contacted me to let me know that he really liked them. That just makes my day. It’s a great feeling when the subjects like my photos of them. Just plain makes me feel good.
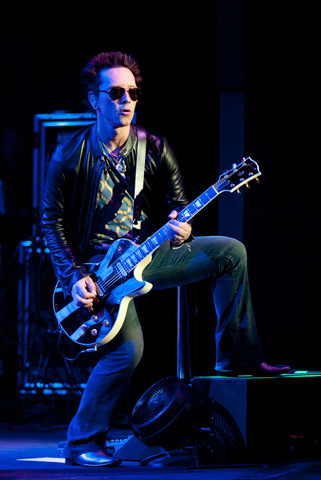
Lucky for me, Billy Idol decided to play a couple more shows in Southern California in December of 2010 and once again I was able to photograph them. By this time I was in contact with Steve Stevens and Billy Morrison directly. When the shows were done, I sent them both images from the shows. The email I got back from Billy is one of my all time favorite responses to my work I have ever got. He loved the shot I sent him. I would reprint that email here, but due to the Rock ‘n Roll nature of the language I think it’s safer to just say that he really liked the shot.
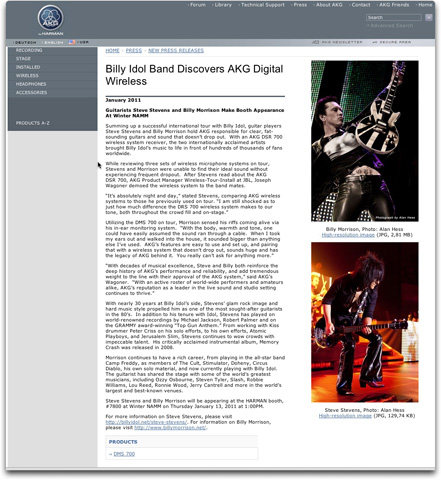
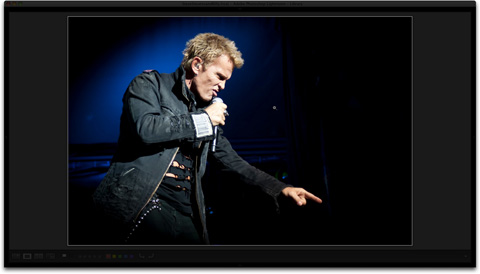
Here is the key… it was just one image. Not a slew of good images with one great one in the middle, but a single image. From there we talked about shooting opportunities and usage for the shot he loved. For example, it was used along with a Steve Stevens photograph for a press release by AKG Microphones.
That brings us to The NAMM Show (National Association of Music Merchants), a show held each January in Anaheim. It’s not open to the public, but it is the place for music manufacturers to show off their goods to music buyers. This includes a lot of signings and endorsements, and this year included the release of the Billy Morrison signature Gibson Les Paul guitar.
So there I was in the Gibson room with Billy as he gets to see and play a production model of his signature guitar for the first time ever. All of this from just making sure I showed my best work. (For more on Billy and his new guitar, click here.)
I think the best moment for me personally was watching as fans came up to ask for Billy’s autograph, and the photo he pulled out to sign was the one I had sent him.
So how do I pick that one image?
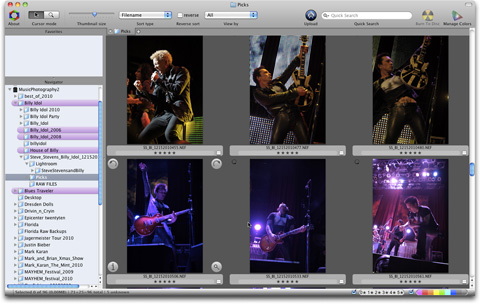
First, I import all the images using Photo Mechanic.
I then start looking at the images as I import them, full screen. I find that Photo Mechanic is by far the fastest program for doing this.
I go with my gut feeling on the first round, just picking the images that stand out. It might be the lights, or the pose, or a look in the subject’s eyes, but I don’t think too much about it. It’s either good enough or it isn’t. This is by far the fastest part of the sorting process. I never spend more than a few seconds with each image. For some shows, this means picking 10% of the images, other times it is closer to 40%. I am not too worried about picking too many since I know I will be culling images again in Lightroom.
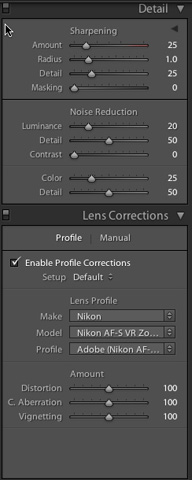
The next step is to select all the picked images and I copy them into a new folder called Picks. I then import these images into Lightroom. This makes my catalog easier to deal with since it only has the images I think are worth editing. I now apply a preset to the images that turns on the lens correction and applies Noise Reduction of 20 Luminance.
My next step is to go through the images and crop where needed to make sure that the composition is what I wanted. I tend to shoot a little wide and usually have to crop each image a little. This only takes a few seconds per image, but now I can start to go through the images and start really narrowing down the picks.
In the Library module of Lightroom, I select the first image, press E for loupe mode, then Shift+Tab to hide all the panels except for the main screen, and press L twice so that the screen is black. Now I start to look through the images with a more critical eye. When I see a shot I like, I press P to mark the image as a pick.
Once I have gone through all the images, I press L to bring up the lights, and G to see the images in a grid. Now I select all the images that have been marked as picks and create a collection of them. These are the best of the best and will be the web gallery on my website or submitted to the client.
It is from these images that I still need to pick the single best shot. To do this, I ask myself a simple question; does this image portray the musician in a way that I think they want to be portrayed? That usually makes it easier to get the selection process down to a small handful of images and then it is a matter of looking hard to decide which is the best.
I have to tell you that sometimes this process is easy. There are shows I have shot that the minute I pressed the shutter release button I knew that I had that one shot. I wish it was that way for every show but it isn’t.
I have found in speaking to many photographers that this is one of the hardest things to do. They take great photographs, then dilute the images by showing too many. It is one of the hardest things to do and the only way to make it easier is to practice.
So that’s it! Thanks for reading, and I hope you got something out this.
For more on Concert Photography, check out the Kelby Training class I did with Scott Diussa. If you are planning on joining us at Photoshop World in Orlando, Scott Diussa and I are teaching a concert photography pre-conference workshop with a live band, which you can sign up for right here!
About me:
I shoot as may concerts as I can.
I have written five books, including iPad Fully Loaded, Composition Digital Field Guide and Exposure Digital Field Guide.
I teach at Photoshop World.
I love my iPad.
I shoot with a Nikon D700.


Alan, great guest blog. I always enjoy the conversing on Twitter and I really loved the Kelby Training class. I’ve been getting into the concert photography thing for a few years (as you know) and I appreciate all the help. My last shoot looked so much better after following your advice on shutter speed. Hope one day I can get some captures half as good as yours!
Ken
Dammit Ken! beat me by 2 minutes! hahhahahahahhahahhaha
Pedro: Youhave to be quick to beat Ken on the blog posts! :D
–John
Just amazing Alan.
I think that your “tip” works not only for concert photography, but for all your photography. I’ve seen several portifolios out there with 5/6 images of each shoot, waay too many!
I’ll try even harder from now on to pick only “the shot” out of each photoshoot.
Thanks for the awesome post.
Pedro
Great guest post, Alan. I love seeing the photos you post, and they’ve inspired me to want to try concert photography. I haven’t done a thing with it, but I’m heading to the precon in Orlando, and am excited to get involved.
Alan, Great “Guest Post!”
Loving the series of images you’ve included here; even more so knowing that concert photography is definitely not one of the easiest things to master by any means but somehow you manage to make it look easy.
Thanks for sharing,
Glyn
Great guest post Alan. I always enjoy your work and your insight to post processing. Indeed, a given 3 song set is on average around 300 frames. Editing that to 25-30 keepers is really (IMO) the hardest part of the assignment.
Best,
Allen
It was somewhere around 2007 you had told me something like this. You had told me I was showing to many photos. So cut down a lot. It is so hard sometimes. Just keeping it to one will be so much more harder to do.
Heya Alan
A great post, loving the series of photography pieces posted here too. Must definitely be a tough job to pick out the “best” photography pieces when most of them are of top quality.
Keep up the great work. :)
Great stuff Alan! Great post!
Alan,
Thanks for your insightful post – loving that final image of Billy Idol.
Wise advice. It explains why every shot I’ve ever seen of yours is a great one.
Great post Alan. You always give very helpful advice.
Allen, Great Blog with tons of good info and extraordinary photos! You know, I’ve been searching for a good review process for my photos, and I really like your workflow. I hope you don’t mind, but I’m going to incorporate it starting today! I’m not familiar with Photo Mechanic, is speed the only reason you use it? Thanks again for your awesome blog today and turning on the idea bulb!
Dennis
Photo mechanic does a whole lot more, and has a ton of great features. I use it to add all the tagging, titles, keywords and captions to my images on import.
Thanks Alan! Appreciate the feedback!
Dennis
Hi Alan … ooops sorry for misspelling your name!
Dennis
Wonderful guest post, Alan. For the folks above who said they’re planning on taking the Rock Concert Pre-Con at Photoshop World with Alan and Scott, you’re going to love it. For those who are thinking about it, just do it. I had a blast when I took it last year and it seemed like everyone else there did, too.
Great post, Alan! Pictures are terrific and I like the synopsis of your workflow. I will try to incorporate it in mine. But why not just import into Lightroom to start? Does PhotoMechanic work that much faster than Lightroom for importing and sorting?
–John
Lightroom has improved it’s import function a lot but Photo Mechanic is still better. I started using Photo Mechanic back many years ago for it’s ability to import images from multiple card readers at the same time. I have used Lightroom and for a while I used Bridge for imports but in the end I came back to Photo Mechanic for it’s speed and the ability to add all the IPTC info I want. For more on Photo Mechanic… http://www.camerabits.com
Guess I’ll come out of the woodwork for a bit for this guy! For those of you that don’t know him, Alan is a super cool guy, and it doesn’t suprise me to see him throw his whole workflow out there in the hopes that it will help someone progress. I totally agree with the concept of looking for your best Shot, not your best Shots. When you load up on one job that you have done you make yourself appear as if that was your one and only chance! That doesn’t look good to art directors and clients. You also start making “sentimental picks” rather than what shows your work the best. Good point Alan. Hope you are enjoying the “Kelby spike!” See you in Orlando.
Thanks Michael
See you in Orlando!
It seems like this would be a no-brainer, but showing your best work often gets lost or disguised in the idea of showing your FAVORITE work. Great advice…And on a lesser note, I heard Billy Idol at a festival last year. He’s still got it.
Great post, Alan! I’m really glad you shared this point especially after our conversation regarding this very topic last week. I just love the Billy/Gibson shot! I would have loved to be at NAMM with you although it would have been hard to keep my hands on a camera with all those guitars around! :-)
Looking forward to doing the Concert Photography pre-con workshop at Photoshop World in March with you as always!
Great stuff Alan. I’ve been a fan of your concert work for some time. As a guitarist (and not a good looking one either), I can really appreciate the effort that goes into making an image rock. You have consistently delivered the goods and helped inspired me to be a better live music photographer. Thanks again for the advice and keep ’em coming.
Man, I thought Billy Idol was dead!
Alan, what is your favorite lens to shoot these type concerts with and a sample set of your settings on the D700, ISO, AP,Shutter,Manual, etc etc. C/S/M…. Your shots are so crisp and clear. Nice job and great post.
What good advice. It is so hard to narrow it down, isn’t it? I love your pictures and your style. Very hip and cool : )
Awesome post Alan! Looking forward to your pre-con at PSW Orlando http://photoshopworld.com/schedule/instructor_name/alanhess/#schedule
If it’s anything like Vegas, everyone is in for an amazing experience!
– Alan
Fireleaf Design
Awesome Alan. Amazing thing is I remember that post! Didn’t realize I had been following Scott’s blog that long. I photograph MANY concerts through out the year. Your work has been inspirational. Thanks for sharing…