Hello everyone, it has been a very busy year and a half since I last did a Guest Blog Wednesday. I would like to thank Scott Kelby and Brad Moore for the chance to share what I have been up to with the community once again.
The busy year and a half has been filled with fighter jets, muscle cars, helicopters, armored tanks, jet-powered boats, rock stars, athletes and general adventure and mayhem. In other words, work has been loads of fun and I feel extremely lucky and thankful for every moment. Here is a short video with highlights from the past year or two:
You may recall that I work very closely with my retoucher, Justin Paguia, who also was a previous Guest Blogger. About 3 years ago I decided that I wanted to accomplish something visually with my photography that I was unable technically to do on my own. I could imagine what I wanted in my head, but didn’t have the time or advanced Photoshop skill to create these final images I dreamed. Thus, I began my adventure to search for a retoucher that I could establish a close working relationship with that would understand my style and my passion for the action/rock and roll/gasoline/bright colors/adventure. I did some Google searching and I asked for referrals. Nobody seemed to be the right fit for me until one day NY art director & stylist “Jersey” introduced me to Justin. We hit it off right away with our immature love for 80’s action movies and similar artistic visions.
Over the coming months Justin and I would slowly train each other how to work in order to achieve the dynamic “look” I was striving to achieve. Before each shoot/project/campaign I intend to be retouched, I will normally call/email Justin (he is NYC based and I am always on the road) to consult the creative concept I envision and what elements I would have to capture on-set (extra ground elements, sky, articles of clothing, various portrait poses, etc) to make his job easier. After 3 years of practice and training and experience, we have become quite a team. Justin won’t retouch every shoot, but I always have him working on something.
Some of the best work in my portfolio (in my opinion) are images I did for myself or for my portfolio. If I were to give any photographer a piece of advice, it would be to always shoot something for yourself. Sure, we all have to pay the bills and you may say to yourself you are too busy doing the “bread and butter” jobs, but let me tell you, I am crazy busy doing photography and co-running a film company, but I make time for personal work because whenever I shoot something for myself that I am passionate about, new and better paying gigs come from it. Trust me on this.
Today I will be sharing with you two projects I did as personal projects and Justin will be chiming in with his retouching process. I hope you enjoy!
Juelles & The Sunflower
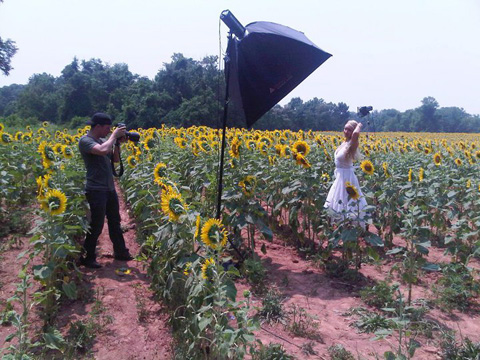
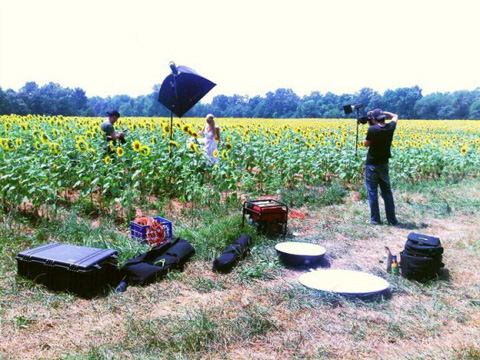
While location scouting for a music video I had to film last fall in the DC area, I discovered a burnt down sunflower field minutes from my home. I thought to myself what a cool location that would be for a photo shoot. When spring came, I would check every few weeks to see if the sunflowers would be re-planted or grow back. By about April/May buds started to appear and when July came along the sunflowers were ready for their close-up.
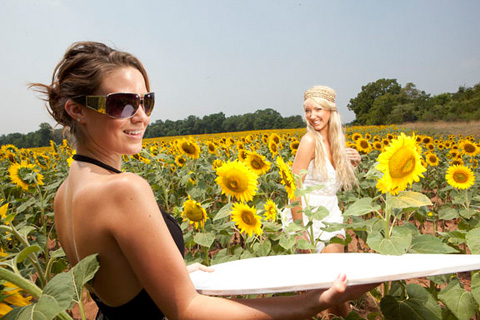
I recruited model Juelles Chester, because I thought her look would fit perfectly and she brings a great energy to the set. My makeup artist was Jenna Marie Streitenfeld, who also helped with clothing styling and hair, and my assistant was DC photographer Carey Hess.
The lighting scenario was pretty simple. I used two 600 watt strobes with 7” silver reflectors with barn doors as catch lights set to 1/2 power and a 1000 watt main light with large softbox set to 3/4 power and placed over her head. The overhead main light created a perfect glow on her skin but there were too many shadows under her eyebrows and neck. Easy solution! Used a large white reflector and placed it facing up near her waist.
Justin: I’ll take it from here Doug, thanks. Before I start, I have to thank Scott Kelby and Brad Moore again for letting us steal the spotlight (even though I harassed him via Twitter at the NY CS5 seminar haha).
Now, to business. When given an image to work on for Doug, it’s usually something dark and moody, either SWAT teams, cars or rock bands. So when he told me we were going to do the complete opposite, it felt refreshing. I was told beforehand he was going to shoot in a sunflower field. When i saw the shot, i knew it had to be an open, color saturated piece that had to pop.
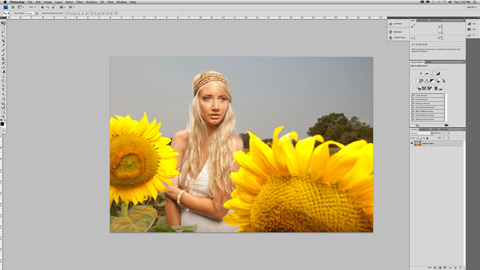
Doug narrowed down his selections and sent them to me to discuss which piece would be the best. We both chose this image.
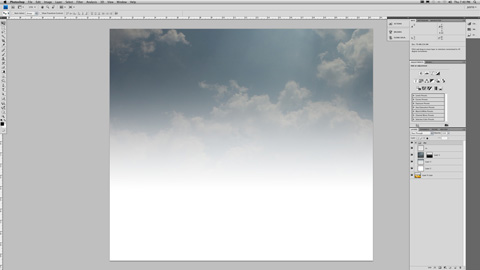
The starting point looked good but the sky was too boring. As always, I tell Doug to take elements of skies before/during his shoots. All I had to do was extend the canvas, drop in the sky to the position that fit, and add in a gradient of white and light blue to the bottom. That way, the sky would look like it was fading into the horizon. If you didn’t read my previous Guest Blog, I’ve been known to have everything grouped into their own folder for organizational purposes.
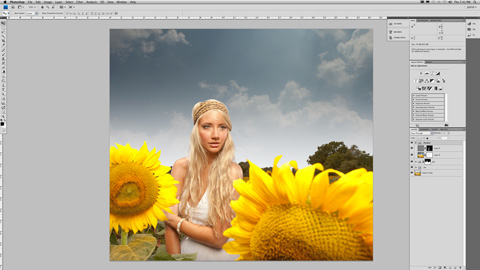
Once it was composited, I made a folder for the model and background with the original sky masked away, which needs to be on top of the folder for the added sky. Inside the folder containing the model, I made a separate folder for the retouching and basic cleaning up of the image.
Add a sharpening on top of that, high-pass and/or unsharp mask, but subtly.
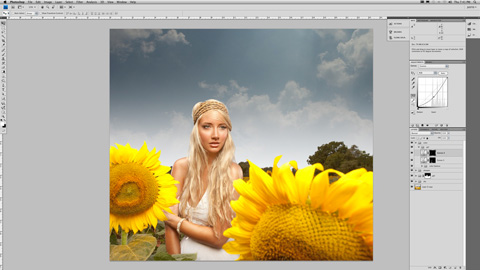
Now its time to push the colors. In a newly created folder labeled ‘color’, another folder was added inside labeled ‘girl’ (I know, I know, too many folders.) The basic retouching was done, but her skin tone was uneven and her skin needed to pop. I added a curves adjustment to lighten the colors, then quickly made the mask black to hide away the move. Using the brush tool at a low percentage, I painted on the black mask with white as the foreground color so the curves adjustment would show through. I first evened out her skin tone by lightening up certain shadows and blemishes, then accentuated the highlights to give her a glow.
Then, I did the same curves adjustment, but this time darkening the colors for the shadows.
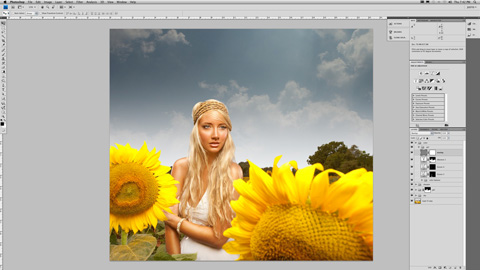
Since the model was in a sunflower field, she needed the perfect tan, so I moved the slider in the vibrance adjustment to 100%, but changed the opacity so it wasn’t excessive.
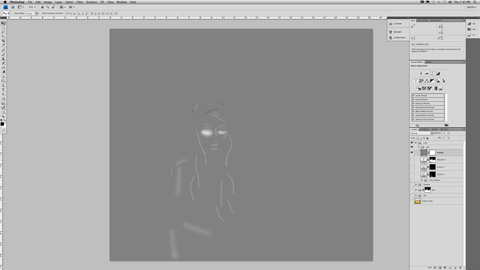
To make the highlights and shadows pop even more, i made a new layer with a 50% gray neutral color on an overlay blending mode and used the brush tool to paint, white on the highlights and black on the shadows. If you try this yourself, use a low percentage on your brush.
What the layer looks like by itself.
Then a little desaturation on her arms to tone it down.
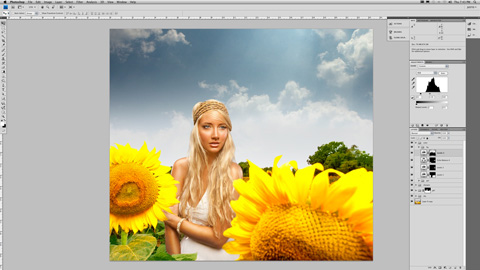
The next thing to adjust was the sunflower and trees. I used a levels adjustment in a new folder labeled ‘bg’, and used a mask to concentrate only on the sunflowers.
Same thing with the trees.
The contrast was there on the trees, but the levels adjustment warped the colors of the tree and made it look dead. Easy enough fix by making a color adjustment move to push the greens.
The last thing to push was the sky. Same technique, levels with everything else masked off.
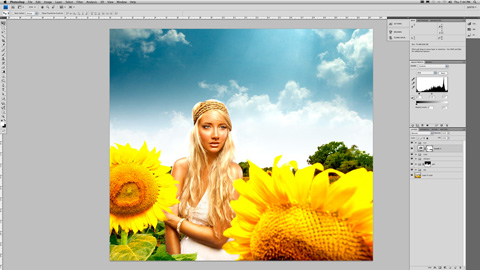
Even though the sky colors weren’t warped, it didn’t match the overall feel of the image. To counter that, another color balance was added and the slider for cyan was moved to give it the summer vibe.
Now you’re thinking the image looks pretty decent right? It does, but why not push it further. Once again, a new folder was added to the top, this time labeled ‘o/a’, my abbreviation for overall. Adding a levels adjustment, I moved the sliders at both ends to give it a high contrast.
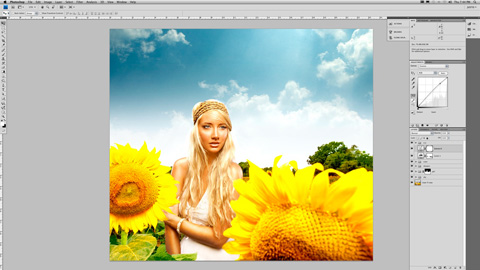
See, now it looks good, but then I thought, why not add another color adjustment. This time I added a slight curves adjustment to open everything up.
For the final touch, I added a vignette with a levels adjustment to darken up the corners.
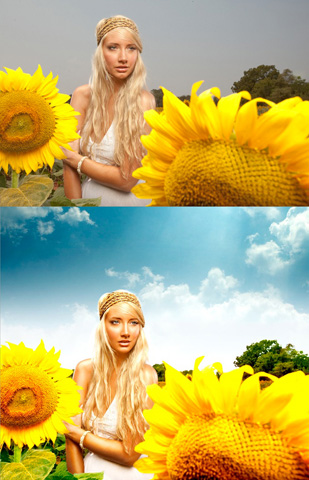
Here’s a quick before and after so you can see where the image started and the difference all those small moves made for the finished file.
If you were to only see the end result, then you would probably think it took a lot of time an effort for the end result. But after seeing the breakdown, all it takes is pushing colors, knowing when it’s too much or too little and how the colors will match the theme you’re going for. Now back to Doug with the second image.
Back To The Future DeLorean
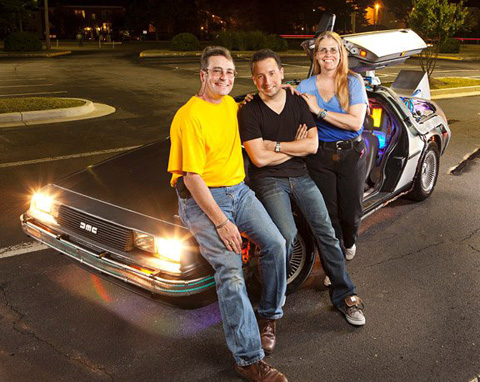
Posing with Terry & Oliver Holler, who built and own this Delorean
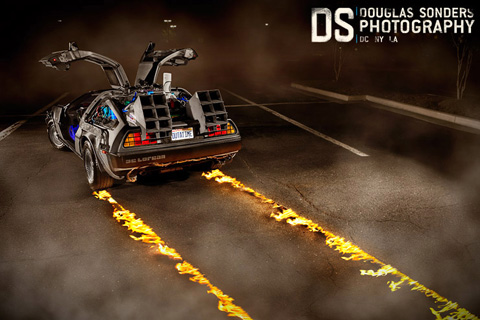
Aside from watching every original episode of Knight Rider, no other film or TV show would fuel my love for cars more than Back To The Future. Over the last several years I have been photographing movie and TV vehicles (real and replicas) for a personal series called the Unicorn Project (hard to find desirable vehicles). I met Terry and Oliver Holler, the lovely couple that built this particular amazing Back To the Future DeLorean replica, through this personal series via a friend. You see, Terry & Oliver, when they aren’t running their movie theater in Myrtle Beach, they are driving this DeLorean all over the country raising money to fund research to one day hopefully treat and cure Parkinson’s disease. They are wonderful selfless people and I wanted to do something nice for them by making them posters of their DeLorean that they could use to promote their charity efforts. Please check out their website, ToTheFuture.org.
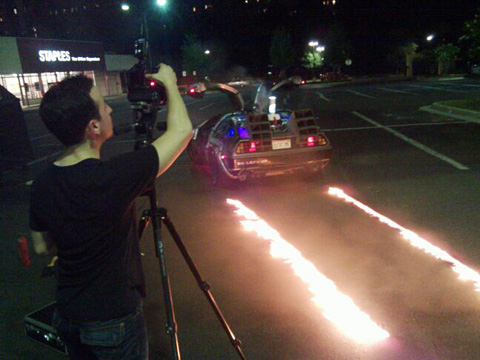
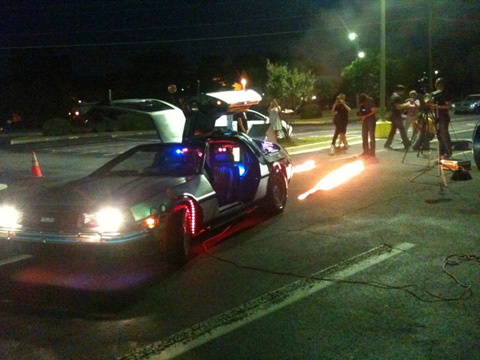
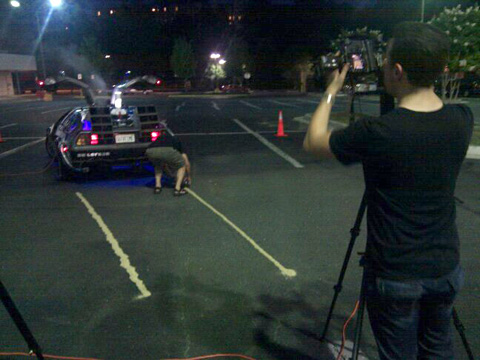
My friends Tom and Bubba Lloyd over at Bubbas East Coast Rods & Customs in Northern, Virginia helped arrange an empty parking lot, about 5 assistants, & found a pyrotechnician that would volunteer to help with this charity photo shoot. We had a blast on set!
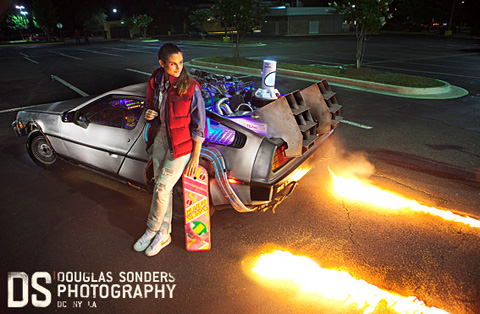
A sample of another photo in the works from this shoot
This image was captured with four 600 watt strobes with 7” reflectors places around the car. They were set to about 1/3 power. I didn’t want them too powerful so I could expose some shots where the fire would appear. Let me preface this by saying, do not do this type of pyro without a trained professional (I had a fire marshall on-site). For the flames we used kitty litter soaked in flammable liquid, which allowed it to slow burn so I could get a bunch of photos off before it burned out. The photo was taken with a tripod so I could expose for the strobes lighting the pavement and the stainless steel car body. I took another longer exposure of the glowing car interior without the strobes, and a bunch of the fire with and without the strobes.
For you DeLorean / movie car lovers, check out my blog for the “Great American Geektrip” when 2 friends and I drove a Ghostbusters pickup truck and a turbocharged DeLorean across the United States last year.
Justin: Now this is the type of shot Doug and I normally work on, more compositing and a lot of special effects to take it to the next level. I’d write another breakdown with screen grabs, but it would be too similar to the SWAT Team breakdown from my last guest blog. So instead, I recorded my whole retouching process. It goes from the basics, creating clipping paths and simple retouching, to making the color adjustments and giving it a color mood. If you watch it carefully, I relied on a lot of trial and error to see what worked with the shot. Which light fx would work and what would make the background more exciting? You can’t tell from the video, but it was pieced together from 5 separate recordings, and in-between takes, Doug and I were iChatting, sending .jpgs back and forth, discussing what worked and what didn’t. I actually had a mental block for this project, but since Doug and I are a team, we brainstormed through the chats and talked through the final steps. He would mention an idea, i would execute it but give it my own twist, then we would branch out into another idea. Ahhh, good times. Watch the video so you know what I’m talking about.
Dirty Laundry
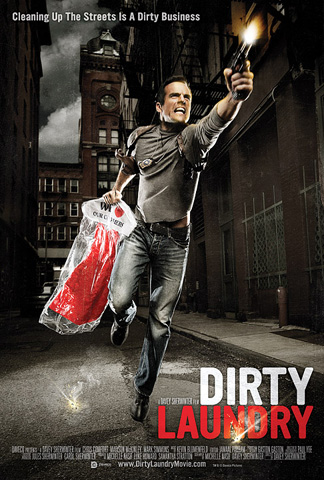
This was a fun project we did for Director David Sherwinter and his independent film “Dirty Laundry.” It was photographed in a Tribeca, NY alleyway with an actor, some fake police props (holster, badge, & non-firing gun) over the course of one to two hours.
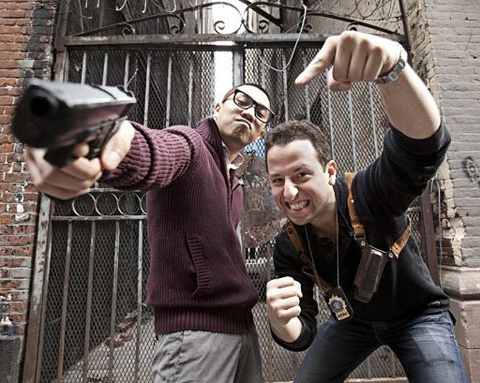
Justin was on-location for this photoshoot to consult on the elements we needed to capture to create the final image. Oh, I included a photo of us warming up the set, enjoy.
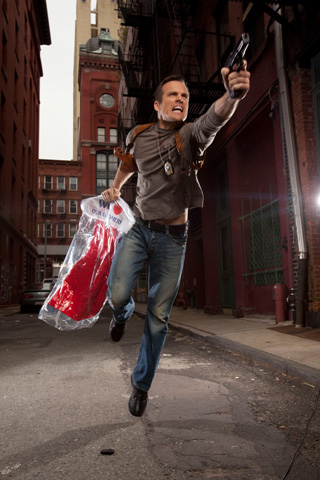
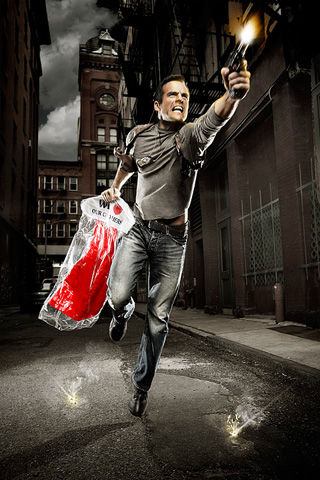
I photographed the actor, Chris, with an extra large softbox mounted to a 1000 watt strobe set to 3/4 power. It was placed in front of him slightly over his head. Then, I used two 600 watt strobes with 7” silver reflectors with barn doors as catch lights set to 1/2 power. We had Chris do a bunch of runs up to the camera until we caught him in the pose we wanted. When that was done, I shot elements of the gun, and the background by itself with varying exposures to give Justin some variety to work with in post-production. Long story short, I had Justin pop the contrast, brighten the background, drop in a moody sky, clean up the shirt a little bit, and add gun fire. I included the before and after photos.
Justin: Dirty Laundry, I think this might be the only time I was on set with Doug while shooting, so it was the first time i was able to talk to him directly about getting a tighter shot, making it easier for me in post. During the shoot, I would mention what we could add or take away from the shot and I could see what elements I may need later on. The badge was shot in different angles with close ups for detail and the dry cleaning was positioned in certain ways for the type and dress to be visible without the highlights blowing out the details. All in all, it was a good time….even got to ride a Segway while Doug was working haha. The point i’m trying to make is, be sure you plan ahead and think about what you’ll need to make the retouching easier.
I think that’s all the input I have for today. Just keep practicing and go through all the trial and errors. Most importantly, keep on learning. I wouldn’t be here without great mentors, so shouts to my guys Chris McCormick and Mike Moskowitz.
I hope you have enjoyed what we have shared with you this Guest Blog Wednesday and that some of this may have been helpful to you. Feel free to comment or reach out to me if you have questions. Thanks again for your time.
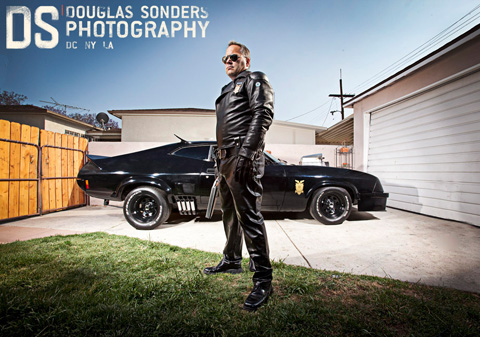
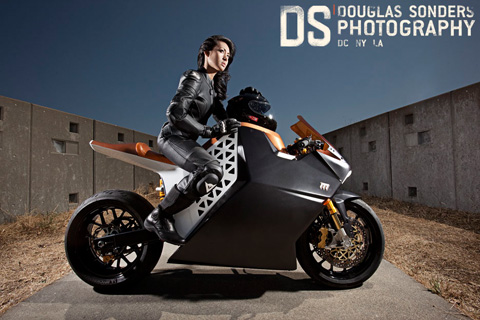
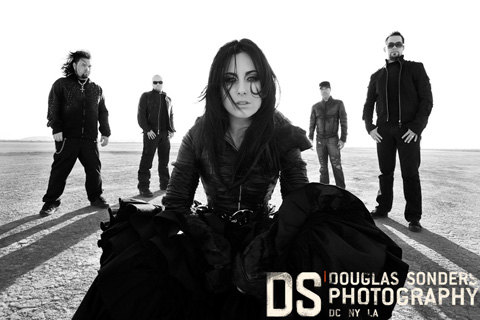
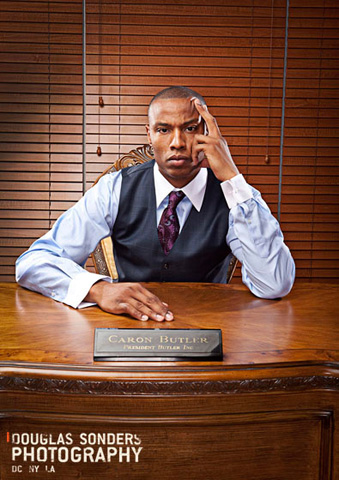
Here is some other work I have done in the past year and a half (some with Justin, some on my own):
Keep up to date on my adventures via…
My blog – douglassonders.wordpress.com
Twitter – twitter.com/douglassonders
Vimeo – vimeo.com/douglassonders
My Website – www.SondersPhotography.com










It was really awesome post! Thanks a lot for sharing.
You guys rock! Thank you for sharing your vision and technique. Very inspiring.
What an extraordinary guest blog!
Hey guys,
Thank you for the great and effective tutorial on Photoshop. Love how you have a main foreground image on your other works you have created. Some amazing photography with great emphasis.
Great team work guys, keep it up.
One of the best Guest Blogs Ever !
only problem is, i’m late for work now
It’s the whole process that goes into fulfilling creative vision and that is why this is great. Thanks guys!
Damn amazing work, both photography and retouching.
What an amazing work !
I specifically like the MadMax car with the Kieffer-like driver !
Thank you, then you may enjoy the behind the scenes video:
http://vimeo.com/4695654
This is an awesome Guest Wed Blog! Thanks for showing us indepth what you guys do!
So awesome…wow just way beyond what I ever imagine I’ll be as a photographer or designer. Intense work for sure. Its really awesome that you guys shared how it all gets done. And for some reason I was hearing rock music in my head as I read through the post :)
thanks for sharing, hope your next year and a half is just as exciting!
Excellent work. Love all of these shots. It’s great to see how a photographer/retoucher team can collaborate to create some amazing images. Thanks for a great post!
Wow! What an awesome guest blog post. I need to bookmark this post so I can come back later and watch the videos….
I am sorry if this has been asked before but geez I love your work!! And I would love to know what the lighting is you are using in the video??
Such spectacular work and a great read!
Now thats what I call a dream team. I know Justin so I have seen his talent (finally get to see him in action NICE!!!! LOL @ Douglas you have a new fan your work is Amazing simply Amazing… Its refreshing to see artists that go out there and do what makes them happy…
I really enjoy this post for three reasons.
1) It’s the first post I’ve read on here that’s made me want to comment. I’m not sure EXACTLY why, but I feel the need to have my voice heard for some reason.
2) It’s a different voice on the blog. Don’t get me wrong, I read this blog almost daily and I can appreciate Scott’s work and feedback. Heck, a lot of what I’ve learned about post processing has come from Scott and his gang. But the guest blog idea is just genius. I can come to one site and learn about so many other people/influences all at the same time.
3) As somebody who is constantly looking to improve his post processing (especially the creative side), I REALLY appreciate the photo breakdown that Justin did. I like being able to follow along step by step and learn. It would be great if the people showcasing their post processing techniques could include downloads of the files to try it ourselves. I know we can always go out and shoot our own but if you want to follow something along RIGHT NOW, it would be ideal to have the downloads.
In addition, I like the idea of taking different photos of different elements in the area to process/add in after. I need to get better at my selections in Photoshop though. I’m pretty sure Dave Cross does a Mastering Selections in CS5 class on Kelby Training which I check out from time to time…I should really dive into that class. Selections just seem very very time consuming. But that’s going to be essential for this type of work…
Thanks for sharing and thanks for reading.
Great stuff. Already showing it to guys around the office.
its guest blogs like these that make me come to the site. awesome work. probably the best guest blog ever
Wonderful read, great guestblog post and great work.
You two make a great team. Keep up the good work!
Fantastic work. The sunflower shot is really beautiful. I love the music in the first clip. I notice that your lighting setup carries quite a punch, lots of powerful lights. Is it possible to go the strobist route and achieve the same results?
possibly in the right lighting conditions. you have to consider my main lights are 1k watts. you could do it the strobist route with multiple exposures and / or use of a diffusion screen on the main subject (to block out a lot of the ambient light / sunlight) and then use strobist to light
Agree with all the other comments! This is an outstanding guest post…thanks for sharing the step by step process that you did with the sunflower shoot, Justin! I would love to see a similar breakdown on the work flow used on the shot of the guy running with his gun…Douglas, I added your link to my favorite photographer’s sites…thanks again!!
Scotty
Jakarta, Indonesia
I agree with all the other comments. This guest post is outstanding. Thanks so much for the break down on the work flow of the sunflower shoot….that was very enlightening. I would really like to see the same break down of the shot where the guy is running down the street with a gun…can you do that for us, Justin? Douglas, your photography is really good…I have added you to my list of favorites.
Thanks,
Scotty
Jakarta, Indonesia
Keep an eye on my blog. I will be doing more photoshoot breakdowns and behind the scenes fairly regularly. Thanks for the interest!
http://douglassonders.wordpress.com
Awesome stuff, love these kinds of post!
Hey Guy,
Great work and thanks for all the behind the scenes details.
Denny
Very nice! I loved reading this and seeing the steps it took to make your images.
Is it a pain for you when you sit down with your clients and explain the process what’s going to happen to the image.
I mean, I would imagine you would just show them your book so they know what to expect. But when on set and they ask to see the image for me even without the retouch as much as you have it’s a pain to explain (haha to that one pain to explain) what’s going to be going on in the post-processing part of it. Mainly because I can see what I’m saying and I ask myself I wonder if this person really even understand what I’m talking about when I say healing brush or they’re just nodding their heads!
—
DT.
Miami, Florida | Nassau, Bahamas
Oh yea I forgot to mention I worked along with Jenna before she’s amazing at what she do as well! :)
reasonable question. the thing is, majority of my clients hire me because I am a specialist / I have a specific look and they have a good idea what they can expect from me.
Thanks Dwayne!
And a big thank you to Douglas Sonders for the mention.
Great post, thank you both! (and to your team as well…)
I love the tip with adding sky to the image and how to make it more realistic with gradient. I have never done it before, but now I can do it right! Thanks for a great guest post.
Great post but some more details about the retouching part from justin would have been even better!
Interesting post
Lovely photography and retouching work as well. Just thanking for your shared post.
It seems they are the best photograpers… really awesome photography.
hats off :) awesome
Clipping Path
Wonderful photo shoot place !
wow lovely photography and styling I like It. Thanks for sharing!!!!!