

I want to thank Scott and Brad for allowing me the opportunity to be the guest blogger and share some of my experiences with you. I am primarily an architectural and landscape photographer and love shooting both for different reasons. While landscape photography is a more personal art form, architectural photography is a collaborative project. Most of my clients are builders, architects or interior designers; my job is to convey their design in the best possible light and to showcase how their clients will utilize that space or building.
Here are a few tips to successful architectural photography:
Determine Photography Scope
Ask questions to find out what their photography needs are and how they will be using the final images. They usually want every aspect of their project photographed until you inform them of how many days that will take and the cost to accomplish it. After a few minutes of silence you will hear the words "I don't think we need to do that many photos." This is when they start to focus on the most important aspects of the project that need to be captured.
Visit The Job Site Before The Shoot
One of the most important steps, if at all possible, is to meet the client at the job site before the photography shoot date. This will allow you and the client to determine the rooms and angles that will be photographed, decide what time of day will provide the best light, how many assistants are needed, discuss styling, and get all the contact information for the building. I also send my clients a link to my website that has a pre-shoot checklist for them to go over and make sure they have everything they need.
Use A Tripod
If you think you can hand hold your camera and capture sharp images with a straight horizon, you're kidding yourself. Architectural photography is about keeping the perspective of the building correct. A lot of the newer DSLR cameras have built-in levels and if your camera does not, you can buy a level for around $30 that will slip onto your camera's hot shoe.
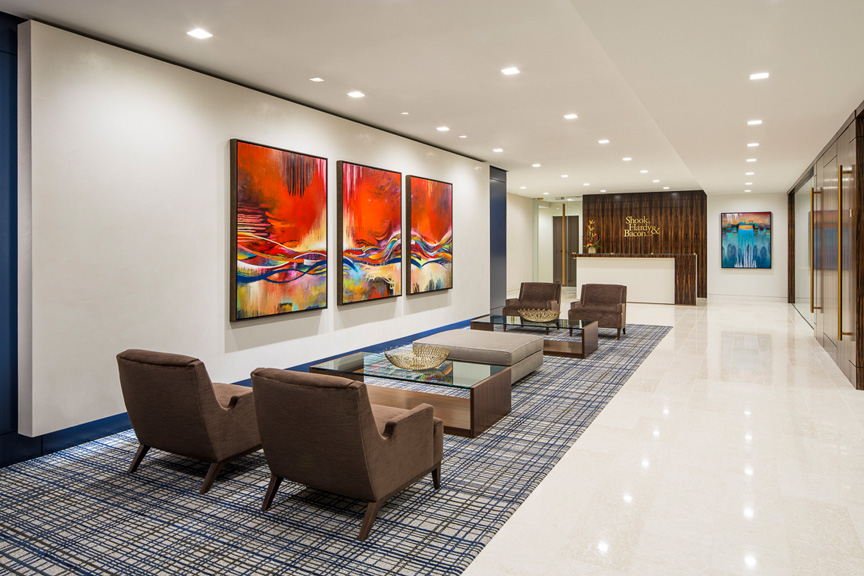
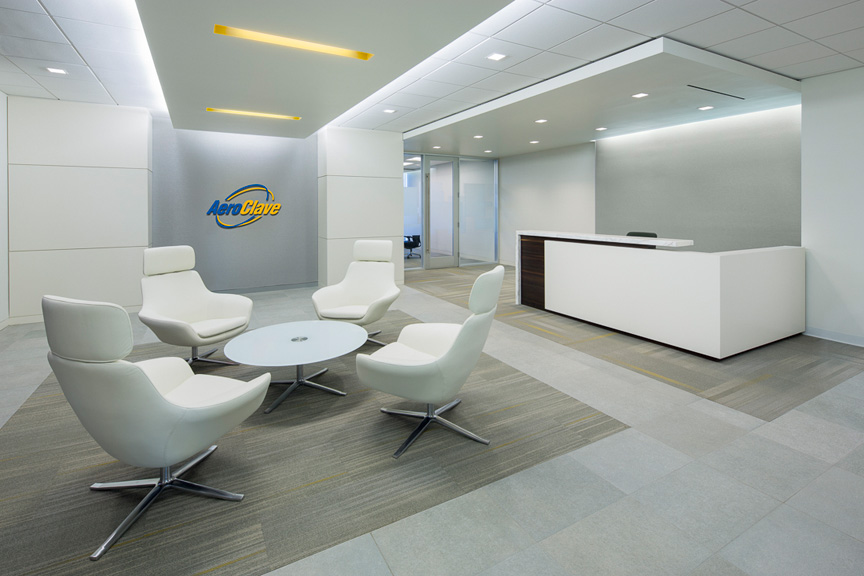
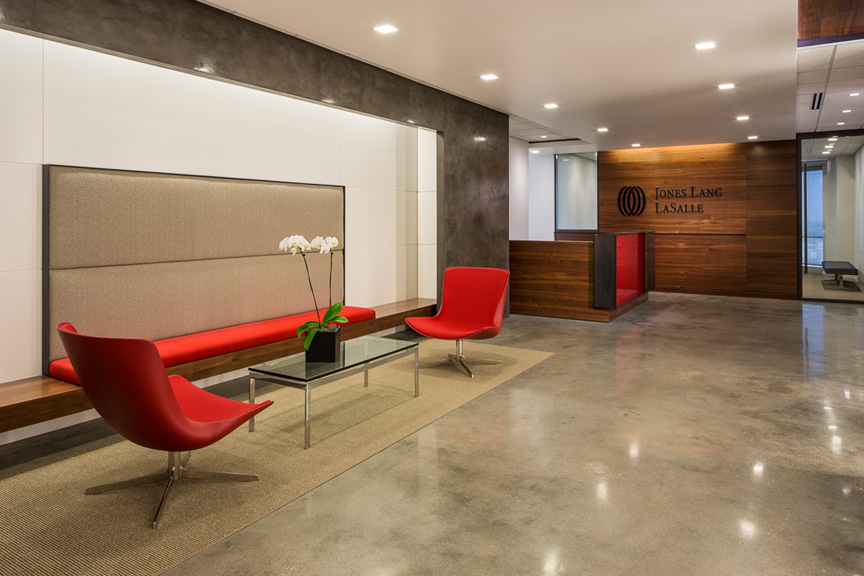
Put Yourself In The Corner
Very rarely will you photograph a room straight on as this will not give the room any dimension and will flatten it out. By placing yourself in a corner, you will give the room or building more depth and interest.
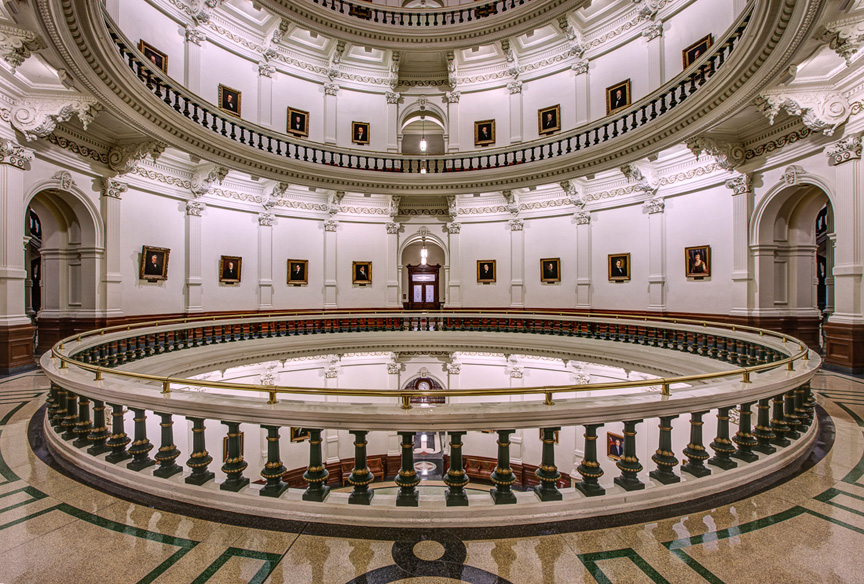
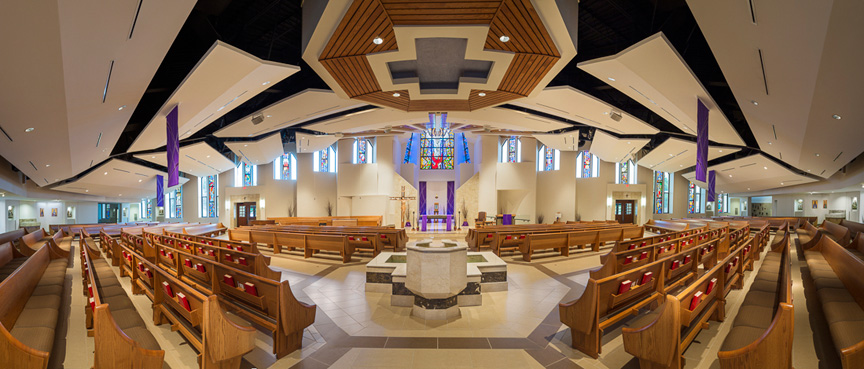
Don't Put Yourself In A Corner (I know what I just said.)
There are some situations where photographing your subject straight on will make sense: when the subject is very symmetrical. When it happens, and it is rarer than you might think, it can be a very strong and compelling image.

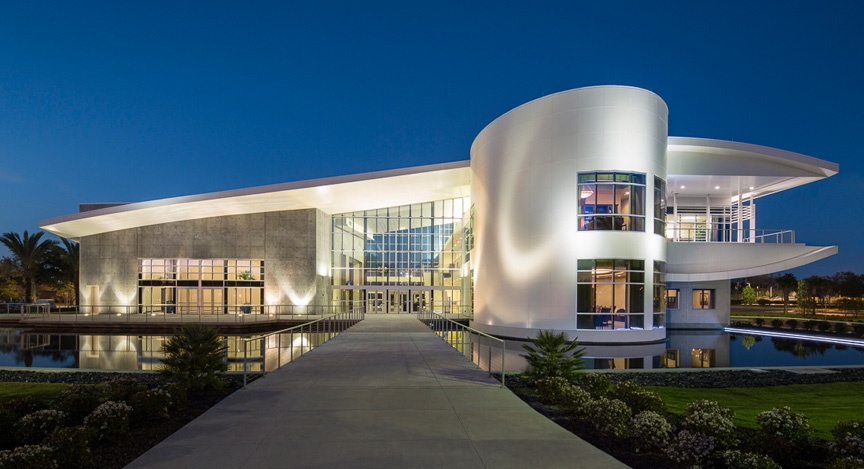
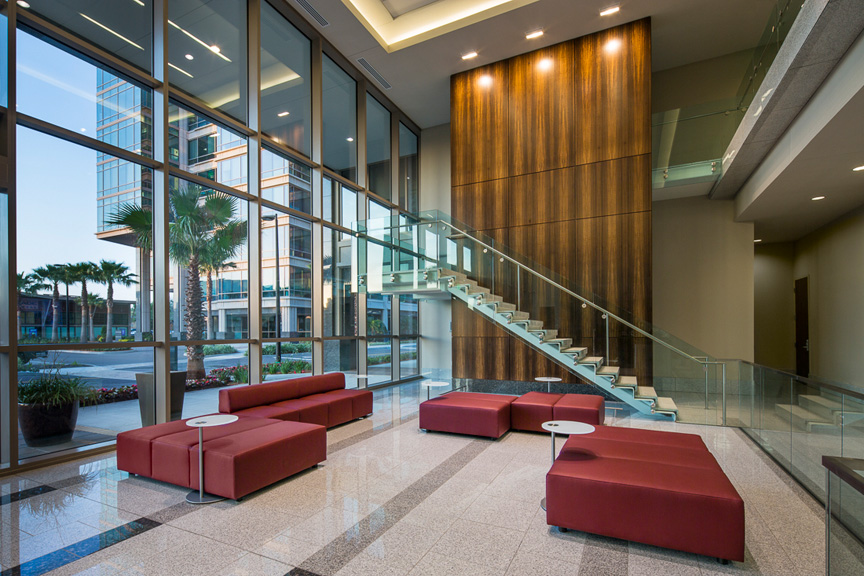
Photograph At Twilight Or Night
Having a well-done twilight exterior in your portfolio will get you work, no question about that. They are very powerful photos that your clients will want and pay more for. If you are photographing only interiors, one of your setups should be at twilight when the color temperature of both interior and exterior are the same. There is only about a 20 minute window when this happens and you need to have your lighting ready for it.
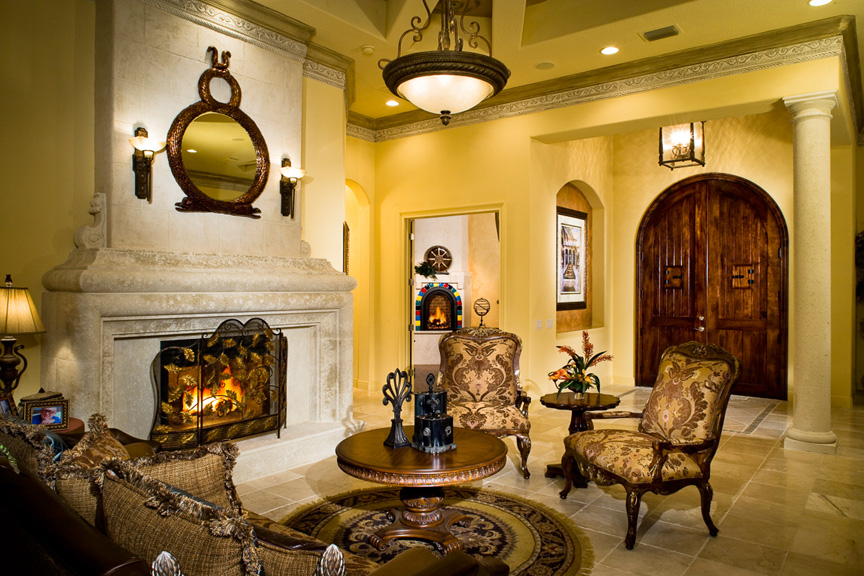
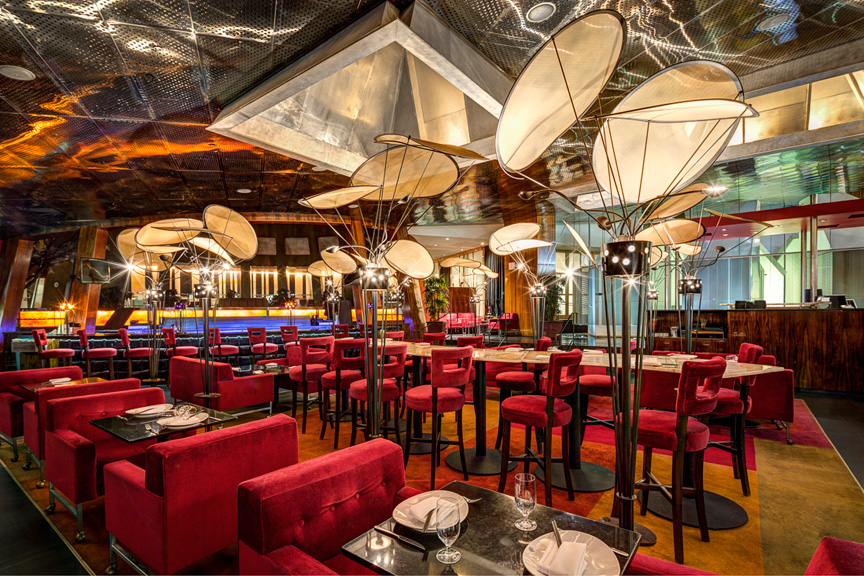
Photograph Using Tungsten Lights
With tungsten lighting, you will have more control than you do with strobe lighting. Tungsten will give you a completely different look than most other photographers who just use strobes. The bad part of using tungsten lights is that you will be working late into the night, but it's worth it.
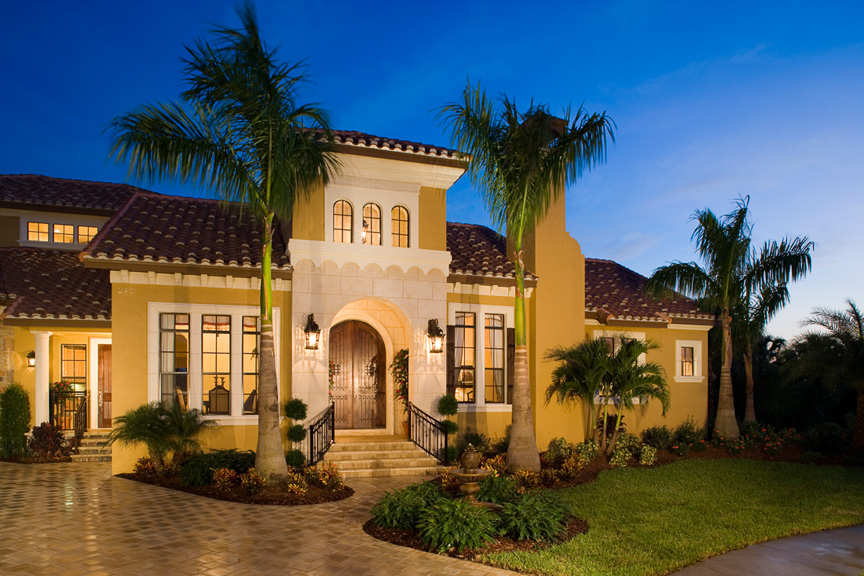
Water Down Sidewalks And Driveways
This is especially important for residential photography and less crucial for commercial buildings. If you don't water down sidewalks and driveways, they become the brightest elements in your image; by watering them down they become dark and create a reflection of the building and is an added benefit.
Don't Overuse HDR
I am asked all the time about how much HDR photography I use in my photos. The answer is as little as possible! Digital cameras do a great job of capturing a lot of information and post-processing in Adobe Lightroom can usually get what is needed. You should bracket all shots in case you need to use HDR or pull parts from different exposures to get what you need for the final image.
Use A Color Target
The correct color is essential for architects and interior designers and you better capture it for them or you will do a lot of post-processing over again. If you tether your camera to the computer, you can white balance the photo with the client right there and get their input on color and/or any problems that will have to be corrected on post-processing.
Look For The Little Things
With all that is going on with lights, clients, assistants, make sure you look for the small thing that can ruin a good photograph. It can be a pillow out of place, a cabinet door ajar, or a footprint in the middle of your shot because of carpeting that was not brushed. Have the rest of the crew look at the computer and see if they can find anything you may have missed.

Use A Tilt/Shift Lens
If you have one, it is a great lens that was made for architectural photography; if you don't have one, you might want to rent one and try it out. There are many places you can rent them from and the lens I would recommend is the 24mm tilt/shift. This is a very good lens for interior photography which will allow you to make rooms look larger than they are and you will have less post production than if you shot the same room with standard lens.
One of the good things about architectural photography is that it's not a moving subject and a building is not going to have an attitude or show up late. I have always had a love of architecture and photography and making a living with the two things I enjoy is a dream come true. I hope some of these tips will help the next time you are photographing a building or interior.
Randy Van Duinen is an architectural photographer in St. Petersburg, FL and works with The Digital Photo Workshops. You can follow Randy on Google+ and Facebook. His blog at StudioPhotoshop.com is where he talks about anything photography and Photoshop related. Randy has been a contributor to Light It Magazine and speaks around the country about Lightroom, HDR and architectural photography.
Thanks for the tips Randy! Most of my paid work I’d property photography for share holder reports and websites. I’ll try and make one of you’re workshops.
Sorry, autocorrect, that’s “I do” not I’d
Very informative and “straight to the point” blog post. Thank you Randy
Great post Randy and great to see some of your work.
All the best,
Glyn
Nice blog post! I love the twilight shot of the Boston Convention Center. I’ve been getting more interested in architectural photography lately, and these tips will certainly help.
–John
Great stuff here, thanks!
Just straight to the point, I like it. and this type of photography takes so much patience and is way harder than it may ever seem. Great work Randy.
I’m so happy to see a post about architectural photography. It really is one of the hardest specialties to find information on! Great tips. Thanks Randy.
Great info Randy! Thanks for sharing!
Always love seeing your architectural work Randy. Elegant and striking. Great post. Unless you’ve done this type of work, no one realizes just how hard and painstaking it really is. I’ll stick to photographing portraits and kids .
Great tips Randy! Love seeing your architectural photos. Usually I just get to see your awesome landscapes on the workshops!
Fantastic tips and fantastic images. It takes a lot of work to take the everyday and make it art. I especially like the tip about watering down the driveway. :)
yes me too
Beautiful work!
May I add on one more tip? DO correct keystoning (with a shift lens as mentioned or at least in post). Very rarely does good architectural photography keep verticals converging and if so as a stylistic treat.
It is disheartening to see how many even big name photographers show tilting and tumbling verticals – and it’s laziness or ignorance, none better than the other.
Good info.Can’t wait to try some of those tips.
excellent post and so informative. thank you!
Nice, thanks for sharing http://www.mathieunoir.com
Great job Randy, Beautiful work my friend, very informative. Why so intense on the portrait? Your a nice guy.
Randy love your work and your post! It inspires me to go photograph cool interiors and anything architectural!
I am trying this as a last resort. Please just read my page even if you can’t help.
http://www.gofundme.com/Father-Son-Day