

First off, I want to thank my friends Brad and Scott for inviting me back as guest blogger. I love these dudes - because they love photography and because they love helping photographers, around the planet, make better photographs. They are also really good people.
This post is about Creative Visualization, which is the title of my latest book, Creative Visualization for Photographers. In this post I will share some highlights from the book.
What is creative visualization? Basically, Creative Visualization is envisioning the end result - and doing this is often the key to making a good photograph. It's kind of like going on a road trip: If you know where you are going, you'll know how to get there, making the right travel decisions along the way.
When it comes to making a photograph, if you envision the end result, you will know what camera settings to use, what lens is best to convey your creative vision, and what accessories might be needed. What's more, you'll envision how your image can be enhanced/processed in Lightroom, Photoshop and with plug-ins.
So seeing the end-result, developing your creative vision, is important.

This is one of my favorite photographs from my Route 66 road trip -- which my wife Susan planned out (envisioned) so we knew where we were going.

Here is the original shot from which I made the image. No, it's not HDR (High Dynamic Range). The train was actually speeding past us. This image is what I call an EDR (Extended Dynamic Range) image. EDR is about extending the dynamic range of a single file.
Knowing the EDR power of Adobe Camera RAW (ACR) and Photoshop, I snapped a quick shot.
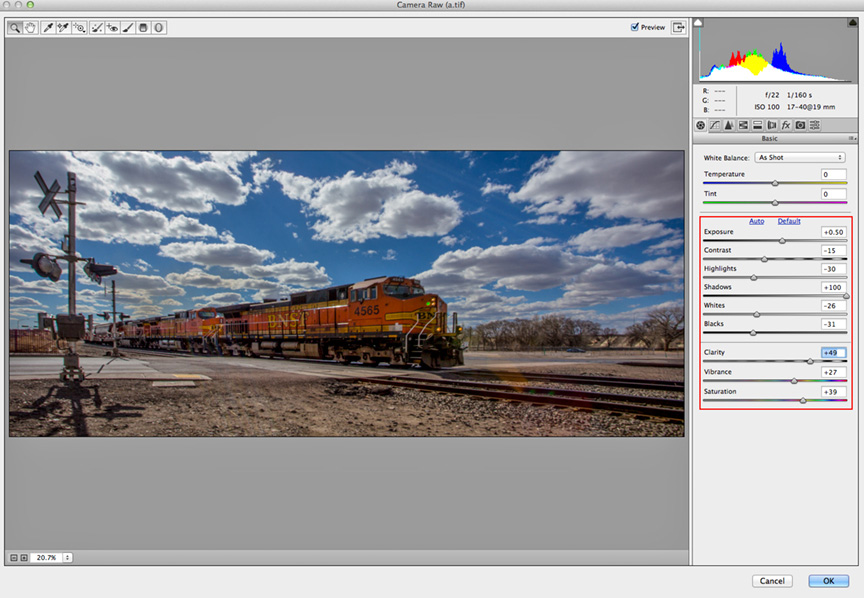
Here is what I did to push the limits of ACR.
Increased:
Exposure - makes an image brighter.
Shadows - opens us shadow areas.
Clarity - makes the image look sharper by increasing detail.
Vibrance - increases the saturation of non-saturated colors.
Saturation - increases the saturation of all the colors in a photograph.
Decreased:
Contrast -reduced the difference between the shadows and highlights.
Whites - preserved the highlights.
Highlights - brings back (and rescues in some cases) detail in bright area.
Blacks - makes blacks look bolder and add contrast to a file.
In case you were wondering, I corrected the perspective (pole on the left leading into the frame) in Photoshop: Select All > Edit > Transform > Perspective.
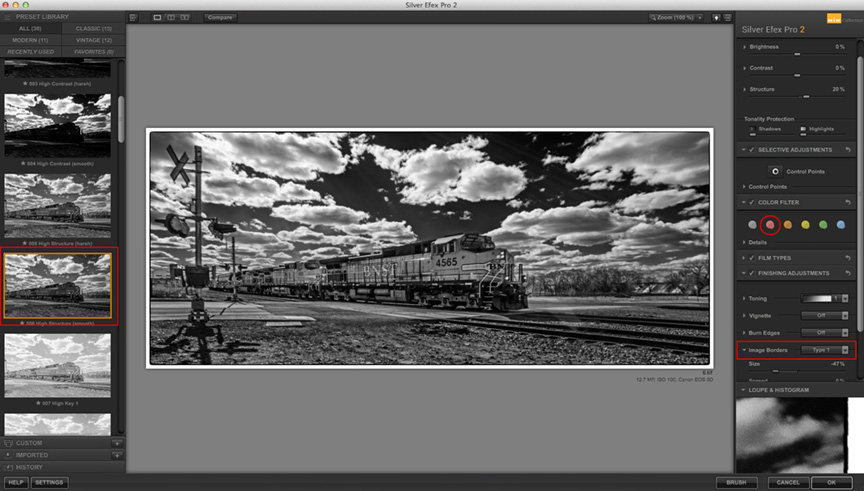
I envisioned a black-and-white image. To convey that vision, I used Nik Silver Efex Pro, using a red filter to darken the sky.

Photographing What We Recognize is an important concept. It's another chapter in the book.
What do you see - or recognize - in this photograph? Take a good look. Take your time.
When I show this photograph to my workshops students, most see a silhouette of Christ's crucifixion. That is precisely what I saw when I took the picture . . . and why I took the picture.
Other comments on this photograph have included:
– A man raising his arms to a crescent moon.
– A blue sky with a low sun.
– A lady dancing.
– Neptune and his trident.
– Sadness.
– Christ, monsters, faith, welcome, danger, decay, a duck.
– Evocative image. Very “Rorschach." There are many things to see in this image.
– A man with a crown, birds at the end of his arms, leaning against a pole with a crescent moon.
– A poor exposure and bad cropping.
The point is that photographers, myself included, usually photograph what we recognize, consciously or unconsciously. What's more, some photographers specifically travel to popular locations to get the "iconic" shot, the same shot that a million other photographers on the planet have taken. That's not necessarily a bad thing. It can be fun and rewarding, and you can learn some things by doing this.
The same is true for musicians, including myself (and my friend Scott Kelby may feel the same way). Sure, I like to improvise, but I also like (try) to play the "iconic" leads of my favorite guitar players: Santana, Jimi Hendrix, The Allman Brothers. As I said, that's not necessarily a bad thing. It can be fun and rewarding.
In the chapter, Looking vs. Seeing, I talk about, among other things, seeing a picture within a picture, and the difference between just looking around and actually seeing a photograph.
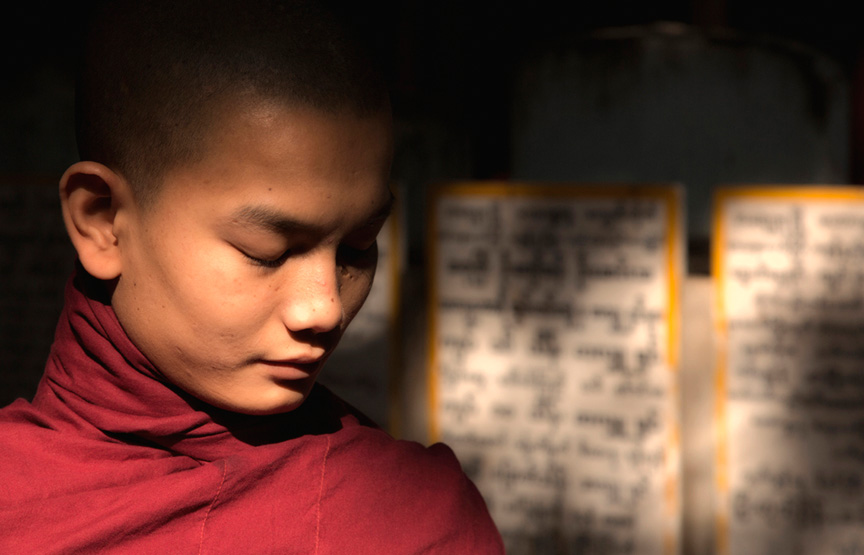
This portrait of a novice monk is one of my favorite images from my trip to Myanmar.
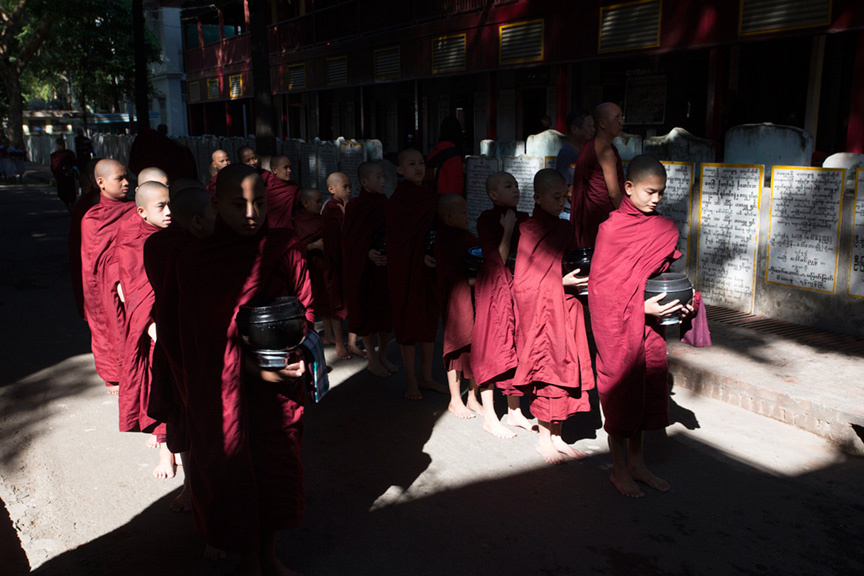
This is a snapshot of the same scene. Had I not been looking for pictures, I might not have focused on the single monk on the right of the frame. And speaking of envisioning the end result, I wanted to create a "sense of place" image, so I chose a medium aperture to slightly blur the writing on the wall in the background, while still being able to see that there is writing on the wall.

Photography and the Death of Reality, another chapter in the book, is not a new topic, but as we move more and more into digital darkroom enhancements, the topic becomes more and more important.
The chapter leads off with this image of the Blue Swallow Motel on Route 66, which we planned to be at for sunrise - because, again, we envisioned the end result.
Before I go on, I'd like to share a story with you about Ansel Adams, relayed to me by one of his assistants, the talented John Sexton. Here goes: A man writes Ansel Adams a letter (condensed here): Dear Mr. Adams, I have your wonderful books. Your beautiful pictures of Yosemite inspired me to visit this National Park. However, when I got there I was disappointed. The park does not look like the pictures in your book.
So much for reality.
Since the early days of photography, people with cameras have made images that don't represent reality, even when they tried. That's due, in part, to the way cameras record light, and how lenses bend light and compress or widen a scene or subject - not to mention that we see in 3D and camera see in 2D, and that our eyes have a dynamic range of about 13 f/stops compared to the five or six f-stops our digital cameras see (in a single exposure without digital enhancements).
The chapter has three main messages:
One, it's designed to encourage you to make your most creative images ever, and not to be afraid to follow your heart when it comes to making digital enhancements.
Two, it's important to consider the reality of your photographs and the photographs of others.
Three, photographers are somewhat like magicians, or illusionists if you will. The creative process of image making is like the art of doing a magic trick. If you don't know the trick, the trick is amazing. If you do know the trick, you know that it's a relatively simple procedure.

The scene needed some digital darkroom magic, for sure. This is a straight shot (no image processing) of the scene.
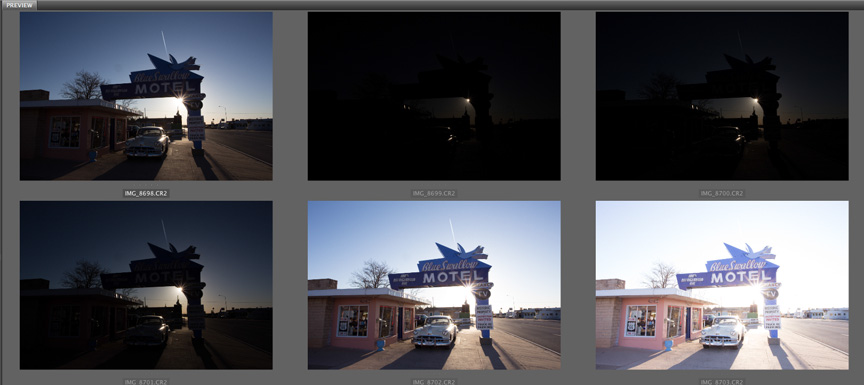
The magic started with a bracketed set of images, from which I created my HDR image.
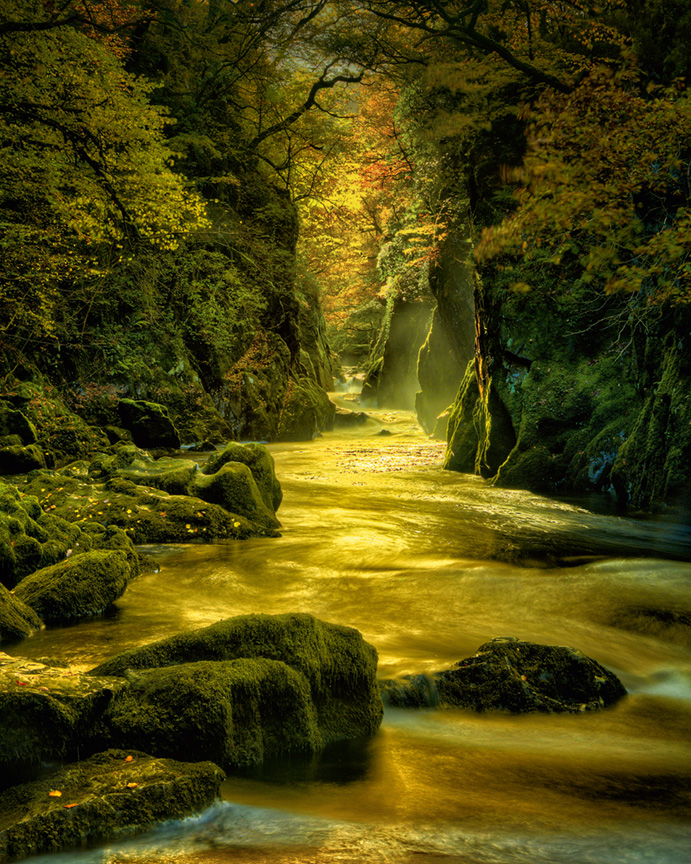
Here's another example of creative visualization, combined with some HDR magic and basic image enhancements. It's an image from Fairy Glen in the Conwy Valley in North Wales.
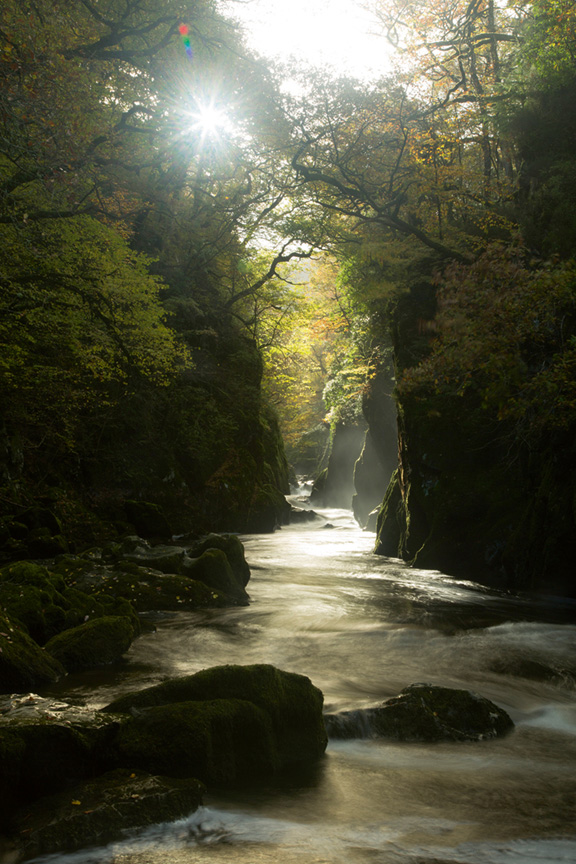
The scene looked like this upon arrival at Fairy Glen.

In the book I talk about the space-time continuum - which may sound a bit far out. I'll end this guest blog post with this concept for a good reason: I think it will make you feel good about being a photographer.
The space-time continuum is a mathematical model that combines space and time into a single idea. That concept came to mind when I took this photograph of a lenticular cloud near Mt. Rainier in Washington State.
If you had been there, you might have chosen a different space (composition) for your photograph. You might have taken a wider or tighter shot, or you may have composed your image differently.
What about time? You may not have pressed the shutter release button at exactly the same time as I had, so the clouds might have been in slightly different position. You also may not have used the same shutter speeds that I used, which could have affected the movement of the clouds in your photograph.
Back home, you probably would have processed the image differently, perhaps making it a more saturated image or a black-and-white image.
When you think about, a photograph you take is a single idea - of your individual creative vision. Acting on your ideas, and accomplishing your goals, will give you a good feeling about your work - and yourself.
Creative Visualization is not limited to photography. It applies to your life, too. In his book, Real Magic - Creating Miracles in Everyday Life, Dr. Wayne Dyer talks about (basically) how you can create your own reality. Visualization is the key.
You can see more of Rick's work at RickSammon.com and follow him on Twitter, Facebook, and Google+. Rick will also be talking about creative visualization at Photoshop World in Vegas later this year, and you can check out his classes on KelbyOne.
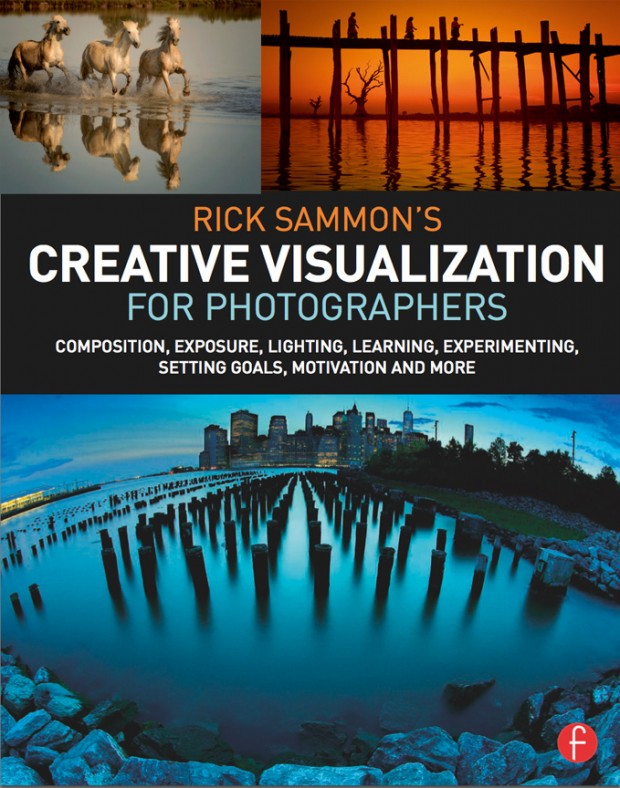
Available in paperback and Kindle versions
Thank you Brad! I guess visualizing this Guest Blog Post paid off. :-)
Awesome post Rick, I missed the post last night, didn’t know a good friend was posting!!! See ya in October! :)
Thank you my friend. See you in October – or soon at PSW!
Thanks Rick for the great inspirations. I can’t wait to share this with my students.
Hi Michael – Thank you. If your students have any questions, they can email me at ricksammon “at” me.com. I actually answer every email. Thank you, Rick
BTW the book is great Rick.
Hey Tom “My Life in HDR” Baker. That means a lot to me. Thank you!
Terrific post, Rick. You’ve inspired me to do way more visualization in photos and in life!
Thank you my friend!
Nice article.. but I really don’t like that train photo! To be honest – its something I would do.. and I’m not a pro photog…. all post processing and really overcooked. To each their own I suppose…. nice work in the other photos but nice to see that even pros rely upon PS to create usable images!
For sure, as my dad used to say, “To each his own.”