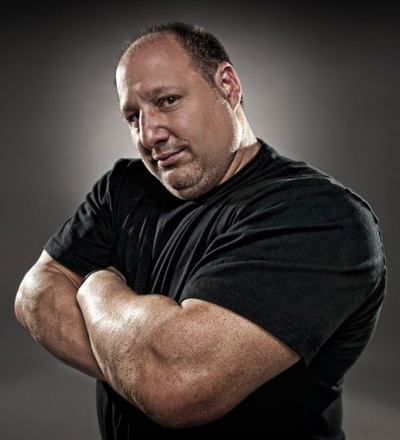
Photo by Scott Kelby
Before I begin I want to thank Scott for including me as one of the weekly guest bloggers on his blog. To say it’s an honor for being one of the 52 guests he has per year is an understatement! You wouldn’t really think that being a guest blogger for Scott is an intimidating task until you are given the opportunity. Only then does the truth of the matter come out! I myself, a man of many words, struggled with what I should talk about and who I should target my post for. Then I remembered the KISS method; Keep It Simple Silly. For the more complex theories and techniques, I will guide you to the experts that I pull my inspiration and knowledge from. Please don’t mistake this for name dropping for shameless plugs for my friends… As they say, “it takes a village to raise a child“. In this case the saying would be “a community of artists draws inspiration!”
Creative Ways to Mass Produce a Photo Shoot
There are many different types of photo shoots that a photographer can do. Although the concept of photography in general is the same, each area within photography comes with its own set of rules that have been predetermined by photographers, editors, and clients throughout the past. It is up to each individual photographer to determine which rules to follow and which ones to break in order to achieve your goal. Our goal here is to create a template that can be reused to get the same results. I am not talking about an Adobe Photoshop or Adobe Lightroom template but a template that takes us from Click to Print. The final output from our Click to Print Template will be package printing; wallet size, 5×7, 8×10, 10×13 and 16×20, all from the same print without compromising our creativeness.
The major steps that we will complete in this project are 1) doing the mass photo shoot, 2) applying any post processing, and 3) send the images off to a lab. Yes, I said a lab. In the past I did it all which included the printing, packaging, and shipping. I wanted to learn the entire process and offer custom sizes. I also wanted the ability to fix anything I screwed up in the shot! I recommend completing a full scope project like this on your own a few times so that you can gain the insight in each area of the process so that you can mitigate any risks or problems for future projects. But I know that some people do not have the ability to create high quality prints themselves so that is what this whole post is about; giving you some of that insight to help you mitigate your risks without having to drop a ton of time and money on new equipment.
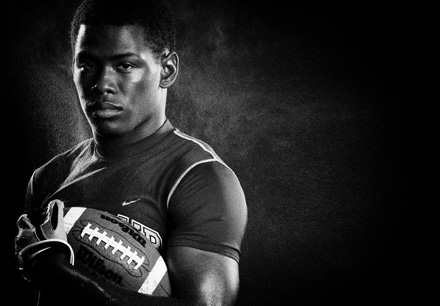
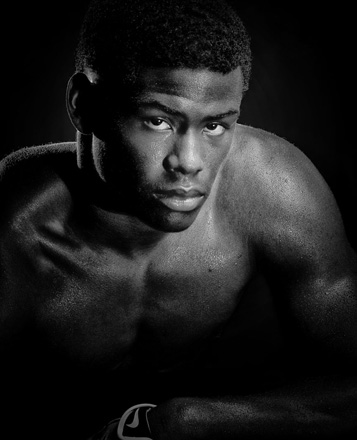
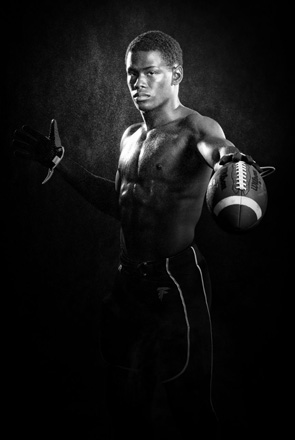
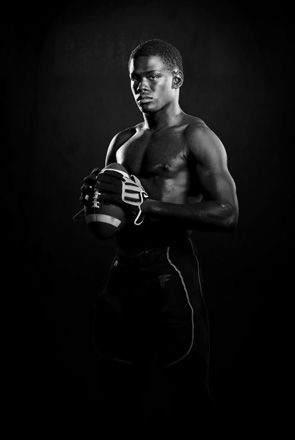
Prior to diving into the details of what I am going to explain I want to tell you a quick story that shows the usefulness of what I am going to tell you. I had an opportunity to photograph one of the most sought after high school football players, a young kid named JJ Keels. My game plan seemed pretty simple; I wanted to capture his humble demeanor but at the same time make him look like a tough college level player. Another intention of the shoot was to experiment with lighting in stages and to develop a tutorial on it. At first, I took the standard safe portrait shots. Then I had my assistant, Terry Reinert, spray JJ down with water to get that sweaty tough look. Then we took it another step further into the experimental range by spraying water in the path of the lights to create the images you see here. After the shoot, I used Adobe Photoshop to continue creating my vision and also to experiment even more. Once I had the format down, I took notes on what I would do different on the next shoot so I wouldn’t have to spend a day in Adobe Photoshop for the next one. Take note, if I took on this shoot with 60 football players waiting in line, I would have to edit 60 additional images to get the results I got. There is no way that I could have done that without having done a test shoot first and got my game plan together. The test shoot enabled me to develop a format that I can use to mass produce the same type shot in the future. I was also able to develop a predefined lighting system to use as a starting point for other shoots.
Doing the Mass Photo Shoot
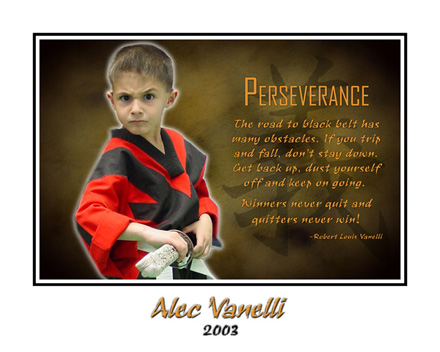
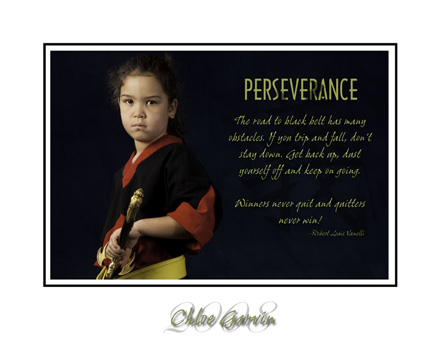
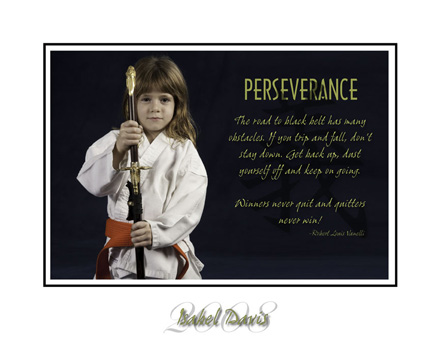
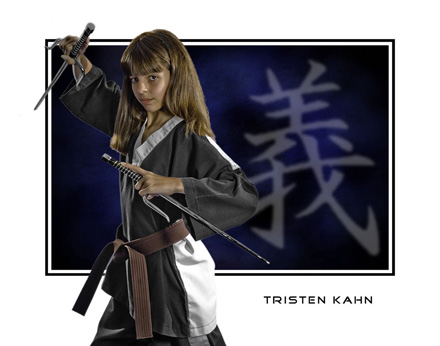
Running a karate studio gives me a huge pool of talent to pull from for my photography experiments. I am never limited on subjects to try out my ideas on. I emphasize the words try out because you are doing just that; experimenting to determine what will work for your upcoming mass photo shoot. Find someone that can benefit from your time and energy for your test shoot. Explain that this is a test shoot and you are experimenting with different lighting configurations and poses. In return for their help, you can provide them with the photo package that you create or put the images on a CD for them. This practice is generally known as a TFP (Time For Prints). Use your neighbors, friends or family members but I do recommend not using children or someone who is overly shy because you will need to focus on the photography side of the experiment and you won’t want to take on the added worry of dealing with your subject. Another good source for test subjects is networking websites like Model Mayhem or One Model Place. Look for upcoming models that can’t afford to pay for a portfolio and ask them if they would like to participate in your experiment and receive portfolio pieces. Word of caution, have an assistant or an escort with you when dealing with strangers for both personal and legal reasons. It pays to be safe!
Regardless of who you use as your test subject, make sure you have them sign a model release form. Ed Greenberg and Jack Reznicki teach a class at Photoshop World called, “Everything Legal”. In this class they explain the legal aspect of photography including model release forms and copyrighting your images. You can also read their column in Photoshop User Magazine. In short, Jack gave an example of a photographer doing a free shoot for a friend’s neighbor. In exchange for the shoot, they get a set of photos and the photographer gets to use the images on his web site. He didn’t have them sign a model release form because it was a free shoot. Everything was fine until the couple divorced. After that they asked him to remove the photos from his web site. The photographer doesn’t have a leg to stand on. Another area Ed explains is why you want to copyright ALL your images. These two are a great resource for legal advice. Jack is also an incredible photographer by the way! Check out his portfolio.
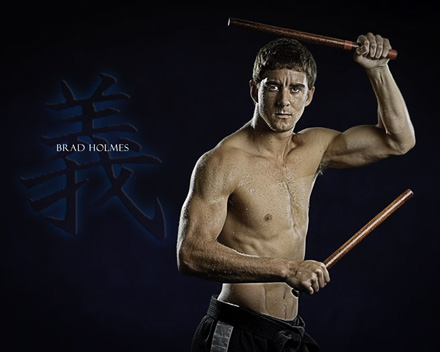
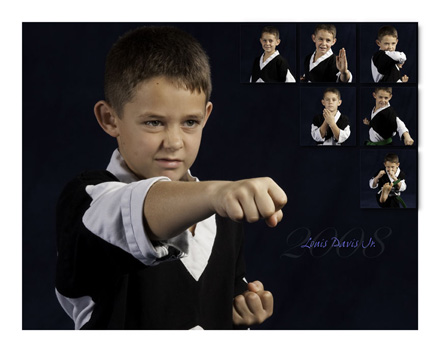
So now you have your test subject and are ready to begin the photo shoot. The first thing that you have to do is keep an open mind. Have a game plan but be flexible and also be ready to change it. The next important thing that you should adhere to is to avoid the pitfall of filling the whole frame with your image. Moose Peterson just had a heart attack; did Vanelli just say NOT to fill the frame??? Moose has an incredible ability to capture what he sees without cropping. He fills the frame using every pixel the camera will allow. This is what we are suppose to do and should do except on this project. After the test shots with JJ, I was ready to try a mock shoot with Brad Holmes, one of my Black Belts. I learned from the test shoot that I had to shoot a little wide to give me room to crop the image to different aspect ratios needed to create the photo package. Keep in mind that we are losing pixels which will eventually result in loss of image quality. However, the loss in quality is not enough to make a difference on the standard package sizes. You may see a slight difference on a 24×36 print but prints that large are extremely rare for photo packages.
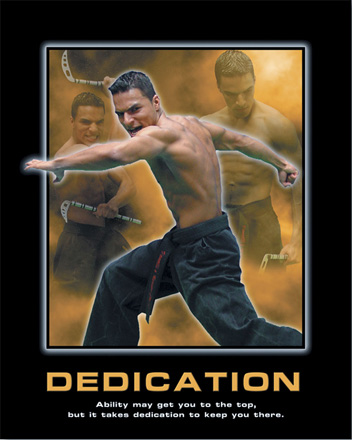
Finally, be consistent with the composition of the shot, the pose, and the special effects. Things like fog machines, spraying water into the path of the light, and, in the case of shooting my karate students, kicking or punching are impossible to repeat for each subject. For custom shoots you should be the artist that you are and go crazy with the creativity. For mass shoots you should be creative but also a little flexible in that you can be creative but also consistent.
Once I was happy with the results I was seeing in the camera, I acted like I had 60 people standing in line waiting for their turn in front of the camera. I put pressure on myself to get the shot and move on. This is very important especially when dealing with subjects that have limited time to be at the photo shoot.
Applying Any Post Processing
My first word of advice here is to use Adobe Lightroom! This part gets confusing to most people. If I have Adobe Photoshop, why do I need Adobe Lightroom? Think of Lightroom as a digital darkroom where you go to develop your digital photos. Photoshop’s purpose is to manipulate the image. Lightroom not only organizes your photographs and projects but it allows you to quickly and efficiently post process your photos.
I always start my Lightroom work flow by following a series of simple steps I learned from the Guru himself, Scott Kelby. His book “Lightroom 2 for Digital Photographers” has a permanent spot on my desk. When I can’t quickly find what I need, I log onto Kelby Training and watch the Lightroom videos. For this article I outlined my steps below. For a more detailed look at my work flow I created a video tutorial for you to follow along.
1) Import all images from the shoot in DNG format.
2) Select the keepers and delete the unusable shots.
3) Color correct one image and, if the lighting is the same, apply it to all the images from the same shoot.
4) Adjust the exposure.
5) Fix the eyes.
6) Remove any skin blemishes.
7) Smooth the skin on females.
8) Export image in Photoshop
9) Add a vignette, if any, at the very end (more on this later)
Looks like a lot? It should only take about 45 seconds per image. David Ziser, best known for his outstanding wedding photography, developed a system with his employees. He is able to tell you how much each image cost him to have his employees process them. Once you get a system to work for you, use it!
On step 8 above we export to Photoshop. Now we are into the Mack Daddy of all imaging programs (sorry Rod Harlan for using your well deserved nickname but it was for a worthy cause). Photoshop has grown so much over the years and has developed into an overwhelming program for beginners. I remember working with version 2.0. I must have called Adobe Tech Support three times a day. Finally one patient technician told me that their support system is for when the program didn’t work and not for learning how to do something. I asked how I was supposed to learn this stuff. He turned me on to KW Media. KW stood for… Kelby and Workman. I wish I knew the name of that technician. I’d bring flowers to the insane asylum I probably sent him to. The moral of this story is save an Adobe technician and go to Photoshop World.
Once I import my photograph with the Lightroom adjustments, I open a template I created; merge the two files together, and save the photograph using the same name that you imported it with. Showing how I created the template is beyond this article but I do have a video that shows the process. Using this process organizes the files better in Lightroom.
Send Images Off to the Lab
The last stage in the process is to crop the images and get them off to the lab. I use a Nikon camera that has a native 2/3 ratio. This gives me an 8×12 image that, when cropped, will keep my project centered. Upload the image to your lab of choice. Use their tool for cropping the package sizes. Remember back in my work flow I left the vignette until the very end? This is why; if you apply a vignette to the original image the outcome will not be what you are looking for when you go to crop the image. If you need to apply a vignette, use the printing lab’s tool for that. If you are printing the project yourself, start with the 8×12 print and crop from there. Each time you crop, save the image and then start with the 8×12 again. Don’t crop and then crop the crop. This will throw your ratios off. You’ll notice certain sizes crop even such as wallets (2.5×3.5) and 5×7 or 8×10 and 16×20. To make printing this package easier, use the built in picture package feature in Lightroom. If you use this feature, you don’t have to crop, the picture package will do it for you and the vignette will look consistent.
Printing is an art by itself. In my case it pays to have Miller’s Lab do my printing and packaging for me. The cost is very reasonable and the quality is impressive. I have an Epson 9800. I can print as wide as 44″ by almost any length. Although the printer can do mass printing, I use it for my proofs and for large scale one print projects. Anything in quantity, use a lab. It takes a large load off of me and allows me to spend more time doing what I would rather be doing than sitting next to my printer cutting and packaging images.
Last Word of Advice: Game Day!
You have everything set. The lights are on, battery is charged and now you are ready for the first subject. Before any participant steps in front of your camera, make sure they filled out an order form, signed model release form, and made their payment ahead of time. Your assistant can collect them one at a time. After you take the shot, record the photograph number on the subjects order form. This way you are not scrambling to put a name to a face. Play music, be pleasant, and have fun with what you are doing. If something goes wrong you will have the knowledge to fix it on the fly; that’s what the test photo shoot was for! When the day is over, follow the Lightroom and Photoshop work flow. Make sure you keep a back up of all the photos just in case something goes wrong!
I mentioned having an assistant at the shoots quite a few times. I am a firm believer that every photographer should have someone assisting them on shoots. This frees your time to be creative and the assistant will gain valuable knowledge. My assistant, Terry Reinert, is more of a colleague than an assistant. When Terry has a shoot lined up, he sometimes asks me to assist him. When I do, I keep my mouth shut and let him run the show. I only give advice when asked. I’ve developed this concept while teaching karate for the past 28 years. It turns students into instructors, helps them grow, and develops a tight bond. One of my most memorable photo shoots, using this theory, was when I was in Los Angeles visiting Mike Kubeisy. Ben Willmore heard I was in town and made a special trip to see us. How incredible it was to shoot with these two creative shooters. We took turns assisting each other on the shoot. I learned so much from keeping my mouth shut and ears open. Thanks Dad for teaching me that one!
Conclusion
So there you have it, from Click to Print. I hope that I was able to give some insight into each of the steps that will guide you in the right direction when doing a mass photo shoot. I mentioned many names in the article in the hopes you will research these talented artists and draw inspiration from them. Thank you for reading and thank you again to Scott for this great opportunity.


WWE : World Wrestling Expert [Entertainment]
Sometimes we need entertainment . Thanks for it.
I just want to thanks to my favorite photographer mr, scott kelby for the excellent photo. All the others things are also nice. Thank you so much.