In the last chapter of all my “Digital Photography Books” (Parts 1 through 5), I do a thing I call “Photo Recipes” where I show a photo and then discuss how to take a similar shot (what lighting equipment was used, camera gear and settings and on).
Today, in that vein, I’m doing a “Lighting Recipe.” When it comes to lighting, I’m one of those “less is more” guys, and my lighting set-ups tend to be mostly just one light, but someone two lights, and occasionally three. However, in this case, we’re actually going to use five lights—but don’t freak out—it’s really a three-light shoot because the other two lights are just “dumb lights” aiming at the background of white seamless paper to make it really white, so you can’t really count those, right? So think of it as a three-light shoot, using five lights. ;-)

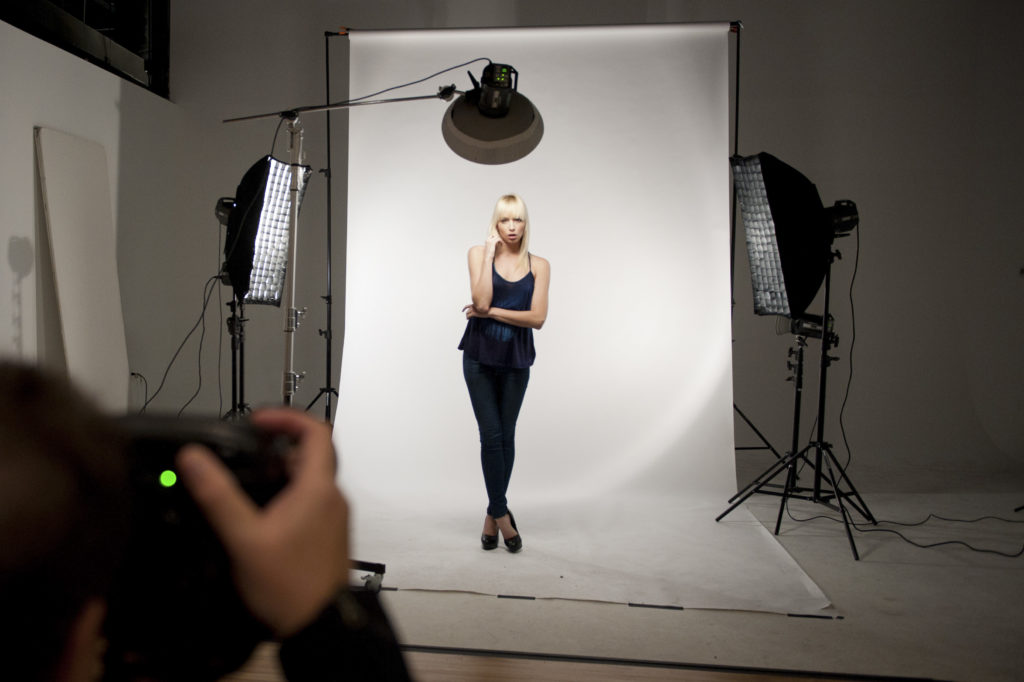
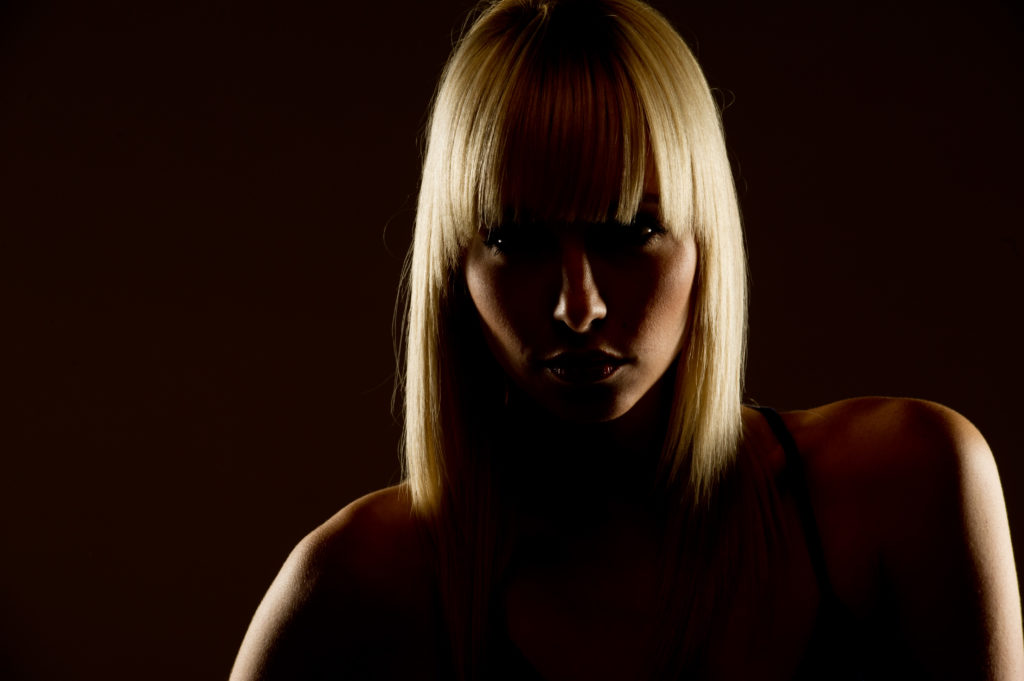
Figure 1: Here’s our image (above). This edgy lighting look is usually used seen with your subject on a dark background, but you’re seeing it more and more on white seamless, so that’s what we’re setting up here. The key to this look is the strong highlights along both sides of our subject.
The Front Light:
Notice I didn’t call this the “Main Light” because in this instance it’s the two backlights that are the Main Lights—the front light, which in our case is a strobe with a 17″ Beauty Dish, attached (it makes the light a bit more contrasty than a softbox) is just providing fill in the front, so we keep the power for this front strobe down as low as it will go.
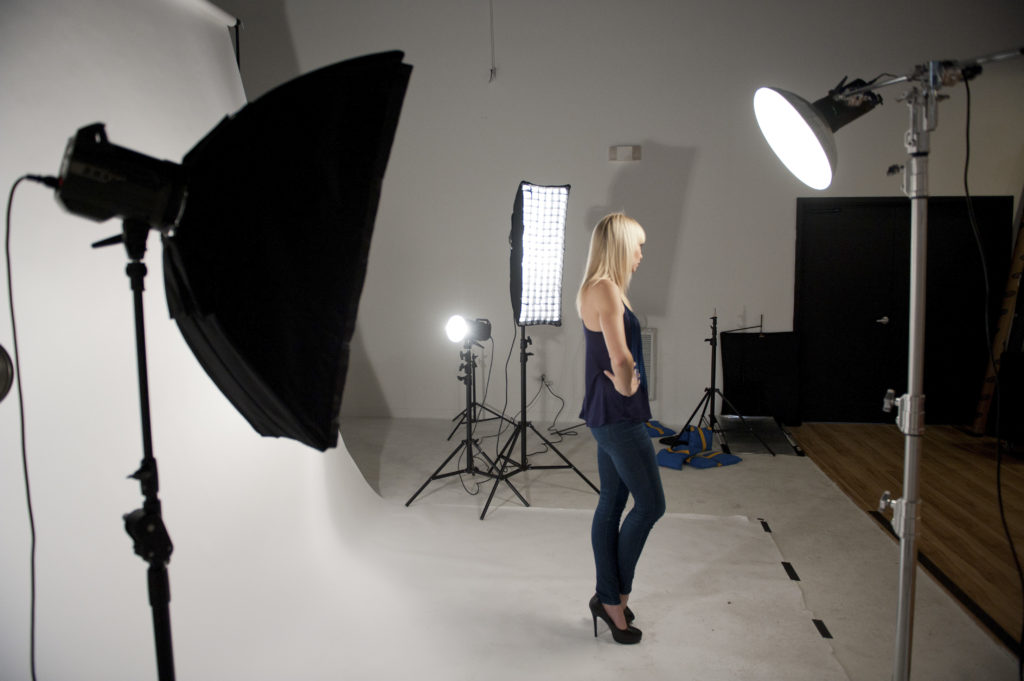
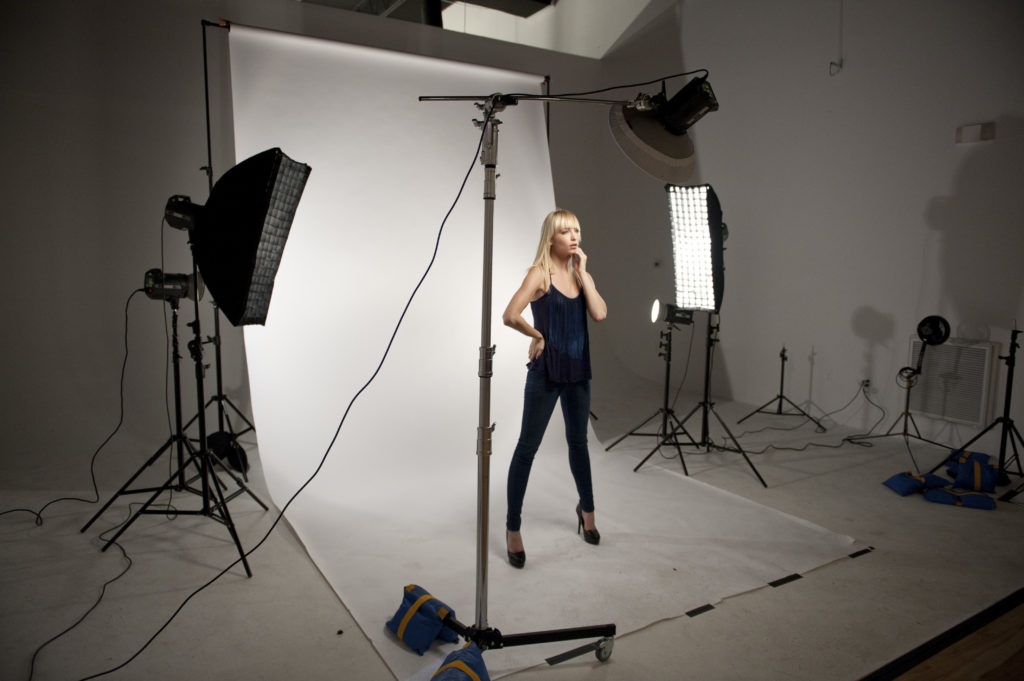
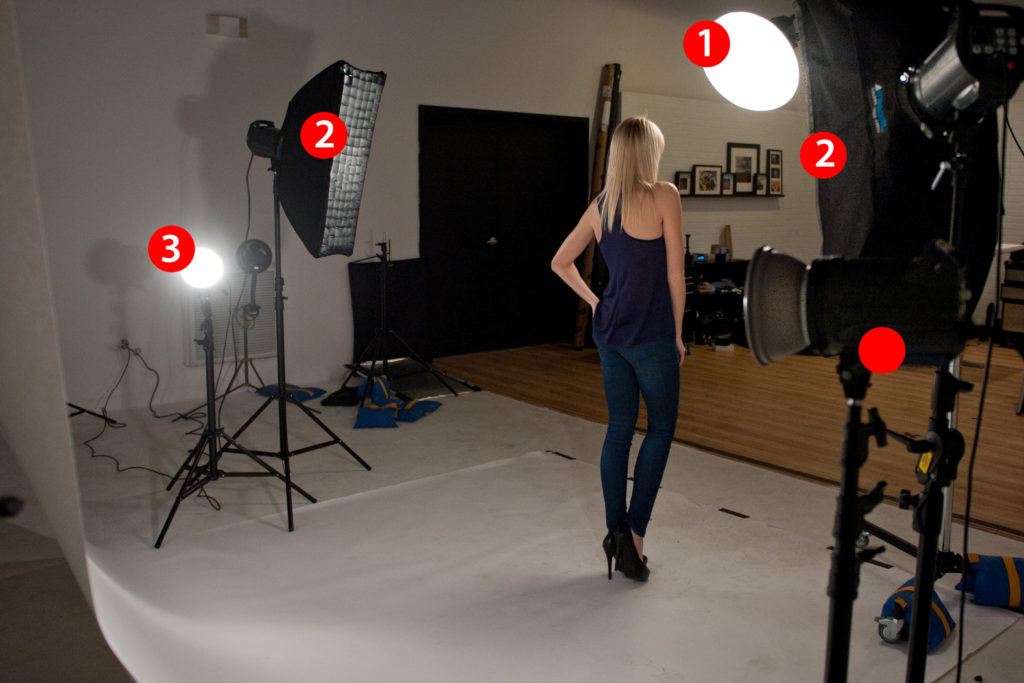
Figure 2: You can see from this angle that the Beauty Dish (#1) in front is positioned directly in front of our subject and tilted down at her at a 45° angle, and it’s very close to her as well, which is another reason why you keep the power of the front light almost all the day down as low as it will go.
The Main Lights
The two Main Lights are actually in the rear (they’re marked as #2 below), and they’re doing most of the work for this look. The softboxes are two of my workhorse softboxes—-they’re 1’x3′ strip banks. Both strip banks have egg crate grids in front of them (more on these grids in a moment). You position these two strip banks behind your subject, on either side, up a bit high and tilted back down — aiming at your subject at around a 45° angle.

The key to making this work:
The secret to nailing this look is to build this set-up one light at a time, starting with the strip banks and turn every other light OFF! Just turn on one (either the left or the right—doesn’t matter) and do a test shot so you can see the aiming of the light. You want it to light the sides of your subject without really spilling too much onto their face. It should be a rim light like the sun would backlight your subject. You’ll need to crank up the power on these since they’re your main lights, so I have them at three-times the power of the front beauty dish (so it’s a 3-1 power ratio).
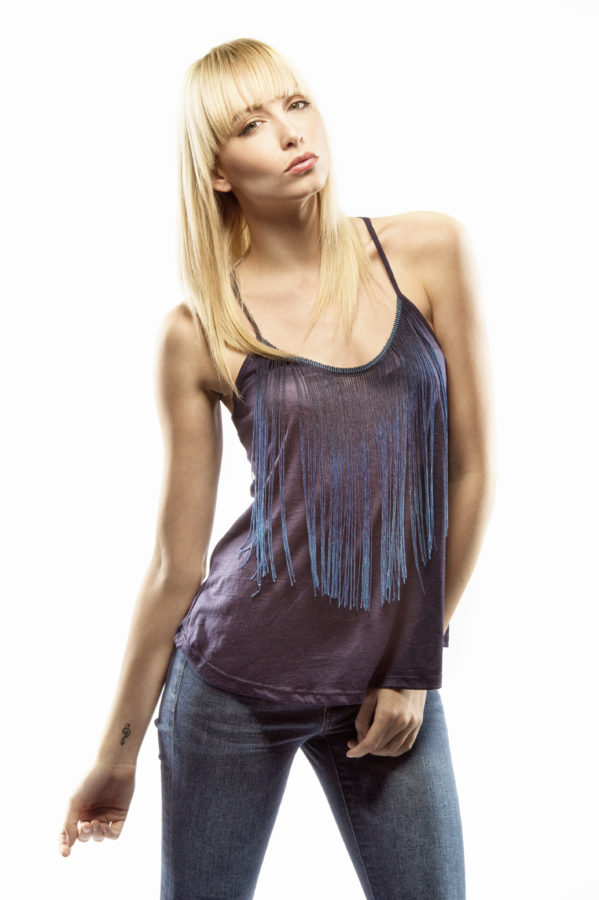
Once you get one side in place, turn on the other side—-use the same power settings, and align the height and aim so both sides look pretty much the same (as seen in our example shown below). Once you get that all set, now you can turn on the front Beauty Dish (remember to keep its power all the way down). It will act to fill in front of her face so it’s not as dark as you see in the image above.
The Egg Crate Grids
The beam of light that comes out of a tall-thin strip bank is already more narrow than what you’d get out of a large square softbox, but to make that beam even more focused and tighter I use two Egg Crate Grids.
Camera Settings
This image was taken using a 70-200mm f/2.8 lens, at a focal length of 135mm. My ISO was 200. I shoot in the studio in Manual mode, so I can set the shutter speed at 1/125 of a second and forget it. My f/stop was f/11 (pretty typical for me in the studio), which is an ideal f/stop for situations where you want absolutely everything in focus in a portrait. I focused on the eye closest to me; held the shutter button down halfway to lock focus, and then I recomposed the image (with it still held halfway down) and took the shot.
The Background
It’s an inexpensive roll of white seamless paper. 9 foot in width, it only costs around $56 at B&H (link).
Lighting The Background
It’s just two more of the same strobes, but with no softbox attached—just metal reflector to push a lot of light back there. They’re on either side of the paper (they’re seen above marked as #3) —positioned down low and aiming up at the background.
Where to position the subject
I generally position my subject 8 to 10 feet from my background so the front lights don’t affect the background. In this case, since the background is going to be bright white anyway, it wouldn’t have mattered if the light spilled over, but the way the lights are positioned, there wouldn’t be much spillover anyway—-two of the lights are aiming back toward the camera, and one is aiming down at the floor, but as a general rule I keep the subject 10 feet from the background for spillover concerns.
There ya have it. Hope you found that helpful. :)
Come catch my seminar – coming next to these cities:

Those are my next stops for my “Ultimate Photography Crash Couse” — San Diego and Phoenix in just a couple of weeks, and then LA and Houston in March. Come out and spend the day with me — you will learn a lot (well, that’s what photographers who have come out have told me). Details and tickets here (just $99, includes a detailed workbook and some other goodies). :)
Have a great weekend, everybody!
-Scott