

#TravelTuesday has come around again, and so soon! Right here at Scott Kelby’s Photoshop Insider, that means I, Dave Williams, get to share something with you from the world of photography, Photoshop, travel, and life. Today, I’ve opted for photography and I’m going to lay down some tips to step up your shooting, right after I check in with the latest news!
Over at Layers Magazine, the new #MondayMotivation series of guest posts is going great! Yesterday, we saw a superb piece by Douglas Young, who goes by the monicker Doug Does Disney. It was so sparkly and inspirational—I loved it! If you haven’t seen it, go check it out!
Just one more thing I wanted to mention: my next foreign mission is to Norway, and when that happens, I’ll be taking over the KelbyOne Instagram Story, so be sure you follow that and follow me!
Right, let’s go!
Have a subject
This is something that puts landscape photography in the forefront of my mind. The specific thought is Moose Peterson, smiling and pointing at me, saying, “stop shooting sticks and stumps!” Well, it’s those sticks and stumps that are the subject. The foreground interest. Maybe Moose is right, maybe we should switch out the sticks and stumps for something more interesting! The important thing here is that when we’re shooting a large scene, what’s often happening in the thought process that made us bring the camera up to our eye and shoot is that being there, present in the scene at that time, it looked beautiful to you. The difference is that it doesn’t always translate that way into something beautiful to the viewer who wasn’t there—it’s simply a large expanse. We’ve taken that huge scene, flattened it, and made it into a little rectangle. Adding that foreground element into our large scene, whether it be right in front of the lens or simply close enough relative to the background, will create a feeling of depth and allow our eye and mind to really be entertained looking at that image.
When we start out in photography, we learn from a whole range of sources. Everybody’s different, so whether you’re the type to watch videos, read books, or get hands-on with courses, you’ll still end up in the same place with the same kind of knowledge. The knowledge comes from education, but also from practice and experience. I’ve had a lot of messages over on my Instagram lately, asking about how to get good photos, so today I’ll take it to grassroots and flip that around, giving my best advice for stepping up your shooting. The aim here is to gift new photographers with some knowledge and simultaneously remind the more seasoned of us what we should be considering when we have the camera in our hands.
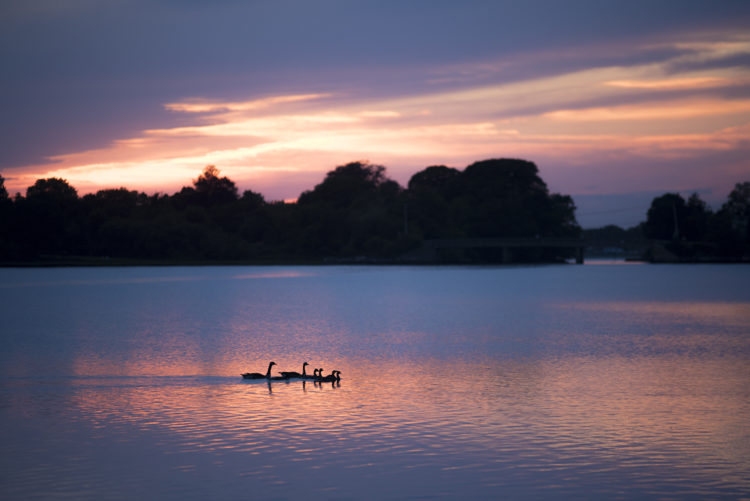
This shot from Massachusetts, USA, is cool. It has colour, it has reflection, but more importantly it has a subject. Without that cute little family of birds swimming in for bedtime, it would just be a sunset. With the birds, there’s something about it to focus on and to make it more interesting. (By the way, when I took this shot, Kaylee Greer was standing next to me making the strangest noises over how cute this little family was. I think she wanted to take them home!)
Get Closer
I remember Scott saying to me once, “That could be closer.” I was a little miffed—I’d taken what I thought was an absolute cracker of a shot. He was right. If you think your photos aren’t good enough, get closer! The art of the crop is something I’ve written about before, and there’s good reason for it. Closing in on the subject and filling the frame right up is a technique to force the viewer’s attention on the detail. It conveys emotion whilst, at the same time, removing the sense of place and other things we think about when we scan an image. This leaves only one thing to think about: the subject.
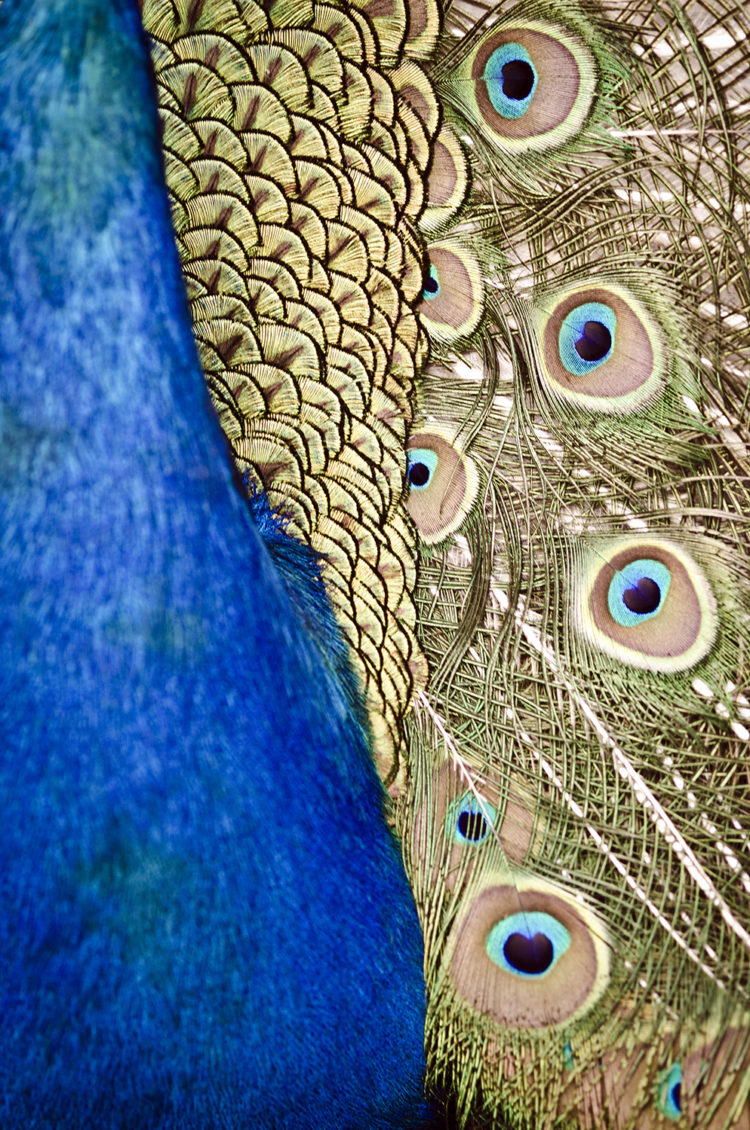
Take this shot of a peacock I took in Maidenhead, UK. It is cropped in tight, giving absolutely no reference of the location, but forcing us to look at nothing but the detail. If I’d shot the whole bird and its surroundings, it would’ve been pretty, but this steps it right up and removes all those distractions, creating a totally different image. Do the same thing to someone’s face in a portrait and their emotion is conveyed so much clearer to the viewer, too.
Shoot tack sharp
That phrase “tack sharp,” has been lifted straight from Scott’s books. It makes perfect sense and it’s a nice, catchy reminder to check focus constantly. Having intentional blur in an image can look great when it’s done right, but when focus is missed, it can have disastrous consequences. There are so many tutorials out there on how to achieve perfect focus by concentrating on ISO and aperture, and their relationship to shutter speed. Further to that, there are a whole bunch of tutorials teaching us what exactly to lay our focus spot on when we take a shot. The important thing to remember is that focusing correctly can make or break an image.
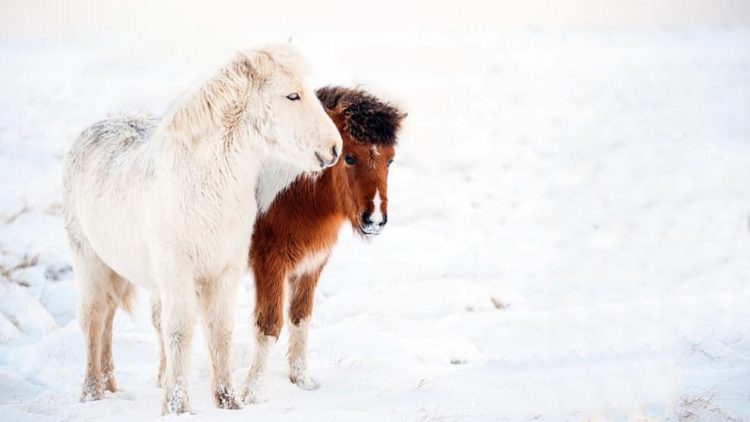
I shot this pair of Icelandic horses one cold day in January 2016, and getting focus in such difficult conditions with numb fingers and trying to lock on to the eyes of a pair of frolicking horses was tricky. Had I not spent the time getting it right, however, I would’ve ended up never being able to show this image and I would’ve been cold for nothing!
Compose
Watch your horizon, scan your scene for its various elements, and line everything up nicely to match a compositional technique that works. Get this done when you’re there taking the shot and you’ll be well on your way to a winning image. You may have to move, and it may take a little consideration to get everything right, but it’ll pay off. One thing that shows the difference between a photographer and a “camera owner” is composition, so give it all due consideration.

Take a look at this image I made on the roof of a monastery in Piazza de San Francisco, Havana, Cuba. We’ve got a lot of compositional elements working together here. First, the subject, the couple, are showing you where to look, but so are the lines on the building to the right. The horizon is straight and it’s sitting at about the top third. There’s a wall to the left boarding the image, which is subliminally bouncing your eye away from that edge and keeping it in the frame. All too often we’ll see something cool, stop dead, and pick up the camera and fire off a shot, then turn and walk away. Taking the time to put all the pieces together in a nice, considered way will show that you know exactly what you’re doing.
I hope this has been useful!
Much love
Dave


this is a comment.