

Today we’re looking at a location shoot I did using nothing but natural light, but in this case we have to give Mother Nature a hand using an inexpensive trick that has big results. Although natural light can be beautiful, natural light is from the sun, and by its very nature, the sun is usually a pretty harsh light source (well, except for a short time about twice a day). So, we pull out one from our bag of tricks to help us make that natural light soft and beautiful.
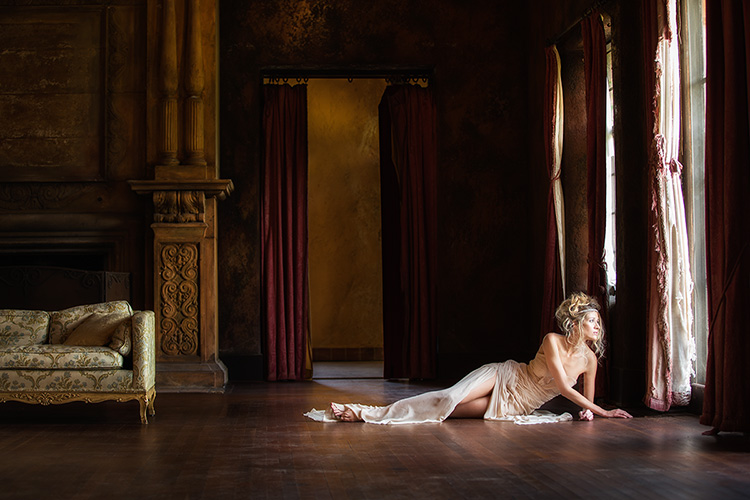
We are on location in an abandoned old Mansion out in the middle of nowhere, Florida (I’ve lived in Florida my entire life, and I’ve never been to the town where this mansion resides — the town is called “Howey in the Hills” and this was Mr. Howey’s personal mansion back in the day.
I asked my wife Kalebra to do the art direction for the shoot, handling everything from picking the models, make-up, outfits, hair, and makeup, to directing and posing the shoot on location — that left me (and three assistants) to focus on nothing but the lighting and shooting.
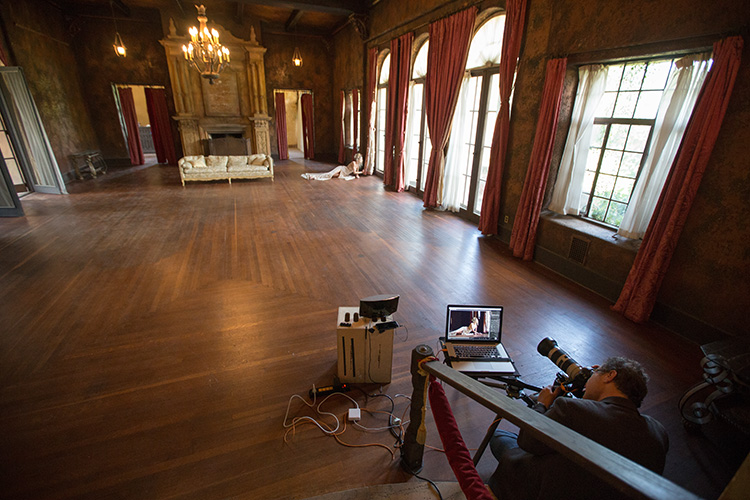
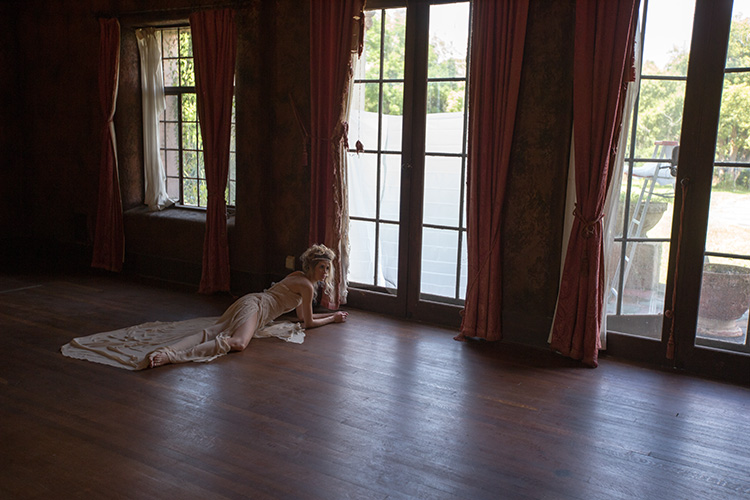
I love the compression a long lens brings to the image, and you can see how far back I am from our subject in this over the shoulder view from my shooting position. I’m using a Canon 70-200mm lens f/2.8 lens here (that’s my go-to lens for portraits), and I’m usually shooting in the 150-200mm end of the lens, but to get the wide look I wanted, including the awesome location in the scene, I had to shoot at 70mm.
After a few test shots, I was already battling with her face being too bright. The storyline for the shoot had her looking out the window, so sunlight would be falling directly on her face. Here’s the narrative my wife came up with for the shot (which was told to the model in advance, so she’d know the story we’re having her play out with her gestures): “Everything she once knew has fallen down around her and now, Prince Charming has walked out the door but even as she falls trying to hang on to him (and searches the window after him) there is grace and hope still left in the light.”
So while the model and my wife Kalebra are working on the posing, clothing, and gesture, I’m trying to tame that harsh sun falling directly on her, and I’m even getting highlight clipping warnings on her face (I’m shooting at f/2.8 so at least I can soften the background behind her a little bit. I would have to zoom in much tighter to get the background way out of focus, which I did on some of the shots, but not the ones we’re looking at here).
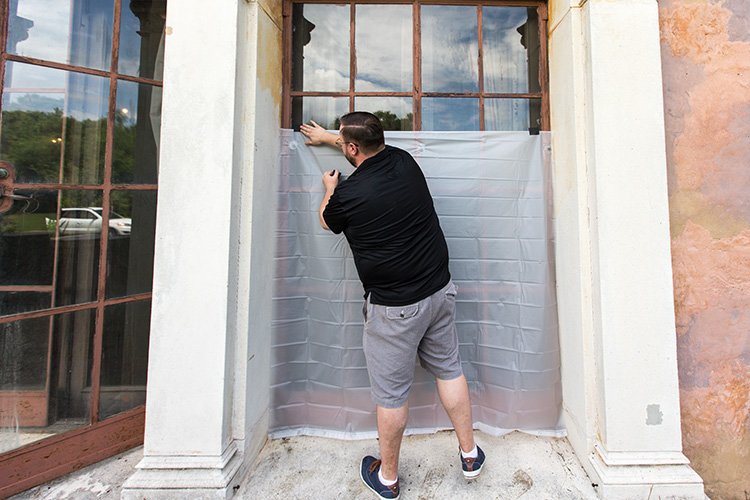
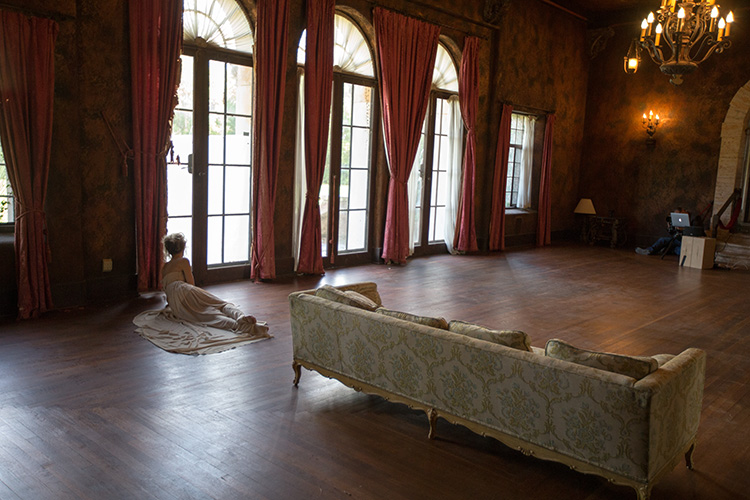
Our trick is to turn that big harsh window light into a big beautiful softbox, by putting up a frosted shower curtain liner over the window (these are very inexpensive — only about $6 at Target and even cheaper at Walmart where I’ve seen them for $1.99. If you look at these shower curtain liners, they pretty much look just like the front diffusion panel of a softbox. Anyone who attended my first “Shoot Like a Pro Tour” learned this very trick — to keep one of these in your camera bag (they fold up really small) for situations just like this (and of course, we had one with us at this shoot as well, for —you guessed it —situations just like this).
It’s important to note — this is NOT a shower curtain. It’s the frosted liner that is sold separately that goes inside the shower curtain in a real shower.
Above: This is Brad using Gaffer’s tape to cover the bottom part of the window (the part hitting our model directly) with the liner.
Gaffer’s tape was invented in Hollywood for use on movie and TV sets because when you use it, and remove it, it doesn’t take the paint with it, or damage any surfaces, and it doesn’t leave a messy residue. It’s really pretty magic for stuff like this and we always have a roll with us for (wait for it…wait for it…) situations just like this (and a thousand other reasons). You can find Gaffer’s tape at any large camera store (I get mine from B&H Photo around $6 a roll).
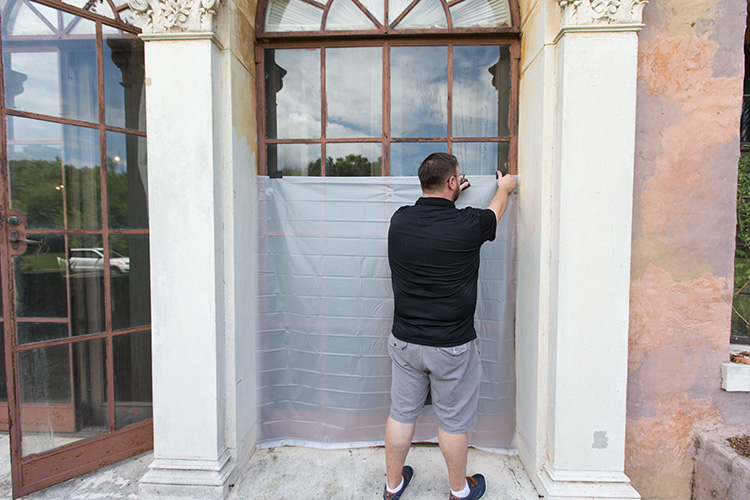
Above: From this angle you can see the liner covering the window
From this angle, you can see the liner going right over the window, and you can even see in this behind the scenes shot, the light looks pretty soft now.
Above: Here’s the reverse angle view so you can see how far back I am from the subject at my shooting position. You can see the window covered with the shower curtain liner, but from the angle I’ll be shooting at it, it won’t be visible at all.
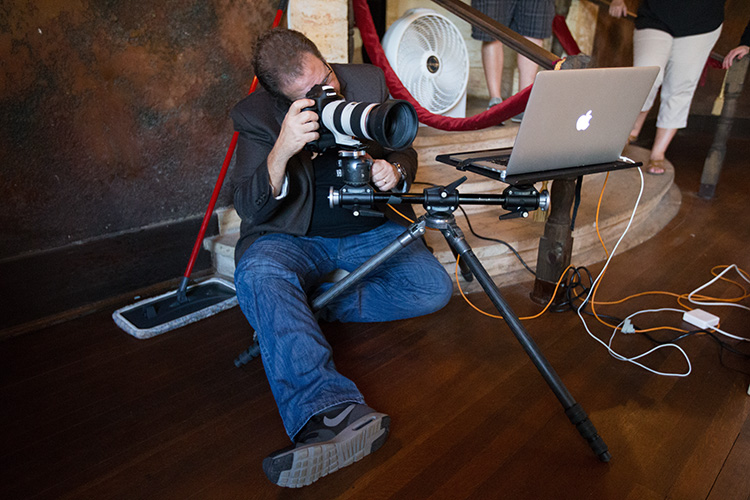
Above: Here’s a closer look at my TetherTools shooting rig — I always try and shoot tethered like this on location if at all possible — seeing your images full screen as you shoot makes a huge difference.
My Camera Rig:
I’m shooting a Canon EOS 1Dx, but I could have just as easily used my 5D Mark III (the results would be pretty much the same since I’m shooting at 100 ISO with my camera mounted on a Gitzo Mountaineer tripod. As I mentioned earlier, I’m using a Canon 70-200mm lens. I’m shooting in Aperture priority mode at f/2.8.
I’m supporting my laptop with a mounting bar from Manfrotto, and the laptop table is from a company called “Tether Tools” and they specialize in tools for tethering (I know, that was pretty self-explanatory). They also make that long Orange tethering cable (it’s orange so it’s more easily seen in a dark studio environment so you don’t trip over it), and I’m tethering directly into Lightroom on a Macbook Pro.
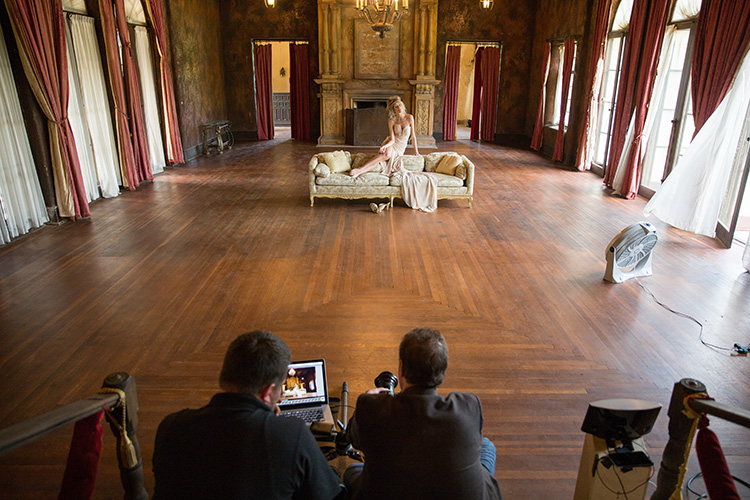
Above: A BTS from another shot that we tried; same location, different view.
Once we got the shot you saw at the beginning, we went for a different look in the same location (compositionally). I’ve moved a few feet over to the left, so the center of the room. You can also see two important accessories in this shot: (1) A powerful speaker system for playing Pandora radio from our phones. We feel that music on the set is very important, and the models love it, and it helps set the mood. We played some classical to get us in the mood, then we switch to whichever type of music the model likes best (that’s our rule — the model chooses the music — if they’re hearing music they love, it comes out in the image). And (2) a floor fan. We don’t want to blow her hair around, but we want it to move it just a little to add some volume to the hair, and it really makes a difference. Later in the day, we wanted the drapes blowing, so we cranked it up, and had two assistants right outside the window fanning the drapes with two large diffusers to make them blow, but that’s normally not how we use the fan — it’s just to add a little movement and volume to the model’s hair.
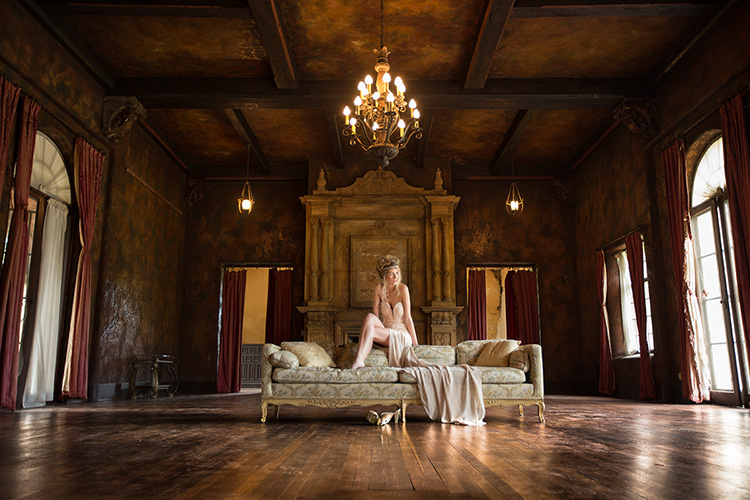
To create an epic feel for the image, I switched to a Canon 16-35mm wide angle zoom, and positioned my camera way down low to get a low, wide perspective. The fan is just out of the shot, so you don’t see it in the frame. We moved the couch much closer to the camera, to add more depth, and get the subject closer in the frame, so using the 16-35mm let me get lots of the floor and ceiling in the shot even with the subject and couch much closer to my shooting position.
To finish up: I hope this article gave you some ideas of how to control harsh natural window light (if it indeed is harsh), and some compositional ideas as well, and a few other little tips along the way.
That’s it for this chilly Florida Tuesday. Thanks to everybody who came out to my Tampa seminar yesterday — definitely one of my most-fun crowds of the year. Looking forward to visiting new cities next year, starting off in Richmond and Atlanta in late January — hope I’ll see you there.
Best,
-Scott
P.S. RC and I taped a “20-days of Christmas” series where each day we post another holiday gift idea — everything from lighting to camera bags and software. If you scroll down a few days here on the blog, you’ll see the first five or six, and we post a new one every day (including weekends). Hope you find them helpful. :)

Great tip, Scott, and a really nice shot as well. Maybe it’s the OCD in me, but is anyone else distracted by the dusty footprints on the dark hardwood floors in front of the model? That’s my one and only tiny issue with an otherwise great pic. :-)
What a timely post! I have just recently been thinking about using our large, south-facing windows at home for naturally lit shots, but knew the light would be much too harsh. What a simple and ingenious solution! Thanks, Scott!
Great post! Always love these behind the scenes posts because I learn so much and it gets my creative juices flowing. Also, like that you post what gear you’re using and why.