

Hi, gang, and happy Monday! I’ve been sailing the seven seas (not really), and I’ve dug up (not really) some more Photoshop Buried Treasure (OK, this part is true), and this time it’s on how to get back to the previous version of Select and Mask, which used to be called “Refine Edge.”
Adobe updated Refine Edge with a new mathematical algorithm and a totally new workspace (rather than it just being a floating panel), and while the new math works better for some images, it doesn’t work as well for some other, so being able to jump back to the other method (and old math) when you need to is pretty handy. Here’s a quick rundown:
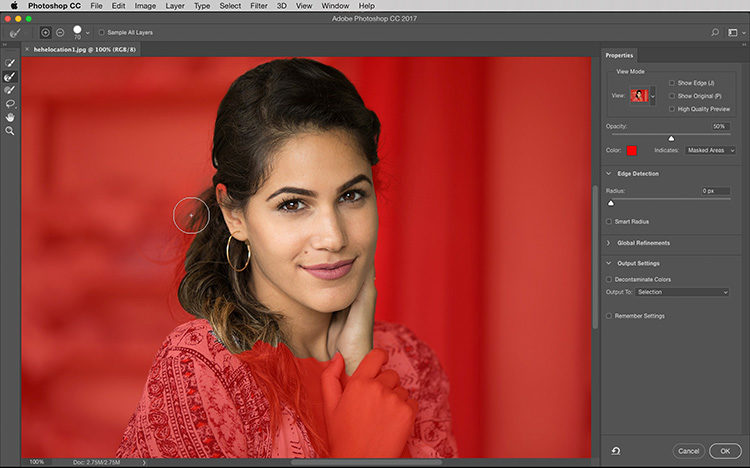
Above: Here’s the current Select & Mask workspace, with its own toolbar on the left side, and side panel on the right, using the new math. I really love this new interface, and how it works most of the time, but there are certain instances where the old version works better, and that’s why Adobe added a way for us to get back to the older version.
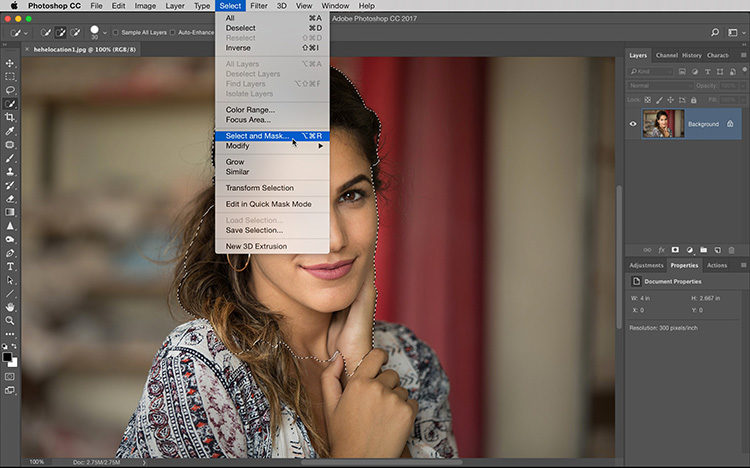
STEP ONE: To access the old Refine Edge feature, hold the Shift-key, then go under the Select menu up top, and choose Select and Mask from the menu (as shown here — it doesn’t work if you hold Shift and click the Select and Mask button in the Options Bar — you have to choose it from the pop-down menu as shown here).
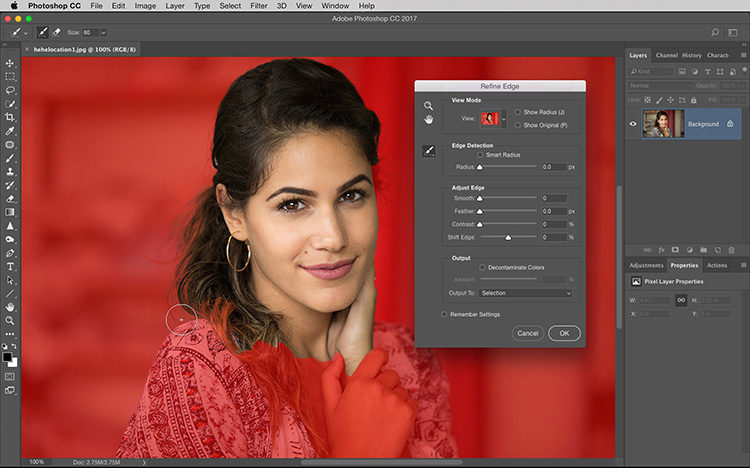
STEP TWO: Now the regular Photoshop interface remains in place, and the old Refine Edge window appears, as seen above, and you can use it like you always used (provided, of course, that you always used to). :)
Hope you found that little piece of Photoshop Buried Treasure helpful! :)
Don’t forget — Friday at 8:00 pm — LIVE from the “Gallery at KelbyOne”…
It’s an interview and behind-the-scenes from KelbyOne member’s solo gallery show in the Gallery at KelbyOne. Join the most awesome Larry Becker, as he sits down with competition winner Melanie Kern-Favila to talk about her amazing photography, and get to know her and work. It’s free; everyone’s invited to join us, and it will be simulcast on my Facebook, this Friday, July 21st. Ask anyone who attended the first opening with Mark Wegner, it’s really a fun, inspiring night, and a great opportunity to join us in celebrating the wonderful work of our members.
When: Friday, July 21st, 8:00 PM, EDT
Where: My Facebook page live
See you then! Have a great Monday, ya’ll!
-Scott
P.S. If you’re a KelbyOne member and you’d like to join us in person at the Gallery this Friday at 7 pm for a wine and cheese reception for Melanie’s Gallery Opening, you are welcome to join us and enjoy her work in person (it’s free for KelbyOne members, but there’s limited seating, so grab your seats now – here’s the link).

Weird – I tried it and didn’t work. Also tried Option and Cmd instead of Shift. I just get new interface all the time. Bummer – I did like the old one better….
Hi, Susan – you are trying it from the menu – not pressing the button up in the Options bar up top, right? Also, make sure you’re holding the Shift button before you choose the menu item. Lastly, make sure you’re using the latest version of Photoshop CC, because that feature was added in an update — it wasn’t always there. Let me know if any of those works (but I’ll bet it’s that you haven’t updated to the most recent version yet. That’s my guess).
Same exact thing here. I tried shift, command, option- and every combo thereof. I just can’t get the new tool to work on hair- it either masks too much or leaves an awful halo.
Is there another way around this?? I don’t get why I can’t make it work. I need it to, tho, desperately.
Has anyone found an alternate option??
Awesome! How would we know this without you? I saw nothing about this in the Adobe updates and notes. Thanks so much SK!
Thanks for your nice tips.