I know it’s been in Photoshop since forever, and in many cases, there are faster and better selection tools, but to this very day I still wind up using the Magic Wand tool a decent amount. One of the reasons I get good results when I do use it it is the basis of this little-known tip — it’s how to control how much the Magic Wand actually selects. Here goes:
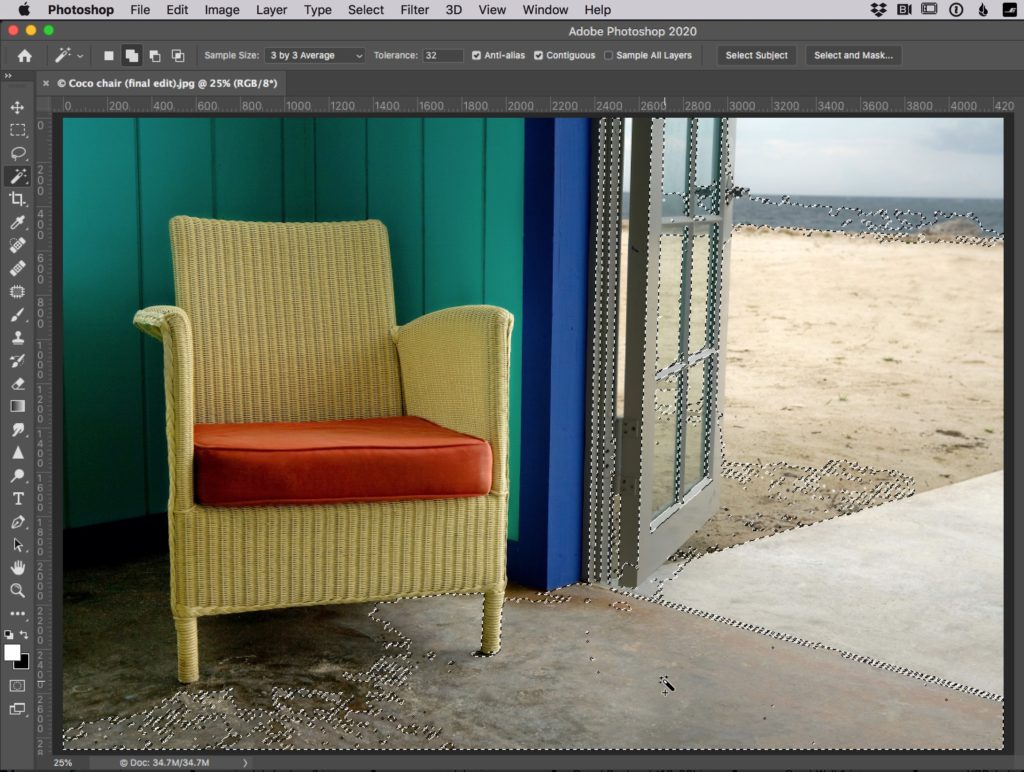
Above: Let say you want to select the floor area in front of the chair, for example. If you click the Magic Wand on the floor, it selects a lot of the floor, but because the color tones are somewhat similar, it also selects part of the door frame, and the door and sidewalk outside and part of the beach and…well…you get the idea. The trick here is controlling how big a range of colors the magic wand should select.
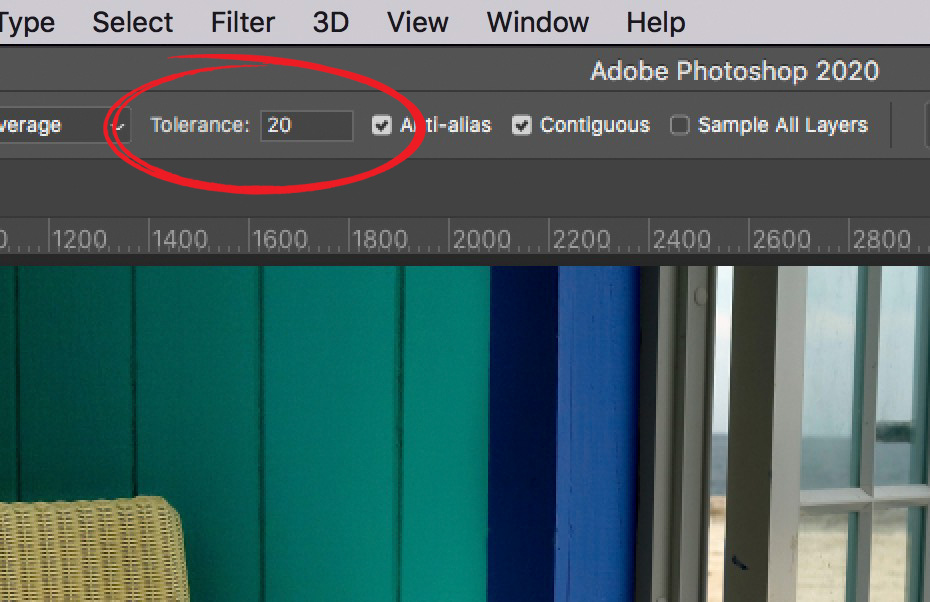
Above: See that field called “Tolerance” up in the Options bar (I circled it here in red)? That’s what controls how many color tones the Magic Wand selects, and the default Tolerance setting of 32 always seems to select too much. Lowering that number lowers how many different color tones out the Wand will select. Here I reset it to 20 (which, by the way, is what I leave the Magic Wand set to as my default — if you type 20 in there, it’s sticky and will stay at 20 until you change it to something else or reset the tool using the reset button).
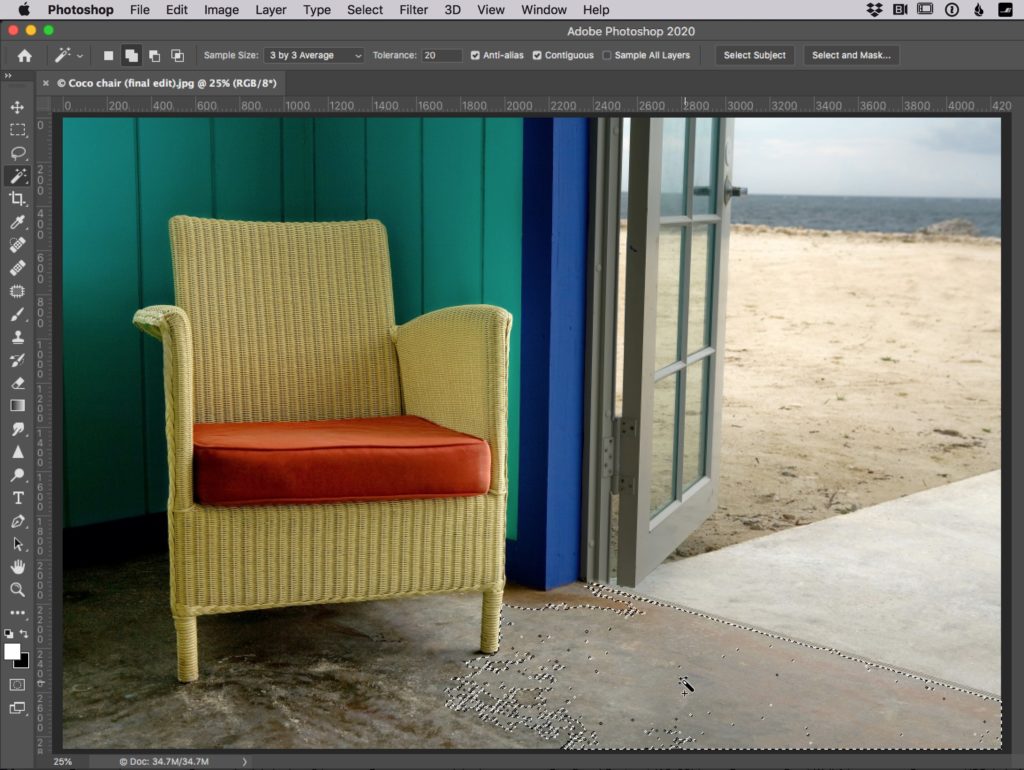
Above: By just lowering the Tolerance from 32 down to down, and clicking in approximately the same area, look how much less the Magic Wand selects now. No door frame, no door, no sidewalk, no beach, etc. It didn’t do a perfect job, but it’s a lot better (I would probably use the Quick Select tool for this job in reality, but I just wanted you to see how much the wand selects at different tolerance settings). Now let’s look at something a bit more real world.

Above: Let’s say I want to select that blur frame to the right of the chair. I clicked the Magic Wand right in the center of the dark and lighter blue areas, and it only selected the lighter blue side of the frame, as seen above). In this case, I would have liked it to select both sides; the dark blue and the light blue tones as well.

Above: I increased the Tolerance to 48 so it will select more colors; I clicked in the same place, and now look — it selected both sides of the blue frame (as seen above).
In short: think of the Tolerance settings as an “Amount” slider for the Magic Wand. In fact, if you want it to act more like a slider, click and hold directly on the word “Tolerance” and you can drag left or right to change the Tolerance amount just like you would with a slider.
Hope you found that helpful. :)
Here’s to a kick-butt, a fantastic week, full of opportunities and fun. :)
-Scott