

Perspective. It’s a word I try to keep at the forefront of my mind when I’m going through a challenging situation (or year, right?). Perspective is also a word I emphasize in my pursuit of better storytelling.
Technology has endowed us with the benefit of capturing story with bold new perspectives. Smaller remotely triggered cameras and more compact and powerful lighting tools can now be placed anywhere. Out of all the advancements we’ve seen in the last 5-10 years, my hands down favorite is the use of drones.
My Drone Backstory
I first started using a drone for small documentary film projects around 2013/14. I helped tell the (continuing) story of Eli Reimer, the youngest person with Down Syndrome to reach Mt. Everest base-camp. We’re friends with his family and wanted to document his trip to the Summit of Mt. Kilimanjaro. (Side note, Eli didn’t reach the summit-but he did get roughly ten feet higher in elevation than Everest Base Camp-a PR for him.)
While we did get a couple of usable video files from the drone, we also got to expend additional calories as we hunted for it throughout the bushes during one of its famous fly-aways. That particular drone didn’t have a proprietary camera and utilized a GoPro on an upgraded Zenmuse gimbal. It was messy, unpredictable, required a larger remote and a ridiculous amount of batteries that made it difficult to travel with.
And it was freakin’ awesome.
To say that drone technology today is better than that of 2013 would be an infinite understatement. Gone are the days of fly-aways, cases and cases of volatile batteries and now, smaller remotes work seamlessly with high functioning phone or tablet apps allowing you an assortment of flight modes. Drones are getting smaller with greater flight times and features-which makes them perfect to travel with.
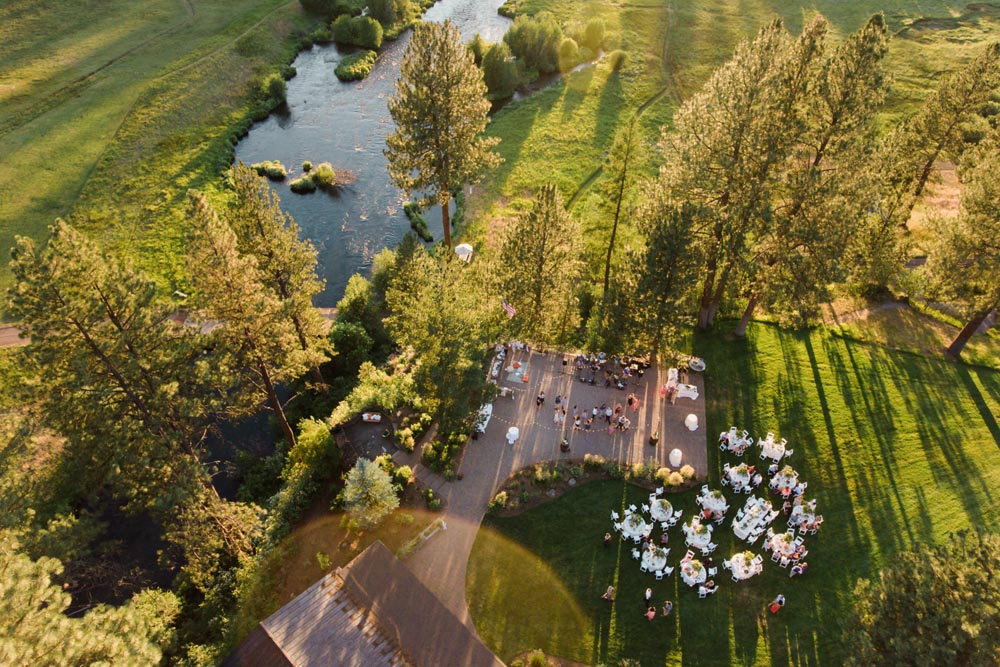
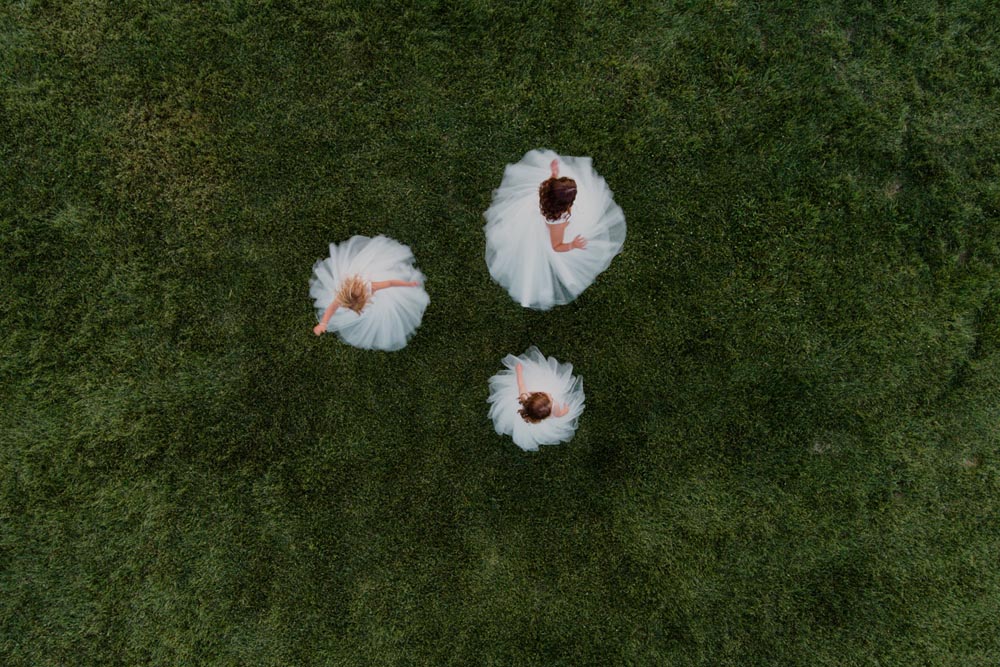
Roughly four years ago, I decided to bring a DJI Phantom 3 drone to a ranch wedding in Oregon. My intent was to capture a few video clips that could be used on my website and, as I’m always looking for a new perspective, I thought I might try to grab some stills. Though the cameras in the earlier drones weren’t comparable in quality to my then DSLR, I found I could capture images for my clients that before then could only be obtained when they booked the “Helicopter Rental” package, which strangely enough, never sold…
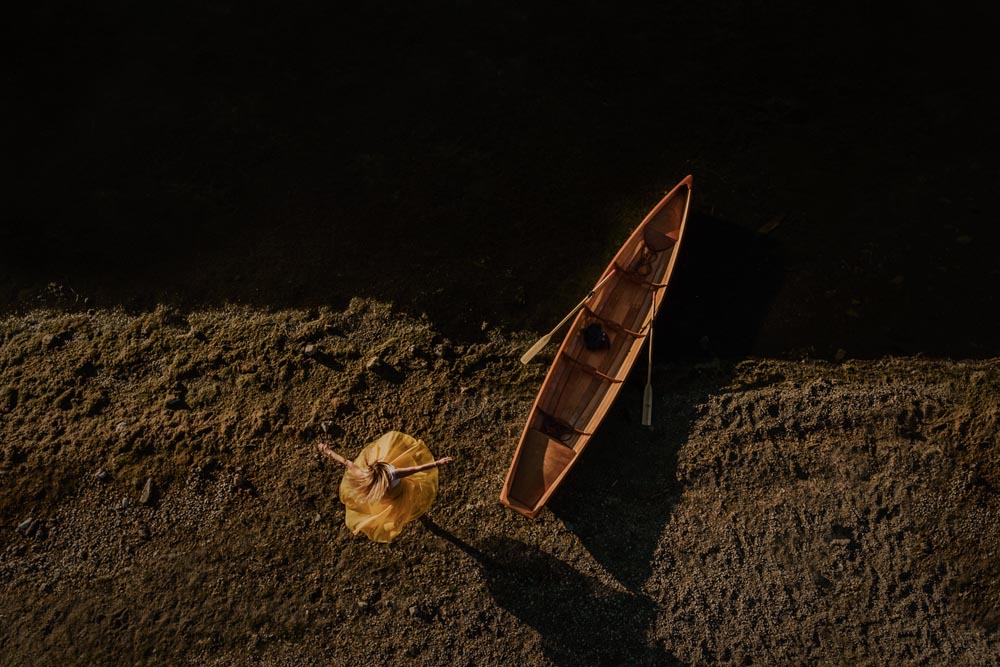
Though not technically magnificent, I was able to capture the ranch at sunset with the wedding reception in glow, little girls twirling in their dresses from above and little details that perhaps everyone had seen, but not from this vantage point. Vendors were given images of their work they hadn’t seen before. The bride loved the perspective.
Major light bulb moment.
Now, the majority of weddings and engagement sessions I capture have a drone component to them. As I seek to continually push myself and become more creative with drone portraits, I thought I’d share some things I’ve learned along the way. If you’ve not yet played with the bird’s eye view that drones offer you, I hope this information sends you over the edge to take flight and enjoy the new perspective. I just hope this gets you stoked.

Safety
Know your equipment and the laws in your country, state, county or city. Know where you’re allowed to fly and how high. Fly in spaces you feel comfortable and fly within your ability. If you’re a beginner pilot and a Windows user, you can take advantage of DJI’s in depth “Flight Simulator” software which helps you grow your ability while walking you through different intelligent flight modes and environments.
Fly creative, fly safe.
Concept + Location
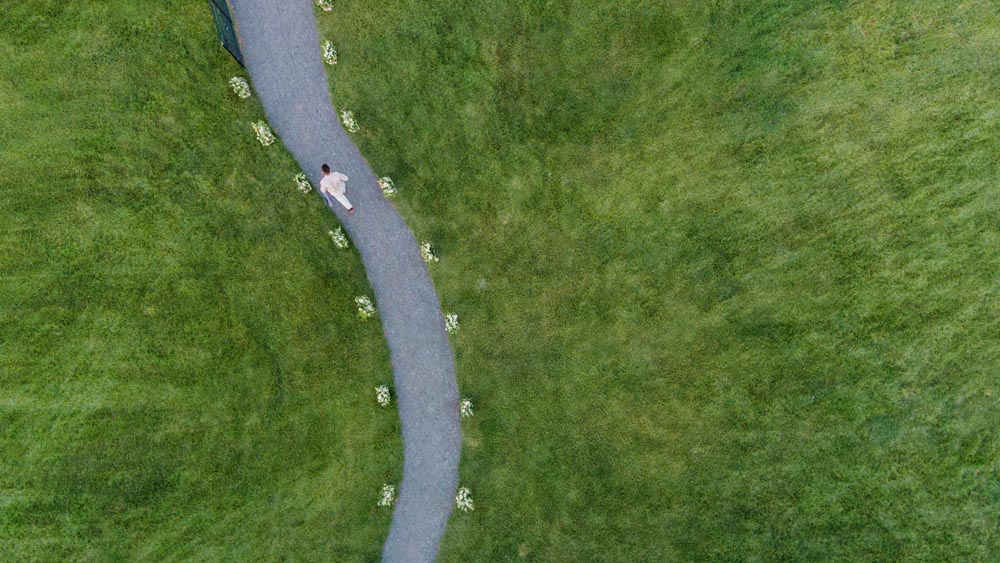
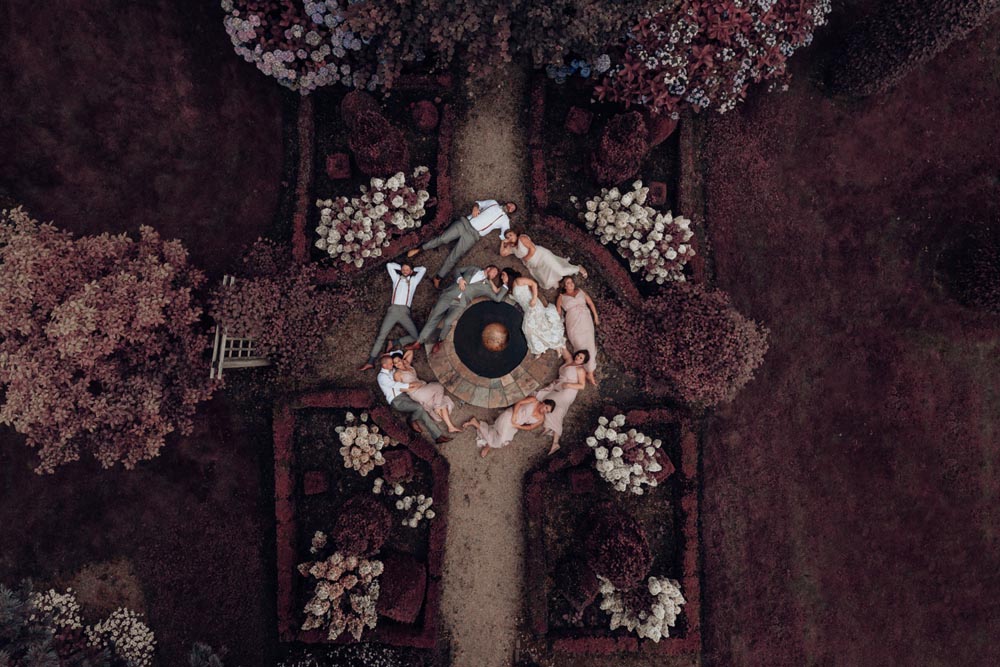
Most of the time, I bring the drone and incorporate it into a shoot that’s structured around a typical session, such as a wedding, engagement or family portrait. Generally, I can find a pose or use of the land to make an interesting image.
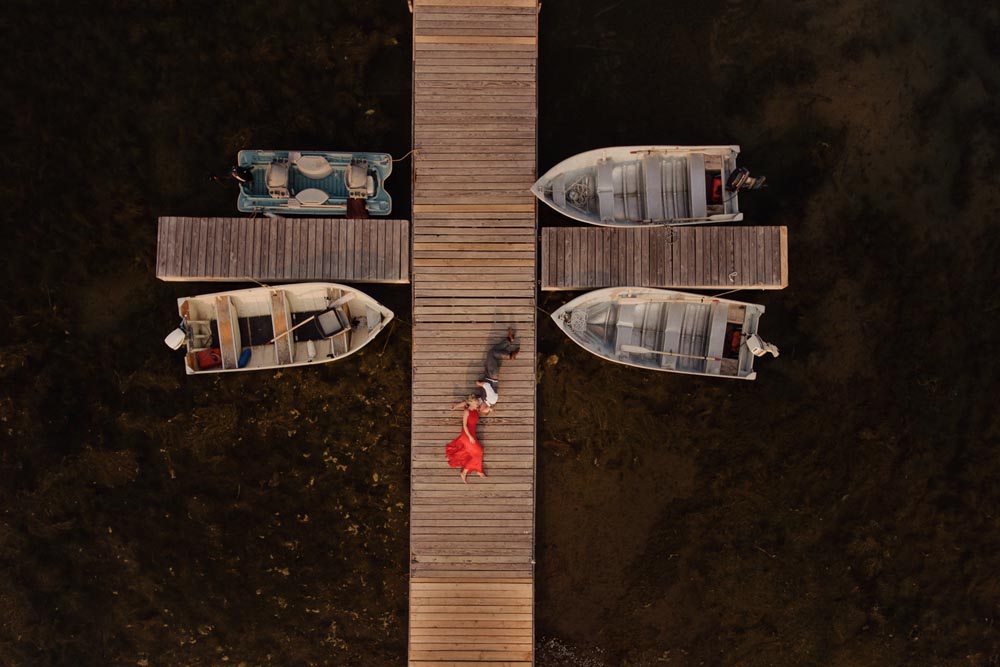
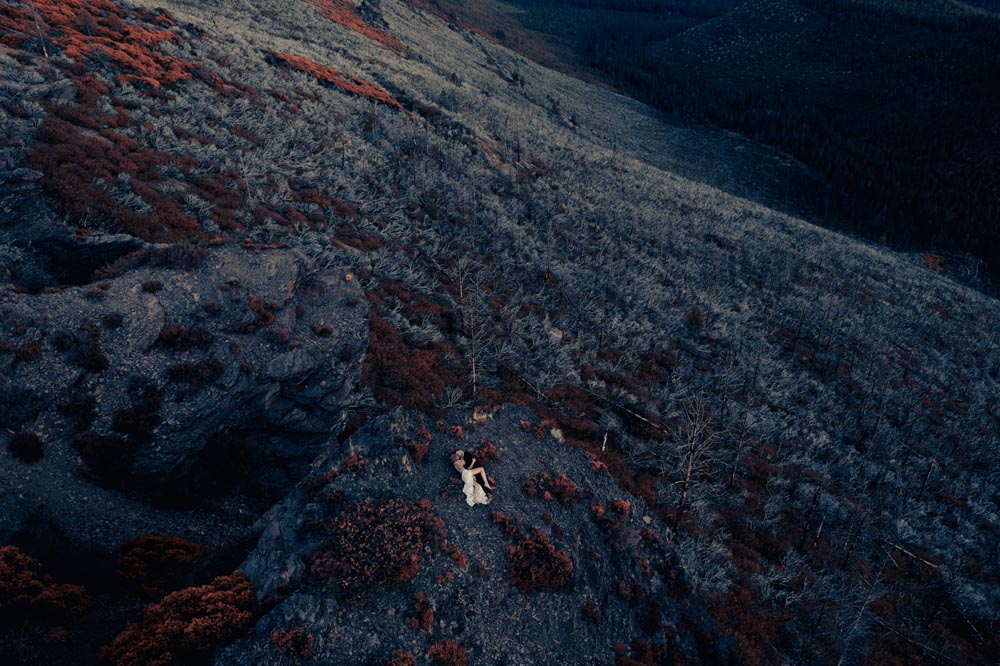
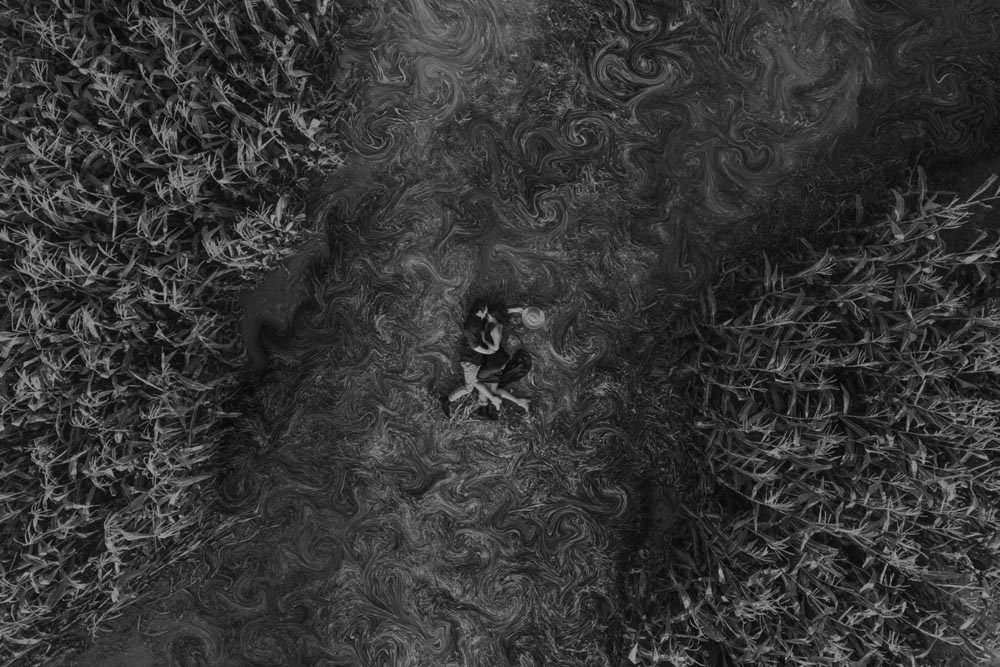
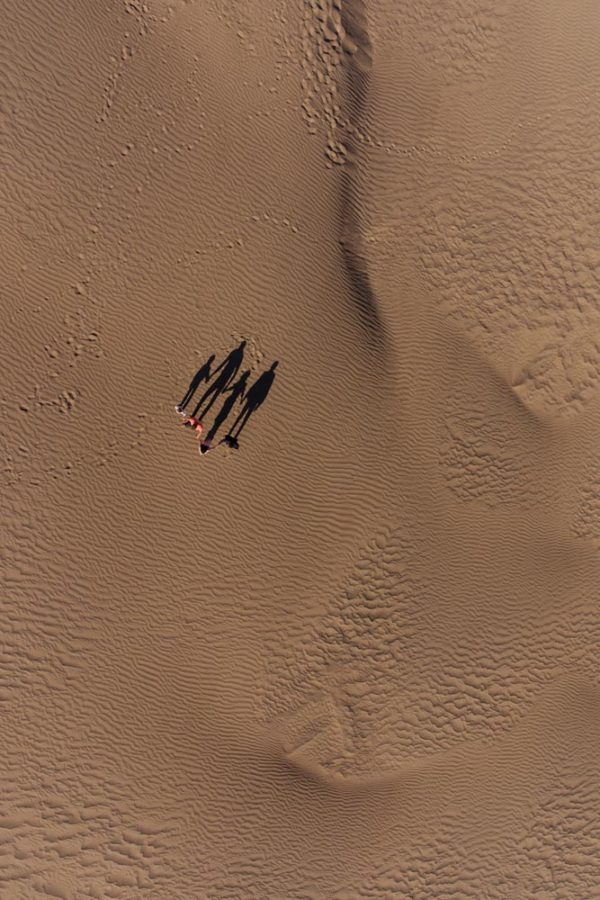
As of late, I’ve been more intentional with creating images specifically for the drone perspective. I’ve found that using apps like Apple’s Maps or Google Earth can help me scout a location I haven’t been to in person to see if it’s a viable option. Sun tracking apps such as Lumos or Photographer’s Ephemeris 3D (TPE3d) are helpful in tracking the sun, and can show you where shadows may fall on your subject. Interesting landscape features, leading lines and uses of color will generally yield a more striking final image. Think through the client or talent’s wardrobe and how you might incorporate it into the color palette of the surrounding area, or, ensure what they’re wearing is going to “pop” against the background.
Gear
If you haven’t yet purchased a drone, examine your needs vs. budget. Do you need to travel with a drone? If so, DJI’s latest offering, the Mini 2, is easy to transport, loaded with features and at base price of roughly $499, doesn’t break the bank. My personal preference is the DJI Mavic 2 Pro. Compared to older models, this iteration of the Mavic is still easy to travel with and DJI’s partnership with Hasselblad has resulted in a fabulous capture device. The L1D-20c camera has a 1” sensor providing for better high ISO image quality and gives the photographer more control over depth of field. There are plenty of videos and blogs out there that compare features in all the major brands-worth a search if you’re undecided.
Chances are if you already have a drone, it will work just fine for portraits. Just know the limitations of what you’re working with. If it’s an older model (despite brand) you’ll likely want to avoid high ISO imagery.
Here’s a list of other items I like to have on hand when making drone portraits.
- ND Filters: These are fantastic for both video and still photography with drones. These filters allow you to reduce the shutter speed in brightly lit scenes. For instance, if you were photographing a river mid-day, but wanted the water to have that milky look that landscape photographers seek. A typical exposure may be f 4.0 with a shutter speed of 1/1200th-which would freeze the flow of the water. Depending on which filter you use, you could bring that down to f 4.0 with a shutter speed of 1/30th lending the feeling of motion to the water. I really like Polar Pro’s filter offering. Another popular brand is Freewell. Both companies offer a combo set, well worth the investment.
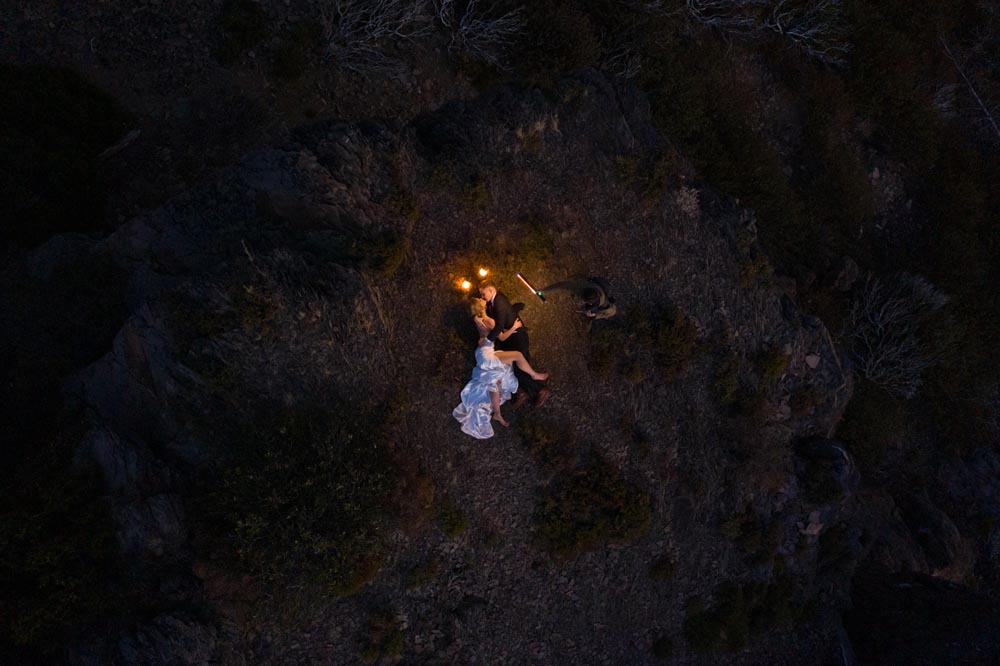
- Additional Lighting: Though you’ll possibly need an extra set of hands, supplementing with additional light sources is a great way to draw attention to your subjects. I love using my Wescott Icelight (there’s now a new version available) with a warm gel to light my subject after the sun sets. It’s also possible to use a manually triggered flash during long exposures. It may take a few shots to get in sync, but it’s possible! I generally will set the output on my flash, then have an assistant fire when I ask them to. Adjustments can be made if necessary (see helpful tips.) The nice thing about shooting with the bird’s eye view, is it’s usually easy to clone your assistant out of the shot. Be nice and let them know it’s not personal.
- Landing Pad: Dust in your drone motors is not beneficial to budgets in 2020 (or thereafter). While there are a few pads on the market that you can purchase, you could easily make your own with a leveler or simply bring a small section of tarp. Just make sure your landing pad doesn’t have long hair…
- Spare Parts: It’s always helpful to have spare props handy. If you’re mechanical, you can even replace motors, arms, etc. You can purchase tools specifically for drone repair at places like getfpv.com. There’s nothing worse than having an amazing image in mind, taking off, crashing and not having a spare prop. Ask me how I know…
- Com Device: Walkie talkies cleverly placed will save your vocal chords.

Capture
I like to inform the subject of what the process will look and sound like. I’ll often get them in approximately the right pose before I launch, then make any adjustments while I’m in the air. Newer drones have amazing battery life so I don’t mind eating up some power while I chat with them, always ensuring the drone isn’t close to obstacles of course. If you have an assistant, it’s helpful to have them both be in communication with the subject and act as a “spotter” for the aircraft.
Though I haven’t fully researched this, I find that sometimes the roughly 90 degree tilt of the drone’s gimbal “feels” more like 93 degrees. This is probably in my head. Regardless, for that reason, I’ll usually max it out (to the approx 90 degrees) for the bird’s eye view, then back it off just a little bit and start shooting from there. I’ve found when I do this, for me anyway, the result is more pleasing.
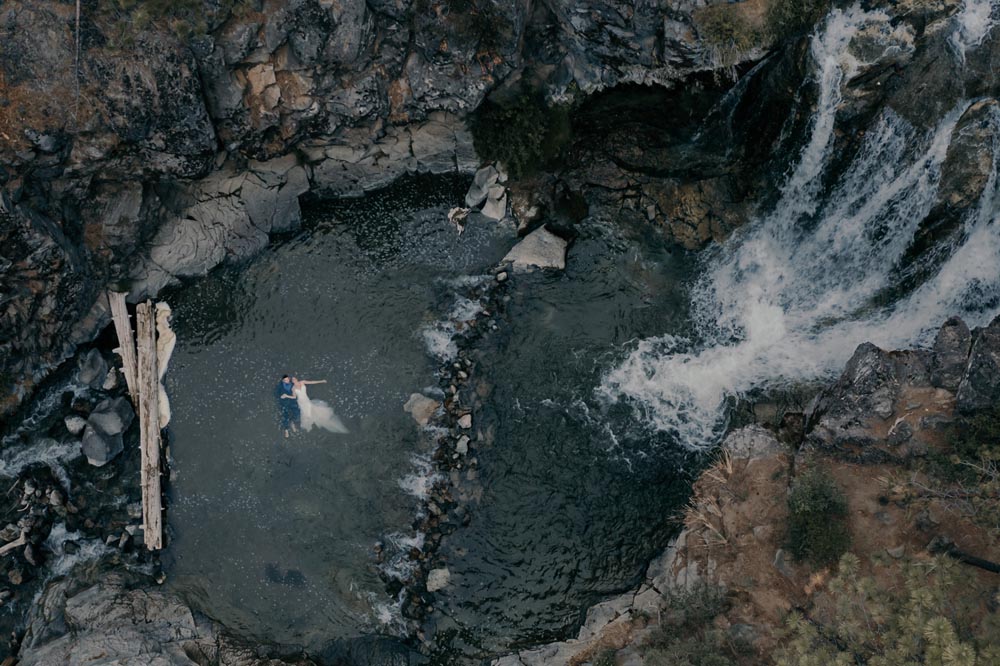
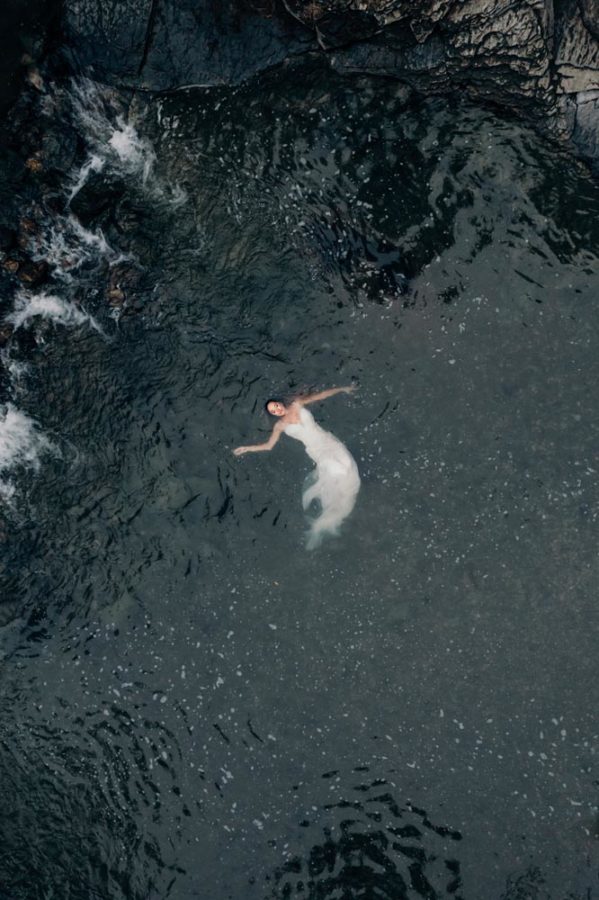
Once capturing, I like to work the shot as I would with a traditional camera. I’ll take a series of images at different altitudes, some at a greater height to give location context, some closer to the subject to scare them. Just kidding-I do make sure and fill the frame with the subject for a couple. It’s important to inform them beforehand the drone does whip up some wind directly below it, which also acts as a studio-like wind machine. Epic.
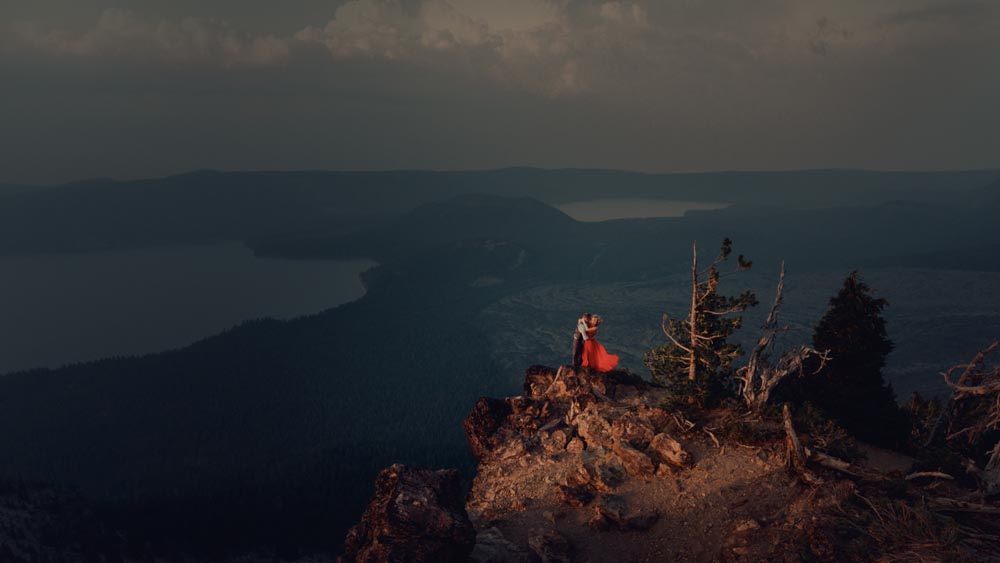
Though my favorite perspective is bird’s eye for portraits, from time to time I’ll tilt the gimbal up to show some of the landscape. This can “skew” the subject a bit, so be aware.
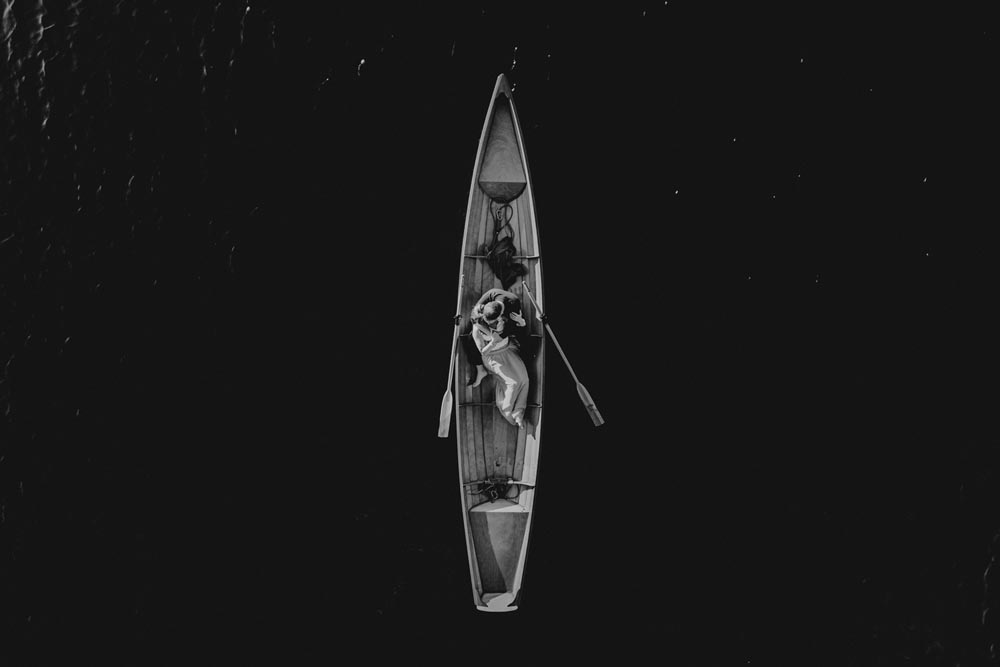
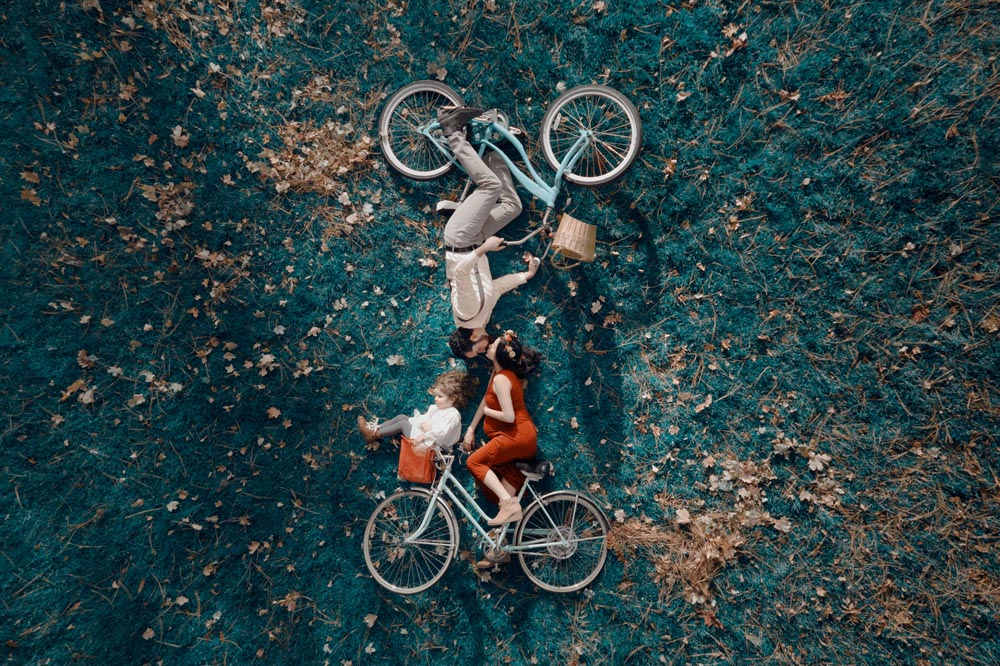
In regard to posing, I’m always about the romantic-when it fits, of course. I would encourage you to experiment with posing and placement, or, as I’d like to do more in the future, tell a story by using props -almost like you’re designing a set for your narrative to take place within. We recently used two old cruiser bikes for a maternity shoot and it made me realize what could be done two dimensionally…
As mentioned, If my intent is to light the subject with artificial lighting, I may have my assistant step out of frame for an image or two giving me information I can use later to clone or combine images in post.
Post Production
I currently use Lightroom Classic and Photoshop 2021 for my still photography post production workflow.
I like to make use of Smart Collections in Lightroom, which is especially useful for a wedding. For instance, I can create a Smart Collection that will see any RAW file captured by “DJI,” and will place it in the collection I’ve titled “Drone.” This makes it quick and easy for me to locate images that vendors may like, or any sneak peeks I’d like to share. I encourage you to come up with a cooler name than “Drone” though…
I’ll typically go through and apply some noise reduction if I was shooting higher ISO images, and will usually check Transform – Vertical to see if improvements can be made. Note that some drones shoot in a 16×9 format, others a 4:3. If you’re delivering a wedding gallery that includes drone portraits, you may need to crop the image’s ratio for consistency.
I’m really into playing with color. I’ll often apply color shift profiles to my work, especially drone images. In partnership with my buddy Kevin Kubota, we created and launched Storyteller Profiles and LUT’s which work great in Lightroom, Photoshop and most non-linear video editors. I think profiles are more powerful than presets, but can be used in conjunction with them. The other great thing about profiles is, although they’re applied at 100%, you can easily dial them back with Lightroom’s opacity slider. Most of mine are used at 30% or so. Bonus tip, by applying them in Photoshop, you can layer them, change blending modes and spend way more time than you have being creative.
I’ll usually finish the file in Photoshop, carefully considering skin retouching and if any distracting elements need to be cloned out. I may, on occasion, use Liquify to remove any COVID weight (at request of course) and in some cases, to make the image more interesting or painterly.
No Fly Zone
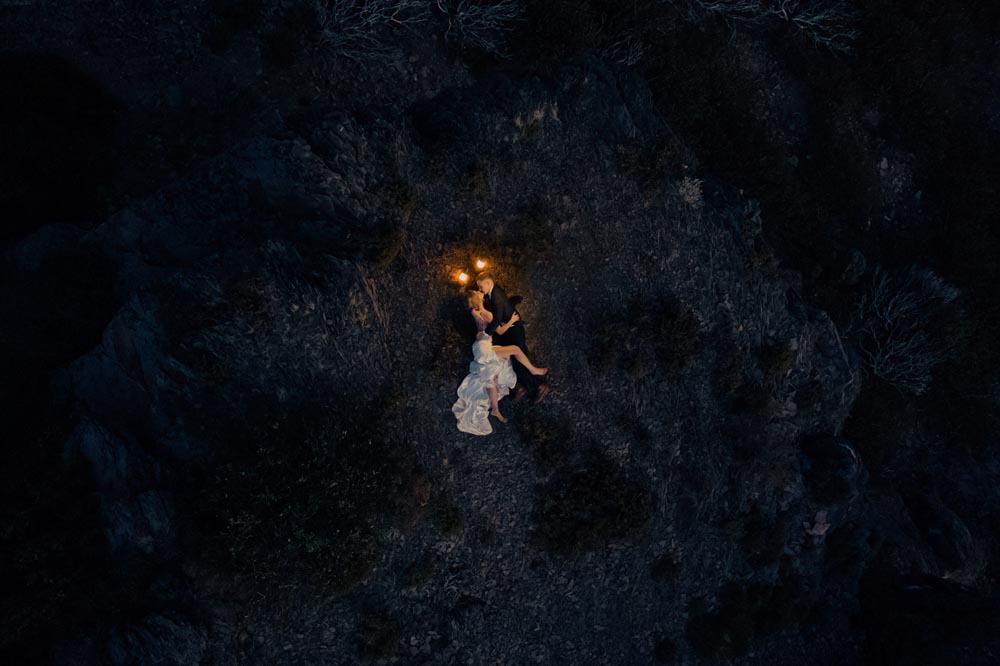
On occasion, as with anything photography related, things don’t go as planned. I had an epic shot planned for this couple by using a space on a downtown building rooftop that not many people have access to. Streaking car lights, neon signs and some additional lighting were going to make it epic. Once everything was set-up, we got them into position but…
The Mavic wouldn’t fly. “No Fly Zone.”
Ah yes, we were close to the airport! Knowing what “could have been” I had to switch to “what am I going to do now.” I remembered I had some steel wool left at home, so my gracious couple waited while we set it up. Parker and I quickly reset some gear, put the Wescott Icelight on a lightstand via a Magic Arm and went to take off…
“No Fly Zone.”
Death of an artist.
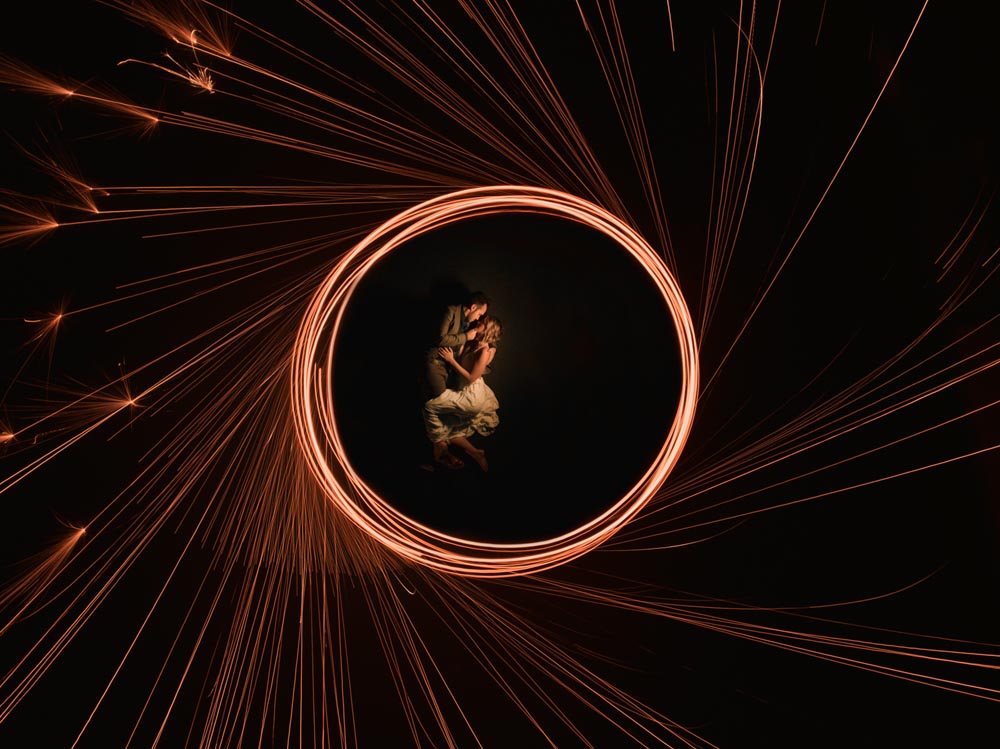
But there’s always another way. Knowing I wasn’t going to be far off the ground, I went and grabbed my older Phantom 4-which has no such software restriction at our home. The Phantom 4 camera pales in comparison to the Mavic 2 Pro, but this beautiful couple was waiting and I was determined to make an image for them.
We swapped drones and took off. The steel wool was lit, Parker swung it, the Icelight was gelled to a warm glow-and images were made. I used a three second exposure on the Phantom 4 to get the steel wool to show. Parker and the Icelight were cloned out of the final image. Note that long exposures like this typically won’t work well on a windy day.
I learned a lot that evening. I’ll be studying and signing up to get my FAA Drone Certification. The information will be valuable, commercial use will be legal and I’ll be better prepared for situations like I was in. I’ve since learned that you can apply to unlock areas in which you received a “No Fly Zone” warning. Anyone else living and learning?
Additional Tips and Helpful Hint Recaps:
- Utilize apps such as Google Earth, Lumos or TPE3d to help scout locations and see how shadows may fall.
- Think about locations with interesting geological features, leading lines or color.
- When using additional lighting for a scene, especially manually triggered flash, you can use DJI’s “Go 4” app to view images just captured (even while you’re flying-watch the obstacles!) Go to Editor / Album / Photos and make any adjustments necessary.
- Always shoot RAW.
- When using supplemental lighting, have your assistant step out for a couple of frames to give you information you can use to clone with, or allow you to combine two frames.
- Generally used for capturing video, try switching your drone to “Tripod Mode,” if you’re using a DJI product. This intelligent flight mode restricts the drone’s movement in a way that allows for smoother control. Other manufacturers may have a similar offering.
- Experiment with slow shutter to drag out head/tail lights, give water that “milky” look and allow for playing with manually triggered flashes. Remember, you’ll likely need an ND filter for this. Buy a set with different strengths.
- Experiment with the gimbal’s tilt to find just the right look for you.
- While newer drones are filled with features, use what you have-story is STILL king.
Connection + Conclusion
If your social feeds aren’t filled with images from above, Best-hashtags.com lists the following tags that may satisfy your aerial thirst:
#drone #dji #dronephotography #dronestagram #drones #fpv #droneoftheday #photography #dronelife #mavic #djiglobal #aerialphotography #djimavic #pro #nature #travel #dronepilot #gopro #fpvfreestyle #dronevideo #mavicpro #dronefly #djimavicpro #droneshots #photooftheday #dronephoto #aerial #phantom #fpvlife #bhfyp
No question this has been a tough year. I encourage you to consume less and produce more. This is an amazing time for personal projects and learning new techniques-such as drone portraiture. This style of capture not only brings the potential for additional revenue, but creates joy for the client who couldn’t afford the “Helicopter Package.”
I have a ton to learn about drone portraits, looking forward to learning and experimenting alongside you. Stay well!
Benjamin Edwards
Feel free to reach out and connect, anytime!
You can see more of Benjamin’s work at BenjaminEdwardsPhotography.com, and keep up with him on Instagram and Twitter, and reach him at ben@benjaminedwardsphotography.com.
Benjamin Edwards is a wedding, portrait, and humanitarian photographer based out of Bend, Oregon. After commissioning Kevin Kubota to photograph he and his wife Lauren’s wedding in 2002, Benjamin saw the power of the photographic lens and knew he had found a passion. Inspired by Kubota, Benjamin and Lauren opened Benjamin Edwards Photography and haven’t looked back—except to be grateful.
Whether documenting a bride’s perfect day, the dangers of female genital mutilation in Uganda, or the crisis in the Congo, Benjamin relies on his Faith, caffeine and love of his craft to ensure the image is captured.
Benjamin was featured in Photo District News magazine in Sept. 2009 as a “Photographer Making A Difference,” and won a Hollywood Film Festival award in 2009 for a short film he directed to raise awareness calling for the halt to conflict mining in the DRC.
In May of 2011, Benjamin was featured on Framed, an inspirational and educational web based series for photographers. The episode revolved around Benjamin’s passions, fears and hope for his photography.
More recently, Benjamin has written the third edition of Nikon: Creative Lighting System Digital Field Guide for Wiley Publishing and worked behind the scenes with Kevin Kubota on The Lighting Notebook: 101 Lighting Styles and Setups For Digital Photographers, also published by Wiley and was recognized by Photoflex as a Photoflex Pro.
