

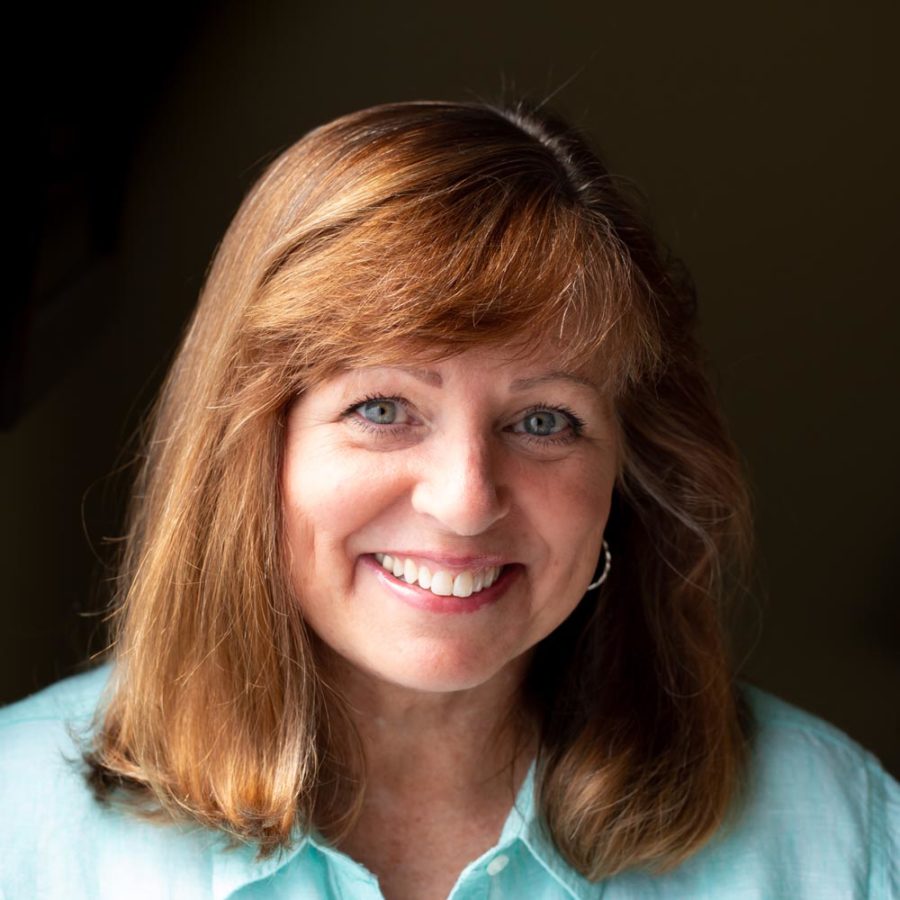
Hello Kelby fans and fellow photographers! My name is Tricia and I’m a photographer. I know, that sounds like I’m introducing myself at a Photographers Anonymous meeting and that I have some sort of obsession or addiction. So true! Just like you, I’m a bit obsessed, or at least passionate about photography. When I’m not shooting, I’m thinking about shooting, or setting up a shoot. So much so, that it turned into a full-time career.
It’s a great honor to be here today! Thank you Scott and Brad for the invitation and encouragement to share my photography story. I’m flattered and thrilled, and truly humbled to pass along a few of my favorite tips for great food photos. I also hope I can encourage you to step outside your comfort zone and pursue the dream of capturing amazing photos of whatever your favorite subject matter might be. Scott thought you may find my journey interesting, so here we go!
Never Give Up On Your Dream
I’ve always loved photography but didn’t start shooting until I was 50 years old. Yes, this is one of those never give up on finding your gifts and talents posts! I hope I can encourage you to continue pursuing your dreams!
Let’s back up a little … you see in 1985 I married a photographer. My husband Ed is a dedicated lifelong photography student, a terrific award winning photographer and my favorite teacher and cheerleader. While our kids were growing up he shot almost all our family photos. There was no need for me to learn how to handle a camera, other than a point and shoot. I didn’t need to know anything about controlling light, depth of field, ISO or shutter speed.
What I did know is that I wanted our photos of the kids to look a certain way. Some of our best family photos were made when we worked together as a team. I explained my vision, offered input, styled the kids and dogs and Ed made the photos happen. Looking back now, it seems I always zeroed in on photos that had exceptional lighting, but I never thought about what attracted me to those kinds of shots. Rim light around our children’s heads or an incredible golden hour photo was what I longed for. I always had an idea of what I wanted from the photos but didn’t understand how Ed made it happen.
How I Became A Full-Time Food Photographer And Blogger
Fast forward to 2010. While working full-time as an office manager, I read an article about healthy food bloggers. I had never read a blog, and really wasn’t sure what it was. When I clicked on the links I found this fairly new concept intriguing. At this point we were empty nesters, Ed traveled a good bit for work and I was craving a creative project to fill my free time. It wasn’t long before I decided to start a food blog of my own, “Saving Room for Dessert, a blog about saving room for the best parts of life.”
I’ve always been a weekend baker and thought blogging would be a great way to document some of our favorite family recipes and preserve them for our kids and grandkids. And, this was a great excuse to try my hand at photography!
It took me a month to write and publish my first blog post. Honestly, I was afraid to put myself out there especially since my photos were sometimes out of focus, not well lighted, and not very appealing overall. I was still working full-time and for 6 years posted recipes and photos twice a week while baking and shooting on the weekends.
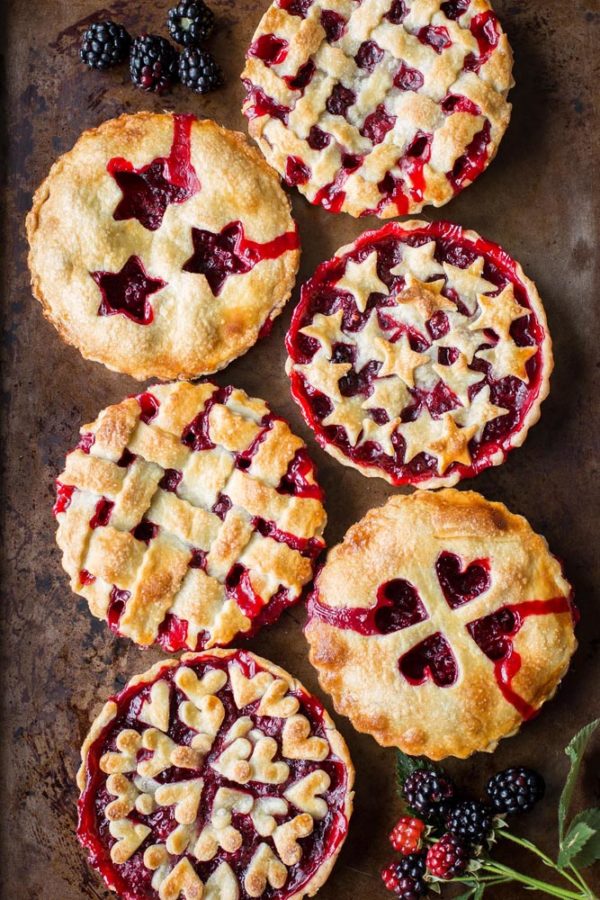
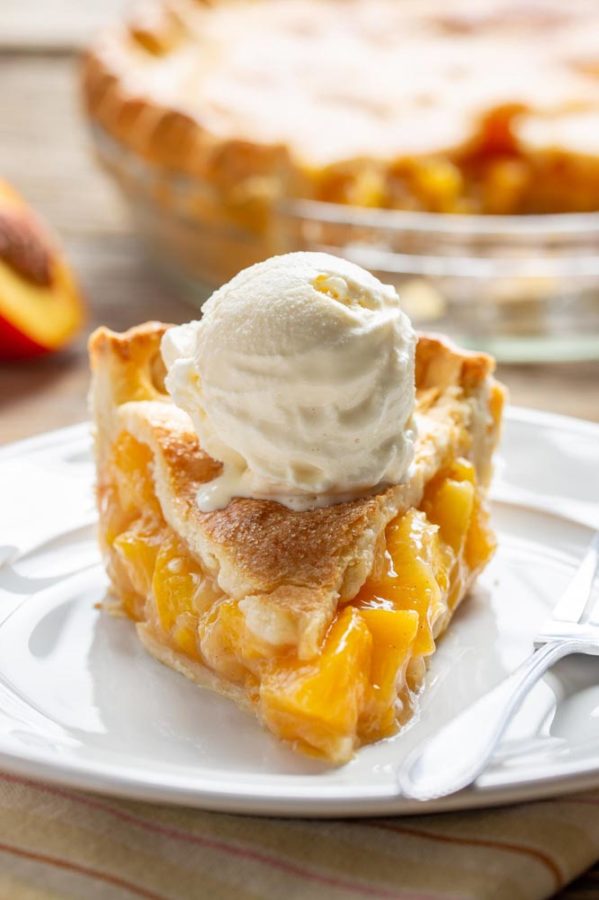
In 2011 I set, and reached, a goal of baking a different pie each week for the entire year; 52 in all. People started to follow me and comment on the recipes. I loved it! I knew the recipes were good, but the pictures didn’t do them justice and certainly didn’t tell the whole story. Out of desperation and embarrassment I decided it was time to suck-it-up and learn how to use a “real” camera.
In most cases I believe it helps if you’re passionate about what you’re shooting.
If you want to be a landscape or wildlife photographer but don’t love being outside in all kinds of weather, packing all your gear on your back and communing with the bugs, critters and wildlife, then maybe outdoor photography is not for you. Sport photographers need to be willing and able to stand outside for hours. It’s vital to understand the game, to know which athlete is the one that makes the big plays, and when that big play might happen. Must love sports!
You get the idea. It really helps to know something about your subject matter especially if you want to make a career out of shooting it. The same concept applies to food photography. I’ve always loved to cook and bake and devoured picture cookbooks as a young girl. Southern Living magazine was my go-to food porn back in the day. My grandmother taught me to make pies when I was 10 and I later went on to win a blue ribbon at a local county fair.
Now, it seems, every person with a smart phone and an Instagram account is a food photographer, which is a good thing. This fact has opened up a whole new world of recipes, cultures, styling and food-inspiration for us all to see. I love that we’re no longer limited to cookbooks, magazines and newspapers to get the best recipes or try food from completely different cultures!
Doing What I Love Everyday!
In addition to shooting photos of the food, I also develop many of the recipes, bake, cook and style the food for the photo shoots. This wouldn’t work for me if I didn’t LOVE to bake, cook, style and write all about recipes and food!
For me, part of the fun is having total control of the process starting with the basic inspiration to make a recipe and ending with a published post. I thrive on ‘start-to-finish’ projects. My best shots are the ones that I’ve had in my head and visualized before I ever start cooking.
There’s a lot of preparation that goes into each and every post I publish. First I start with the basic concept, then move on to SEO research (search engine optimization i.e. what people are searching for.) Next comes recipe research and development and testing.
If I’m happy with the results, I make the recipe again, style, shoot and edit.
I share the food to get feedback from taste testers, which is often incorporated into the blog post.
Finally there is writing and publishing, and then I push out my posts via social media. Some recipes take months to get just right, while others come together the first time I make it. I publish two recipes each week, which means I spend a lot of time in the kitchen and in my photo studio.
Learning How To Use A Camera
You might think I had a leg up on the learning curve since my husband is a photographer and could teach me everything I ever wanted to know. Haha, not a chance! Unfortunately my style of learning and his style of teaching didn’t always blend; it’s a husband/wife thing. I was also very intimated by his mad skills, knowledge and abilities and feared I would never understand how it all worked. To get started he helped me decide on my first DSLR, a Canon Rebel. Then he tried to teach me about the exposure triangle.
Being overwhelmed at first, I scrapped that idea and started out in “P” mode since it was taking way too long for me to ‘get it.’ I fought the idea of shooting in RAW and would only use a simple Windows-based photo editing program that only allowed cropping and adjustments to the brightness, color, contrast and shadows. No matter how many times Ed would try to explain and diagram the exposure triangle, it never clicked until I started experimenting with camera settings myself. As a hands-on learner this step was essential to my growth.
In addition to our polar opposite ways of learning and teaching, we have a mixed marriage: Ed’s a Nikon guy and I’m a Canon girl; very similar, but not the same. Fortunately Ed had the foresight to recommend that we watch KelbyOne classes together, to learn more about my camera. This is when the quality of my photos really started to improve. Thank goodness we survived this marital test and Ed continues to be my best friend, photography partner and SRFD Chief Taste Tester.
Ed’s a great teacher and while I now understand most of what he tried to teach back then, I didn’t really get it until I started asking questions about how to get that a certain look I wanted to create. Little by little I learned, and step by step I improved.
Learning How To Create The Kind Of Photos I Want To Publish
As mentioned above, I’m a hands-on learner so when I saw there was plenty of room for improvement in my photos, I knew it was time to step outside my comfort zone.
It all started to ‘come into focus’ when I moved my camera mode setting from “P” to “M” and from there all the pieces started to fall into place. Ed suggested I set up a simple shoot with a single item in the frame and adjust the settings to see how it affected the photo.
Since I primarily shoot still-life this was a pretty easy exercise, with a big impact. I placed a salt shaker on the kitchen table and started changing the ISO, shutter speed and aperture to see how it affected the subject in the photos. After experimenting I found that I loved the shallow depth of field dreamy look, and that’s when it all ‘started to click.’
Since I post two recipes each week on SRFD, I shoot regularly which gives me plenty of practice. Each post and the 5 or 6 photos I publish showed improvement week after week, year after year. I don’t think I would have ever improved if I didn’t have a commitment like posting twice a week. If you don’t have a place to share your photos, get one! Feedback feeds creative people. We all want someone, somewhere to enjoy what we create.
Another change that made a huge impact was moving to Lightroom to edit my photos. It wasn’t long after learning a few things in Lightroom that I realized shooting in RAW makes all the difference in what kind of changes you can make to your photos when editing.
Getting The Photos I Can’t Wait To Share
The quality of my photos took another big leap after I attended Scott Kelby’s “Shoot Like A Pro” seminar in Washington D.C. Among tons of other helpful tidbits of information, Scott mentioned this little gem: “Go buy a $5 Walmart shower curtain liner; it makes an excellent light diffuser.”
The next day I bought that shower curtain and moved my set up from my kitchen with mixed light sources, to a room at the front of my house which gets lots of bright afternoon sun. I hung the shower curtain in front of that bright and sunny window and immediately found my photo-mojo! Controlling the light in that way was the key to achieving my best photos.
The next “Aha!” moment came when I started watching KelbyOne food photography classes. I really enjoy the class by Nicole Young and have watched it multiple times. I’ve learned so much about composing shots, food styling and the overall set up needed to create the kind of quality photos I want to share.
Next, I picked up two inexpensive small white foam boards to bounce sunlight just like Nicole showed me in her KelbyOne training videos and book, Food Photography: From Snapshots to Great Shots. Nicole’s simple way of explaining and demonstrating her process resonates with me and was just what I needed to take it to the next level.
Several of Scott’s books have become my frequent reference companions, as have KelbyOne tutorials on Lightroom.
Upgrading My Equipment
Next I upgraded my gear to a Canon 7D, a better tripod, a simple remote and a 60mm macro lens. To learn about my new camera I watched a tutorial about the Canon 7D by Larry Becker and Mia McCormick on KelbyOne. Sitting with my camera in one hand and the remote in another, I must have watched the tutorial at least 10 times. I learned tons about the camera’s features and settings, some of which I had no idea existed!
I began to get more positive feedback from my blog readers about my photos, and I even sold a few for money! Through a chance encounter I started doing photo shoots for a local wood store on the weekends. The store expanded their presence online and needed “catalog” styled shots of their products. I shot everything from cutting boards and wine bottle stoppers, to coat racks and furniture and all things in between. This was also a paying gig, which bolstered my belief that I could make a go of this photography thing. This was all while still working full-time as an office manager, and blogging twice a week. I was putting in the hours and paying my dues and then some!
Since then I’ve upgraded my equipment again to the Canon 5D Mark iii and added Canon L series lenses to by bag. The 100mm macro lens is my absolute go-to for food shots.
Taking A Leap Of Faith
After more than six years of blogging just for fun, I started thinking about leaving my government job and becoming a full-time blogger and food photographer. My blog traffic had grown over the years, even though at that point I’d never shared my posts regularly on social media. I was lucky enough that I could take a cut in pay if I had to, so I grabbed my dream.
Deciding to become a full-time freelancer was really a no-brainer for me. All I lacked was confidence. I was never fulfilled working in an office, cleaning up other peoples messes and doing mindless data entry. However, everything I learned in those office environments over the years about organization, commitment and diligence has helped me get where I am today in my photography business.
I was very motivated to succeed as a blogger. Six months before I left my job as an office manager, I committed to learn more about the social media aspects of blogging that I’d never put much effort into before. By the time I escaped the cubicle farm in July 2016 I was already earning enough from the blog to replace my income. That was more than three years ago and I’ve not had a moment of regret since!
My Style Of Food Photography Has Evolved Over The Years
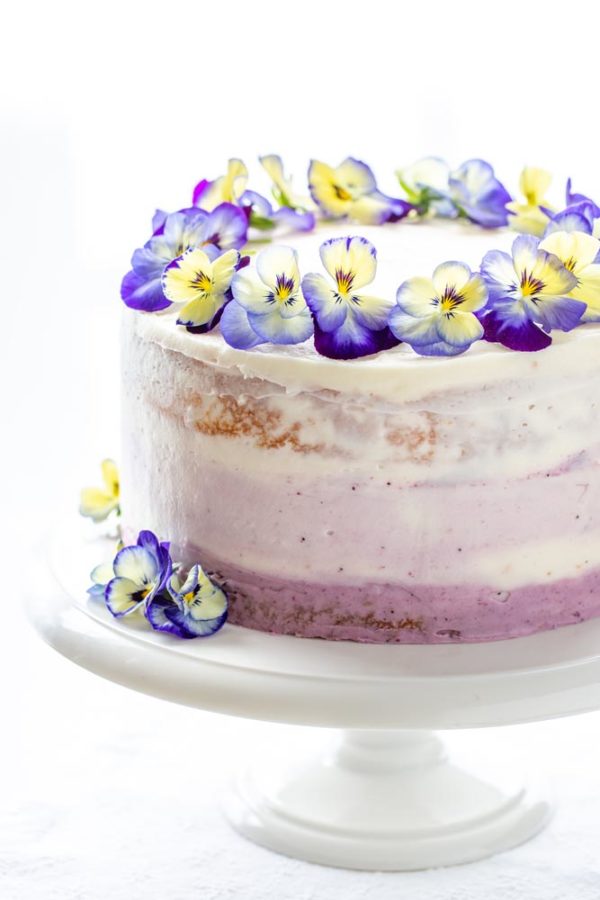
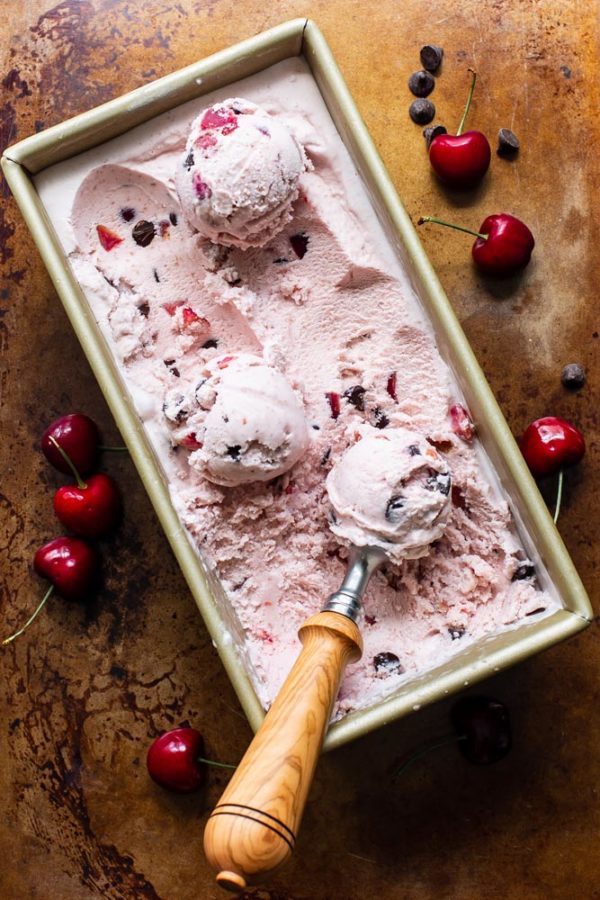
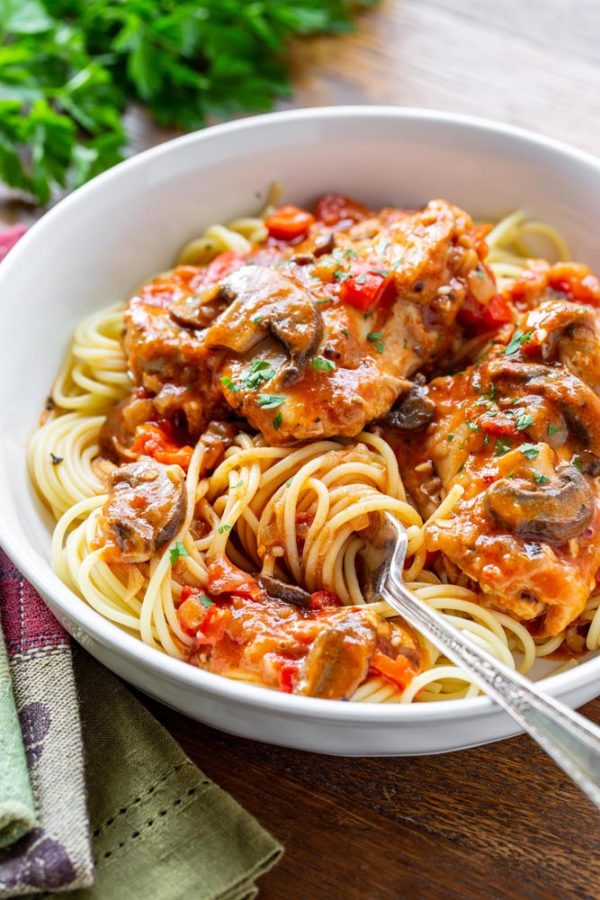
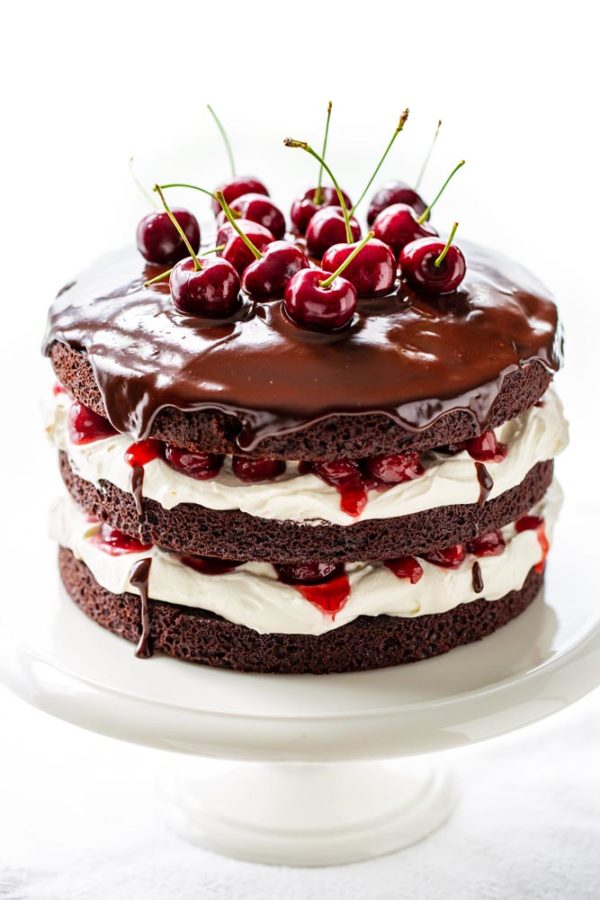
Most often I go for a high key style with lots of bright backlighting, This is both because I personally like the look but also because research and experience has shown that high key photos catch the eye on social media and often get more looks than dark and moody. (But I LOVE dark and moody too!) Bright and light photos do much better on platforms like Pinterest, Instagram and Facebook which all drive traffic to my site. More traffic means better income.
While I love setting up complicated shots with plenty of props and styling, it’s the simple up-close, drool-producing, make-you-want-to-lick-your screen type images that do best.
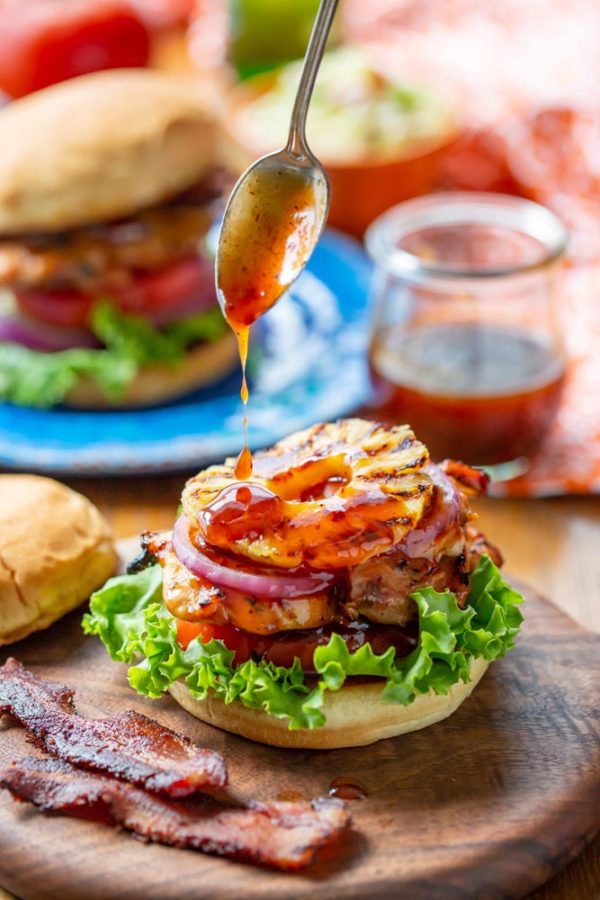
Pinterest has been a game changer for me. It’s as much a search engine as Google. People searching for recipe ideas want to see the food, so up close glistening chicken skewers or dipping sauce that screams ‘taste me!’ is what they get from Saving Room For Dessert.
As a general rule, I never use inedible products or tricks to make my food look better. I’m not a snob about it, it’s just that we want to eat the food and need to taste test the recipes. That’s probably the main difference between food bloggers and commercial photographers who shoot for advertising agencies or food brands. I’m all about making recipes that my readers can make, eat and love enough to make them again and again. It’s important that my readers’ results turn out looking like the photos in my post. If it’s too complicated or over-styled they won’t be happy with their results.
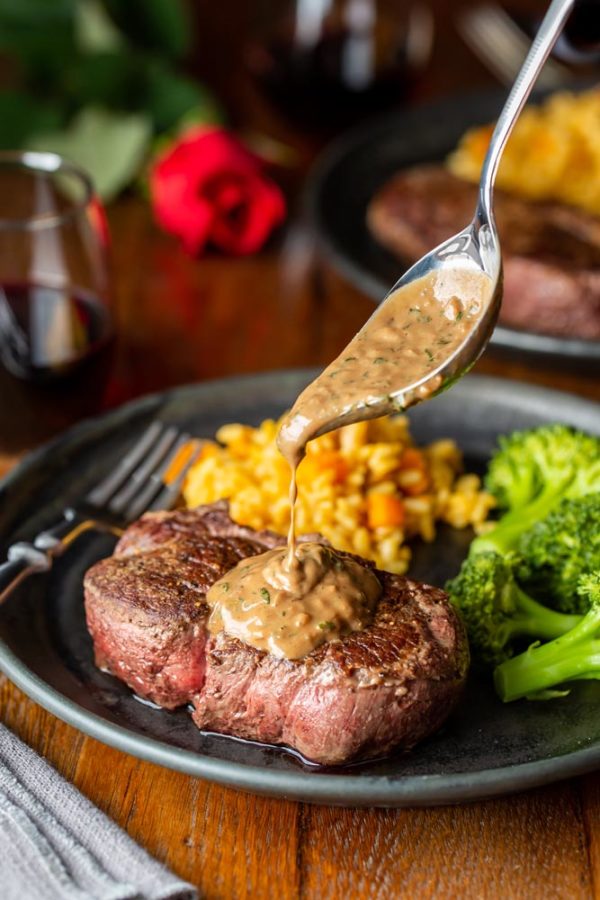
I’ve been known to brush on a little extra gravy, juice, or a water and olive oil mixture on a burger that may look dry. Other than that, since we eat all the food I shoot, everything is natural and edible.
My best photos are the ones I see in my head way before I ever pick up the camera. Food styling can be tedious and takes a lot of effort to keep it fresh and new. I can’t style my posts the exact same way every time, but I have developed some tried and true layouts. Again the goal is to highlight the food and make people want to go to my blog and learn how to make the recipe.
My Setup
I own several continuous light soft boxes which I use for food videos but I always shoot my stills in natural light. I can tell you when and where the sun is going to be in relation to my studio window every day of the year. I adjust my cooking schedule accordingly so the food will be at its peak of perfection, at the same time the light is best.
Shooting near my front window on a sunny day with my $5 shower curtain liner as a diffuser is my favorite set up. Sometimes a cloudy day can be great for shooting too. Don’t let a few clouds stop you from working. In my opinion, shadows add more drama so don’t be afraid to use Rembrandt lighting—with one side of your subject brighter. I love the dark and moody photos with lots of food styling, but the high key close ups perform best on SRFD.
I took a couple of inexpensive white foam-core boards and taped them together like a book binding. These DIY bounce cards can be placed anywhere I need to fill in light on the side, front, or both.
I own a variety of backgrounds and tabletops for food styling. When in doubt, my go-to is a weathered white wooden garage sale table I picked up for $5. I frequently use a simple but pretty brown antique wooden table, a barn wood table top made for just for this purpose, and a few other painted boards. Sometimes I shoot on an old dark cookie sheet or on a small piece of white marble. My goal is to pick something that will provide great contrast. Textures are also important for adding interest to shots of plain-looking food. It’s easy to get into a rut and end up shooting brown food, in a brown bowl, on a brown table and all I end up with is a brown mess!
99% of the time I shoot with a tripod. For me, it’s just as important as my camera. I don’t know how food photographers do it without one!
I love my simple, inexpensive hard-wired remote. It’s one of my favorite tools. Using a 2-second delay on the shutter helps prevent camera movement, giving you sharper images.
As a rule I try to avoid mixed light sources. If I’m shooting under fluorescent lights, near a window with an incandescent bulb burning in a lamp nearby, I have a terrible time correcting the color temperature. Stick with one light source and use bounce cards to fill where needed.
TIPS To Grow On
- Learn how to use Lightroom. There are countless KelbyOne courses to help you become a Lightroom ninja. Watch them all!
- Visualize your photos – but pursue opportunities to change it up or challenge yourself.
- Make sure each photo has a “hero.” I’ve been guilty of this mistake many times. I sometimes get hung up on food styling and end up with a photo that has no primary focal point or clear subject. Readers won’t know where to look if you don’t have a hero!
- Join the Scott Kelby World Wide Photo Walk in your area. Stretch your wings and try shooting something new!
- Set goals and stick with them. Practice regularly and commit to completing a few personal projects each month.
- Find a way to share your photos with the world. Facebook, Instagram or a blog are all easy ways to get them out there. Share your talent!
- Find great photos you love and try to replicate them. By experimenting with new techniques, we become better photographers.
- If you’re going on vacation search your destination on 500px.com and see what kind of photos are posted for great ideas, a little inspiration and new locations to shoot from.
- Practice, experiment and grow and…above all else, be fearless!
I may not be the best food photographer in the world, but I’m so much better than I used to be. I see improvements with almost every post. Of course I have bad days when I lack inspiration and creativity, but that’s okay, life happens. I keep getting up and trying again and again. I’ve been known to make and shoot a recipe 3 or 4 different times because I know I can do better. That doesn’t happen often, but it does happen. Sometimes I lose my mojo, and have to work to get it back. We’re all human! Inspiration is important so feed that animal!
I continue to learn and feel compelled to master new techniques to capture a drip, drizzle, splash or powdered sugar snowfall in mid-air. I haven’t perfected it yet, but get better every time I shoot.
It’s tough to do this at home alone. I’m often holding the remote in one hand while reaching around the camera drizzling sauce with my other hand. Getting the camera pre-focused on the right spot is the hardest task to master.
Finally, please follow Saving Room For Dessert and feel free to get in touch through my contact page if you have questions or if I can help you in any way.
Thanks so much!
Tricia
You can see more of Tricia’s work at SavingDessert.com, and keep up with her on Facebook, Pinterest, Instagram and Twitter.
1 comment