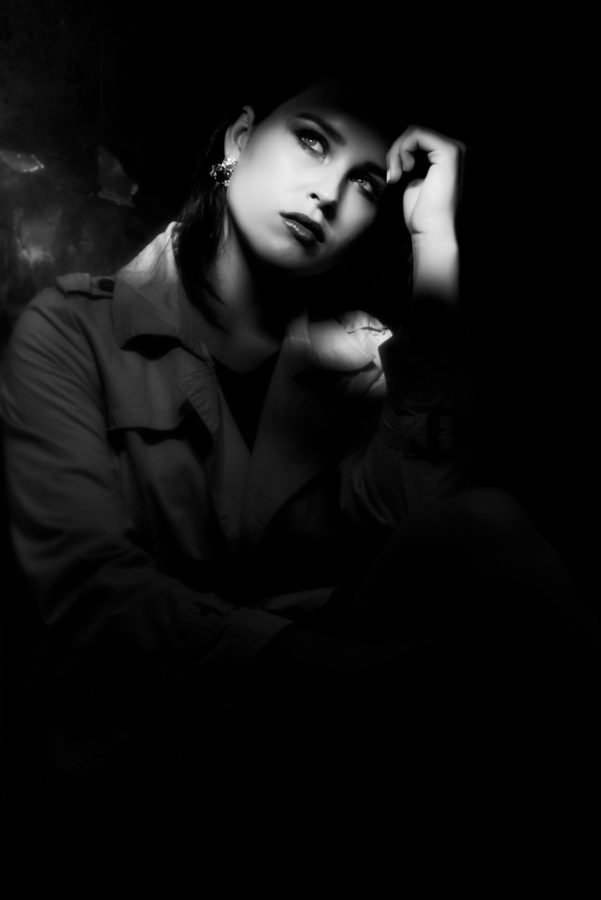
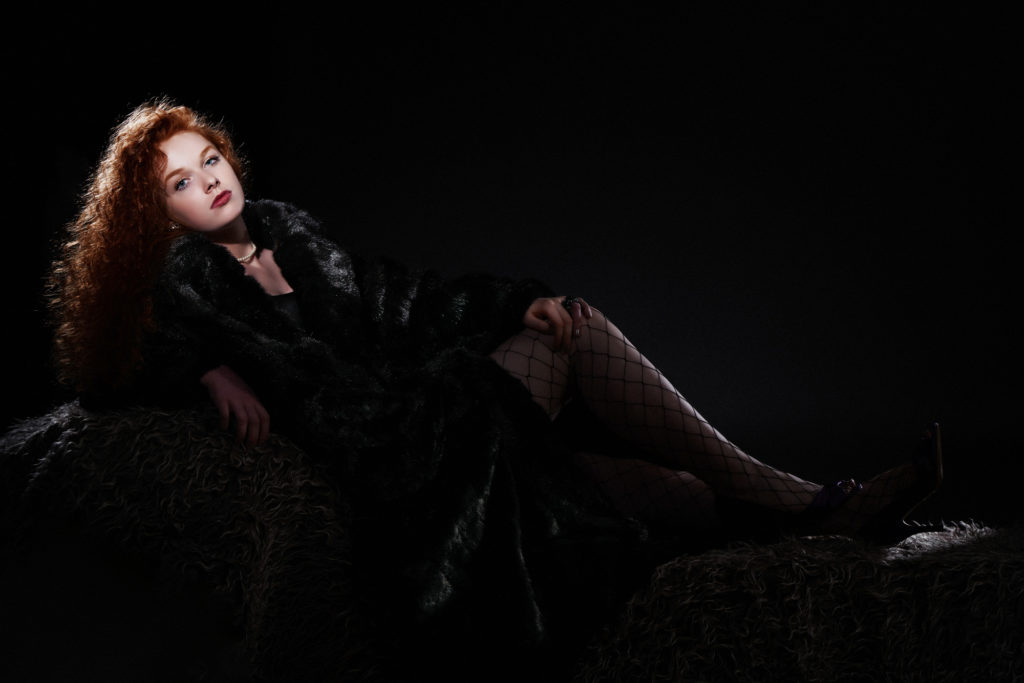
Have you always wondered how images like the one below are lit?
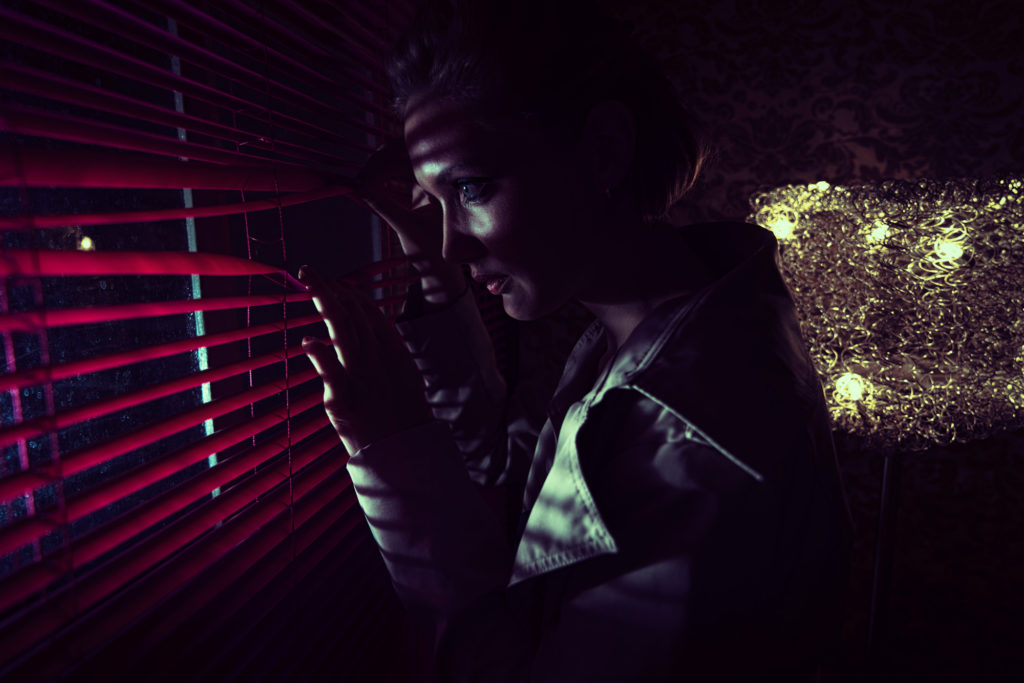
Have you ever tried to get those beautiful distinct lines from venetian blinds?
Hi guys, and welcome to my guest blog.
Over the years I’ve taught many workshops, and one of the things that always strikes me is that a lot of people are very focused on lighting setups. Even when you look at books and videos, it’s almost always about lighting setups.
Don’t get me wrong, those are pretty awesome. But the problem with this train of thought is that although you can now copy something, you don’t really understand why it gives that look, or the theory behind it so to say. So for this blog post I thought it would be fun to just take one small part of the basis of lighting and give you guys a lot of options to build something for yourself.
Today we are going to look at shadow control, more so shadow transfers. So take out your popcorn, sit down…. Here we go.
The Bare Basics Are Cool
We all want to start with the cool stuff, I get it, we want shortcuts. The idea behind this goes for everything in life. But in essence, when you look at, let’s say, one year of progress, you will find out very quickly that shortcuts are not working. Let me explain.
When I was young (not that long ago… well okay), I loved playing guitar. In fact, I didn’t do anything else. My whole life was built around playing guitar.
To pay for my hobby, I started teaching local kids. At that point I think I was 18-19 years old. At that time there was a movement emerging called shredding (playing really fast), and although I did like it, I didn’t really play like that. As a huge Queen fan, I was more into the melodic stuff.
But during that period, bands like Dream Theater, Steve Vai, Joe Satriani, etc. all became hugely successful, and especially Satriani and Vai caught my attention. Listen to Steve Vai’s album Passion And Warfare and you’ll know why it changed my (and many others’) lives when it came to playing the instrument. Both Vai and Satriani used very melodic solos, but in keys I didn’t recognize. There was a certain “feel” about them, almost singing and summer, or very dark and exotic, what the…?
Soon it became clear these guys were not playing the standard stuff, but were using so called modes. So, my students wanted to learn those modes. A lot of teachers started teaching them scales, intervals etc.
Long story short, there are seven modes that are used most commonly. Imagine having to learn all seven modes over the whole neck of the guitar and remembering them all in any key possible… Feeling dizzy? Yeah, well so did I. But this is what you HAD to learn. Until I started to study what was going on (remember in that time we did not have internet, you really had to figure everything out yourself)…
Seven modes… Seven keys in a scale….mmmm
Very soon it dawned on me that is was actually very simple. Learn the C major scale and just start on different notes to get the modes. Start on D for Dorian, start on E for Phrygian, etc. Now that mess of seven modes all over the neck became actually incredibly simple. Just learn ONE scale and remember on which note to start. I was literally in heaven and very quickly could play any mode almost blindly on the guitar. My progress was like a rocket.
However, my students were very very reluctant to learn the C major scale. They would rather spend 4-5 hours learning one small Dream Theater solo than understanding what he was playing and why. In 4-5 hours you can learn the C major scale over the entire neck and play something similar to your favorite solo and make it your own, but also “play” with it and create totally new stuff.
Ok so what has this to do with photography you might wonder, well everything.
Shadows
When we talk to photographers and teachers, it’s almost always about the light. Not very often do you hear photographers talk about shadows, well, unless it’s something negative like, “How can I get rid of that shadow?” But, in essence, shadows tell you everything about the lighting.
Is the shadow deep and sharp? You can bet that a smaller light source was used and you can just follow the shadow to find out the angle. Is the shadow softer? You can bet that a larger light source was used. And by seeing the speed in which the light falls off (goes into shadow) you can see how far the light source was from the model. The closer it is, the faster the light will fall off into the shadow.
Edge Transfer
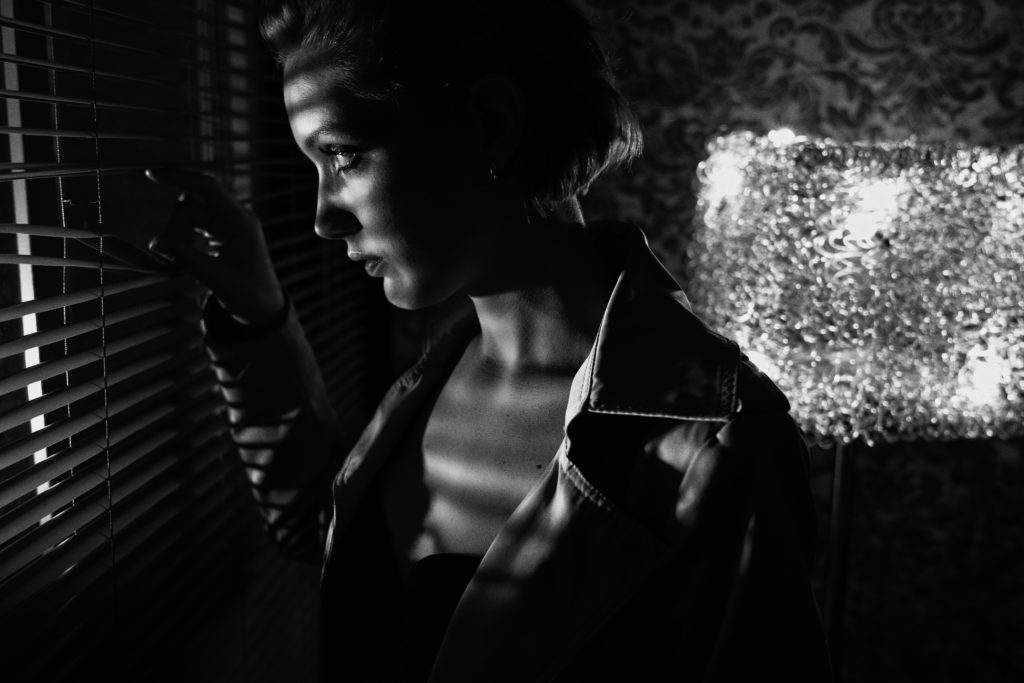
Now one thing that’s very important for shadows and determining the light source is the edge transfer. Remember the venetian blinds at the start?
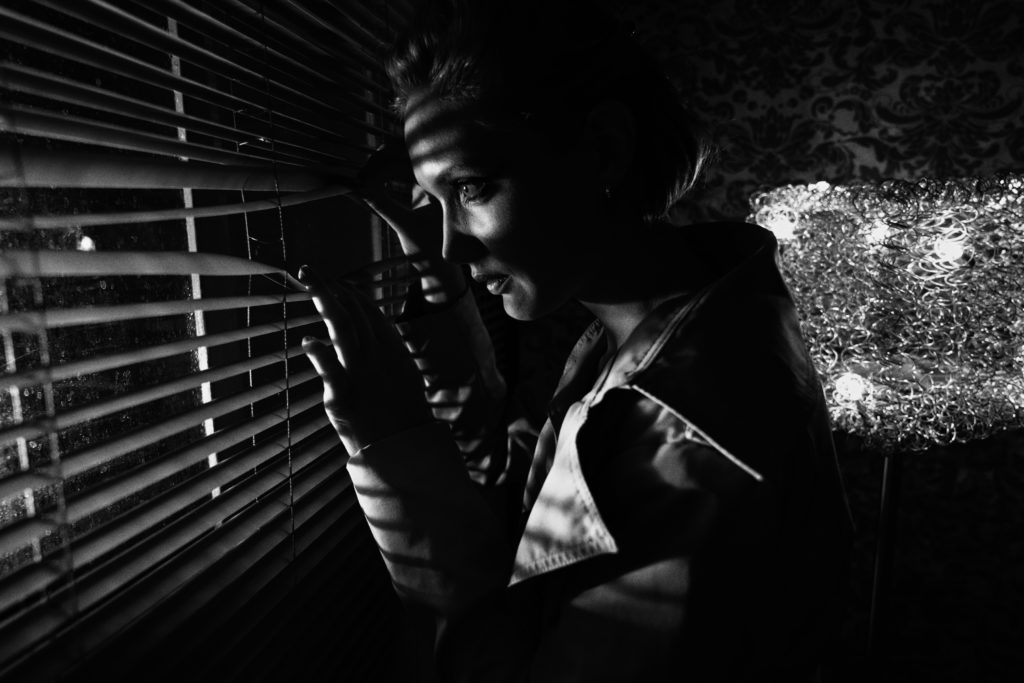
I get a lot of questions from people that tried shots like that but never seem to be able to get the lines they want. In fact, most of the times those lines don’t even show up. So how do I get those lines so sharp?
It’s very simple. It’s all in the distance of a light source to the model and the blinds.
When you place the model right behind the blinds, one would think that those lines will show up, right? Yeah, one would think that indeed. The problem, however, is the light source itself. Often the light source is placed too close to the blinds. Although with an open or gridded reflector, you can see some lines they are far from distinct. Use a softbox and you’ll probably see almost nothing.
By going back to the basics, it all becomes very apparent. The further away you place a light source the harder the light quality. A softbox next to the model is the most beautiful and soft light you can imagine. Now place that same softbox about 30ft away from the model and it’s a lot less wrapping around the model. In other words, it’s a harder light.
So the further away you place a light source, the harder the light quality. But this also goes for shadows, only with shadows it’s the other way around. When you move something that casts a shadow further away the shadow becomes softer and softer.
Going back to the venetian blinds, it’s now clear that we have to place a hard light source, for example, an open or gridded reflector, at a relatively far distance, and have the model stand as close as possible to the venetian The cool thing is that if the shadows are too harsh, you just move the light source closer. If it’s too soft…. Yep, move it back.
But this is just the start. This is learning the C-major scale. Now let’s play with this concept.
Flags
If we move an object between the model and the light source, we block part of the light. By moving this object closer to the light source, we make the area between light and dark larger. By moving the object closer to the model, we make that area between light and dark smaller, hence creating a more distinct “barrier.”
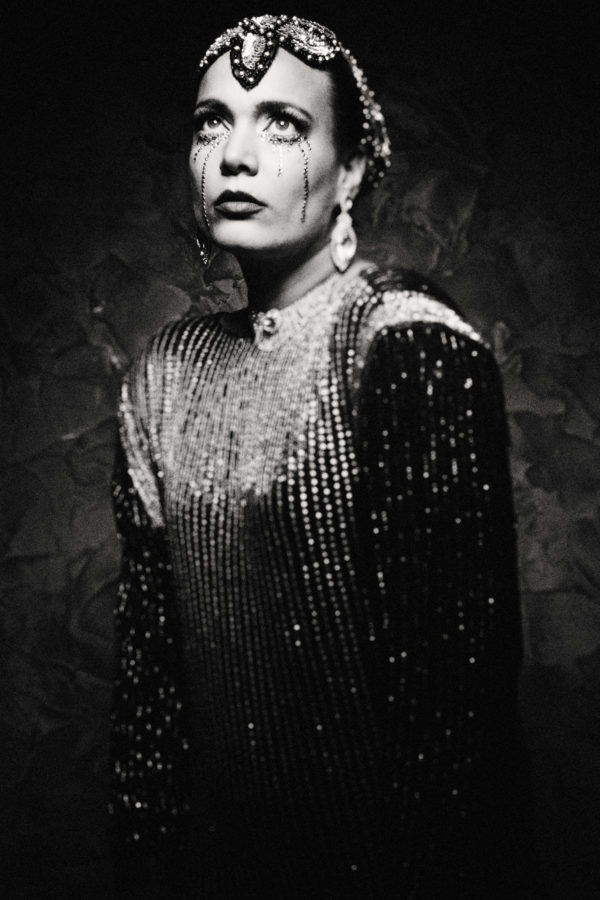
Remember that first shot? Those kinds of shots you saw a lot in the “old” days of photography. Just look up people like George Hurrell or Studio Harcourt. At that time they had a lot less light shaping tools than we have now. Often it ended/started with some Fresnels, and in most cases continuous lighting. Strobes came into fashion much later.
Now if you look up George Hurrell, you will find a lot of diagrams for his lighting, but often a key element is missing. The flags.
So What Is A Flag?
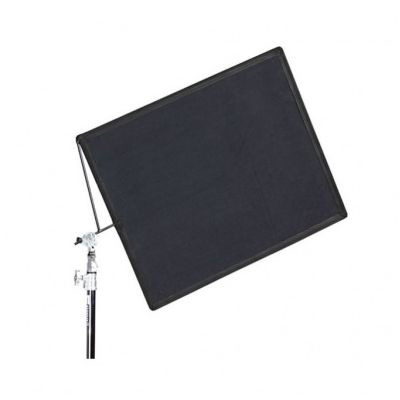
In essence, it’s just something to block the light, nothing more, nothing less. You can use cardboard, a piece of wood, or get a real flag. I use the Manfrotto flags, which I love. They are not cheap, but trust me, once you master using them you won’t ever want to be without. Make sure you don’t save money on the mounting piece. Positioning a flag is VERY precise work.

Now that we have something we can place between the model and the light source, you literally have 100% control over your lighting. You can use grids or snoots to narrow the light beam, but what if you want a diagonal shadow line? Or what if you want a certain area of the face lit, but you don’t want the chest area to be lit, and want it to slowly fall into shadow from the neck down… but when you have the face properly lit, you end up with way too much light on the neck and chest? Just put that flag there and start moving it around to create the perfect light fall off that you want.
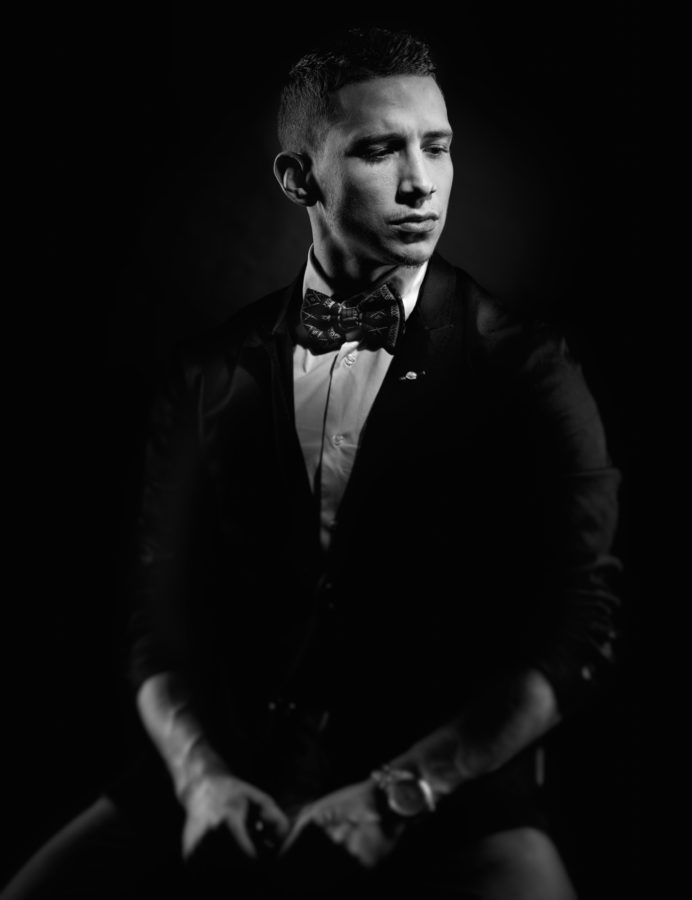
As you can see here, I moved the flag close to the light to block off light, but I wanted a very gradual light fall off. Not too fast and certainly not dark on his hands.
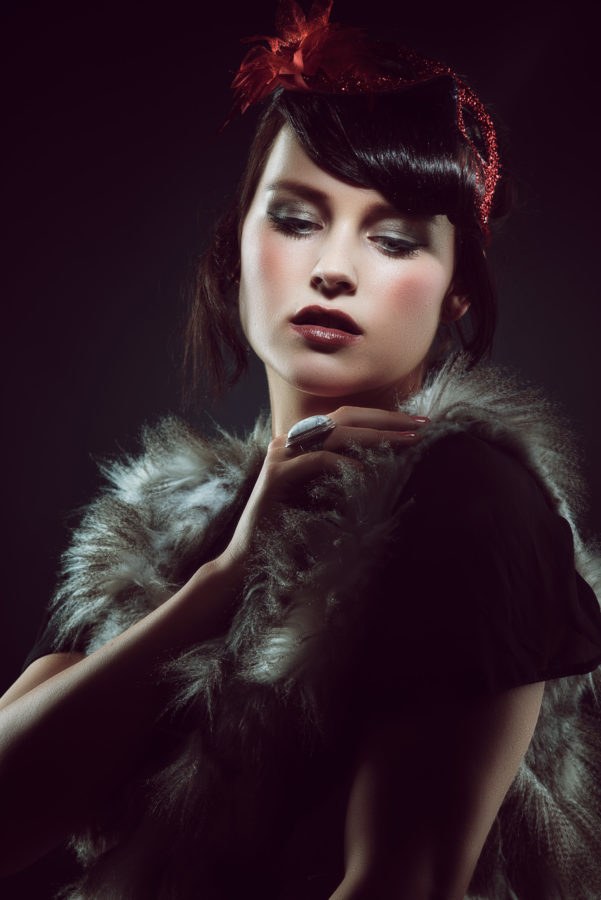
By moving the flag closer to the model, you get way more direction in your light and you get results like this.

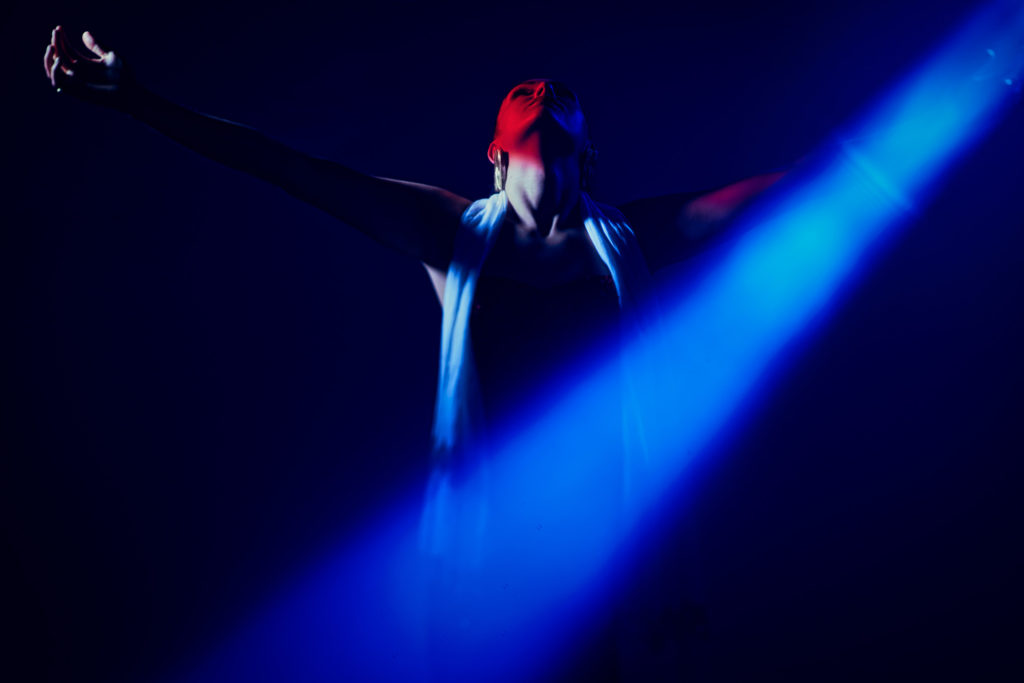
Or in color and with the flag a lot closer to the light source but away from the model.
As you can see you literally have total control over your lighting by just using one flag.
And let’s be honest, you can create a Photoshop vignette, but it’s way cooler to just do it on the spot. Plus it always looks better when you do it in camera for this simple reason… Just look at the background. You can see that this is real due to the lighting on the background. If I use a vignette in Photoshop, the background will look fake, and it’s a dead giveaway that it’s a vignette and not real light.
In Closing
A lot of photographers are controlled by their lighting, while you, as the photographer, should be in control of your lighting.
There are NO shortcuts.
Of course you can learn some lighting setups, but let’s be honest. Which guitar player wants to play the same solo over every song?
As a closing tip. We all know lens flare right? It’s something we often don’t want in an image, and most modern lenses are coated so we have as little lens flare as possible, however… get a really old lens and put some lighting behind your model that’s pretty strong. When you take the image it will look horrible. In most cases totally washed out or even pure white.
Normally we use lens hoods to protect our lenses from too much light hitting the lens. So now cup your lens with your hand on the side of that light and you’ll see that the lens flare will be gone or a lot less visible. Now… and trust me, it takes sometime to get it right… do a Mr. Spock (live long and prosper) and voila!

As you can see, you now have total control over your lens flare and can create some stunning spotlight effects without using Photoshop. Again this does take some/a lot of practice.
The cool thing about learning the basics of photography is that there are absolutely no boundaries to your creativity. Remember, this is just one of the fundamentals. Get my book Mastering the Model Shoot or my watch my videos on KelbyOne to get a lot more information on lighting and styling.
Join my YouTube channel for a weekly update with videos, tips, livestreams and a lot more.
Thanks to Scott for inviting me over and getting me back into playing guitar after a 17 year break 😊
Any questions? Feel free to ask, I’ll be monitoring the comments for you guys. Or do it in the amazing KelbyOne Community.
If you want the opportunity to learn from Frank Doorhof in person, sign up for his New York City workshop! It’s happening on September 1, and will include topics like coaching models, shooting tethered, using a light meter, retouching, styling, and much more. You can find out all about it and register right here.
You can see more of Frank’s work at FrankDoorhof.com, check out his classes on KelbyOne.com, and keep up with him on Instagram, Facebook, YouTube, and Twitter.