I always advocate experimenting in Photoshop to see what happens. Sometimes the results are not at all what you might have expected – in either a good way or a bad way. If you don’t like the results you can always undo, delete or start over. But you may love the results – or at least see some potential that encourages you to keep going down that path of experimentation.
One example of experimentation is using a common technique in an “uncommon” way. Here’s a technique that I’ll be teaching in my Photoshop World class called Photoshop Textures, Borders, Edges and More. It involves using Refine Edge, but to make an unusual edge rather than a perfect selection.
First we need to find an image that will create a cool edge effect, so look for an image with lots of detail like stone texture, branches etc. – a photo with a plain blue sky would not work as well.
NOTE: You could use this technique to create a mask on the same photo, but I’m going to use it to create a mask for a different photo.
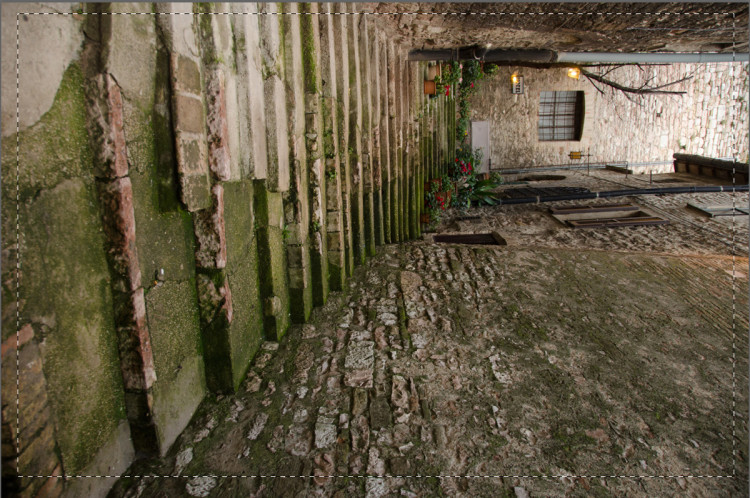
In this example I’ve chosen a photo and rotated it 90 degrees since I’ll be using it in landscape orientation.
STEP ONE: Use the Marquee selection tool to make a selection that leaves a small area not selected. (This is one of the factors that you can experiment with as you try this method).
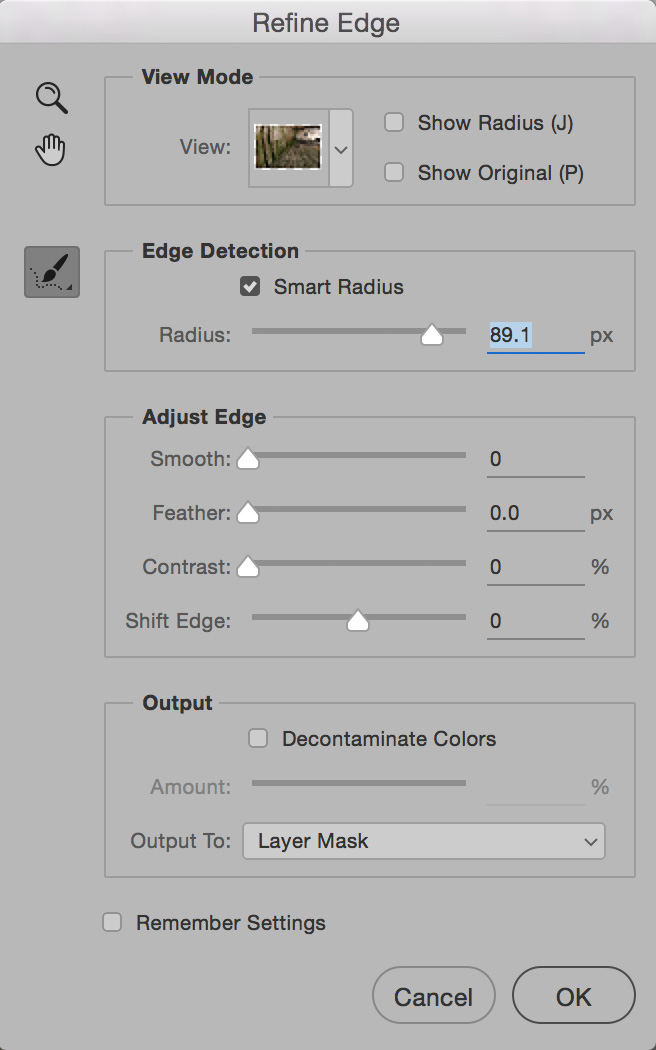
STEP TWO: Click the Refine Edge button, and in the dialog move the radius slider quite high, and experiment with turning on the Smart Radius option. Take advantage of the preview to see the results you’ll get from different settings.
Change the Output to Layer Mask.
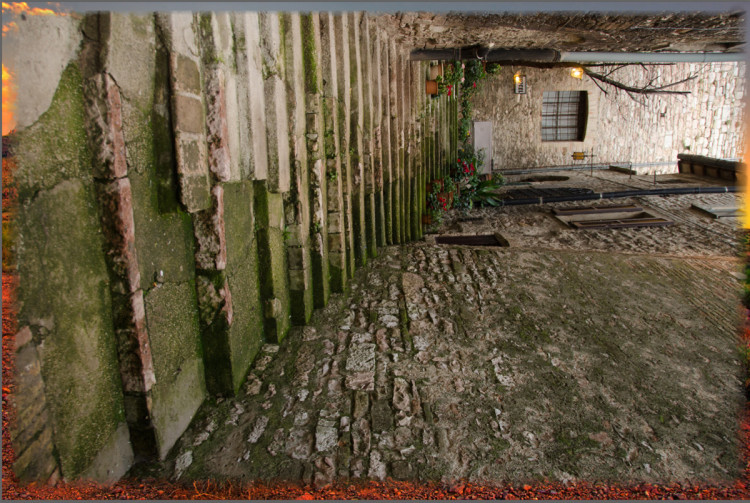
STEP THREE: Drag the layer and mask into the second document. Unlock the Background layer, and then drag the Layer Mask onto the unlocked layer. Finally, delete the copied layer.
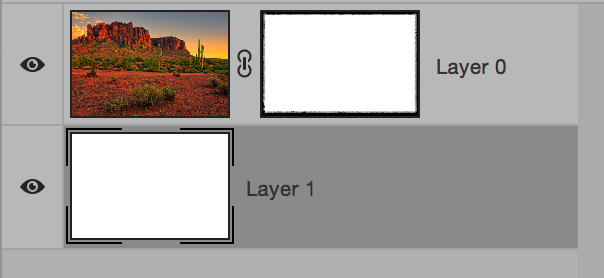
Here’s the final result with a white layer added below to simulate what the edge would look like when printed.
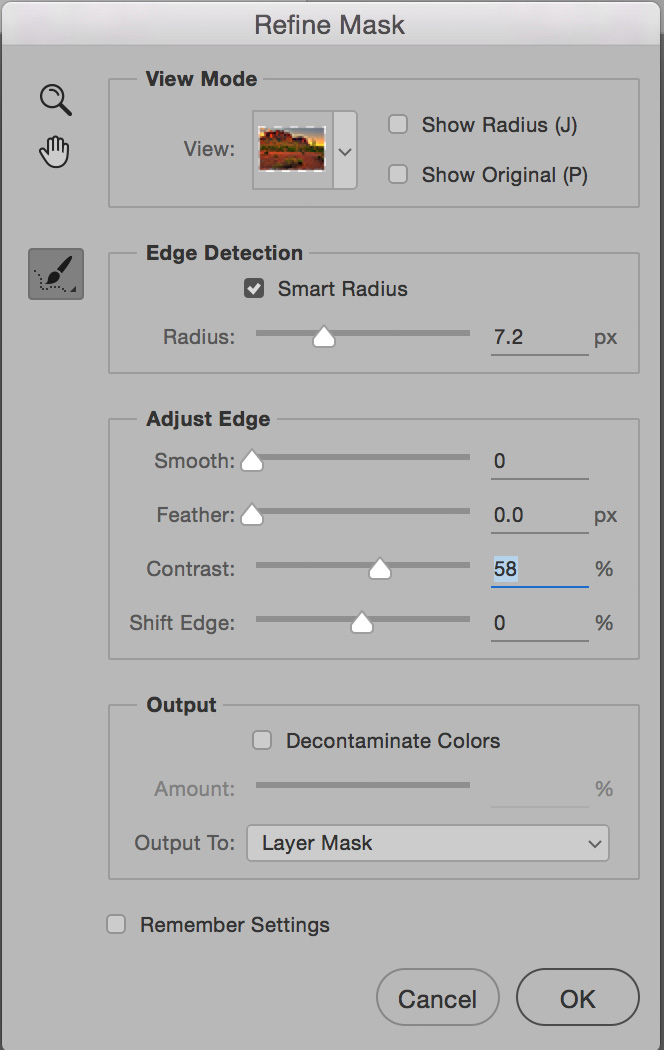
VARIATION: After the mask has been created, you have one more opportunity to edit the effect: double-click on the mask and in the Properties panel click on Refine Mask. Then you can experiment further with different settings.
In this example, I used a small radius and increased the Contrast to change the look of the edge.
Remember, once a mask has been created, it’s easy to copy it into another document and resize or tweak as you need.
Of course a key part of this ability to experiment is to work as non-destructively as possible. This means using layers, layer masks, smart filters etc. to give you as much opportunity as possible to try multiple operations, knowing that you’ll be able to go back if you’re not completely happy with the results.
Remember, by nature Photoshop works in a very linear way – you have to choose to work in a non-destructive manner to give yourself the greatest ability possible to experiment.
Dave Cross shares his favorite non-destructive Photoshop techniques – and much more – on his online training site: online.davecrossworkshops.com. He adds new content each week, often in direct response to member questions. You can also follow him on Facebook, Twitter, and YouTube.
At Photoshop World Dave will be teaching 3 classes: Photoshop Textures, Borders, Edges and More, The Power of Using Photoshop, Illustrator and InDesign Together, and Smart Objects, Layer Comps and Libraries — Oh My!



Always loved watching you teach, made a trip to Nashville years ago to a workshop!
Thanks for doing a post – heading over to play with this right now…