

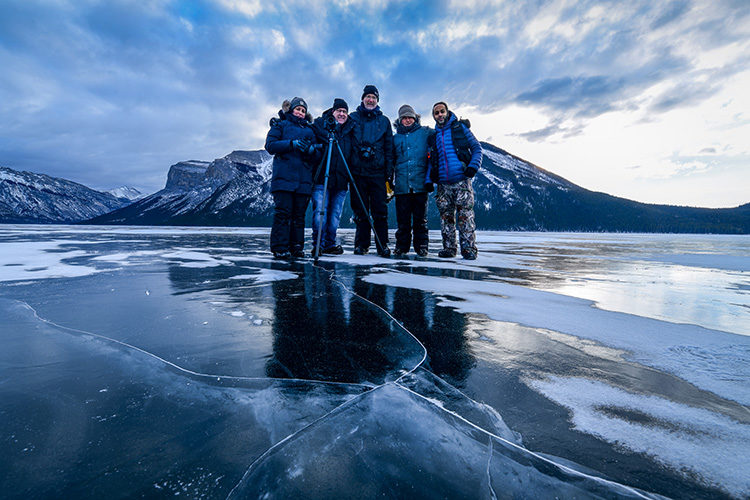
Above: That’s our awesome group of ice warriors!
Hi, everybody — I’m back from four wonderful days up in Canada at snow-covered Banff National Park with my friend and KelbyOne instructor Ramtin “Rammy” Kazemi at a workshop he was hosting, and it was just glorious! Great weather (not too cold and not windy at all); great food, met some really great folks (that’s us above after a dawn shoot), took a bunch of photos, just had a ball all the way around – and best of all — I wasn’t there working; I was just there to learn and make images. Absolutely loved it!
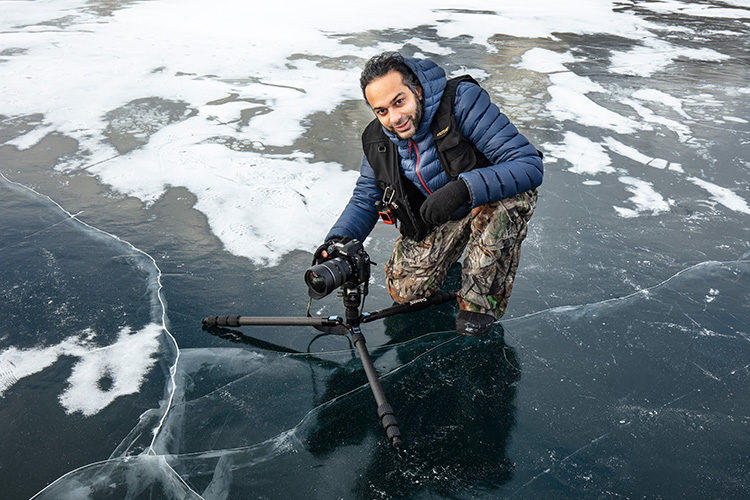
Above: That’s Rammy. On ice. Such a great trainer, and a really great guy all around. I loved his workshop and learned a lot. Here’s a link to his photography site.
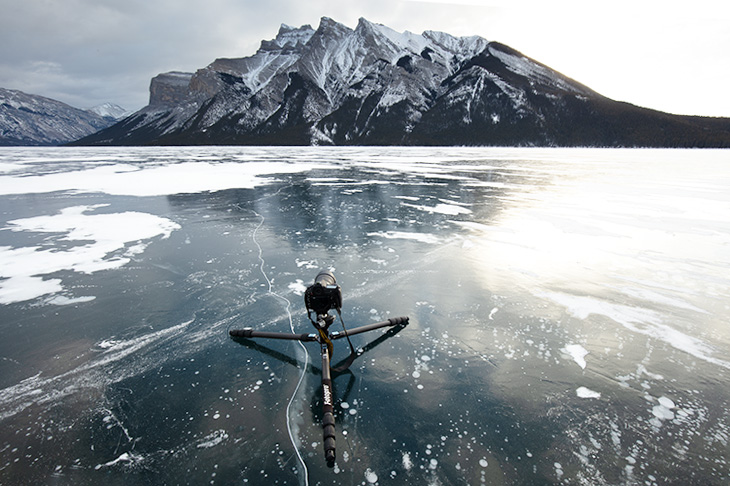
A lot of times we were down on a frozen lake, shooting from a low perspective (either splaying out our tripod legs or using Platypods), and to get everything in focus from the ice chunks down low directly in front of us to the mountains off in the distance, just using f/11 or f/16 won’t do it. Instead, to get we used a focus-stacking technique. Focus Stacking is where you focus on the object right directly in your foreground, then you move your focus point up a bit and focus on the next area back, and then move it upward to the next, and the next, and finally the mountains in the back, then in Photoshop you put them all together (actually, in many cases Photoshop will do all the work for you).
Above: Q. Scott, where’s your Platypod? A. Out on loan. I took two of them but offered them up to other students to try. Q. Hey, isn’t that a Nikon D-850? A. Yup. Q. Wait…did you switch back to Nikon? Q. Well yes, I did. Well, just for this one picture (that’s Rammy’s camera). Had ya going there for a minute, didn’t I?
If you’re a Lightroom user…
…head over to LightroomKillerTips.com for my post today which shows how to take your focus stacked images in Lightroom over to Photoshop to where you just two clicks away from a perfectly stacked image. Here’s the direct link.
For Photoshop users, here’s what you do:
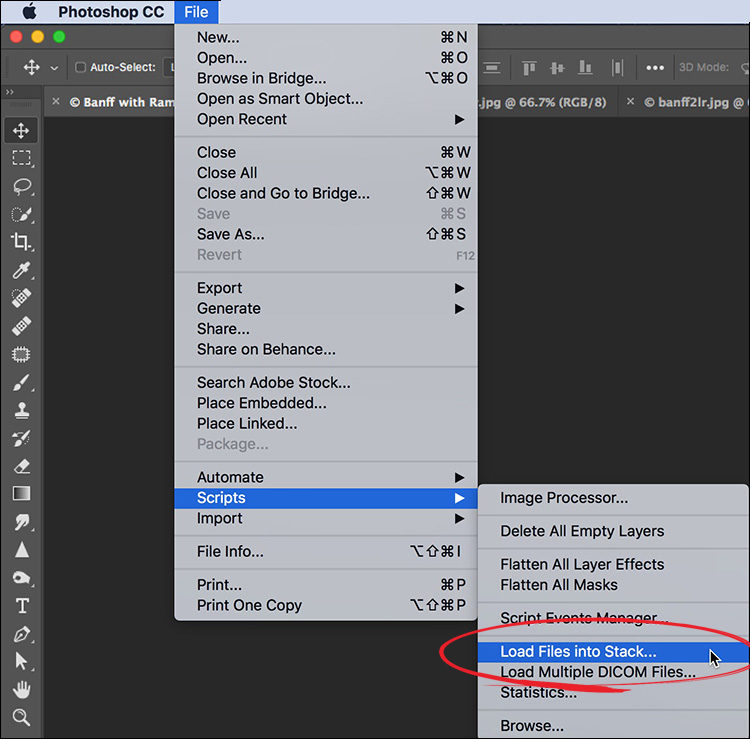
STEP ONE: If you’ve already got your focus-stacked images open in Photoshop, go under the File menu, under Scripts and choose “Load Files Into Stack” (as shown above).
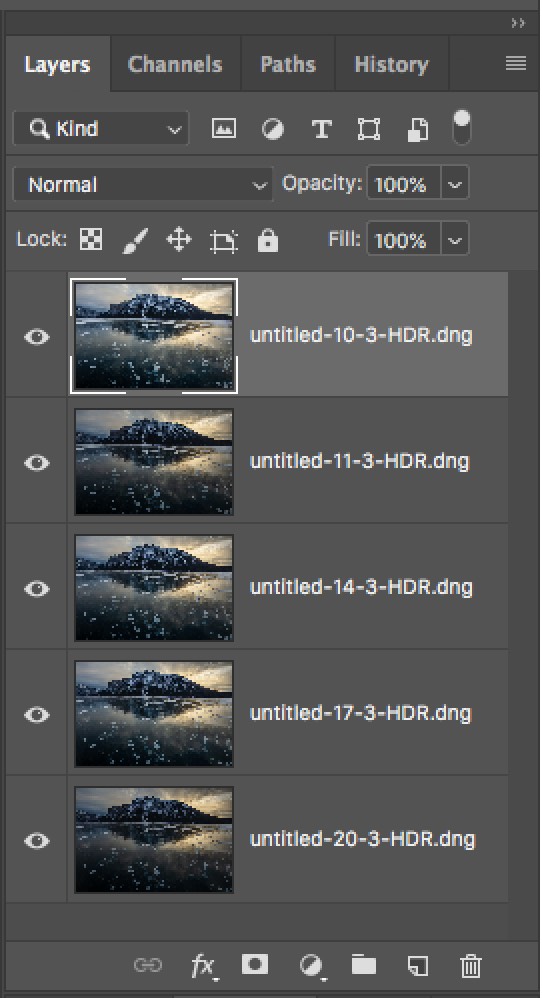
STEP TWO: Doing that takes each open image and puts it into one document with each on its own separate layer in Photoshop’s Layers panel (shown above).
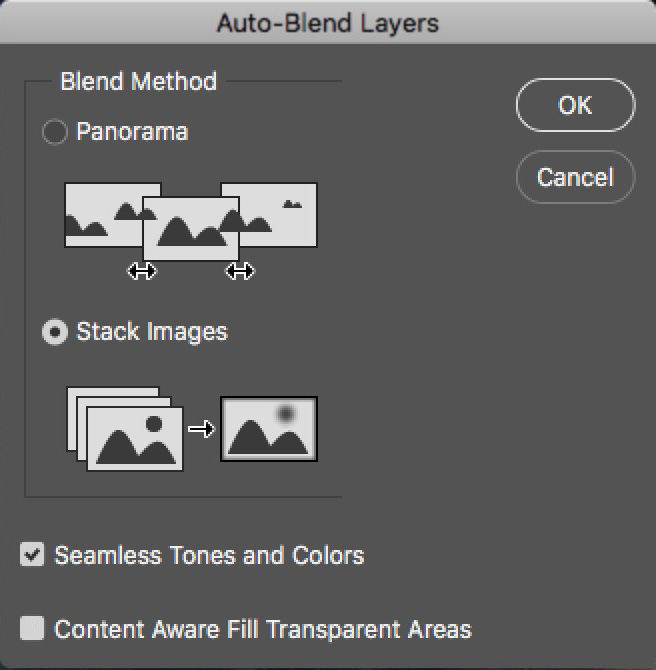
STEP THREE: In the Layers panel, select all your layers (in this case, all five images), then go under Photoshop’s Edit menu and choose “Auto-Blend Layers.” When the Auto-Blend Layers dialog appears (shown above) choose “Stack Images” and turn on the checkbox for Seamless Tones and Colors.
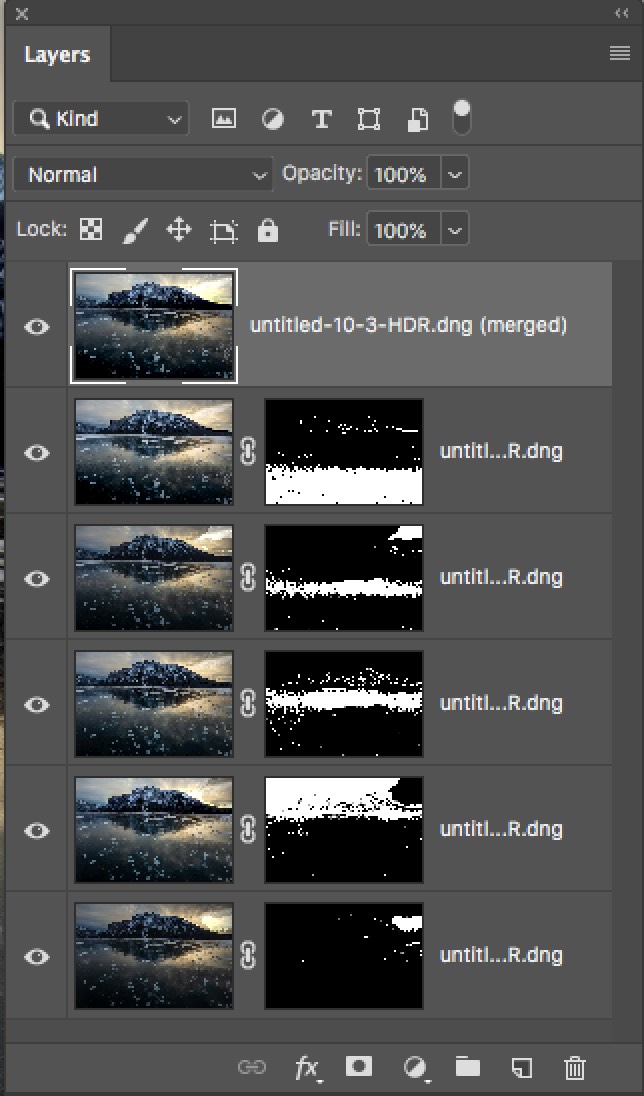
STEP FOUR: Click OK in that Auto-Blend dialog, and it analyzes the images on each layer and only leaves the sharp areas, masking away the areas that aren’t sharp with a layer mask and it creates a new merged layer at the top of the layers panel (as seen above). The layer masks are handy if the Auto-Blend didn’t do a perfect job — you already have a mask in place which you can edit.
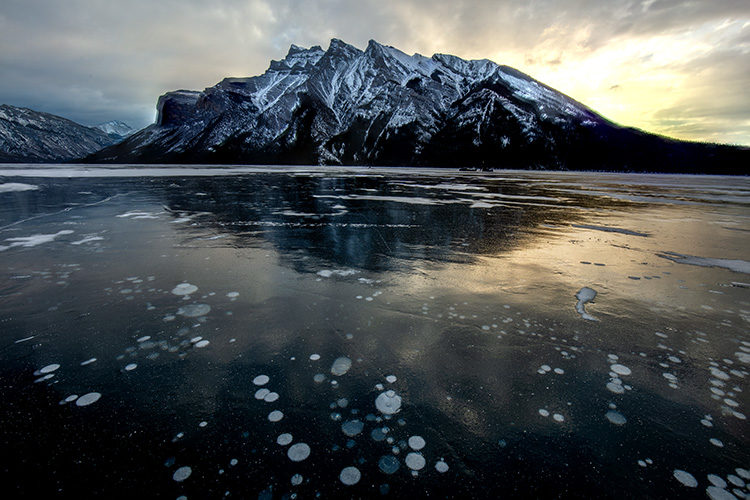
STEP FIVE: That merged layer on top has that expanded depth of field where the bubbles trapped in the ice in front are tack sharp, and so is the ice behind it, and behind that, and even the mountains in the background — all in sharp focus, and all in one image. There’s also a manual way to combine the sharp part of each image — I’ll cover that in a separate post with a video sometime soon. Again, all of this only works if you focused on different parts of your image during the shooting phase, then the rest is up to Photoshop.
Hope you found that helpful (and don’t forget to head over to LightroomKillerTips.com for the other part of this tutorial.

Win a free trip to Photoshop World 2019
Just a few days left to register — if you win we fly you to Photoshop World 2019 (your choice, Orlando in early summer or Vegas in late summer), and we pick up your hotel and meals, and you get the whole VIP experience on us. But you can’t win if you don’t enter. Go right now, enter the giveaway, and here’s hoping you win and we’ll see you at the conference. :)
Have a great week everybody!
-Scott
Hi Scott,
Hey, you pick a very Cold time to be in Canada!:-) I noticed that at each focus point you did a HDR Bracket. Can you explain why you did it that way. It would seem that the lighting would change a lot at each focus point and make it difficult to merge. Or, did you merge the HDR of each bracket first and then focus stack? As you can tell, I’m confused. :-)
Dennis
Hi, Dennis – I merged all the HDRs first, then I did the focus stacking. Of course, you don’t need to do HDR at all for focus stack8ng, but since i did, I merged them all first. ???
Hi Scott, Thanks so much for explaining that. I’ll have to give that a try. Have you warmed up yet? :-)
It seriously wasn’t too cold – no wind at all, and as high as 33-degrees under sunny skies. I really wasn’t cold at all, except for once or twice my lips were cold, so I covered ’em up and was fine. I think we were really blessed with great weather.
Hey Scott, will you be doing a webcast on this trip like you did on previous trips you’ve taken?
We only shot in a few locations before I had to leave, and I only have a handful of shots from pretty much the same five or six locations. Might be a really boring Webcast, but I’ll check with my crew and see what they think. :)
Really interesting technique. You mentioned that this technique produces an image that’s sharper than simply using f/11 or f/16 with a single frame. Question: Since you’re merging several shots together, using only part of each, what aperture did you use for each individual shot? Did you open it up to something more like f/8 to get the best out of the lens? Or were the all still taken at f/11 or f/16?
personal experience: find your sharpest point on the lens and shoot that way – as long as you have “enough” images focusing down through the image centerline, you’ll get your best results. I don’t use my nikon 24-120 at anything but 7.1-10 for this stuff for example. Just make sure you don’t move of change the f-stop.
I leave mine at f/11 generally. I don’t think you’d notice any real difference between f/8, f/10 and/or f/11.
I always do the edit | auto-align on all the layers before moving to step 2.
Seems to come out better if you have even tiny vibrational differences when shooting…
But maybe they’re incorporated that silently at some point in time and I was just locked into my process.
(I do this after I ship to PS from LR as layers too).
Lyle
That’s actually a really good suggestion, because sometimes when you change the focus point there is a tiny bit of mis-alignment in some cases. Couldn’t hurt, right?
Scott
Love my new Platypod…found the Grizzly House!
Black logo University of North Dakota T shirt headed your way…
Brad
Whoo hoo!! I Look forward to wearing it on The Grid! Hey, as luck would have it – on my way to the Calgary airport that night, we snuck into Grizzly House as well. :) Great hanging out with you – glad you’re rockin’ that Platypod! Hope our paths cross again soon, Brad. :)