OK, it was really “Fashion Shoot” Wednesday. Last Wednesday, in between my taping a “Another Day with Jay Maisel” on Tuesday in New York City, and my presentations on Thursday at the Photo Plus Expo. Since I had this day in-between, I set up a fashion shoot as one of the projects for my upcoming book, “Photoshop CS5 Professional Portrait Retouching.”
I’ve been shooting a lot of portraits for the past couple of months, because I wanted all fresh, new images for the book, and even though we have an in-house studio, I’ve always wanted to do a fashion shoot in New York, and do it right—-using a professional fashion stylist to coordinate the look, and finding really great hair and make-up artists, along with New York fashion models who would take the whole shoot up a notch.
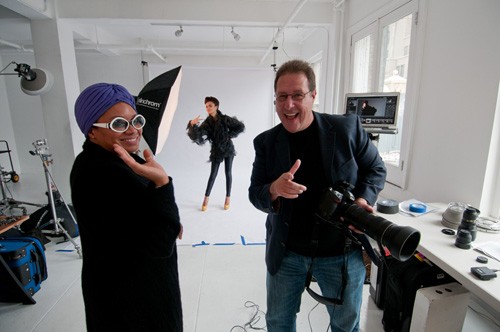
I started my search with the fashion stylist, and after looking at dozens of different NYC stylists, I fell in love with the work of Sophia Batson (link). She’s only been in New York a couple of years now, after working in London and Milan, and she was absolutely marvelous to work with and lots of fun on the set (that’s Sophia and I above, with Gemmy, one of our two models for the day mugging behind us on the set). Sophia picked out all the clothes, brought all the accessories, worked with the agency to arrange the models, and basically left me completely free to just focus on the photography. Sophia is truly awesome!!!!
We found a great rental studio called “Two Stops Brighter” (link) that was coincidentally owned by a NAPP member, and it worked out great. He had loads of stands, v-flats, fans, reflectors, so all we had to ship up there were my Elinchrom strobes and a few soft boxes.
Brad and I got to the studio 30-minutes before the call time for the models, hair, and makeup team to arrive to get things set-up, and in no time at all, we were set-up and ready to shoot. It helped that I wanted to keep the lighting very simple, and most of the day, I used just one Elinchrom BRXI studio strobe with either a 53” Midi Octa or an Elinchrom beauty dish. If we used a second light, it was either with a small softbox as a fill from below, or just to light the white seamless background, though we left it off most of the day so we’d get a light gray background instead.
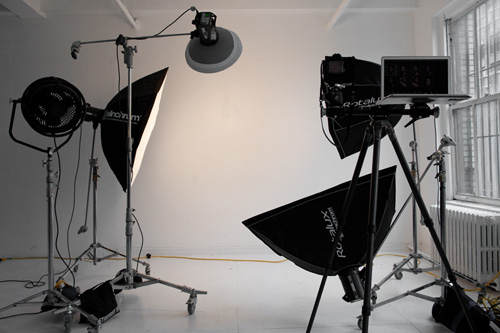
While the models were in hair and make-up, I had some time to kill, so I created a fake set-up to use as the opening slide for my presentation at the Elinchrom booth the following day. Before we set up the white seamless, I moved a bunch of lights into position on the set, leaving a big space in the middle where I wanted to add some text (as seen above). I turned on the modeling lights, then I stood back and took the shot you see above with just the ambient light in the room (I had to set the ISO to 1,600 to get a high enough shutter speed for a sharp hand-held photo. This is a daylight studio, and normally there would be a flood of light coming in, but it was a gray, overcast, rainy day outside). You can see the image, with the text added (using a simple text layout technique I taught in my class at Photoshop World on Designing with Type), by clicking here.
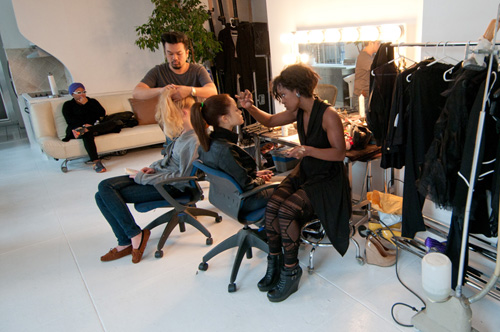
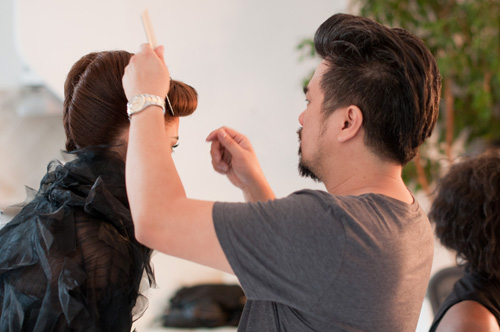
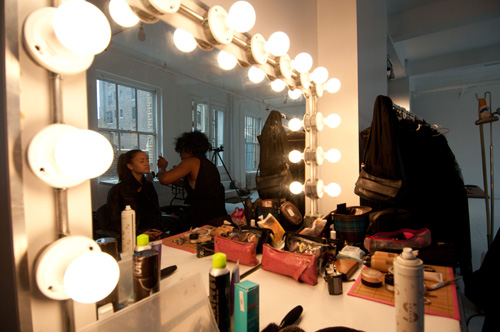
I had sent Sophia sample images of the look I wanted to achieve, and we talked quite a bit before the shoot, so once we were on the set, she took over working with the hair and make-up team (that’s our hair stylist Linh Nguyen on the left, and our Make Up Artist Cassandra Renee on the right), so all I had to worry about was the photography and the lighting. Lihn & Cassandra were incredible—both incredibly talented and very hard working and focused the whole day.
There’s a big advantage to having separate hair and make-up artists, because you can keep the shoot moving quickly all day, because while you’re shooting with one model, the other can be in either hair or make-up, so at least one model is always ready to shoot.
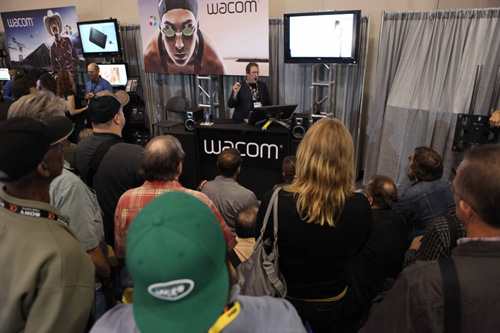
The first model out of make-up was Gemmy, who is shown at the very top of this post, and the image of her you see up there is the exact image I used in my Wacom retouching class at Photo Expo the next day (that’s me during the retouching class above, in Wacom’s booth. Photo by Adam Rohrmann).
In the class, I showed the entire retouch—starting with the raw image out of my camera, to the image you see above. It’s not the final retouch I would do (it’s hard doing a detailed retouch in front of an audience, with a tight time limit), but I still thought it would be cool to share it with you so you guys would get a chance to see what I did in that class.
There is one additional retouch I did to the image you see at the top that I didn’t do in the class, and that was remove a few stray hairs in the front that I told the class would need to be cloned out, but I didn’t want to make them sit through any more of that process than I had already made them sit though.
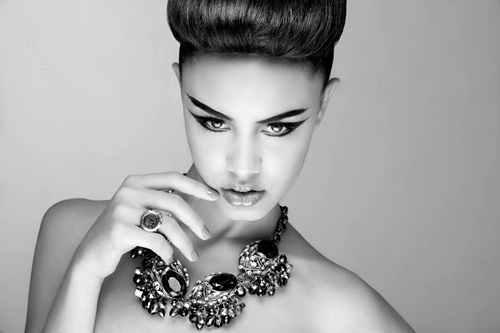
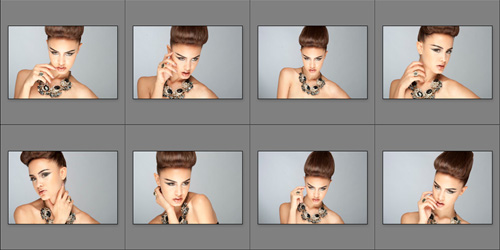
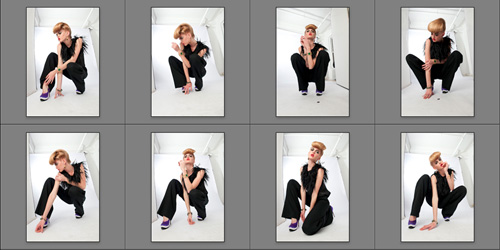
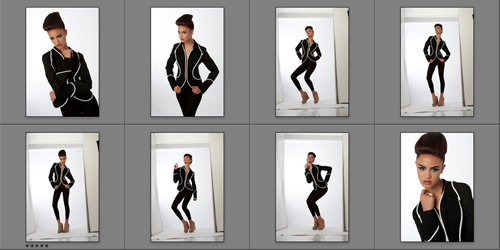
(Above: Here’s a Grid from the first shoot of the day (click on it for a larger view). These are completely unretouched photos, raw straight out of the camera—-I just made a screen capture of them in Lightroom 3). For the image at the top, I just converted it to black and white after the retouching to finish it off.
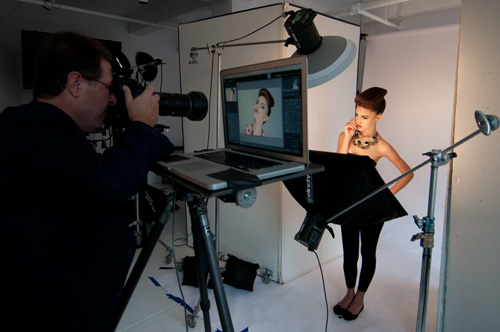
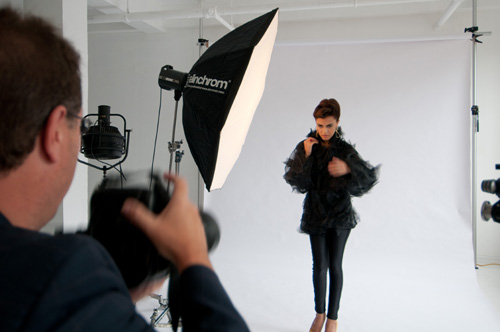
Here’s a behind the scenes production shot (photo by Brad Moore), which shows the simple lighting set-up I used. Just a beauty dish up top, and a small 24″ softbox on bottom. Both lights are inexpensive 500 watt Elinchrom BXRI’s. I’m shooting tethered directly into Lightroom 3, and I’m using a 70-200mm f/2.8 lens at f/11. The strobe on top (the one with the beauty dish attached), is powered down as low as it will go. By the way: the beauty dish attachment runs around $150. Worth every penny.
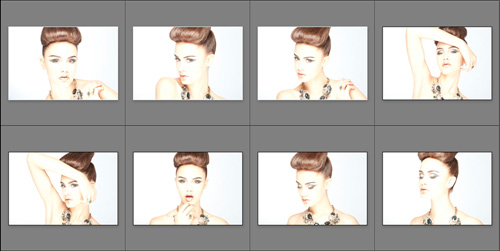
(Above: I know the totally blown-out skin look is really popular right now, so I shot one group of shots with the washed out look you see above, which I actually thinks looks pretty cool. Even cooler when you convert them to black and white, or just really desaturate them, but the ones you see here are just straight out of the camera. Afterward, I turned the power back down, and shot with a more normal exposure for the grid of images you saw earlier).
OK, onto the rest of the shoot:
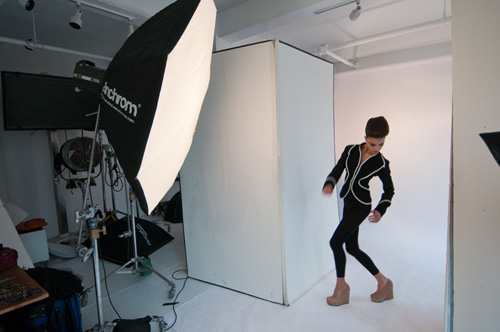
We did seven different looks during the day, and I shot three styles for each look; (1) Head Shots, (2) 3/4 and (3) Full Length. The softbox and sometimes even light-stands got in the frame (as seen above), but I knew I could easily clone them out later. I did a two-minute retouch after the production shot below to give you an idea of what they’d look like once that stuff is cloned out.
(Above): Here’s a production shot (by Brad) of the simple lighting set-up used. Just one strobe, off to the left, with a 53″ Midi Octa softbox. My camera’s in Manual Mode, f/11 at 1/125 of a second.
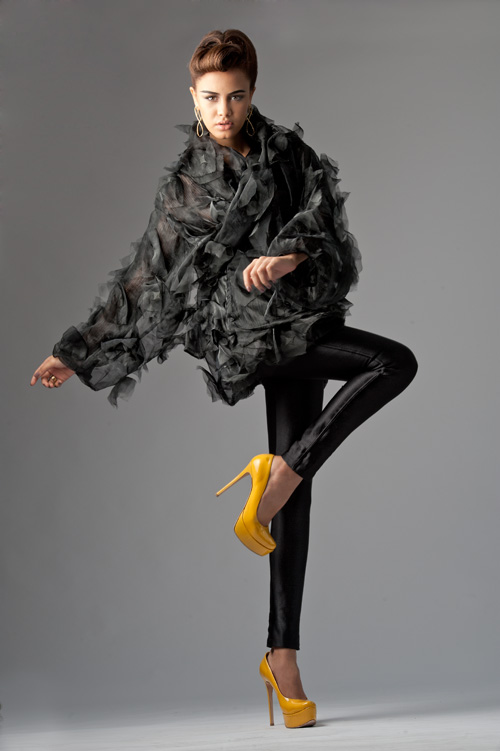
(Above: Literally a two-minute retouch just to show you what the image will look like with the softbox and light stands cloned out. It still needs a lot of work, but you get the idea. Also, to make full length shots look right, with this perspective, you literally have to get way back from your subject and lie on the floor).
(Above: Dani, our 2nd model for the day, had a totally different look. Although we had been shooting full length and 3/4, I had Brad hand me a 24-70mm f.2/8 lens, and I set it wide to 24mm and got down really low on the floor for this much different style. Although you can see the ceiling, and mounts for the seamless, and the V-flats all in the shot, I’m going to leave them in the final images).
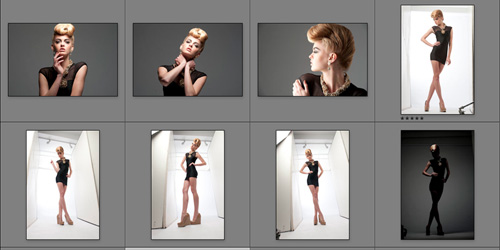
(Above: Here’s a few more shots of Dani, with me trying out different lighting and looks. First the headshots, then a full length, then some more 24mm wide angle, low angle shots, and then finally a dramatic silhouette type of shot).
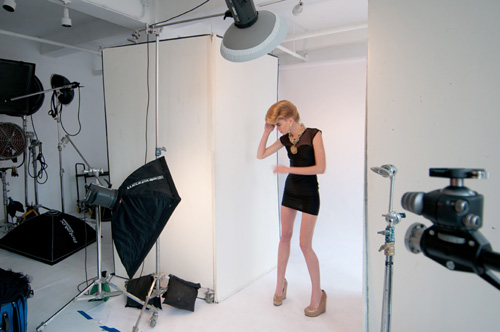
(Above: Here’s the lighting set-up. Two lights–one with a beauty dish up top, and the 2nd down lower lighting her legs for the full length shots. To get lots of balanced light, we put up two V-flats (giant 4′ x 8′ reflector boards you buy from your local sign shop) on either side of her to bounce all that light back onto her for a even distribution of light. You don’t need V-flats to do this–you could use just two really tall white reflectors.
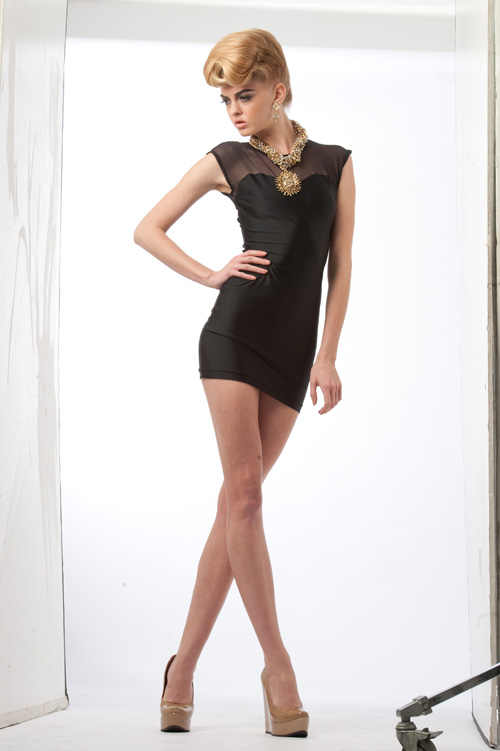
(Above: Here’s one of the totally un-retouched shots, and you can see the lighting gear and V-flats and all in the shot).
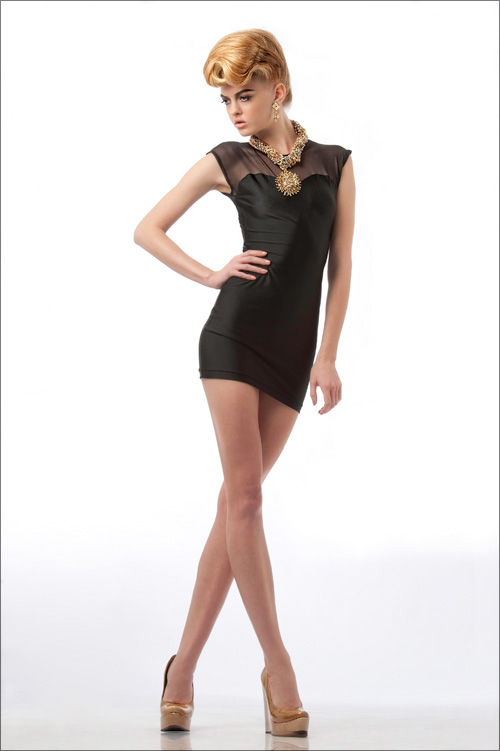
(Above: Here’s the three-minute retouch just to get rid of the lighting gear, and some minor retouching to the subject. It obviously needs a lot of work, but at least you can see what it will look like without all the lighting gear).
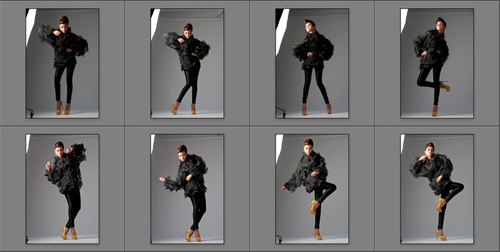
(Above: here’s another un-retouched grid, straight out of the camera).
(Above: Here’s another production shot. Photo by Brad Moore).
The whole shoot reiterated to me once again how important having a top notch team working with you is to getting these types of looks. The lighting stuff was easy. The photography was easy (Well, except having to shooting lying on the floor a lot, which I wasn’t crazy about), but it’s all the other things that come together to make the shoot.
I want to thank Sophia for all her hard work, and for putting such a great team together in Linh and Cassandra, and Gemmy and Dani, and to Brad Moore and Kathy Siler for helping me coordinate everything on pretty short notice, and thanks to you guys for letting me share the day with you here on the blog.
My Photoshop CS5 Professional Portrait Retouching book will out after the first of the year, but you can pre-order it from Amazon.com or Barnes & Noble.com, or wherever you buy your books online.
P.S. Did I mention that I shot up to South Bend, Indiana to shoot the Notre Dame vs. Tulsa game on Saturday? Check back tomorrow for some shots from the sidelines.


Scott, can’t do anything with money. :) Cool shots, I’m waiting on that Jay M Part 2! Hope it’s as good as Part 1!
Hi Ken:
It’ll be a while before Jay’s new class gets fully edited and posted (we taped for nine hours straight, and shot in everything from the back of New York cabs to New York City Public Buses). We ended with a top to bottom tour of Jays amazing 6-story studio/gallery/house. Just an incredible day. Totally different than the last class, but it was still Jay doing his thing. Once again, I learned an awful lot. He’s a brilliant artist.
-Scott
Very nice post with lots of inspiration, I love when you’re doin fashion!
Brilliant stuff – I’m just at the stage where I want to start shooting with models and MUA / stylists to build up and diversify my portfolio. It’s always great to see stuff like this for inspiration.
Cheers
Kris
Hey Scott
Seems like you had a fab time shooting the fashion shots above, which look absolutely awesome. Loving the series of shots were you’ve cloned out the softbox and light stands.
Excellent, thank you for all the detail. Not at this stage yet myself :-( but I really appreciate the time you take to explain everything.
All the best
Lynda
Scott,
While you’ve been in New York playing, I’ve been in your home town of Tampa working :). I took my own photo walk this week with my wife downtown and we had a great time. Maybe next time there will be a chance to buy you lunch.
I am also very excited about your new video with Jay. I enjoyed the first one so very much. I know this one will be stocked full of great advice.
As to your new book, I can’t wait. As primarily a portrait artist I look forward to any and all new advice and information on retouching you can give. It is always a good thing to brush up on old skills and learn some new ones. So will we see this book before Christmas?
Hi Tim:
It’ll be released after the first of the year. :)
-Scott
When I click on any image, I get : “page not found”.
Fred
Sorry Fred—we fixed it.
S.
Nice indepth post of the shoot. Thanks for sharing as always!
I hope “Two Stops Brighter” gave you a generous NAPP discount on the rental!
-Bob
Scott,
If you weren’t teaching me so darn much, I’d be envious of the life you lead. Ok, so maybe I still am envious, but at least I’m benefitting from all your experiences too. Great informative post!
Trev J.
Great post Scott. Not to nitpick, but I saw a couple typos. “To get lots of balanced light, we put up to V-flats” should be “two” and “…accept having to shooting lying on the floor” should be “except having to shoot”.
In the 5th picture from the bottom (the three minute retouch to remove lighting gear) did you add a reflection underneath her feet? It doesn’t appear as prominent in the RAW shot.
Hi Harry: Thanks for catching those—-I fixed both. Just to nitpik—Don’t start off your sentence with “Not to nitpick” and then proceed to nitpick.” ;-)
As for the fifth picture, I absolutely did add a reflection below her feet. That’s why it was a three minute retouch, rather than a two minute, forty-five second retouch. ;-)
-Scott
Awesome post Scott! I really love when you share BTS shots, it really helps to understand the process going on behind the shoots. I also like that you share unedited images of the shoot. Its really interesting to see what you go through as a photographer and editor to get your final look.
In the book will you express your opinions on ethnic skin retouching? Can’t wait for Maisel 2, 3, 4, & 5.
Another terrific post, Scott! Let’s see….sports photographer, street photographer, landscape photographer, fashion photographer….have you figured our what you want to be when you grow up? :D Thanks for sharing!
–John
An Astronaut. ;-)
Scott,
For lying down on hard cement shots, I bought an inexpensive auto mechanic creeper. I flop my belly on it and wheel myself around like a crab. Mine has an “adjustable” headrest that I can use to steady the camera. Works great, keeps me off the cold floor, and is very mobile. I think I paid less than $25 for it, new.
Hi Steve:
Great idea—–I also have to tell Larry Becker about this one! :)
And, then there’s the ground pod I made as an homage to Dean Collins — which also helps on belly shots.
I write it up in the Nov/Dec 2008 edition of my newsletter which can be found on my web site.
Not as mobile, but rock solid steady and it lets us let go of the camera without putting it on the ground.
It also lets us get off the ground while leaving the camera down low and sets it up for remote triggering — I like to use DSLR Remote Pro and run the camera in the Live View mode. That way I can make better eye contact and communicate with the model.
It’s made with a piece of plywood and an old tripod head.
Hey Scott great post…I can’t wait to get that book, I just bought the CS5 book, really good book thanks for doing this, and waiting for the J -M part 2.
what is that tripod or whatever it is that you can have your laptop and camera in tripod to shoot tethered? I want to get one, please where I can get it…Thanks
Thanks so much Scott! Great insights! Beautiful work!
Your one of the only out there who gives every little details we are asking for in our heads when we read these posts! Keep them coming and I’ll read them from A-Z at least twice!
Hey Scott
Thank you for sharing this wonderful session and showing us behind the scenes. Love the sharpness and contrast of the Black’n’white portrait!
Keep up the good work sir :)
Yours Sincerely
Kim Brockie
Retouch Artist
http://www.mrKSB.com
Hi Kim:
I just checked out your site. Awesome work!!!! You’ve got some mad Photoshop skills. Really great stuff–thanks for sharing, and keep up the good work! :-)
-Scott
Hi again Scott
I’m so honored to receive such a big compliment from a great artist as you. It’s really mind boggling :D
I’ve been a fan of your work for years, own a collection of your books, have been following PhotoshopTV since the start and not to forget, I’m a member of NAPP and a Photoshop User subscriber.
If you’re interested in seeing more of my work on mrKSB.com, I will gladly send you a login to my access restricted galleries. :)
Take care and thank you once again
Yours Sincerely
Kim Brockie
Retouch Artist
http://www.mrKSB.com
Gotta love having a good team of stylists. Nothing makes a project come together like a good team behind you. Nice work as usual Scott!
Hi from Germany,
following your blog for some time, I think this is one of the best posts you did.
This is the kind of post people like me can benefit from.
Thank you!
CU
Mathias
visit me on http://www.fotodesign-stein.de and http://fotodesign-stein.blogspot.com
P.S.: may I put a link to your blog on my site?
Gorgeous work Scott!
If I had known you were in South Bend, I would have stopped by to say howdy.
I only live a few minutes from Notre Dame.
Hi David:
Wish I’d known—would have loved to have grabbed lunch with you. :)
I’ll keep it in mind next time. :0
-Scott
Scott, your versatility appears to have no bounds. A terrrific post full of interest and striking images. Well done, indeed!
Balliolman :)
England.
Scott, your versatility seems to have no bounds. Your post is packed full of interest and striking images. Well done, indeed!
Balliolman :)
England.
Scott, besides a really kick butt post, you always have really sturdy, versatile stands. Can you do a post on them or post a link for them?…
Sure, why not?
-Scott
Yes, please. I am particularly interested in the boom arm which is holding the light but doesn’t seem to require a bag of sand hanging off the other end.
Absolutely stunning shots Scott; that first B&W image is killer!!!
The combination of light on the models face and the eye makeup works so well!
Re the new book, pre order placed with Amazon UK and for a darned good price too so can’t wait for that one to arrive in the new year.
All the best to you mate and keep this stuff coming…very motivational indeed.
Cheers,
Glyn
Hey Scott,
Thanks for a very informative post regarding the fashion shoot – it looked like it was a lot of fun! You mentioned quite a bit about Sophia, the models, etc and their roles, but I have a question about more of the business side of the shoot… I am wondering mostly about the “who pays for what (or who)” where it comes to doing a shoot such as this. It would seem that if you had a hair and makeup artist, as well as a fashion stylist there all day, plus the use of the space & equipment, it has the potential to get pretty expensive pretty quickly. In a future post, would you mind going into a bit more detail regarding these types of details (in addition to the photography), if at all possible? (If it’s not possible, I’ll just continue to enjoy the photography information that you share with each post, and be happy. :) )
As always, thanks so much for sharing all the knowledge, information and experience that you do – it’s really great, and so very helpful! I’m hoping to make it out to Photoshop World next year, too. :)
Best,
Jason
Hi Jason:
That’s easy. Unless a client has hired you to create the shot for them, you pay for everything! :-)
Hope that helps.
-Scott
Hey Scott-
Hehehe, roger that, and thanks for the reply! :)
Best,
Jason
The last photo of the model (third up from bottom) – is she doing the PeeWee Tequila dance ? ;o)
Brilliant post, I remember you talking about this inLondon, good to see it come to fruition.
I’m learning more and more about photography all the time …. and that is – leave it to the professionals and stick to the day job Dave !!
Chappy! :-)
-S
This was a great shoot Scott. Thanks for breaking it down for us. Just got back from a day in class with McNally in ATL. You guys gotta stop! Between the two of you, my book and gear list is growing exponentially! I expect my wife will be divorcing me soon. :-)
Seriously, it was very informative and Joe is a class act. Who knew he had such a mean jump shot? And as always, the NAPP folks rocked it. Even picked up your CS5 book. Thanks for helping make these tours happen that make eve shaped apes like me better photographers . Now write me a note for my wife!
Dear Mrs. Rivero:
Please consider this note official permission for Omar to buy any lighting gear he saw at Joe McNally’s workshop today.
Best regards,
-Scott Kelby
Executive Vice President in charge of expensive stuff we don’t actually need
Ha! It almost worked! She was highly amused by the note. Sadly, my request for funding was denied. But you’re a gentleman and a scholar for trying. :-)
Looks like fun, every budding photographer’s dream (well except maybe a Playboy shoot). One question? Is that a 17″ or a 27″ Elinchrom dish?
Thanks,
Gregg
Hi Scott,
Just received my 20×30 from Mpix. Beautiful. I gave you all the royal treatment as far as kudos to your receptionist so I hope they past on the word. I teach a photo class on Tuesday nights and I give Mpix and yourself plenty of free publicity. Of course, I live here in Southern Utah (St. George) and I know you’ve spent plenty of time here in this part of the woods. By the way, I encourage all my students to purchase Vol. 1-2-3 of your digital photo books. They’re absolutely wonderful. By the way, were you in Zion National Park this past weekend? I thought I saw a shiny sportscar with the “photoshop” license plate going through the canyon. If it was, I feel bad I didn’t pull you over just to say hello. Anyway, keep up the great publications as I also just purchased Lightroom 3 just last weekend.
Take care my friend,
Rex Winterton
Pine Valley, Utah
This was fascinating. I learn so much from you. I always click away thankful. Very, very thankful : )
Excellent work, I have a newbie question, as it is called the material you use for the background in your photos and where I can get
Thanks
Hi Randy:
It’s called “Seamless” paper and they sell it by the roll. It comes in most every color, and usually in around 5′ and 9′ and 12′ widths.
Go to B&H and search for seamless paper. It’s less expensive than you’d think.
-Scott
Wonderful photos and peek into the fashion photography world. Looking forward to the new book.
No pix of you on the floor, though. Phooey! ;-D
Apple ~
Love it Scott, great work!
Really nice shoot! I didn’t know that you had another book in the works, can’t wait to read it!
Now that would have been a very good Kelby Training Class.
Cool. Liked seeing the before and after shots. Hey, how was the reflection added to the full-length white seamless shot? Could anybody let me know, or point me to a web tutorial? Apologies for my lack of Photoshop skills.
Kev
I’ll quote the method in Scott’s Digital Photography Book (3rd vol).:
– Make a selection of the reflection you want (in this case the feet);
– Create a new layer using the selection by pressing Command-J (Ctrl-J);
– Edit > Transform > Flip Vertical;
– Press and hold the Shift key and drag the reflection layer down until the bottom of the reflection touches the bottom of the shoes (Shift key allows to drag straight along the Vertical or Horizontal axis);
– Adjust opacity at 20%.
You can also use a mask and gradient on the reflection to fade out the reflection (just google “reflection” and “photoshop”).
Looking forward to getting the book (:
Hi Scott,
Great post!!!
Just out of curiosity how thick are your v-flats?
I picked up four sheets of coroplast from my sign shop & the only thickness that they had was 4mil. After taping them together & attempting to stand them up they just flop over because they are so thin.
Any advice?
Thanks,
James
Hi Scott,
Looks like you are using a 70-200, but what is the hood, thought the new 70-200 VRII still uses the scalloped hood like the original 70-200. Also saw McNally using the same lens/hood on his Quadra video.
Thanks,
Carter
Super article