Ready to go all “old school” with some quick Photoshop tricks that have been around since before the butter churn, but are packed with wholesome goodness and seven essential vitamins? Here ya go:
![]()
Old School: Creating a Soft Spotlight “Behind” Your Subject
If you didn’t put a soft spotlight back behind your subject when you took the shot, this will do in a pinch.

STEP ONE: Open the image you forgot to add a soft spotlight behind.
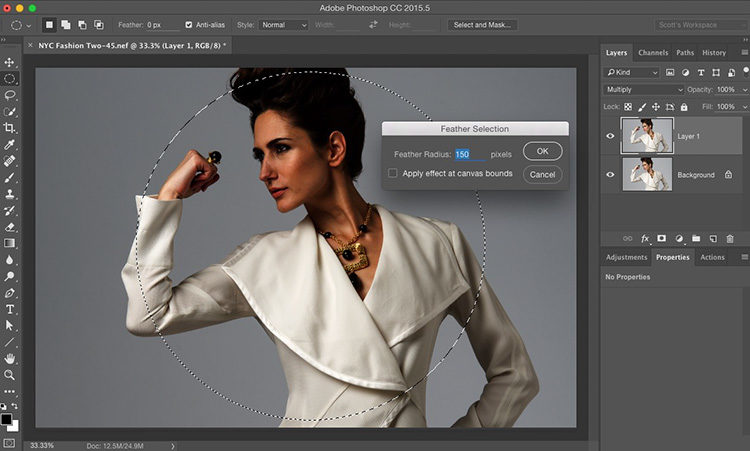
STEP TWO: Duplicate the Background layer and change the layer blend mode to Multiply to darken the entire image (as seen above). Now, get the Elliptical Marquee tool; hold the Shift key, and drag out a large circular selection like the one you see here. Once it’s in place, go under the Select menu, under Modify and choose Feather. Enter 250 pixels for your Feather amount (to greatly soften the edges of your circular selection), and click OK.
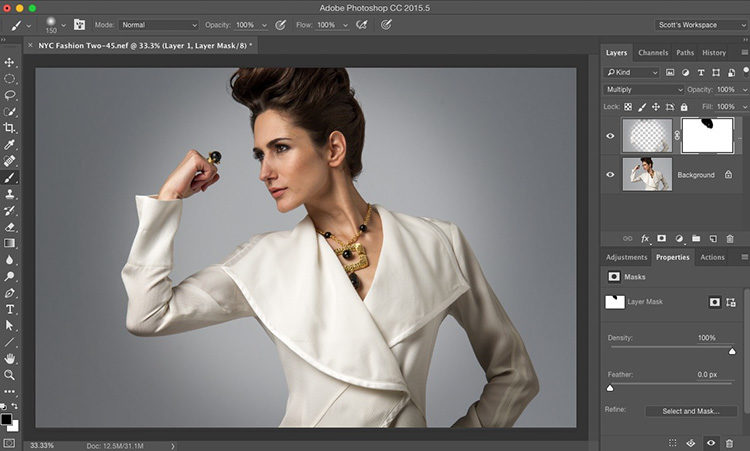
STEP THREE: Now just hit Delete (PC: Backspace) to knock a hole out of that top layer, which gives you a soft spotlight effect behind your subject, as seen above. Two more things: (1) If you want a more defined spot light effect, use less than the 150 pixel feather (maybe 100 or 75), and (2) Because her hair is so tall in this image, I had to add a layer mask to brush away the darkening that went over her hair, but chances are you won’t even have to mess with this.
![]()
Old School Beam of Natural Light
This creates…umm…a beam of natural light coming from a window that isn’t there.
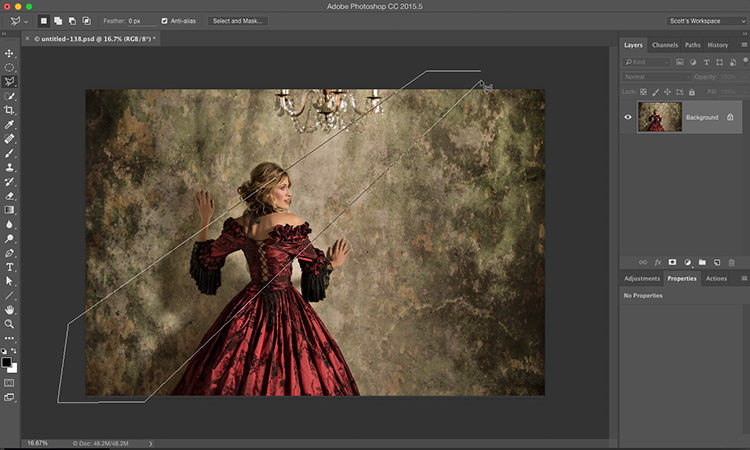
STEP ONE: Get the Polygonal Lasso Tool (It’s kind of like a connect-the-dots selection tool), and draw out a selection in the shape of the beam of light you want (as seen above, where the beam is smaller at the top of the frame and grows larger toward to the diagonal bottom).
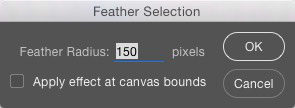
STEP TWO: To soften the edges of the selection, go under the Select menu; under Modify, and choose Feather. Enter 150 pixels and click OK.
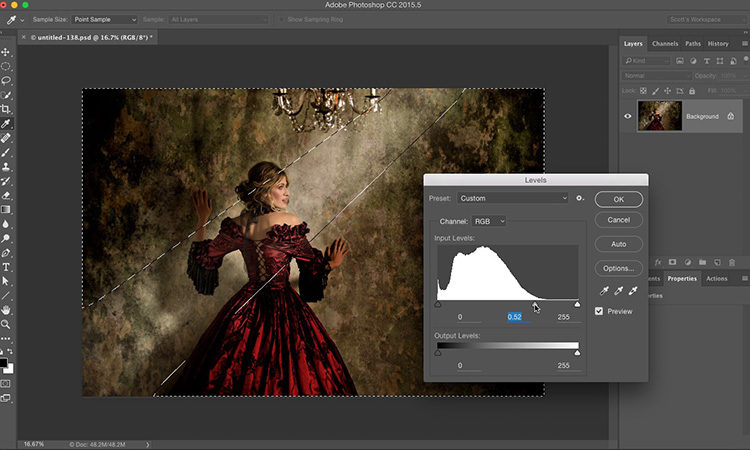
STEP THREE: Press Shift-Command-I (PC: Shift-Ctrl-I) to Invert your selection (so everything outside the beam is selected), then press Command-L (PC: Ctrl-L) to bring up Levels. Drag the center Midtone slider to the right (as shown here) to darken the area outside the beam. Click OK.
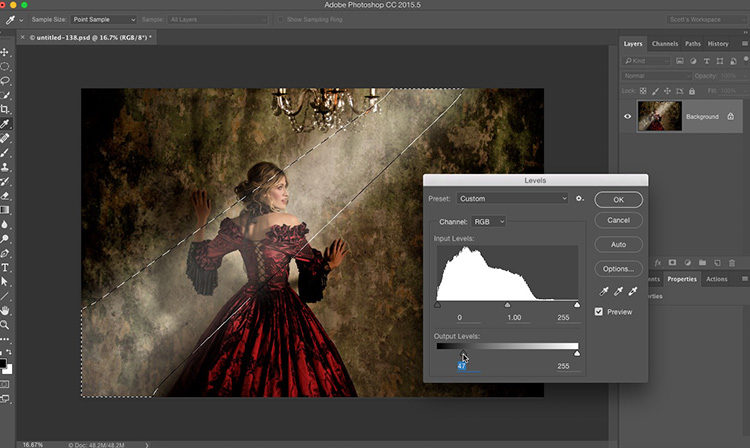
STEP FOUR: Press Shift-Command-I (PC: Shift-Ctrl-I) to Invert your selection again (so the inside of the beam is selected), then press Command-L (PC: Ctrl-L) to bring up Levels. Drag the bottom left Output Levels slider to the right (as shown here) to brighten the soft beam. Click OK.
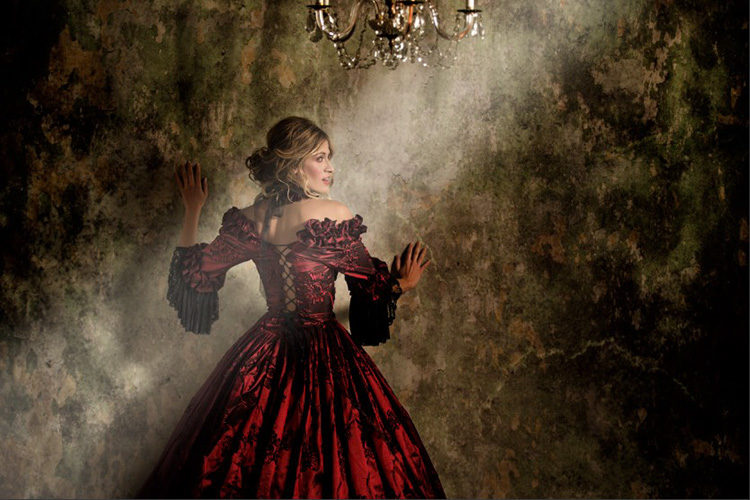
STEP FIVE: Deselect to complete the effect.
![]()
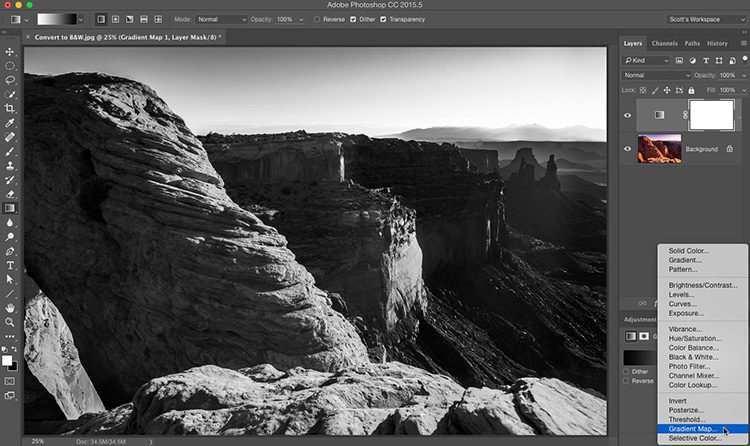
Better Old School Black and White
Instead of just choosing “Grayscale” from the Image menu, under Mode, or even using the Black & White Adjustment layer, try this: Make sure you foreground color is set to its default of white and black, and then choose “Gradient Map” from the Adjustment Layer pop-up menu. Boom. Done.
Ain’t no school…like the old school! Hope you found that helpful. :)
Want a Simple, yet effective Lightroom Retouching Eyes tip?
Check out my “Retouching Eyes” tip today over at LightroomKillerTips.com (inspired by a tip Kristi Sherk shared on this week’s episode of The Grid where we were doing blind photo critiques of retouching).
I’m shooting the Bucs/Raiders game this week (thank Goodness the Bucs are finally off the road). Hope you have a fantastic weekend! :)
Best,
-Scott
P.S. The next stops for my seminar are in Denver and Las Vegas next month. Hope I’ll see you there.


