

It’s a great day for some ACR tips — let’s go!
(1) Putting a Black Frame around your image preview
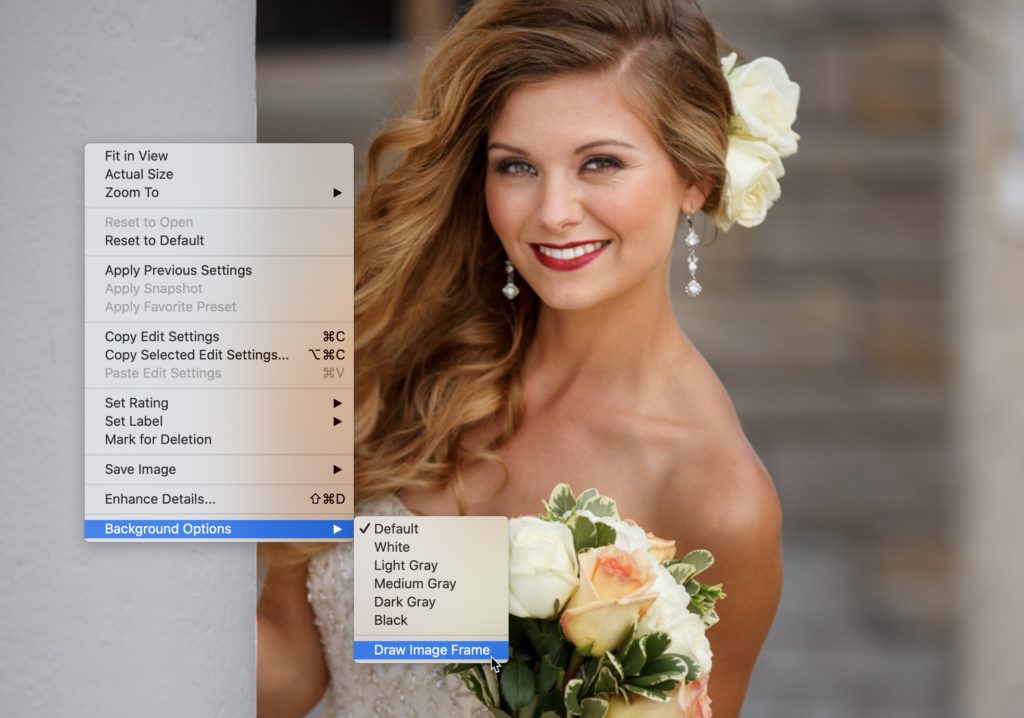
This is one of those features that Adobe kind of snuck into Camera Raw while nobody was looking, but you can choose to have a thin black stroke around your image, or not. You choose it by right-clicking on your image and from the pop-up menu that appears, under ‘Background Options’ choose Draw Image Frame (as shown here) to add that black stroke, or uncheck to see your image from now on without it.
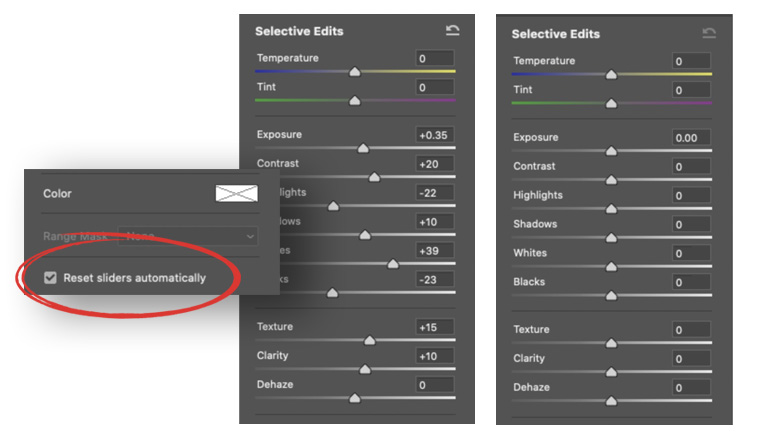
(2) Automatically Resetting the Adjustment Brush Sliders
If you use the Adjustment Brush and you move a lot of sliders (which we tend to do) you can have Camera Raw automatically reset all those sliders when you’re done, so the next time you come you back here, all the sliders are set back to zero. All you have to do is turn this feature on: At the bottom of the Adjustment Brush panel you’ll see a checkbox for ‘Reset sliders automatically.” That’s the one, and now when your sliders are all over the place (like you see below center), and you come back to the Adjustment Brush, they’ll all be reset to zero (like you see below right).
(3) Easy way to brighten your subject’s skin
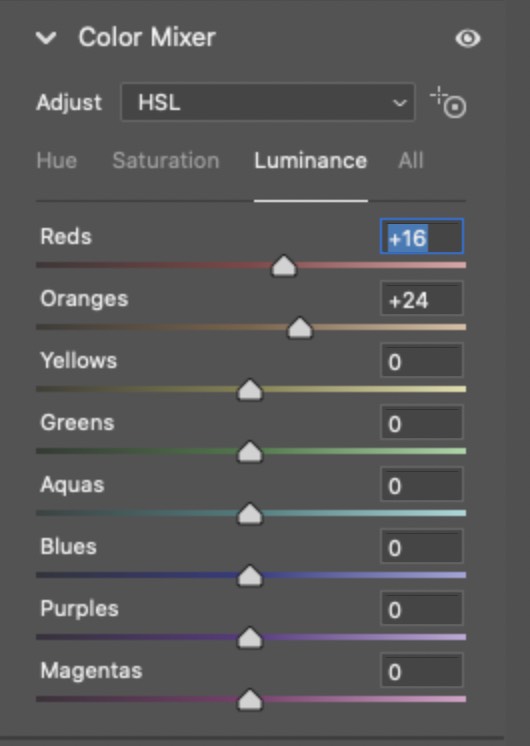
Just head over to the Color Mixer panel; click on the Luminance tab up top, and then drag the Red and Orange sliders to the right to brighten your subject’s skin. Works like a charm.
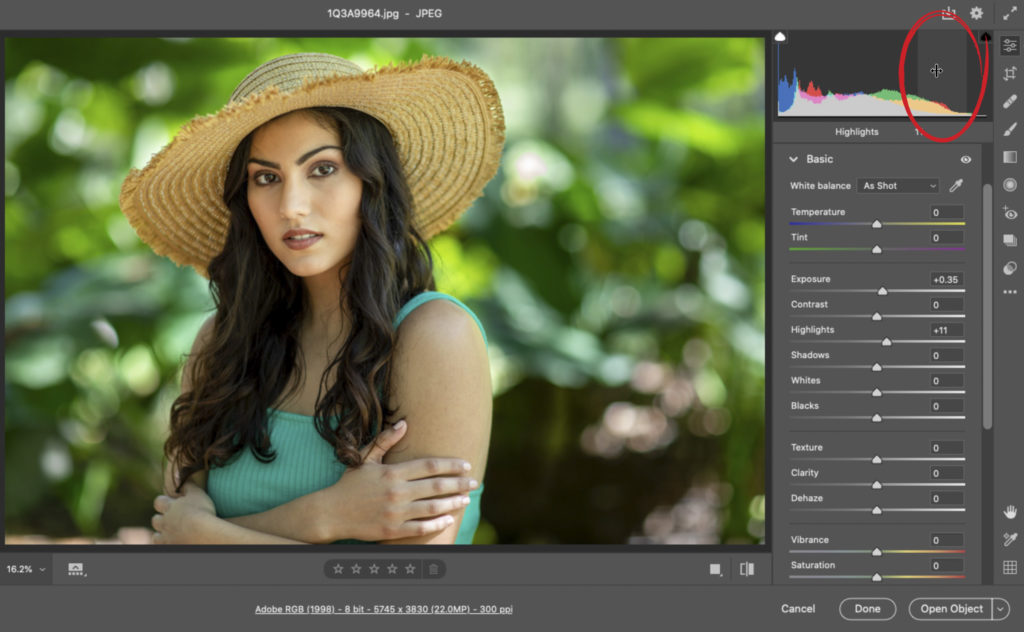
(4) Adjusting Your Histogram
If you know what part of the Histogram you want to adjust, but you’re not sure which slider affects that part of the Histogram, you can click and drag directly within the Histogram itself — right on the area of the Histogram you want to affect, and drag it left or right. Doing this will automatically move the proper slider which controls that part of the Histogram.
(5) How to save your own custom default settings for the Adjustment Brush
To set your own custom settings for brush Size, Feather, and Flow, open an image; set the sliders where you want them to be as your new defaults, and then instead of opening the image, just click the ‘Done’ button. Now, those settings are your new defaults, and when you open other images, those custom settings will already be in place.
(6) Got too many presets? Here’s how to manage your collection

Go to the Presets panel and right-click inside the panel, and from the pop-up menu that appears, choose Manage Presets (as shown above).
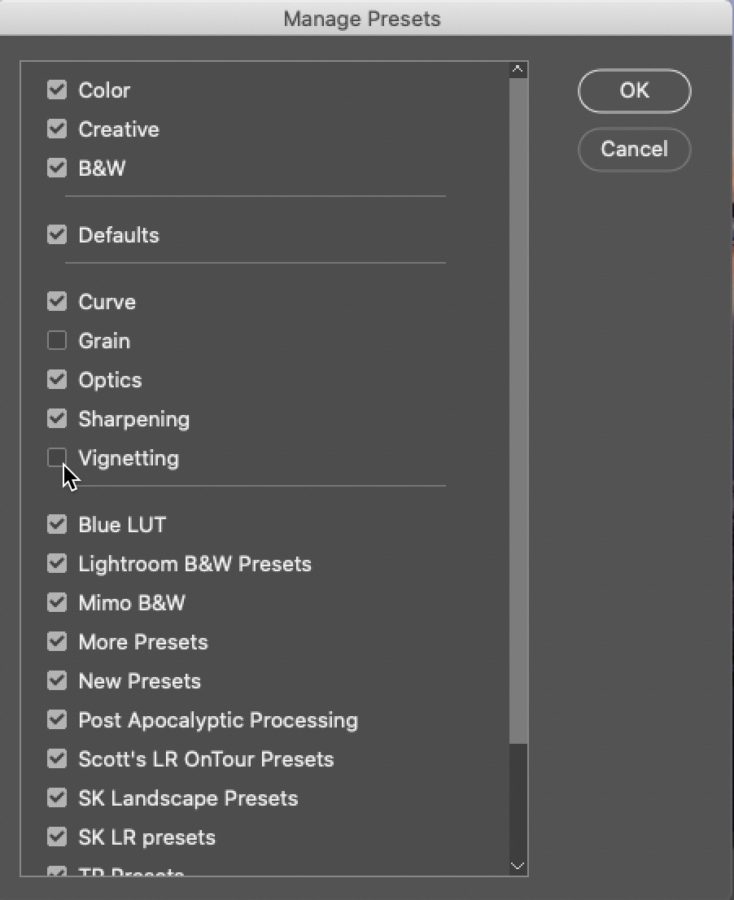
When the Manage Presets dialog appears (above), you can turn off any collection of presets you don’t often use, and they will be hidden from view. It doesn’t delete ‘em, it just hides them from view.
(7) Change The Background Color Outside Your Image
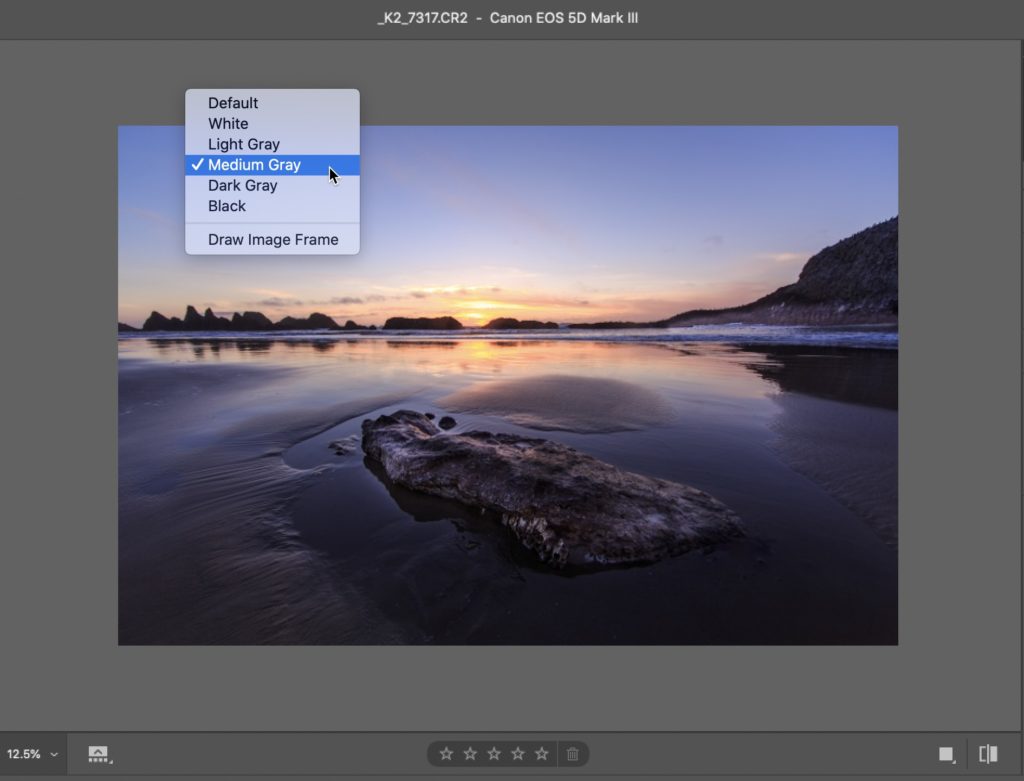
Here’s one to try — zoom out until you see the gray areas around your photo then right-click anywhere within that gray area and from the pop-up menu that appears, choose whichever shade of gray you’d like (the Medium gray you see here is much lighter than the gray default background).
(8) Only See The Before/After View You Want
If you want to see a side-by-side before/after of you edits, you can press the letter “Q” on your keyboard, but each time you click Q it toggles through another different before/after view, including split screen, top/bottom, etc. (there’s four in all). Personally, I only want the side-by-side before/after and I don’t use any of the rest, but luckily you can turn off the ones you don’t use, so you wont’ have to toggle them any longer to get back to the regular view. Here’s how.
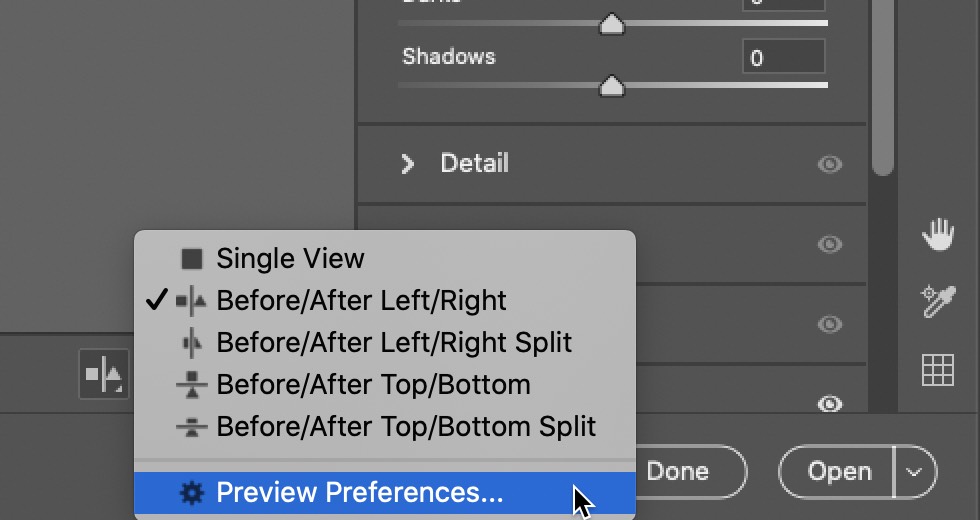
Press “Q” to enter before/after view, and then click and hold on the icon on the left (its icon looks like a square on one side, then a vertical line, and then a triangle). This brings up the pop-up menu you see above. Click on Preview Preferences (as shown above).
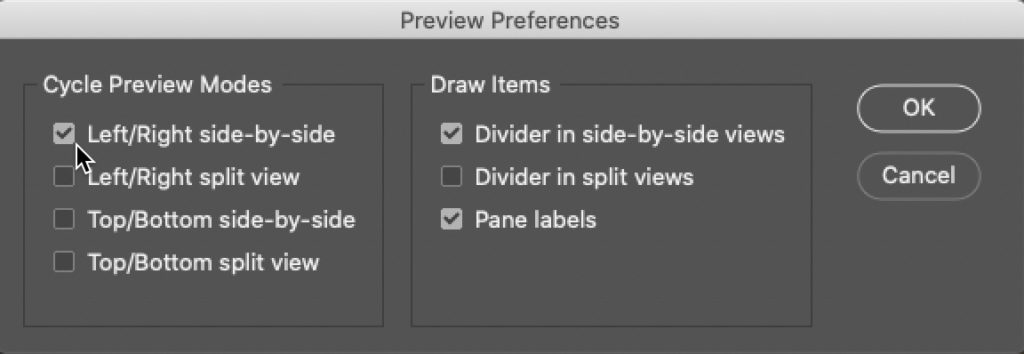
Now, where it says ‘Cycle Preview Modes’ on the left side, uncheck any views you don’t want to see, and then click OK. For the one I set up above, now I’ll only see a side-by-side before and after when I press Q. When it press it again, it turns to Single View (the normal view).
(9) When to turn off the Adjustment Brush’s Auto Mask feature
When you’re painting with the Auto Mask checkbox turned on, you’ve probably noticed that the brush moves slower, and that’s because Auto Mask is trying to determine if there are any edges underneath where you’re painting (so it doesn’t stay off target). However, when you’re painting over something like a large sky, it keeps slowing down for clouds and stuff you probably want to paint over, so anything you’re painting over a large area, I’d turn the Auto Mask checkbox off until I get near the edges of important areas; then I turn it off to do the detail work. Think of it like painting a wall in your house with a roller, but then switching to a detail brush for the trim.
(10) Things running a bit show? Try turning this off!

If you’ve made some adjustments to your image, and then decide you want to “Start Over” from scratch; if you hold the Option key (Alt-key on PC), it changes each panel’s name to “Reset” (so the Basic panel would become “Reset Basic” and clicking on that resets that one panel. Well, what if you’ve changes edits in lots of panels Then instead, to get back to the way your image looked when you first opened it in Camera Raw, click and hold on the three dots at the bottom of the toolbar along the right side and from the pop-up menu that appears choose “Reset to Default” as shown above.
Hope you found those helpful.
Just 18-Days ‘Till “The Flash Photography Conference”

It’s two-tracks (one for flash beginners that I’m teaching and one for intermediate to pro level photographers featuring the King of Flash, the one and only Joe McNally), two days, and it’s live online. It’s going to be epic and you don’t want to miss it. Coming November 17-18, 2020. Tickets and details here.
Have a safe, happy, fun weekend everybody!
-Scott
