


Hey guys. Nick Fancher here. I wrote a couple of guest posts in 2015 after publishing Studio Anywhere and Studio Anywhere 2. I am wrapping up a new book of color techniques called Chroma, which will be released on Rocky Nook in July. I thought it would be appropriate to update some of the processes that I explained in my previous posts.
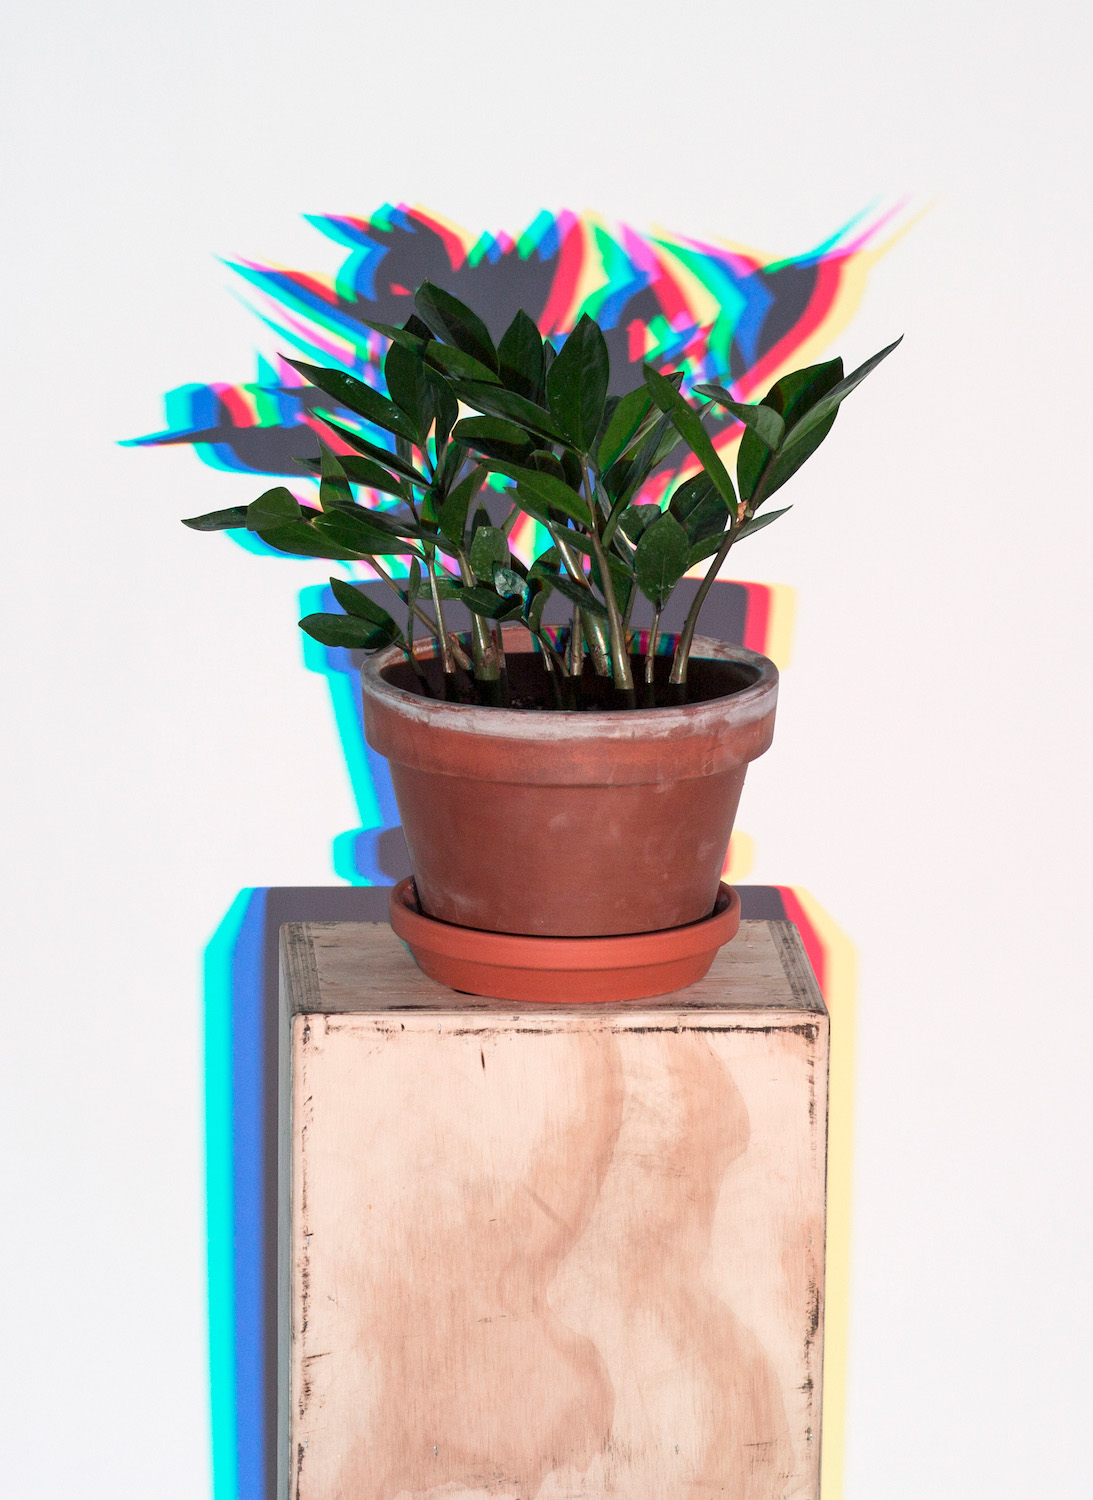
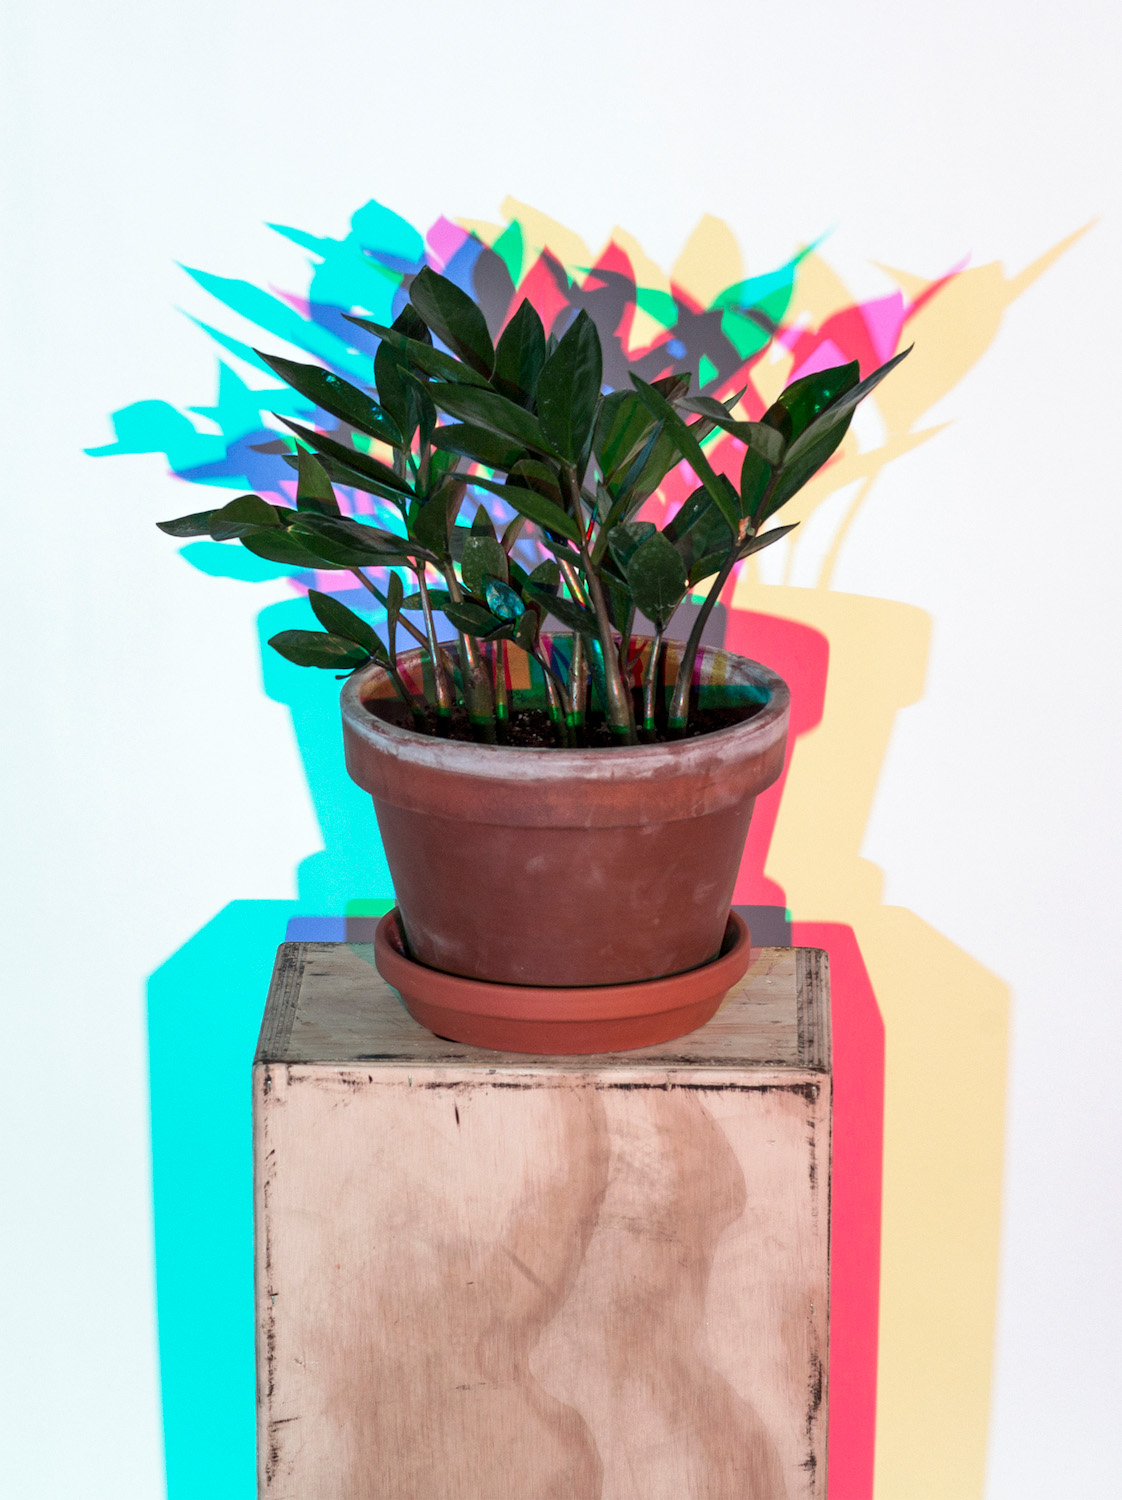
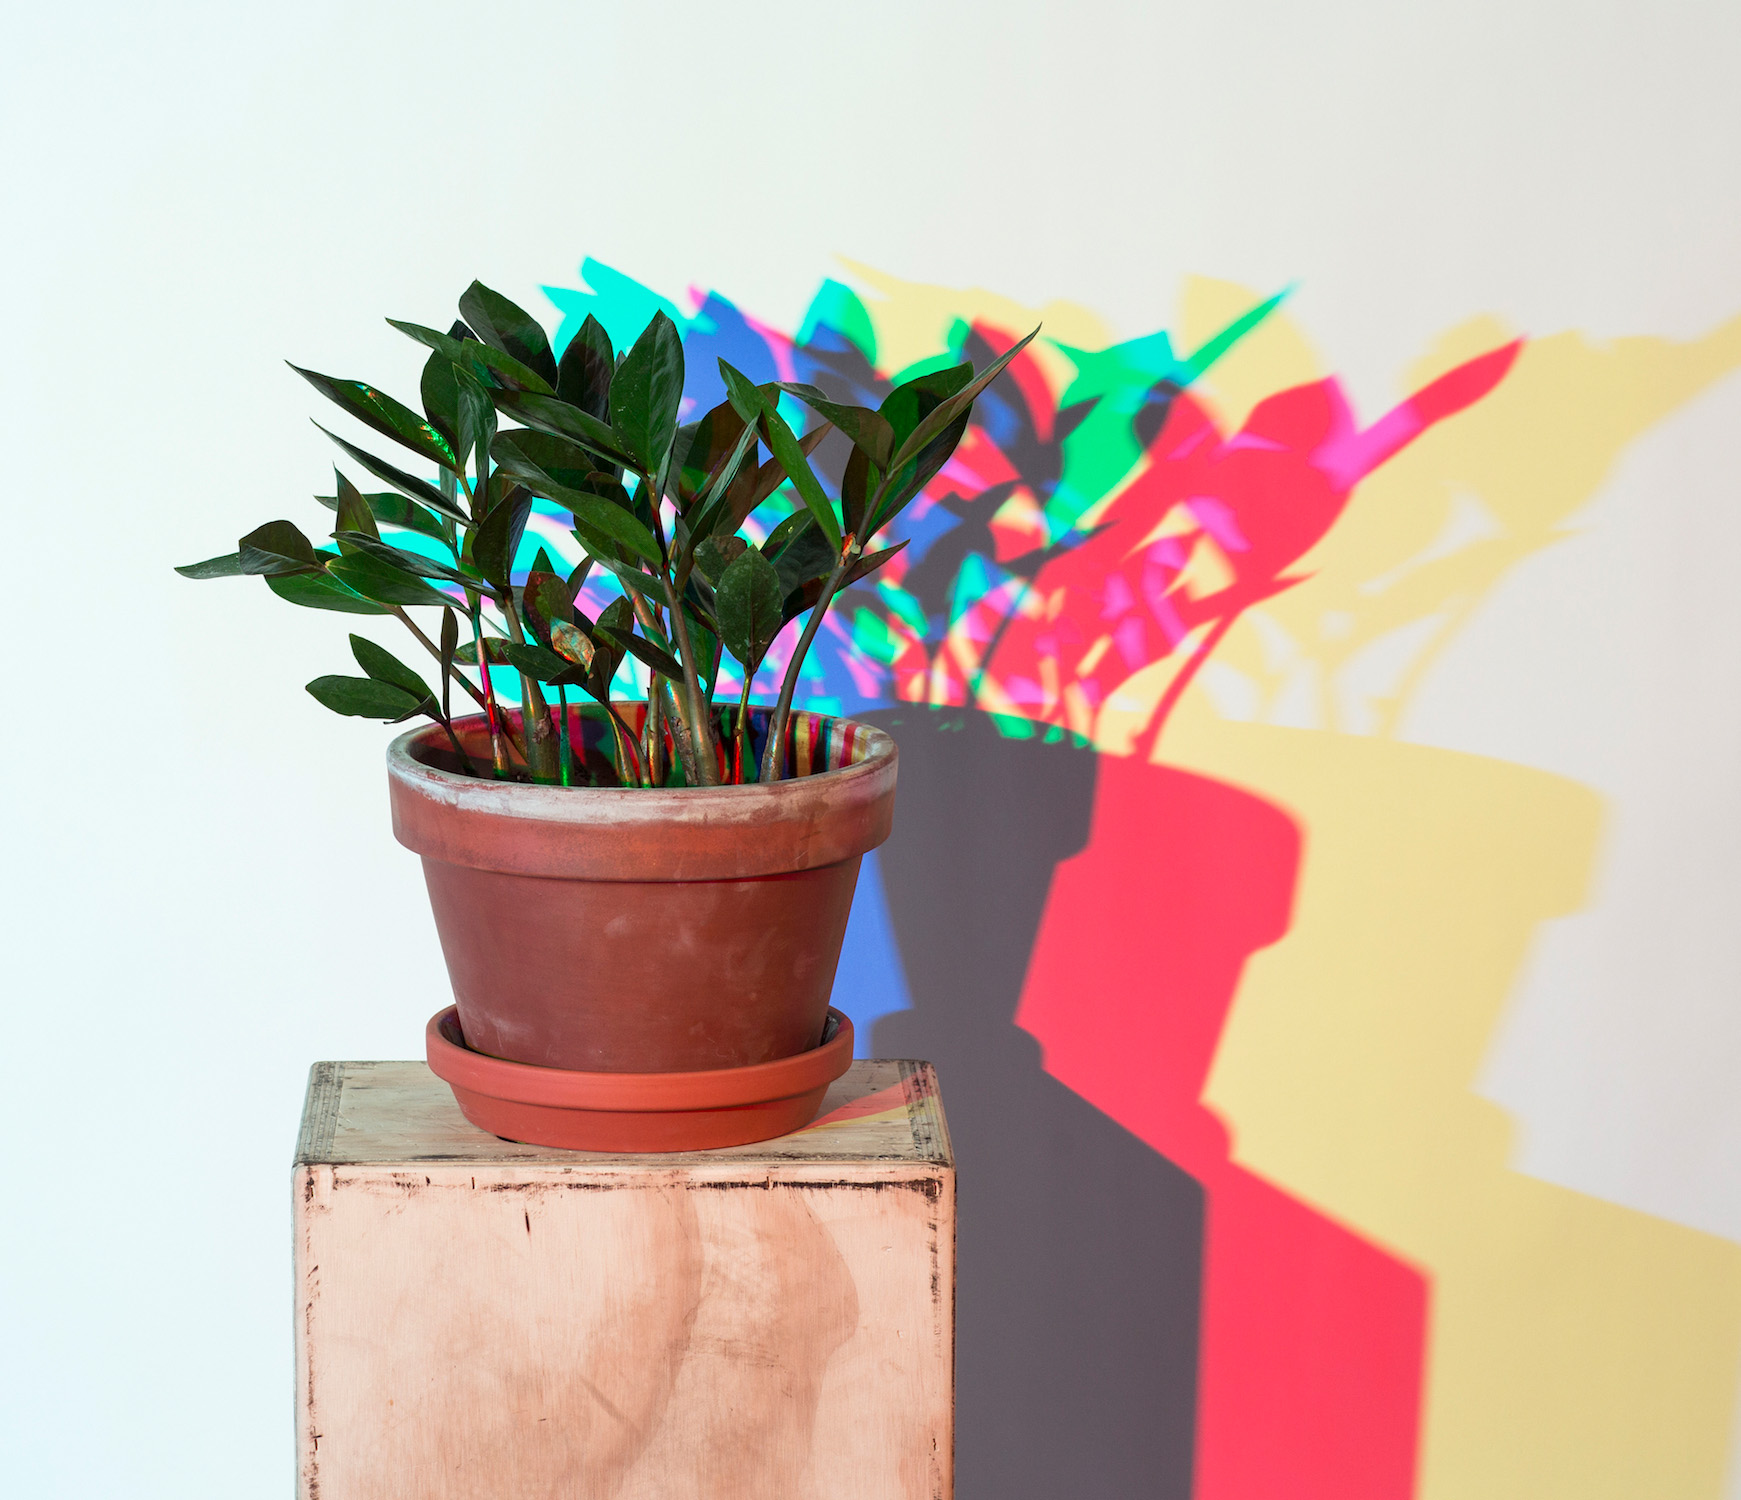
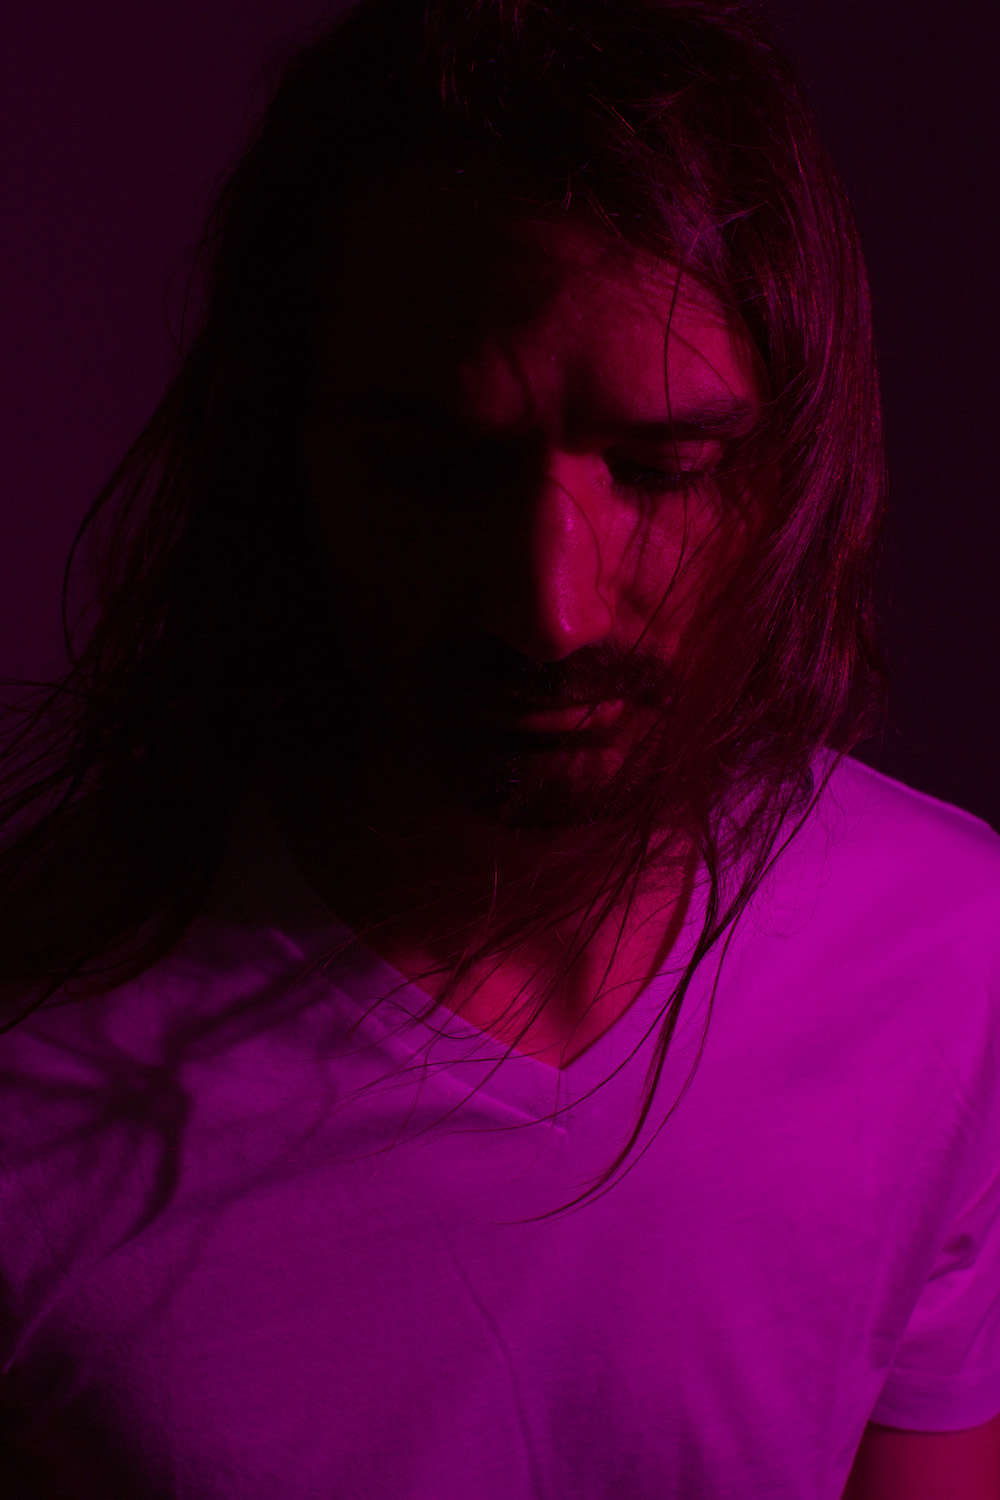
As I discussed in my last post, the science behind the multi-colored shadow technique is that when cyan, magenta, and yellow (or red, green, and blue) light overlaps, white light is created. Because of this, if we were to take three lights and gel them, where they overlap, colorless light is formed. Colored shadows occur when something blocks one of the colored lights, resulting in only one or two of the other colors lighting an area, Figure 1.

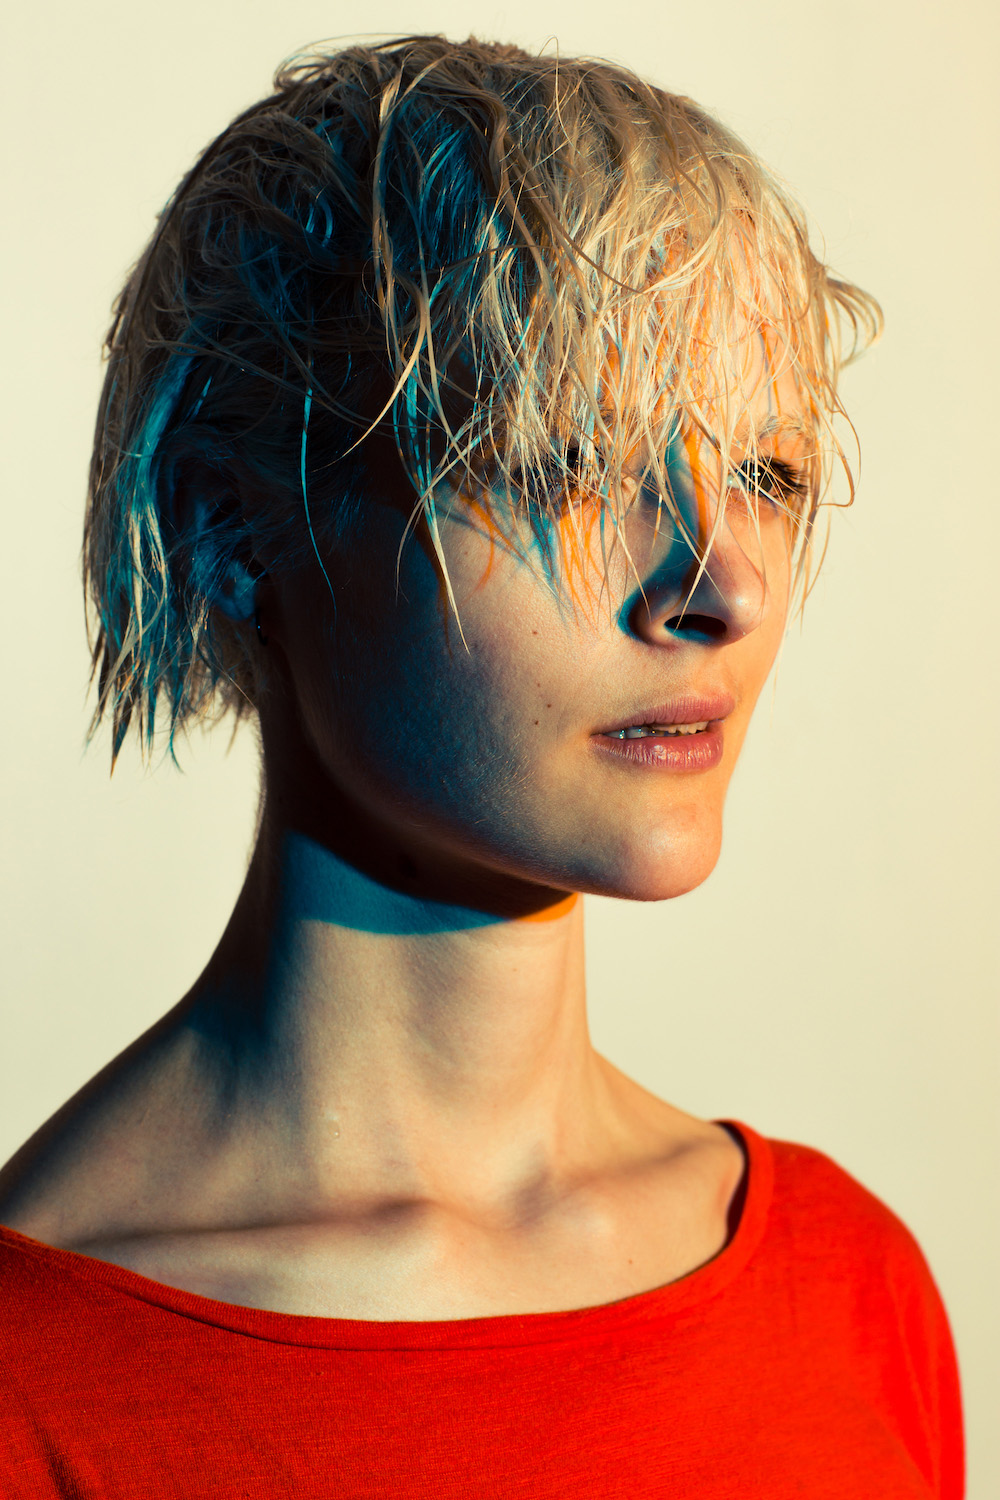
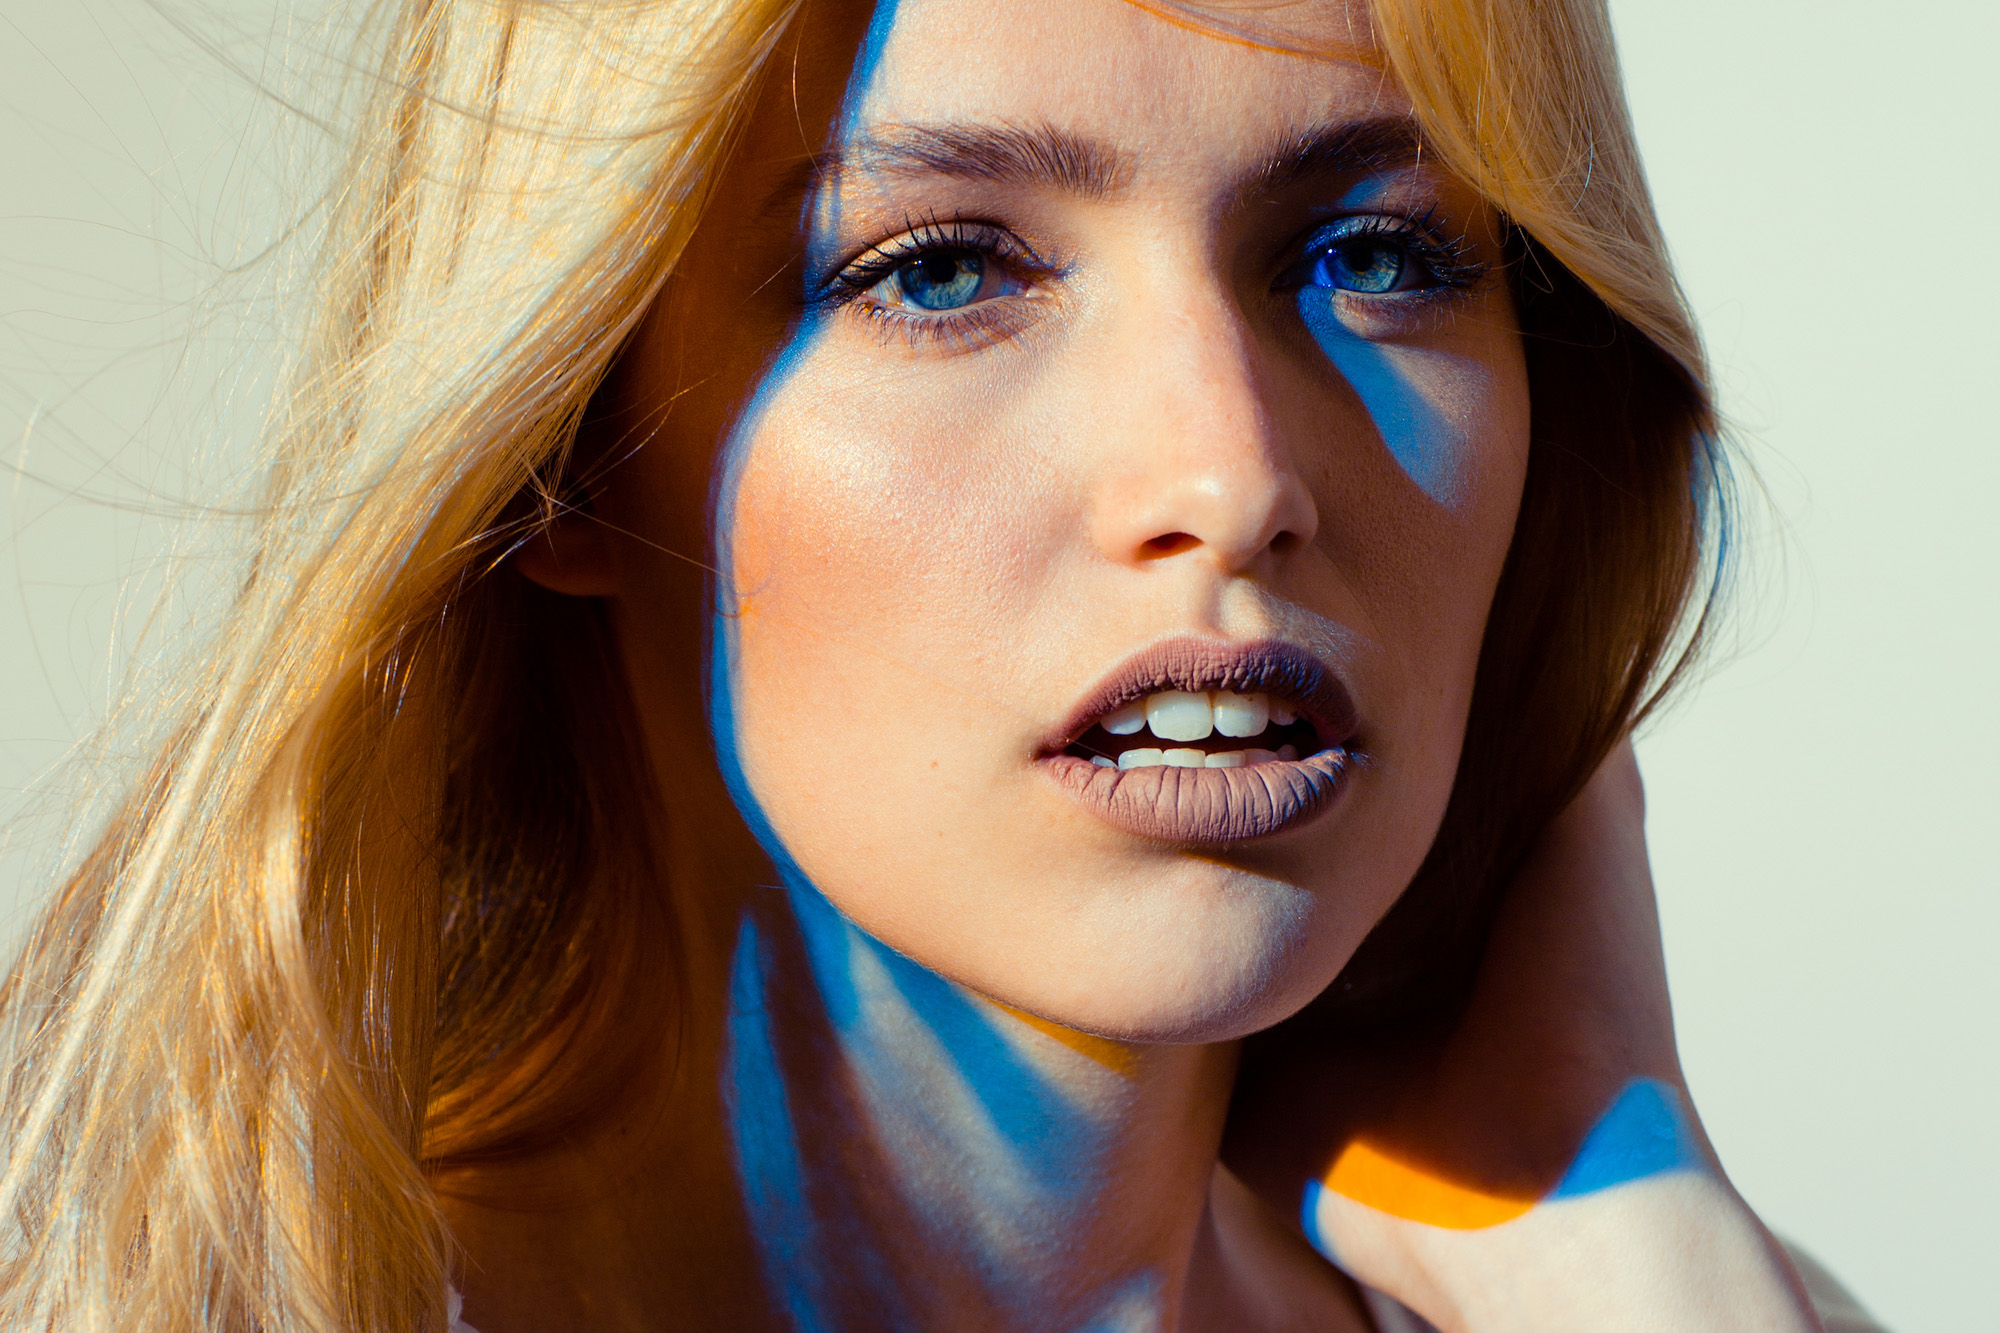
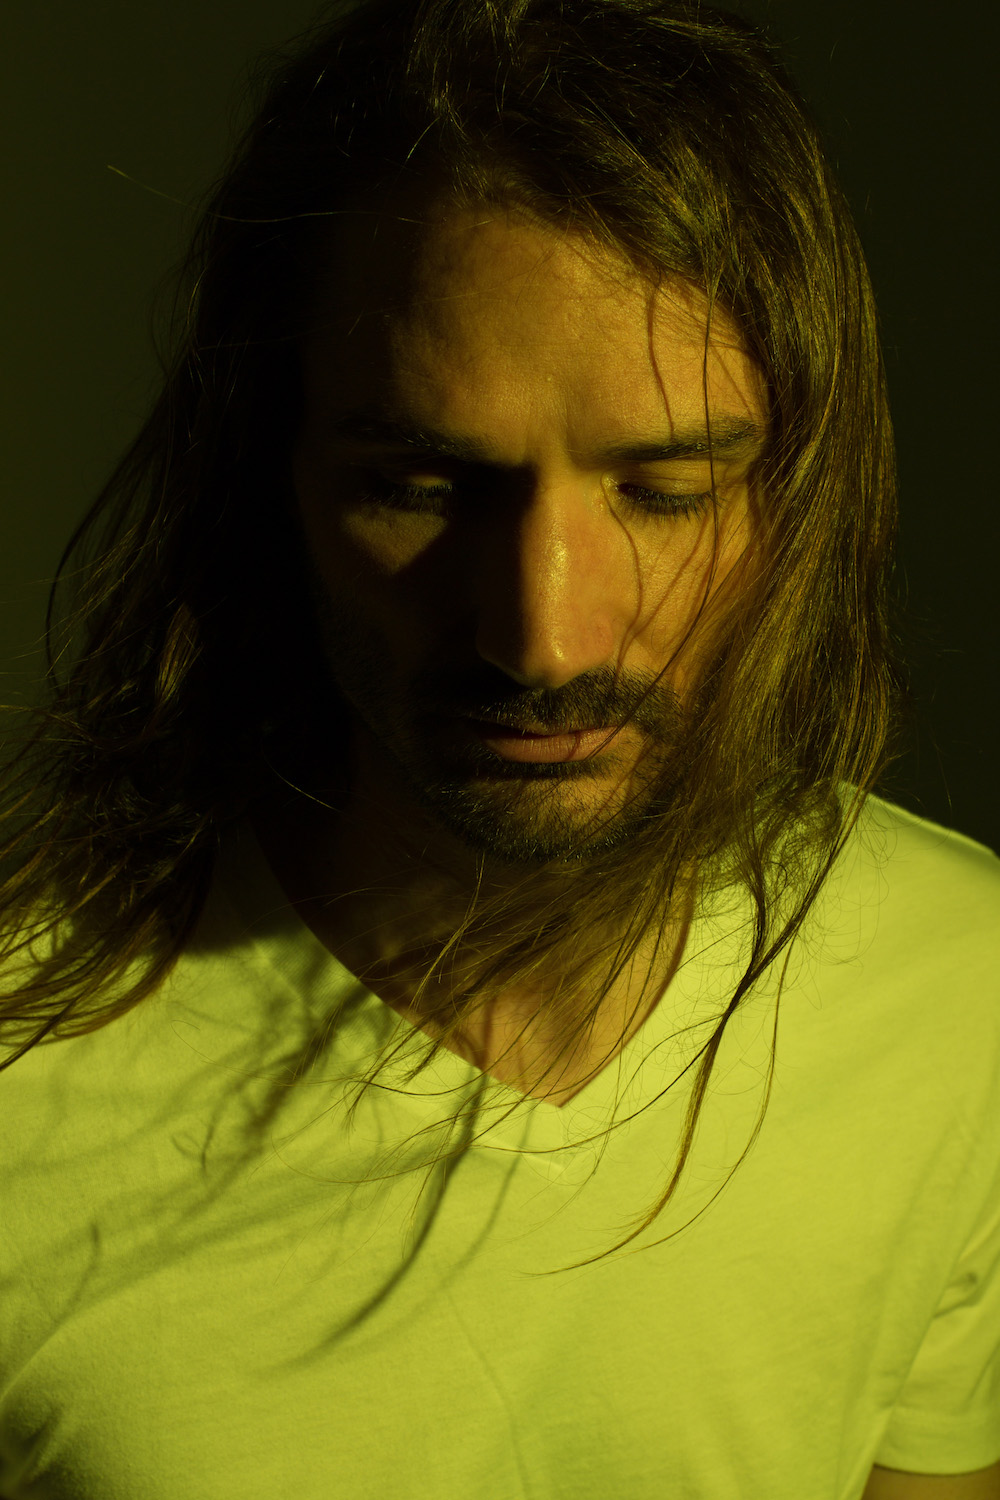
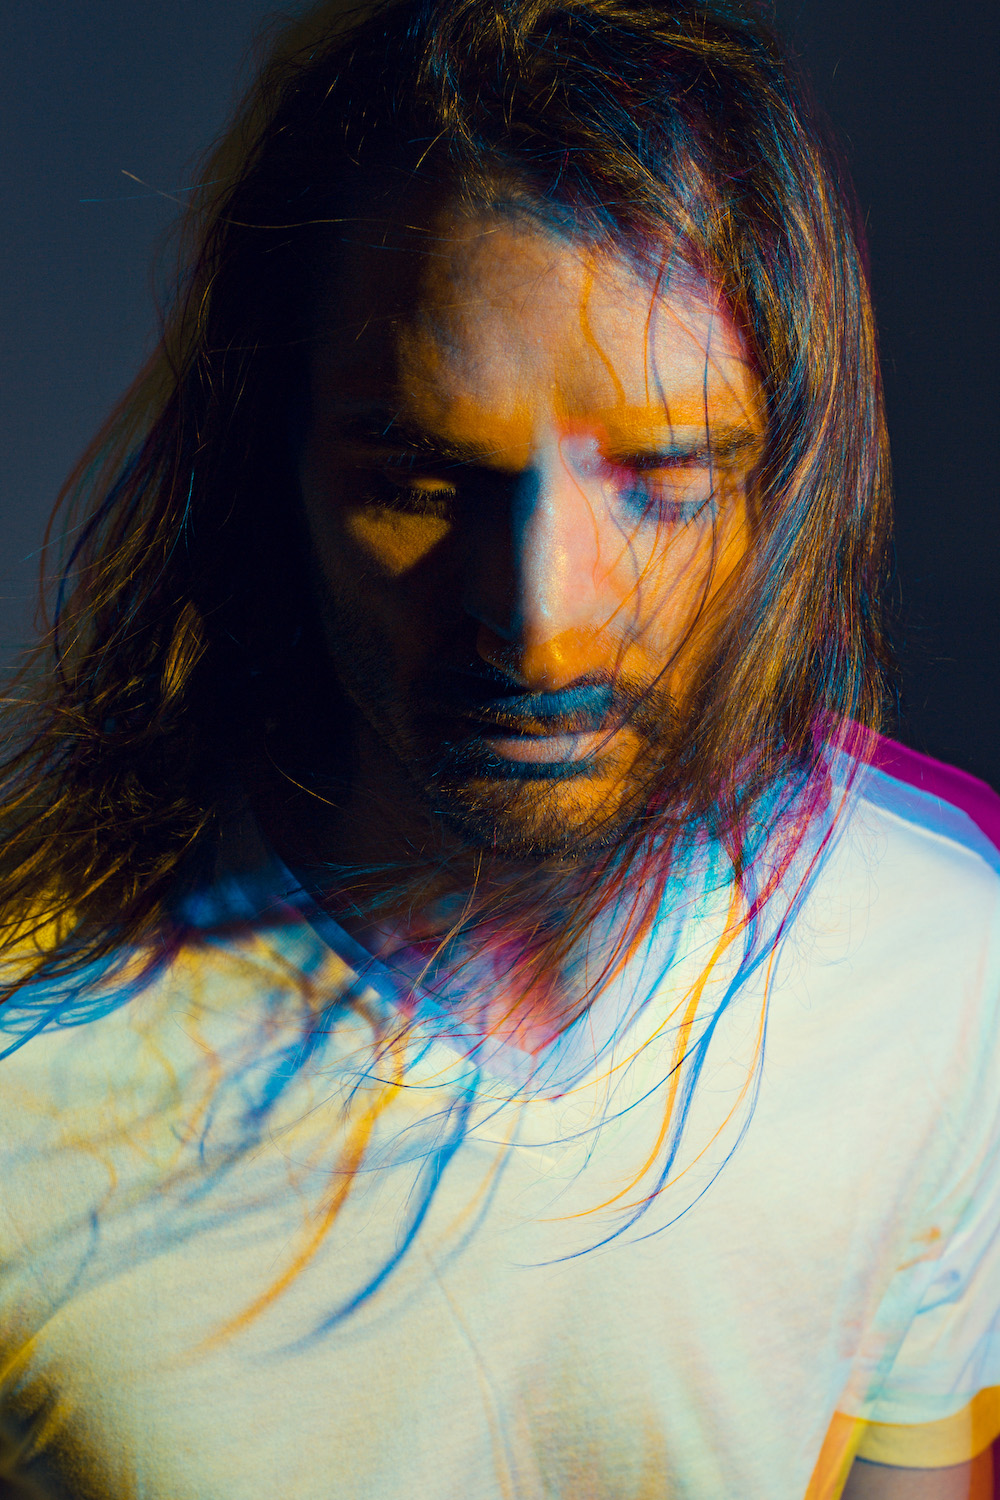
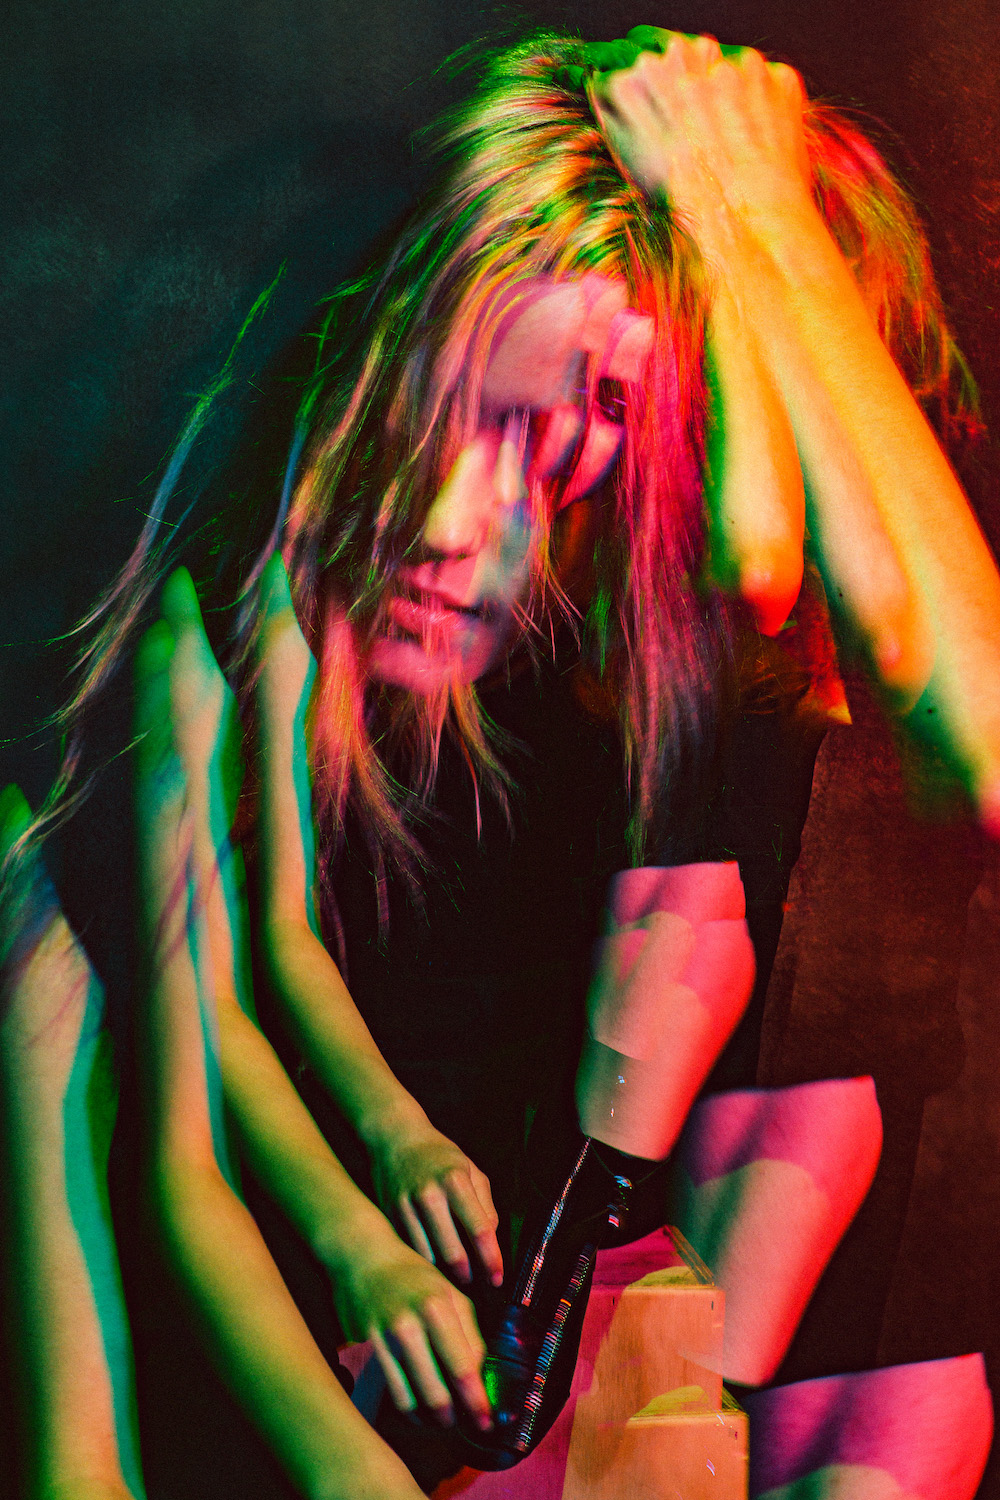
I first discussed this technique in my previous book, Studio Anywhere 2: A Photographer’s Guide to Shaping Hard Light (which bore that image on its cover). Two years have passed since I wrote it and I’ve had a lot of time to explore the many variations of using this technique. I’ve learned that you can still achieve neutral light without using magenta, as is illustrated by Kevin Hart’s yellow and cyan shadows (Figure 2). I’ve also experimented with different methods of creating shadows, including by hair movement (Figure 3). I’ve also minimized my gear rig needed to execute this technique.

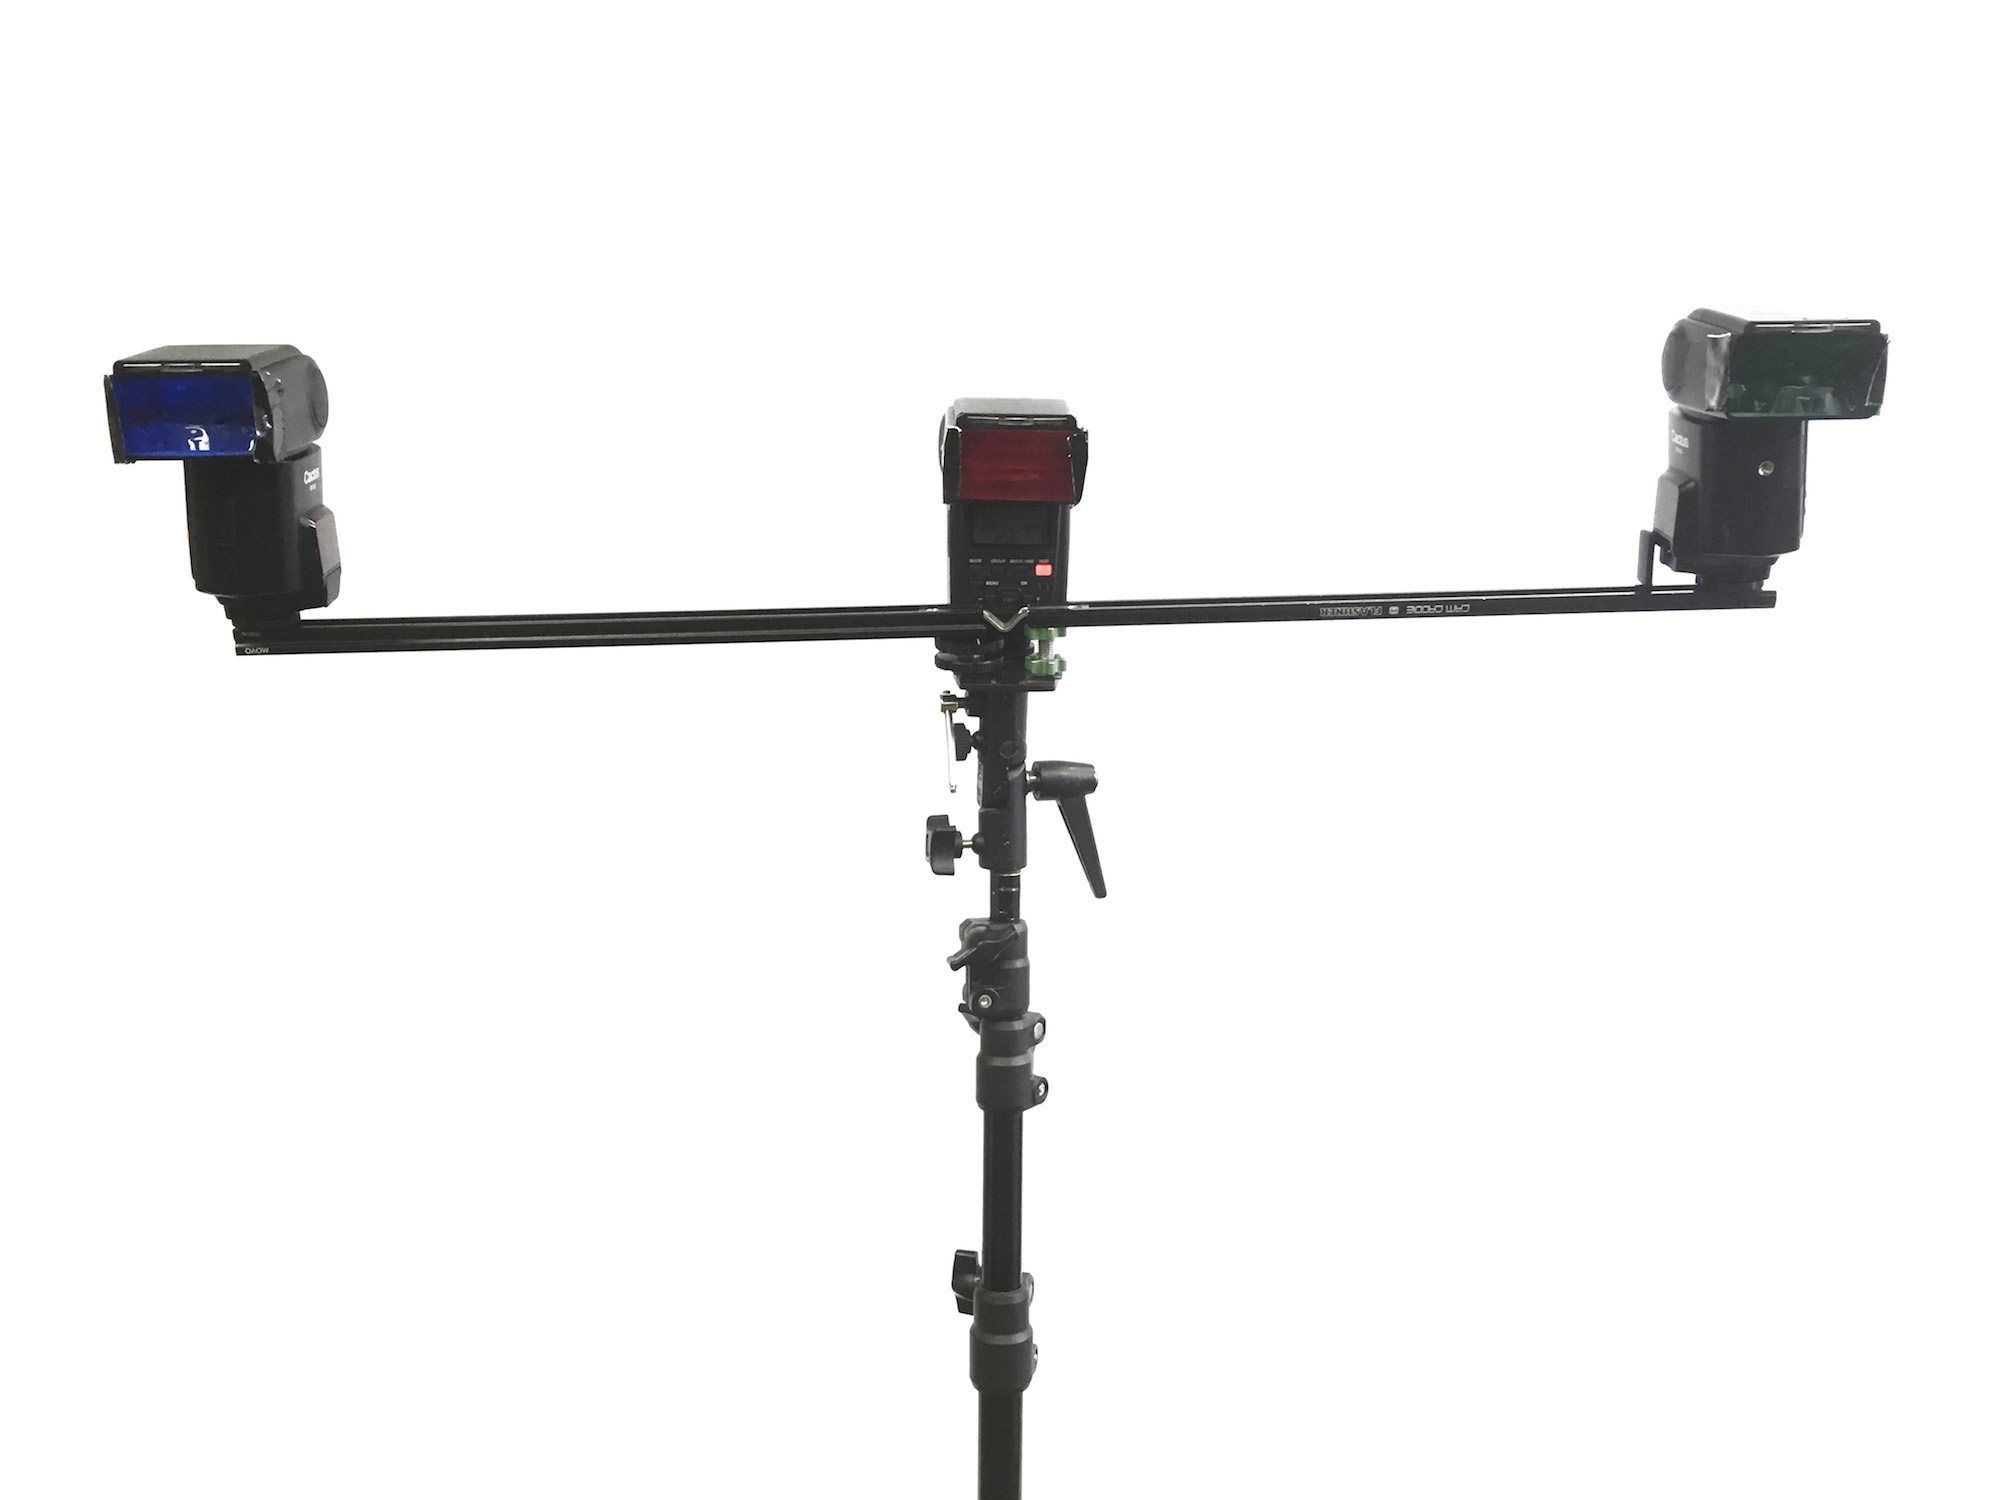
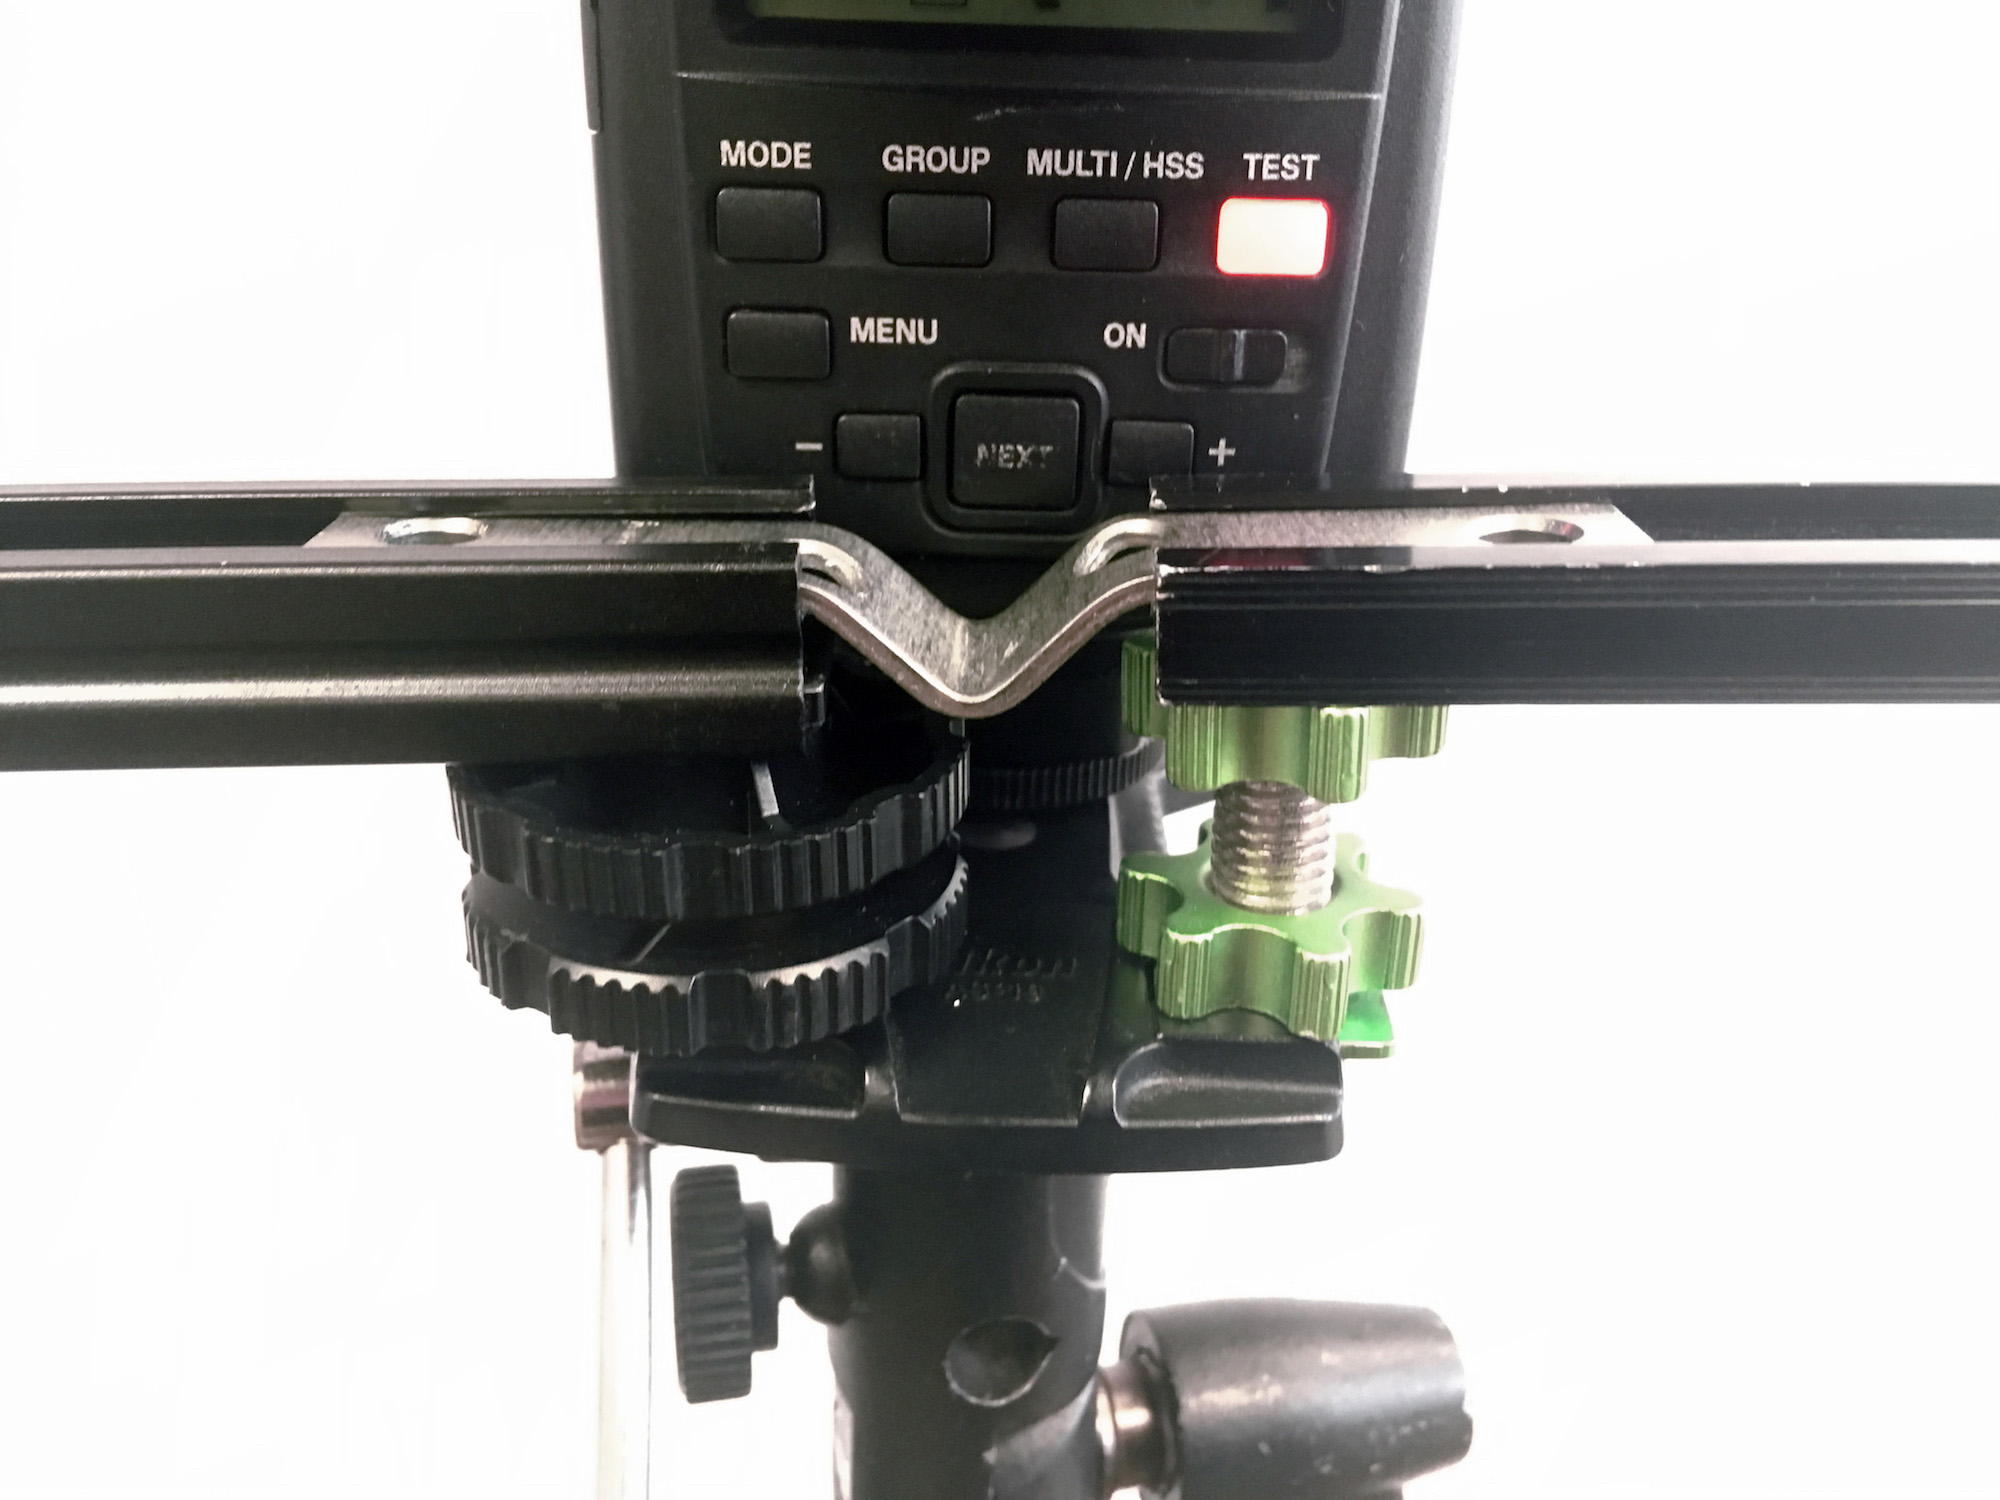
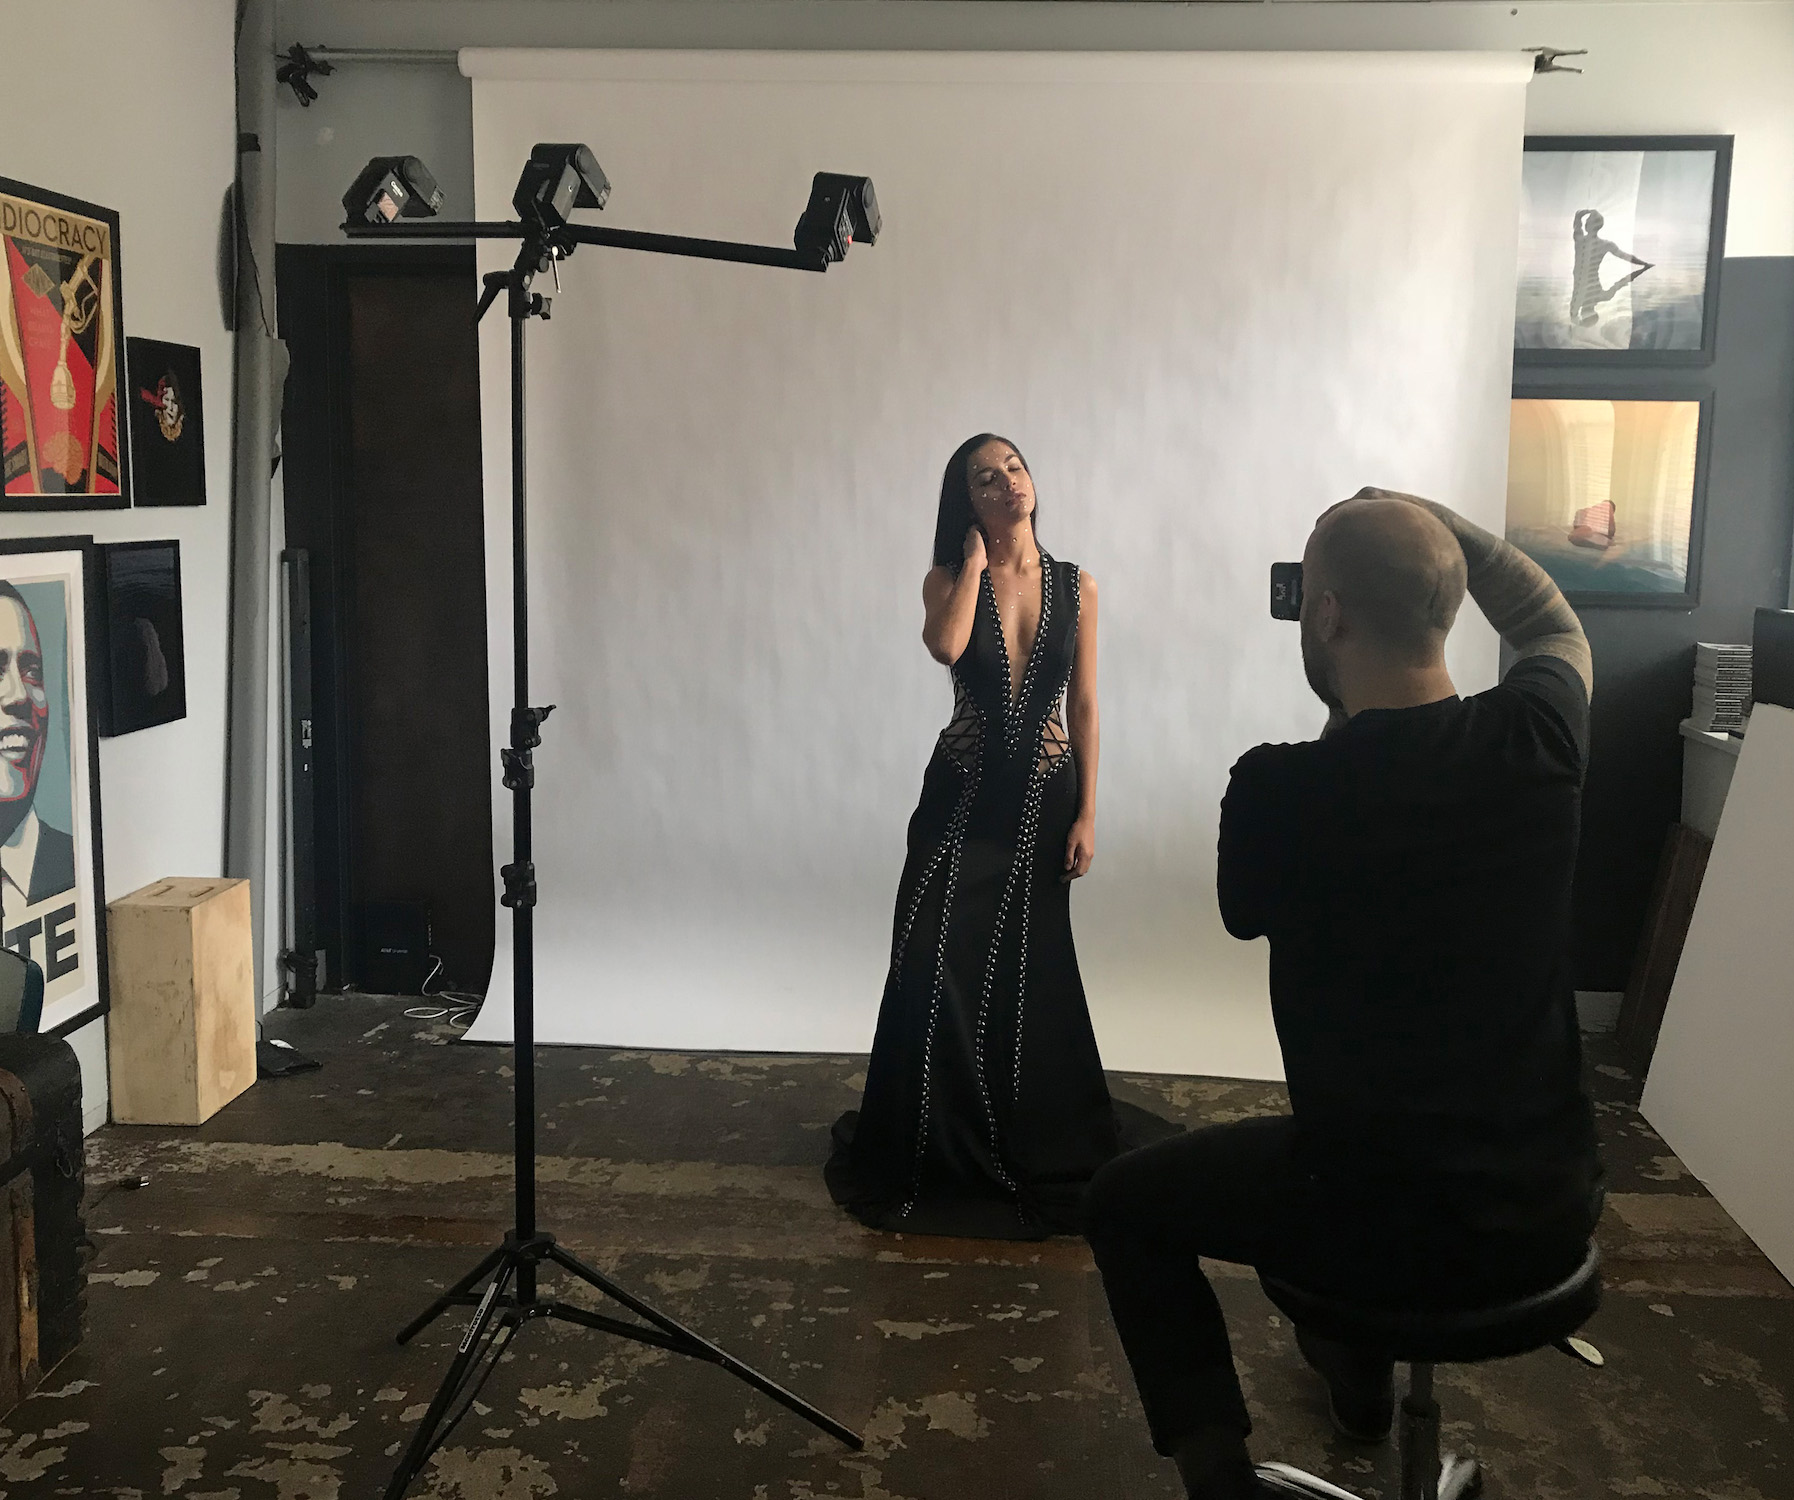
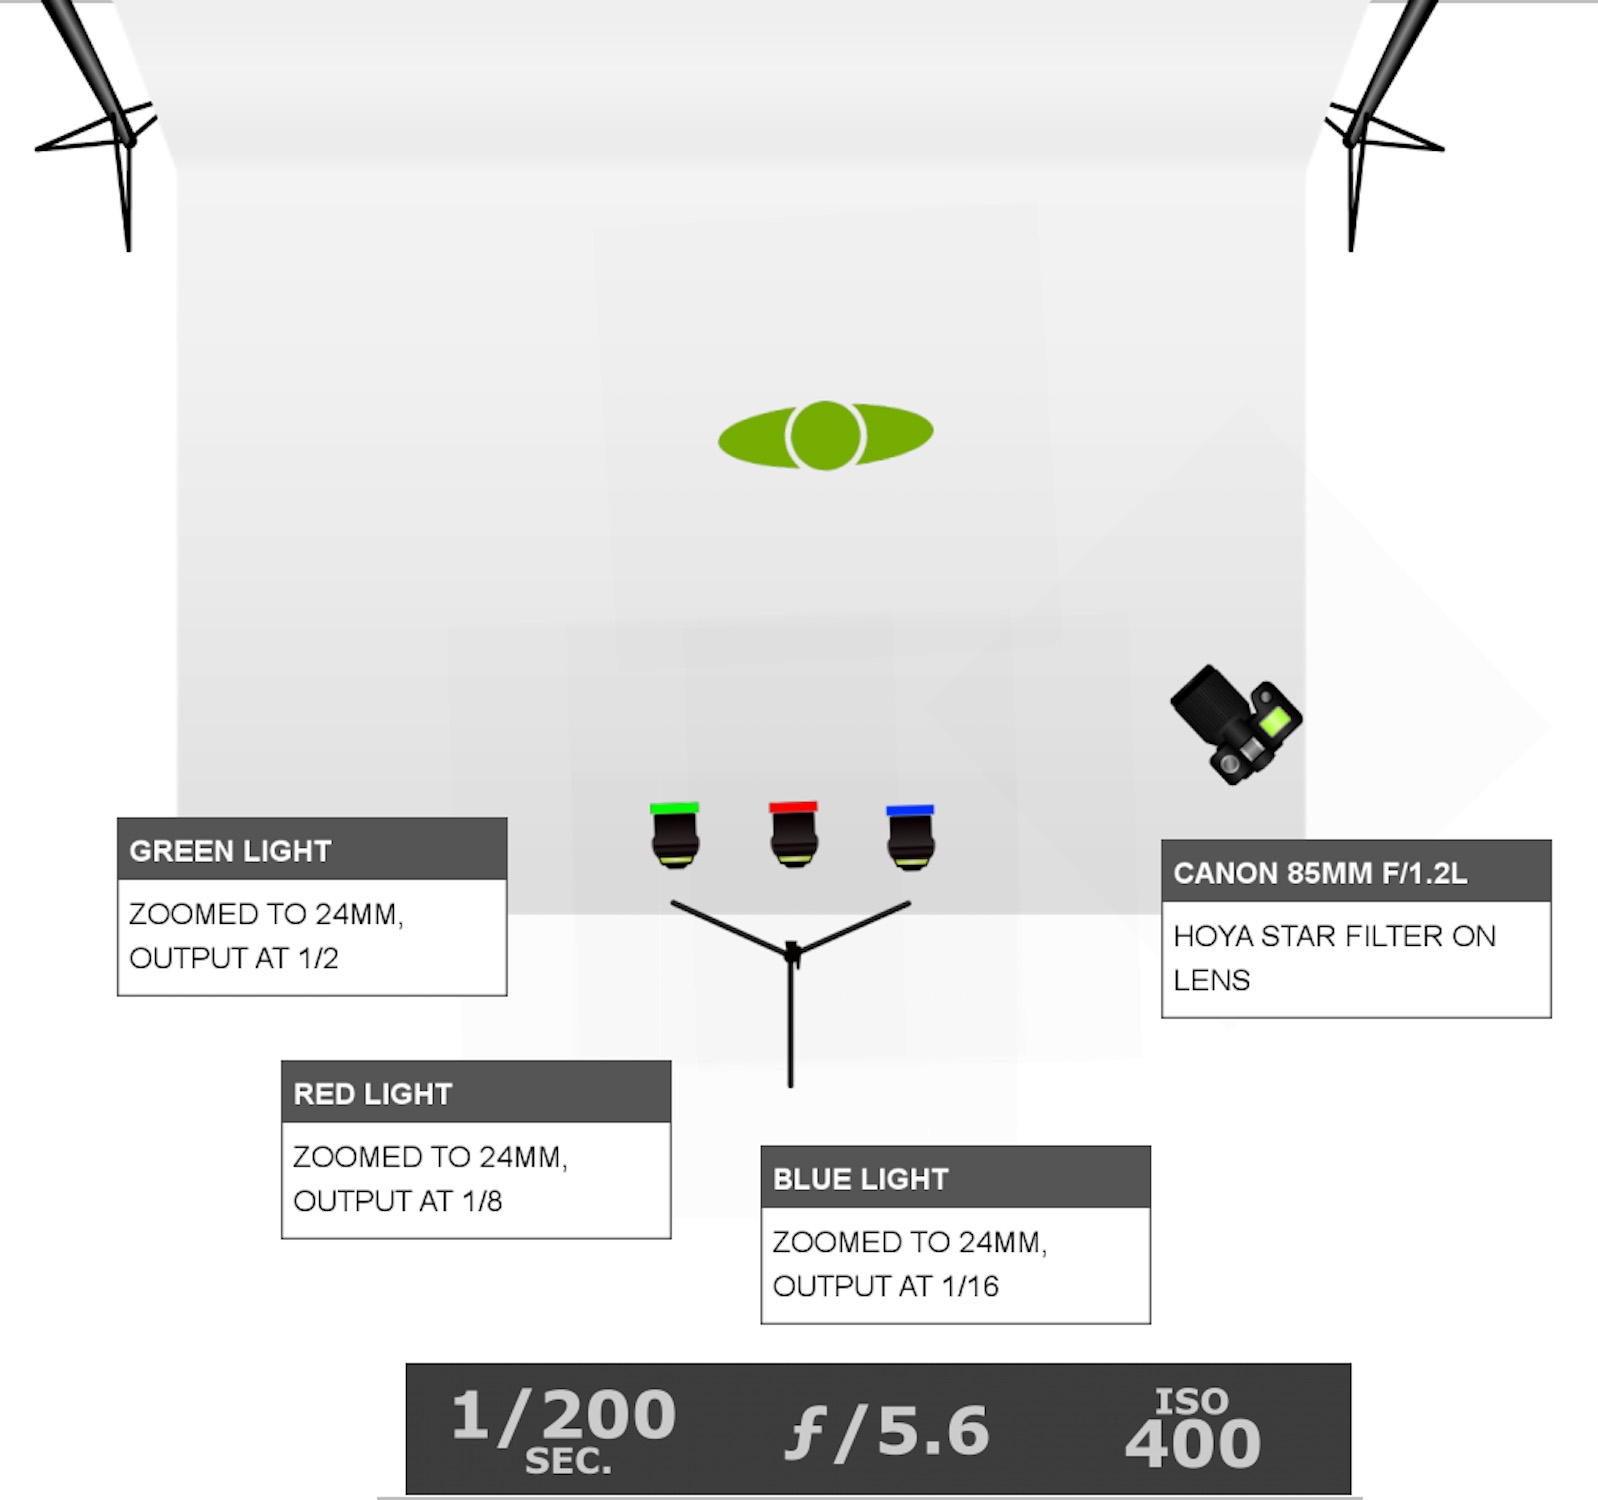
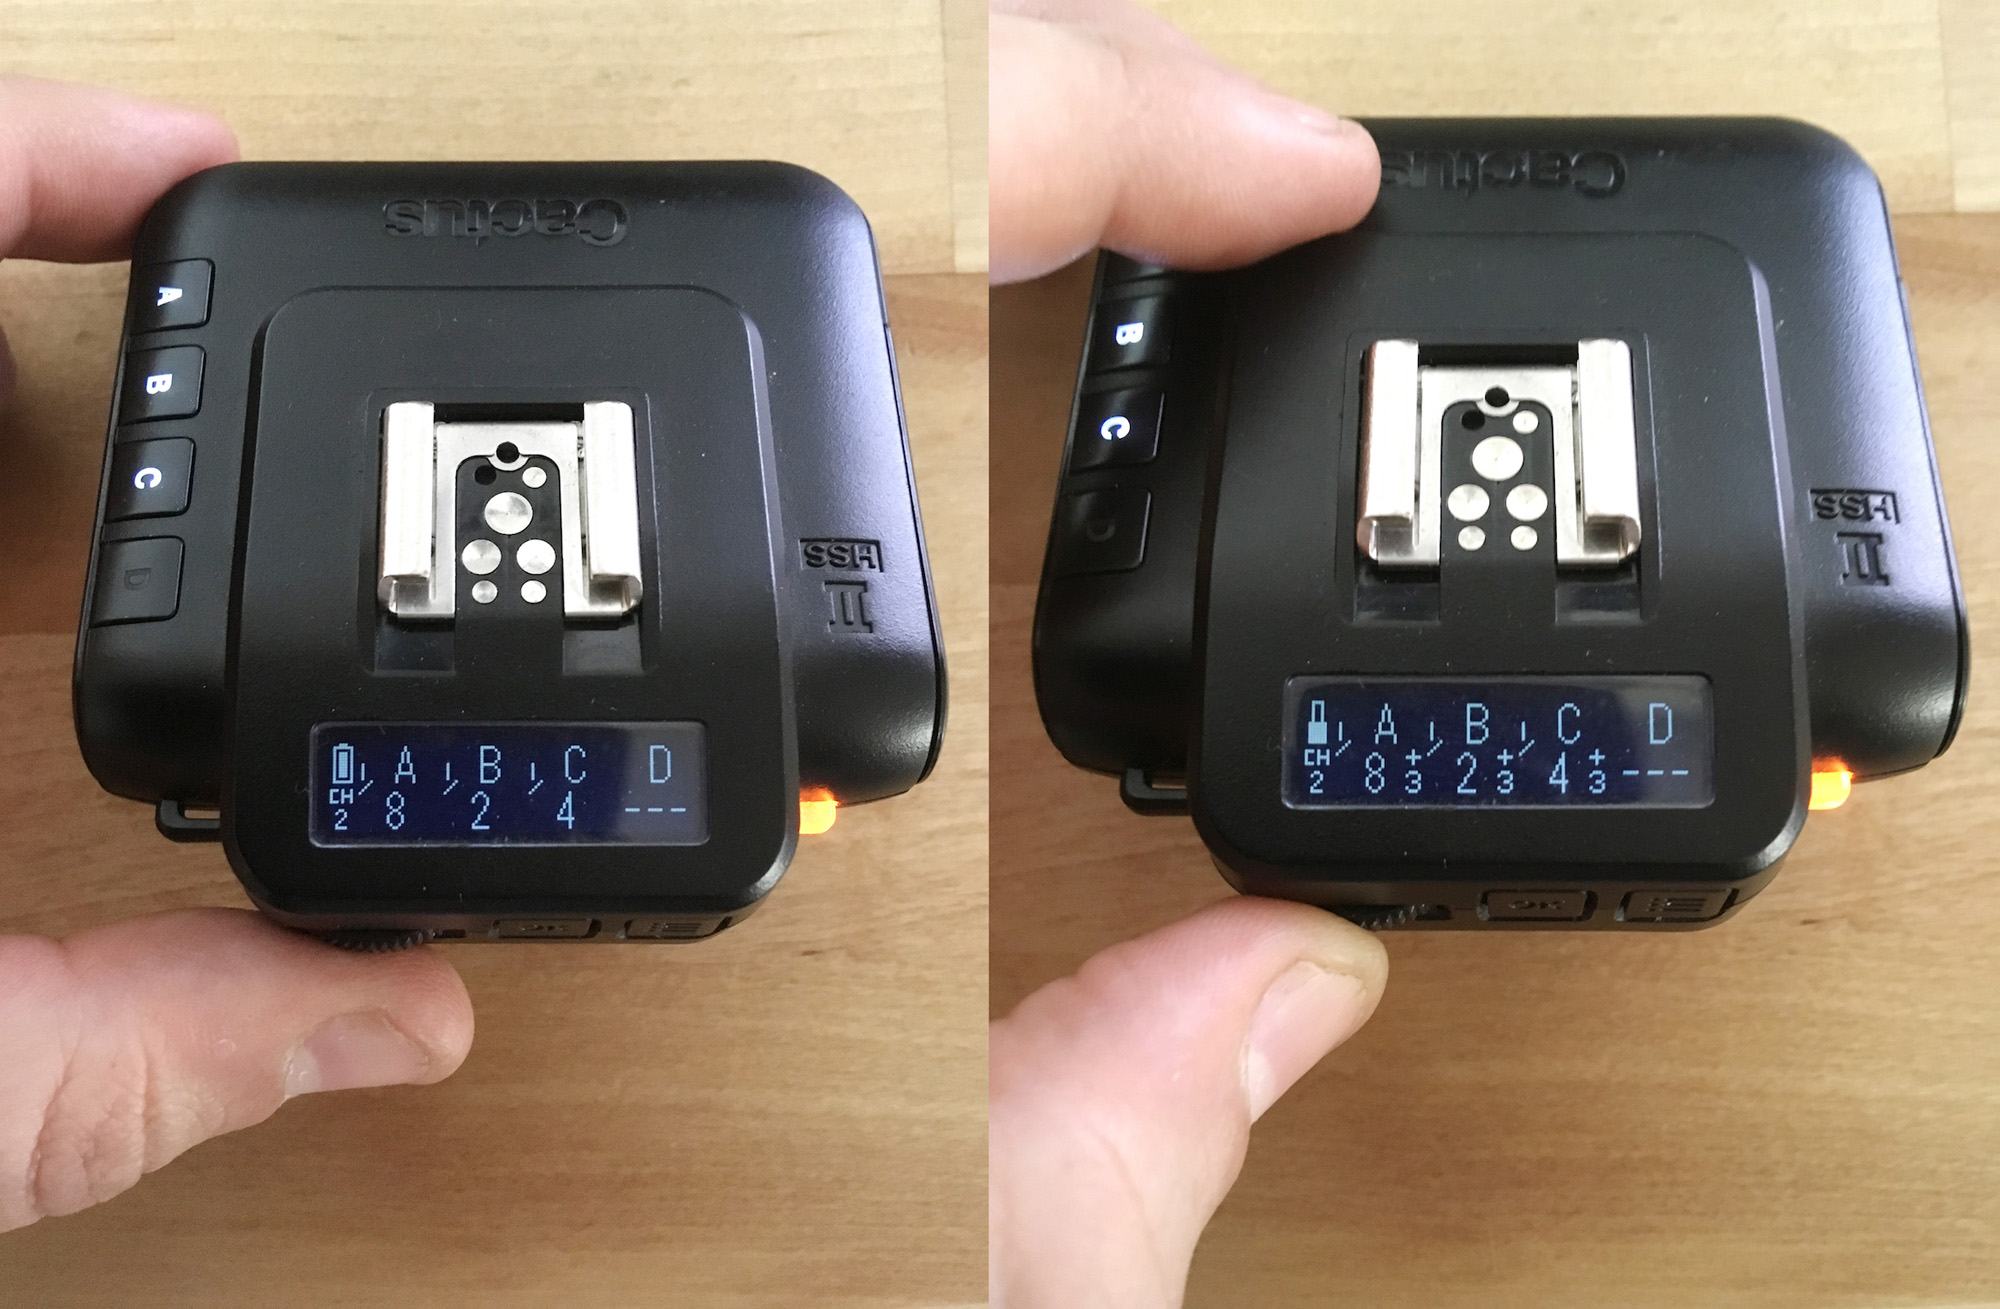
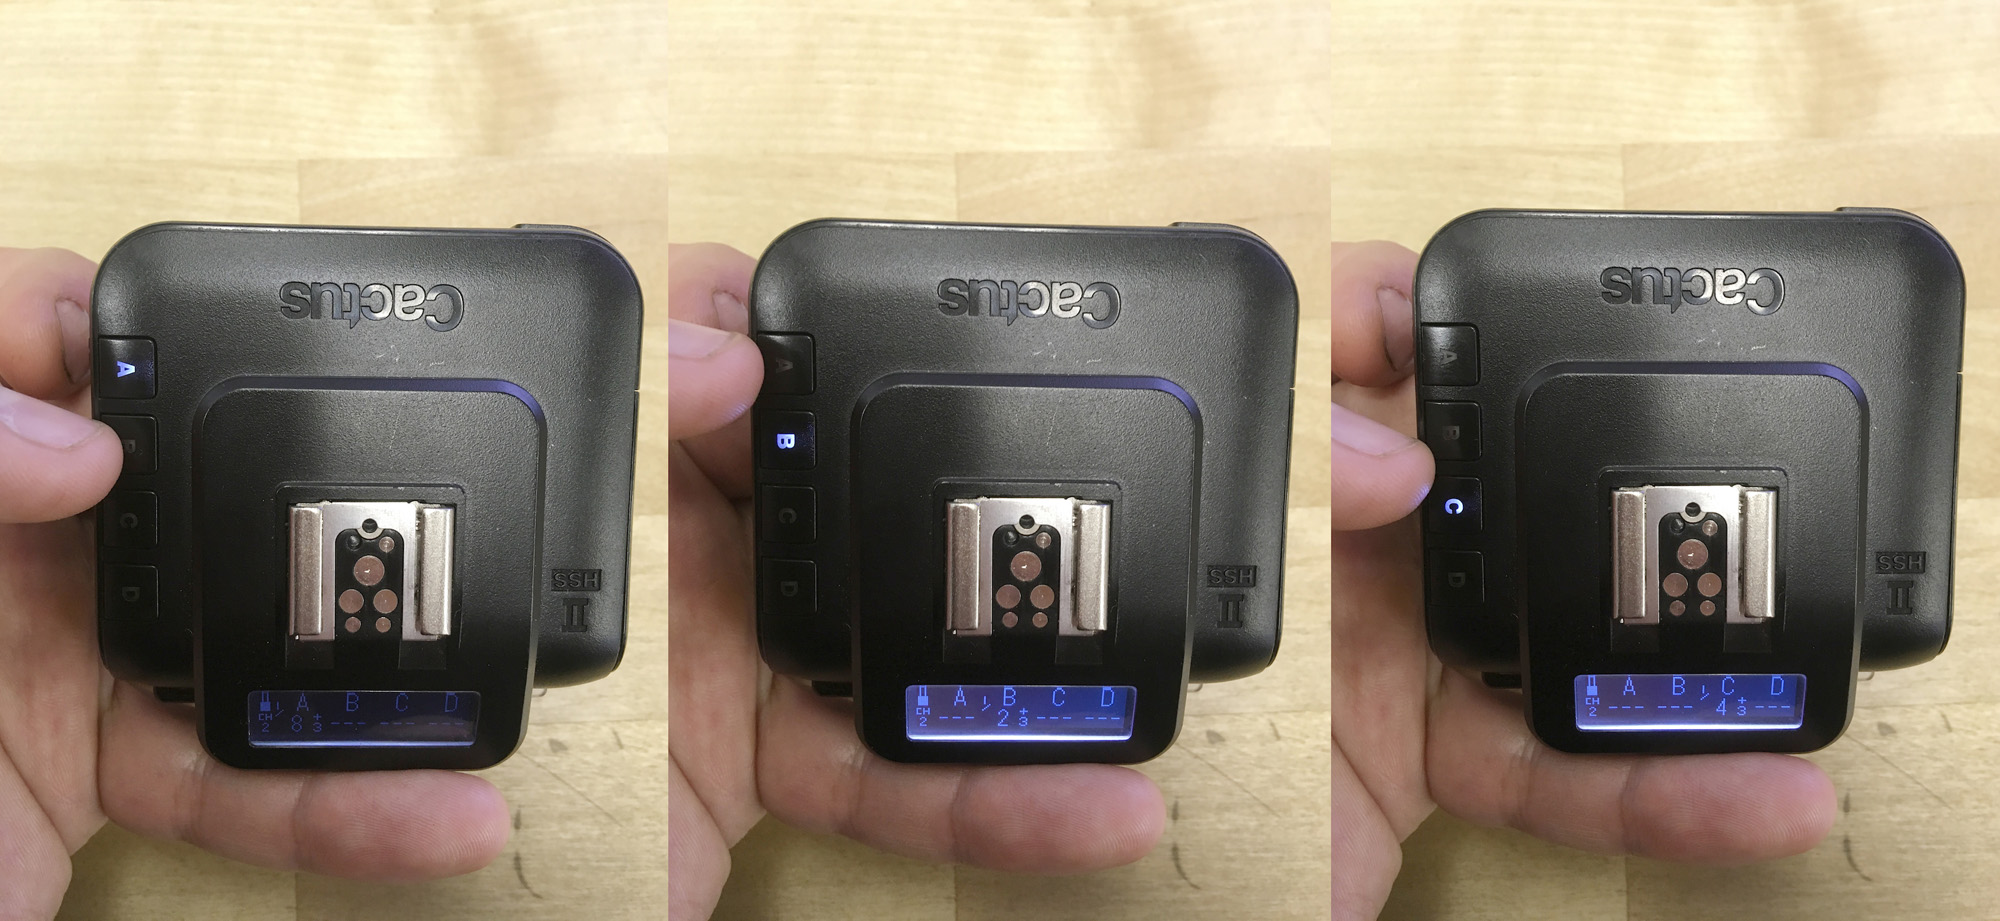
The technique requires the use of two or three flashes. I use Cactus RF60 flashes with a V6II transmitter. When I first began using this technique, I lugged three light stands with me to shoot. This is a frustrating task, especially when working alone, as I often do. I’ve since come up with a lightweight (and cheap) solution: cold shoe extension rails. In Figure 4 you can see that I have two, 16-inch rails, connected to a Nikon AS-19 speedlight stand (it’s way better than the one that comes with the Cactus flashes). I also used a small metal corner brace that I flattened out and used to join the two rails. The joint not only bears the weight in the middle (rather than the flash stand), but it levels out the two rails, which otherwise sag under the weight of the flashes.
The greater the distance between the lights, the longer the colored shadows will be. In Figure 5, the three lights are positioned next to each other, resulting in short colored shadows, but also a large, colorless shadow, where the lights all overlap. When I added one foot of space between each light, the colored shadows grew in space, while the colorless shadow decreased, Figure 6. Also, by having all three lights on one stand, it’s easy to quickly reposition them, if I wanted to position them to the side, for example, to get longer shadows, Figure 7.
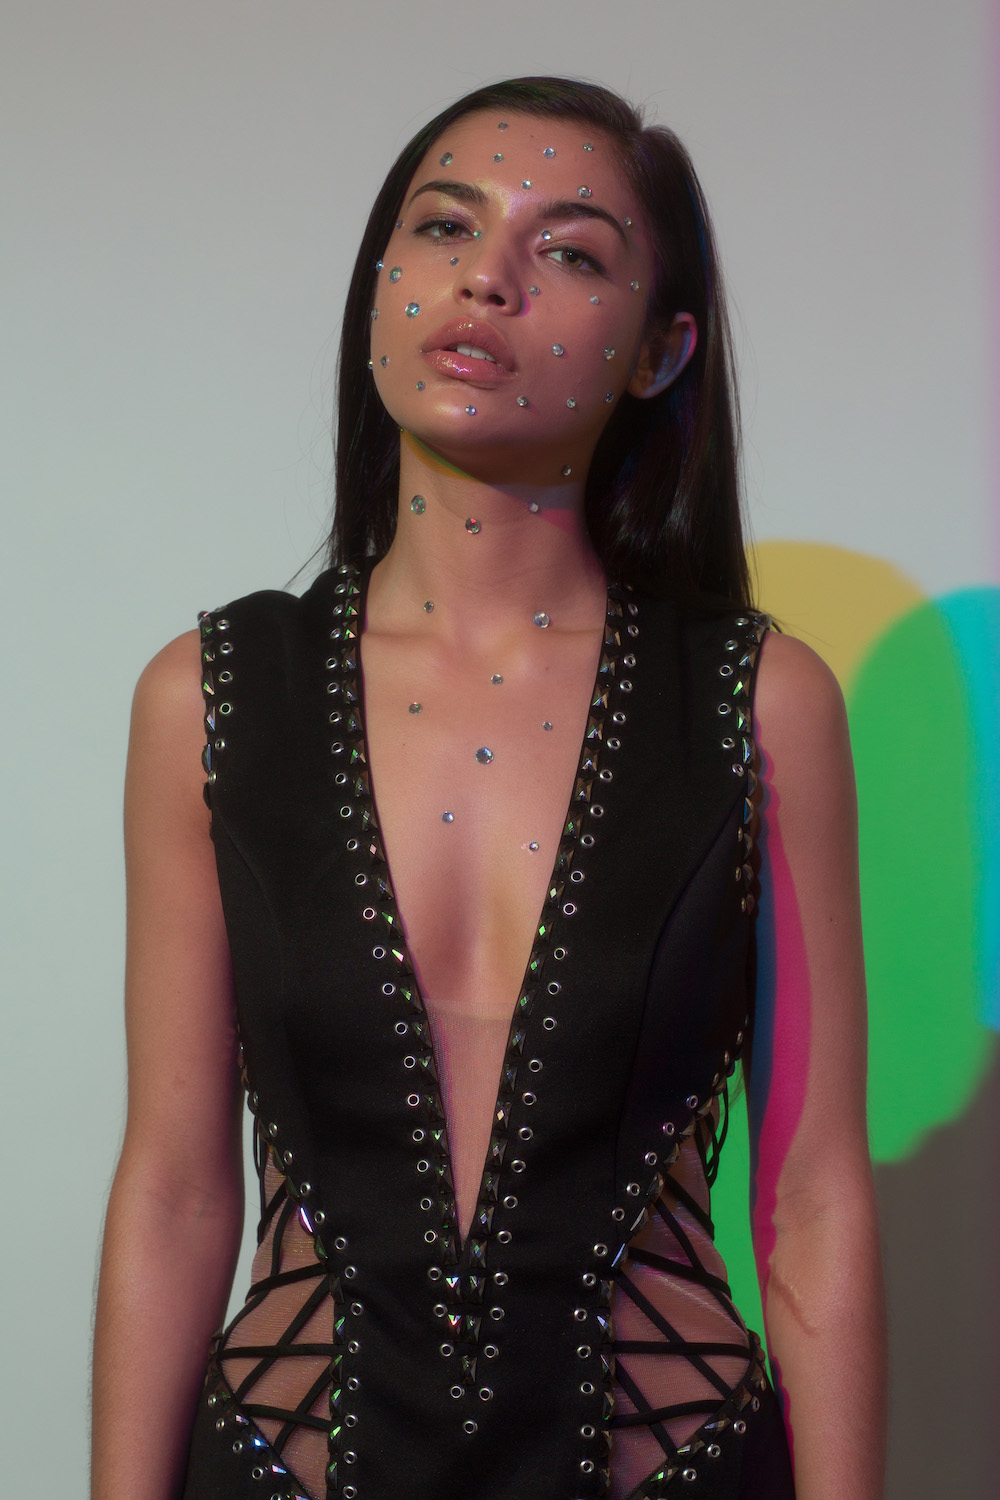
I recently did a beauty shoot with a model in which she was covered in jewels. As in they were literally glued all over her face and chest. I was already planning to use this tri-colored technique, but I also decided to add a Hoya star filter to my lens, to transform the specular highlights that were coming from the jewels into starbursts.
I positioned my lights at such an angle in relation to my model that I could see the lights reflecting in the jewels, in order to maximize the starbursts, Figure 8. Since my flashes don’t have modeling lights, I always hit the “test” button on the transmitter as I watch to see where the light is falling (making sure to first tell the model to look away from the flashes).
The first thing you need to do when using this technique is balance the output between the three lights. Your light outputs will vary depending on the density of the shades of the colors you’re working with, Figure 9. I’ve found that my green light (1/2) tends to be twice as bright as my red light (1/4), which is twice as bright as my blue light (1/8), making the green light four times brighter than the blue in order to achieve balance, Figure 10. With the Cactus V6II transmitter, I can quickly adjust each output to a perfect balance, lighting in layers, one at a time. I can adjust each light in 1/3-stop increments and once the perfect color ratio is achieved, I can dial the global power up or down, maintaining the integrity of the ratio (pretty cool, huh?), Figure 11.
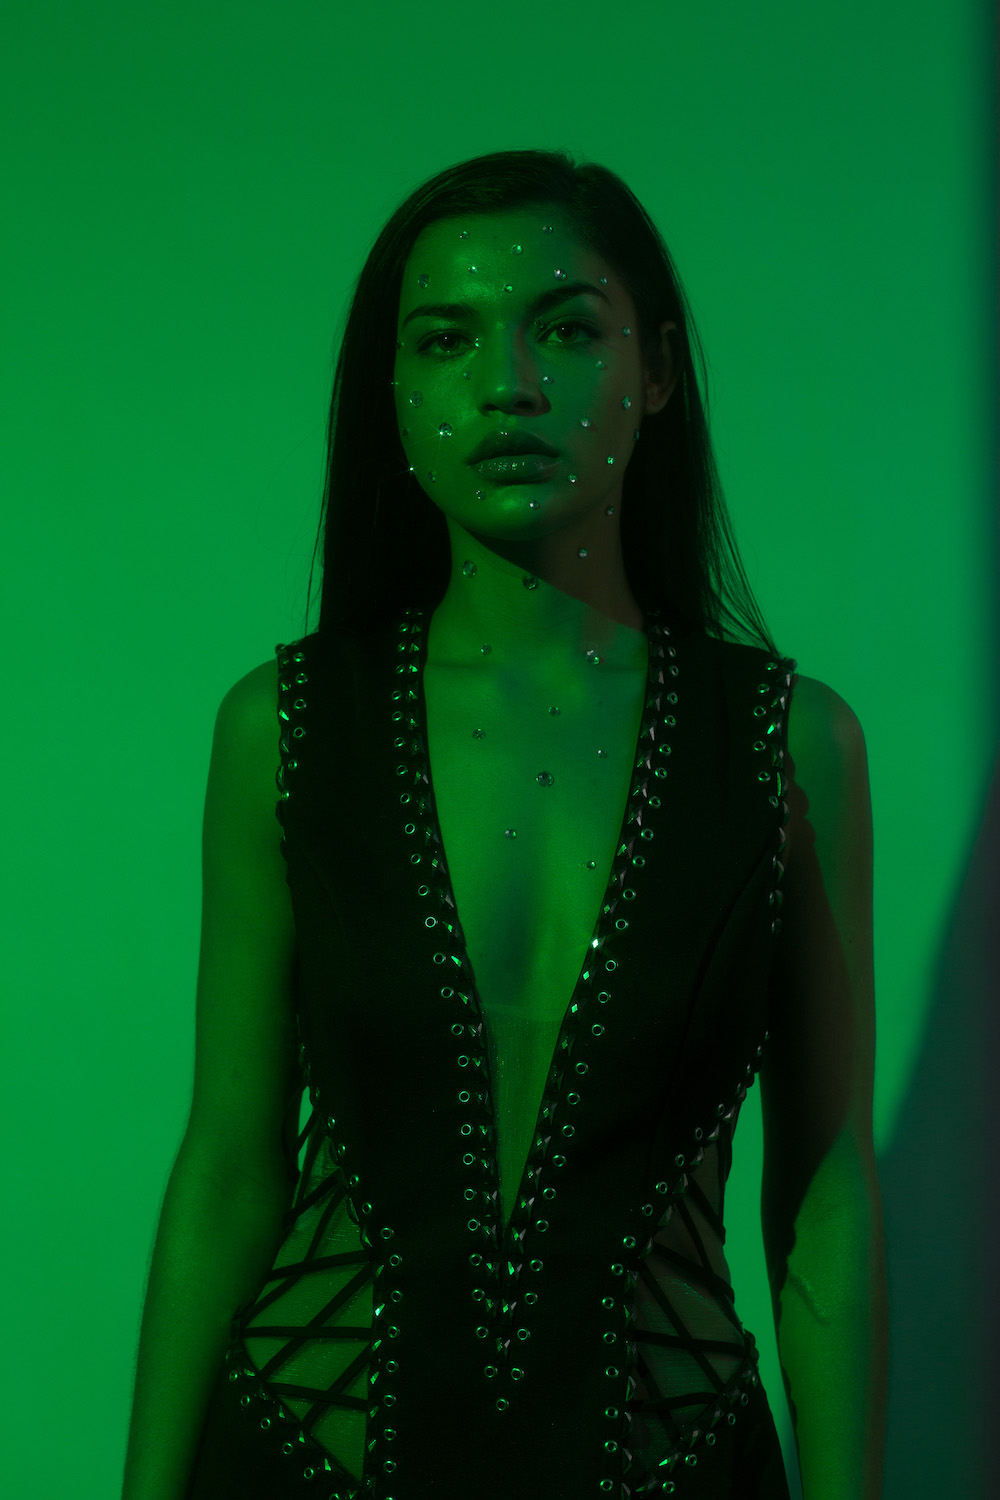
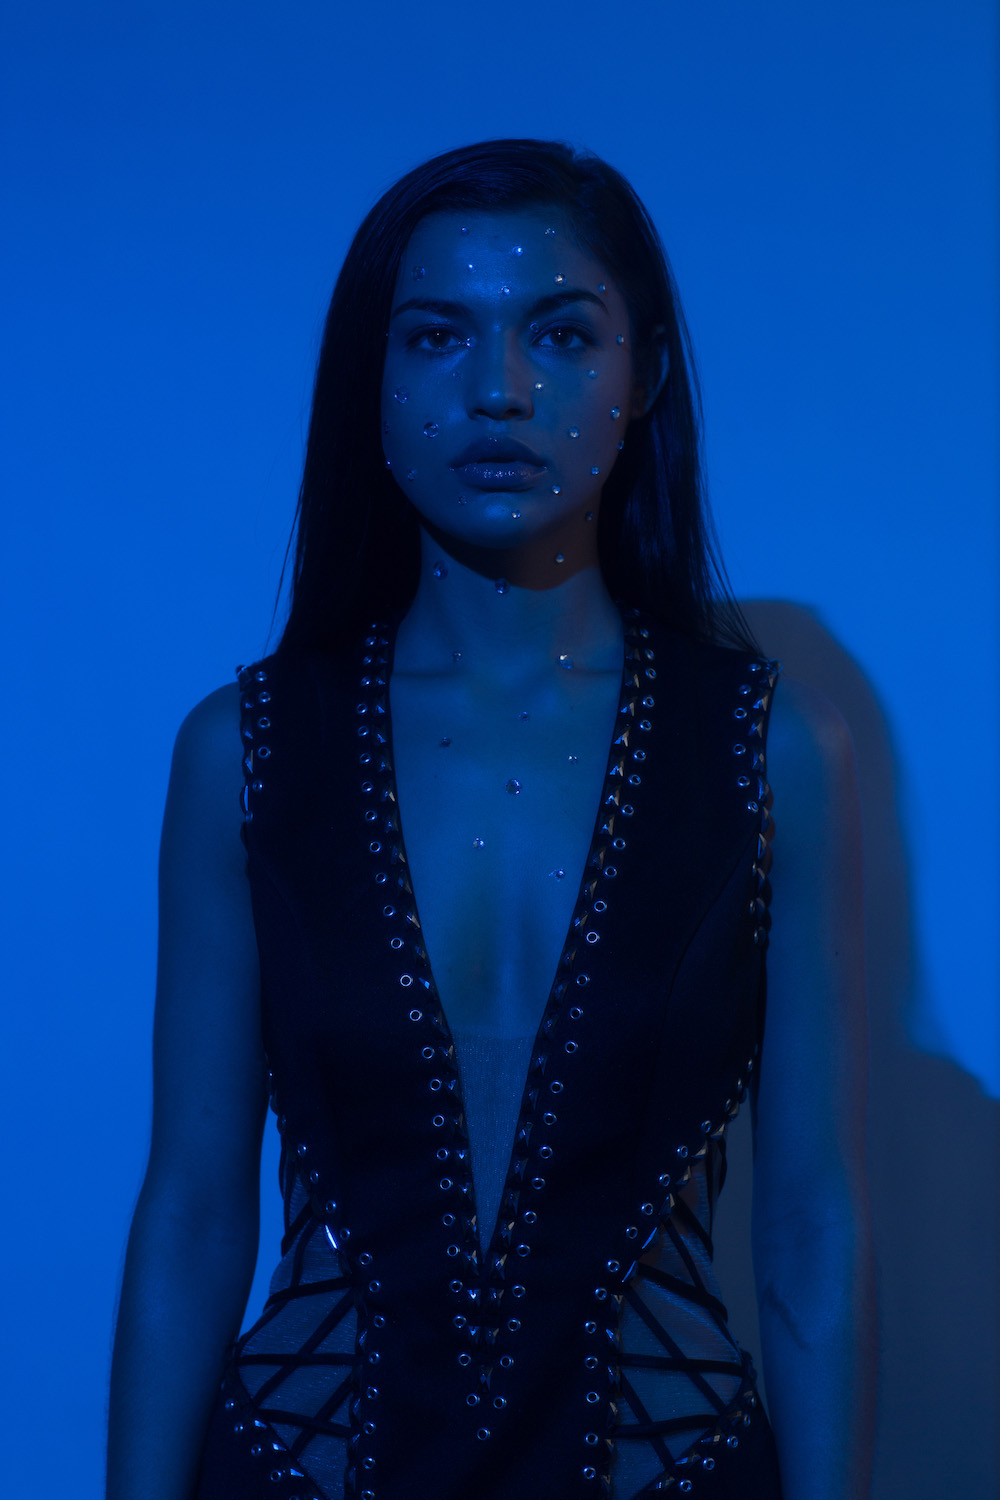
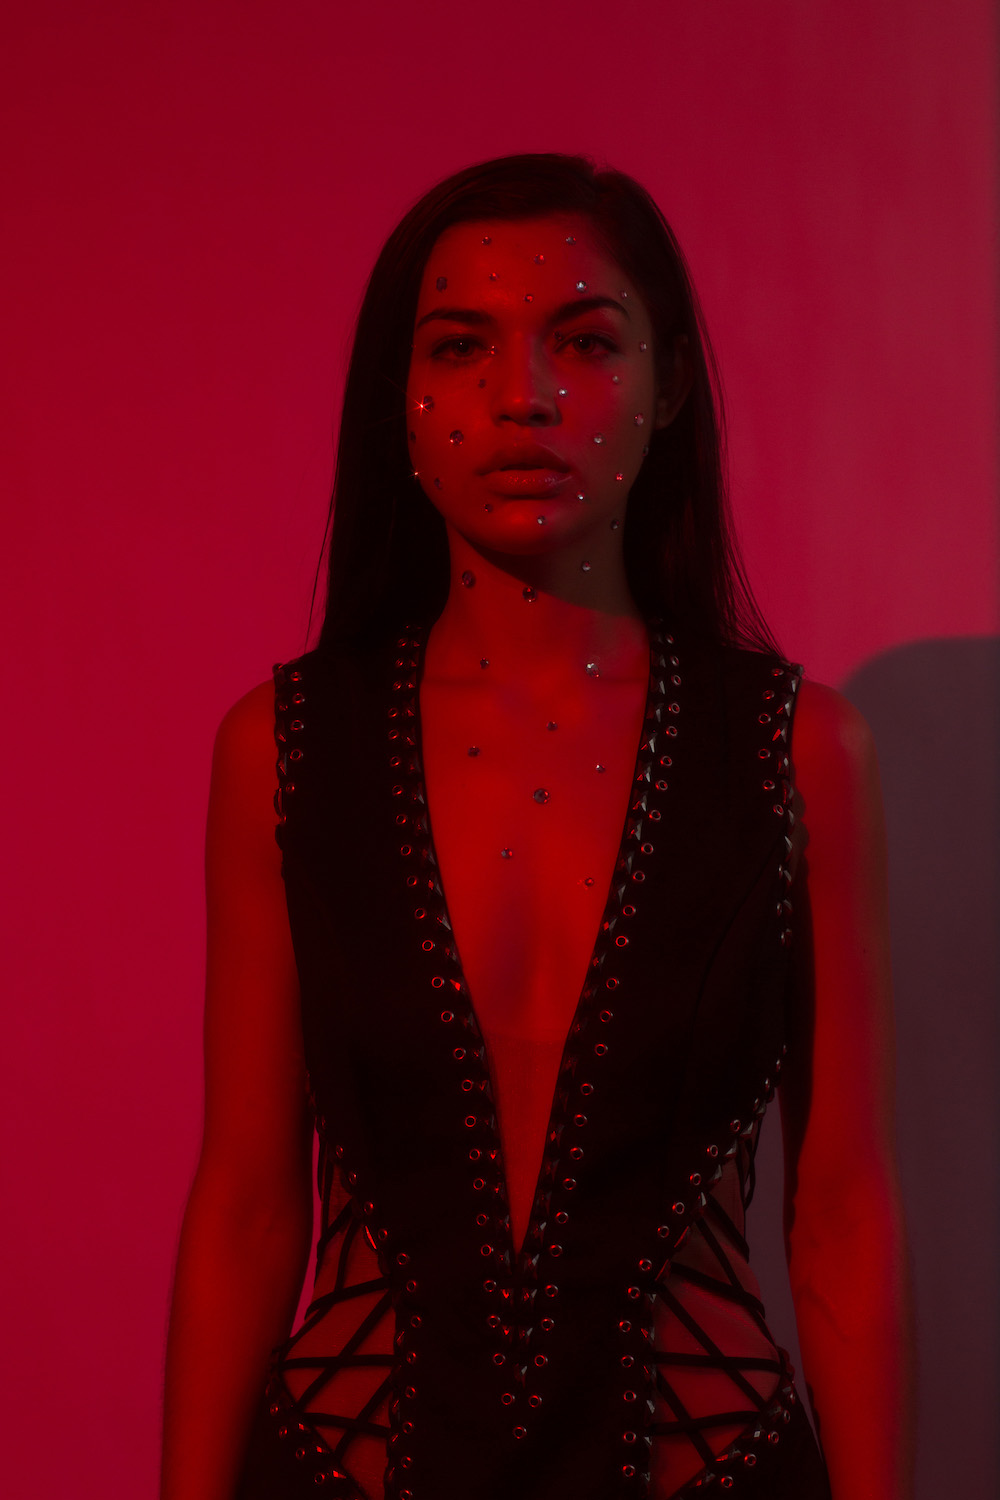
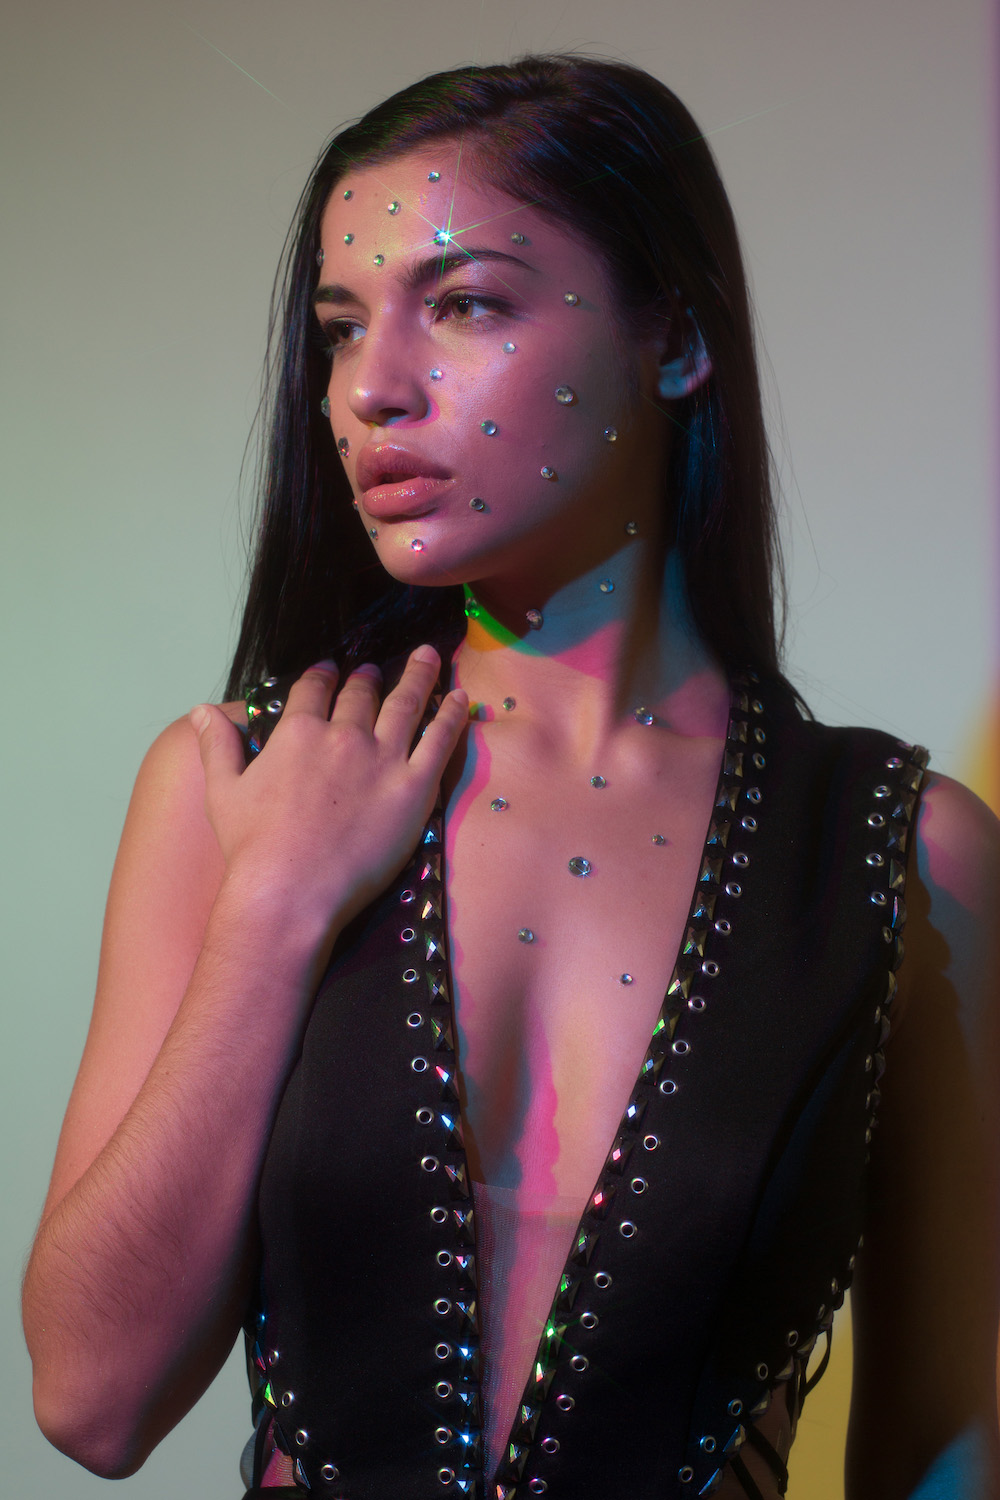
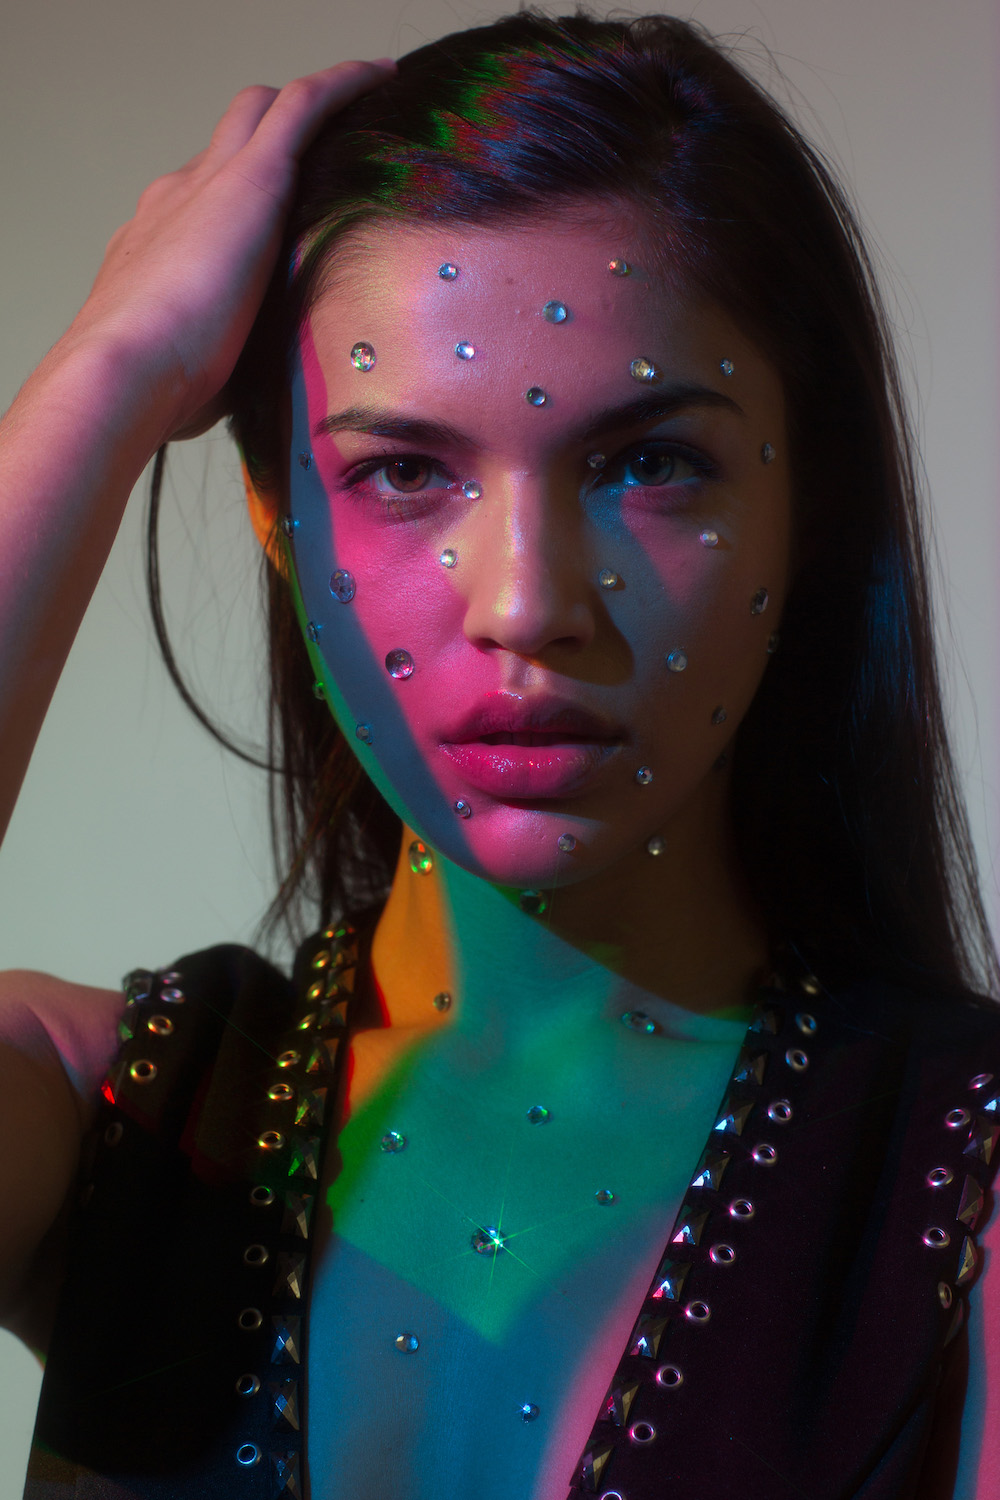
Once I had my settings figured out, I asked the model to make slight movements between each shot as I shot from a number of angles to ensure I get the best possible starburst, Figure 12. The best part of using this technique is the beautiful chaos that occurs whenever she moves, causing more colorful shadows, Figure 13. As you can see in my setup shot, I use a stool on castors, which allows me to move to my gear rack, to my light stand, or back/forth for my composition, without a lot of standing up/sitting down/walking on my knees. Basically it saves me a lot of time and energy.
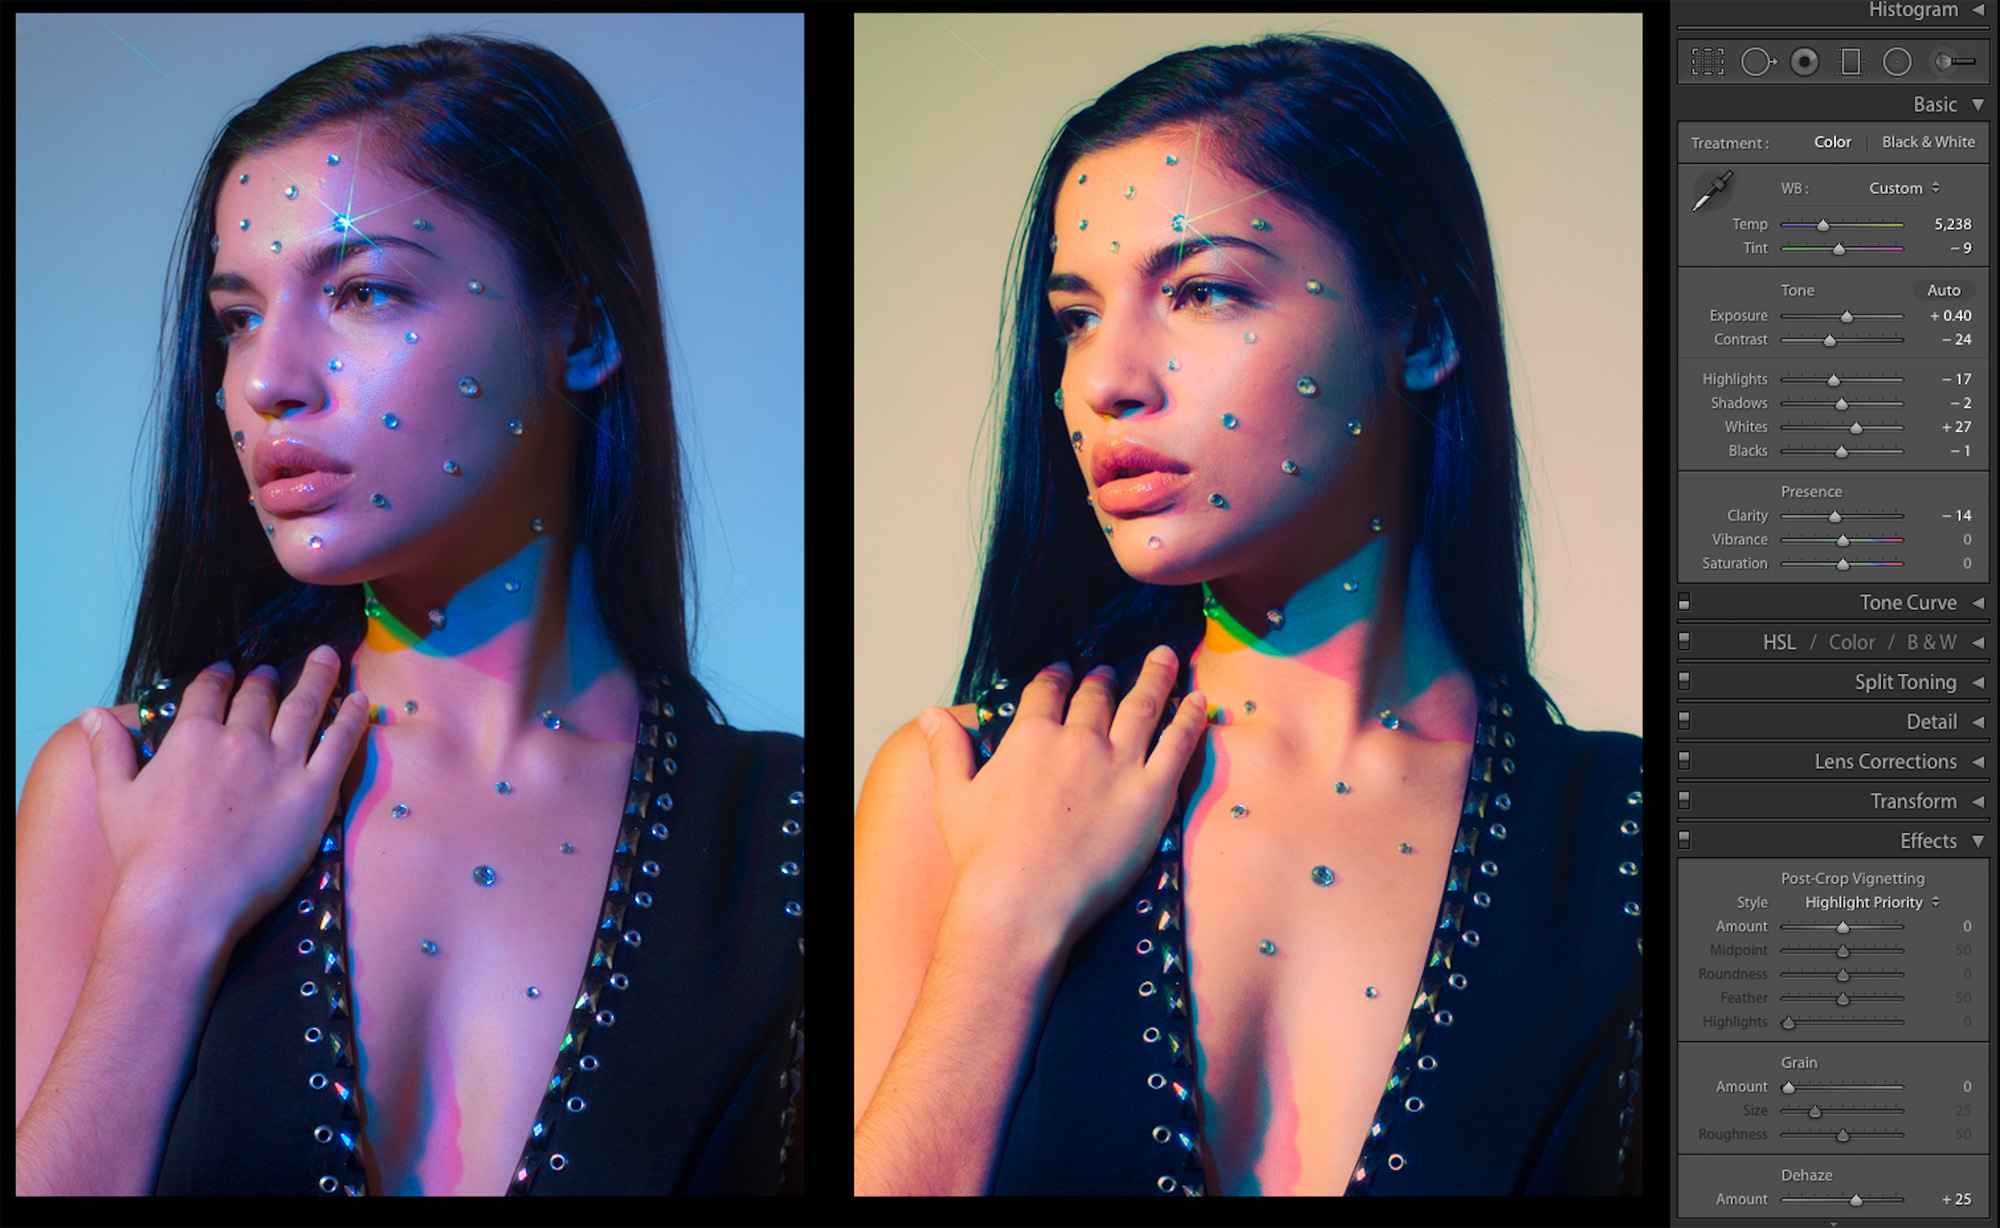
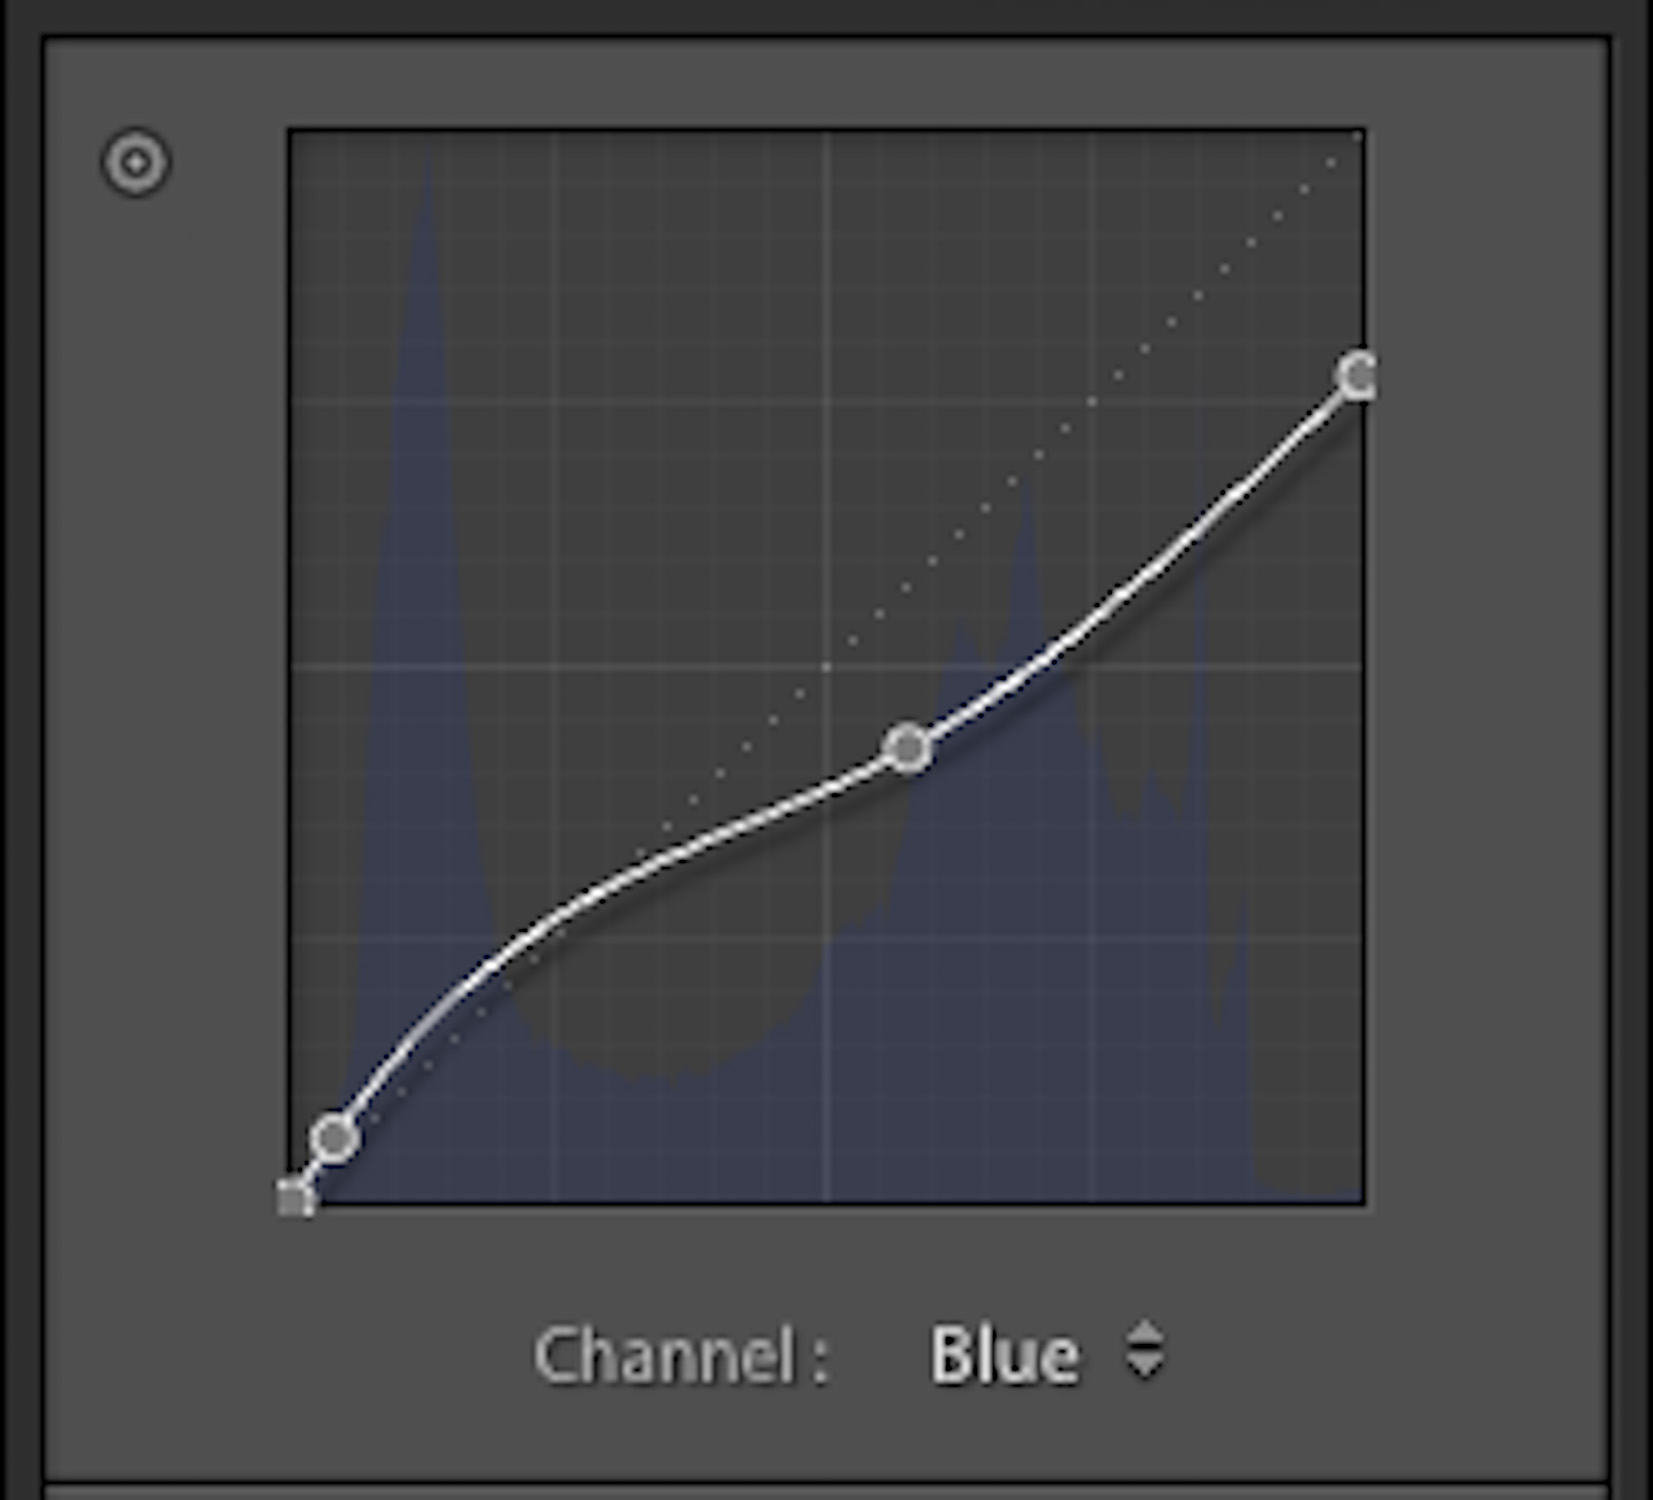
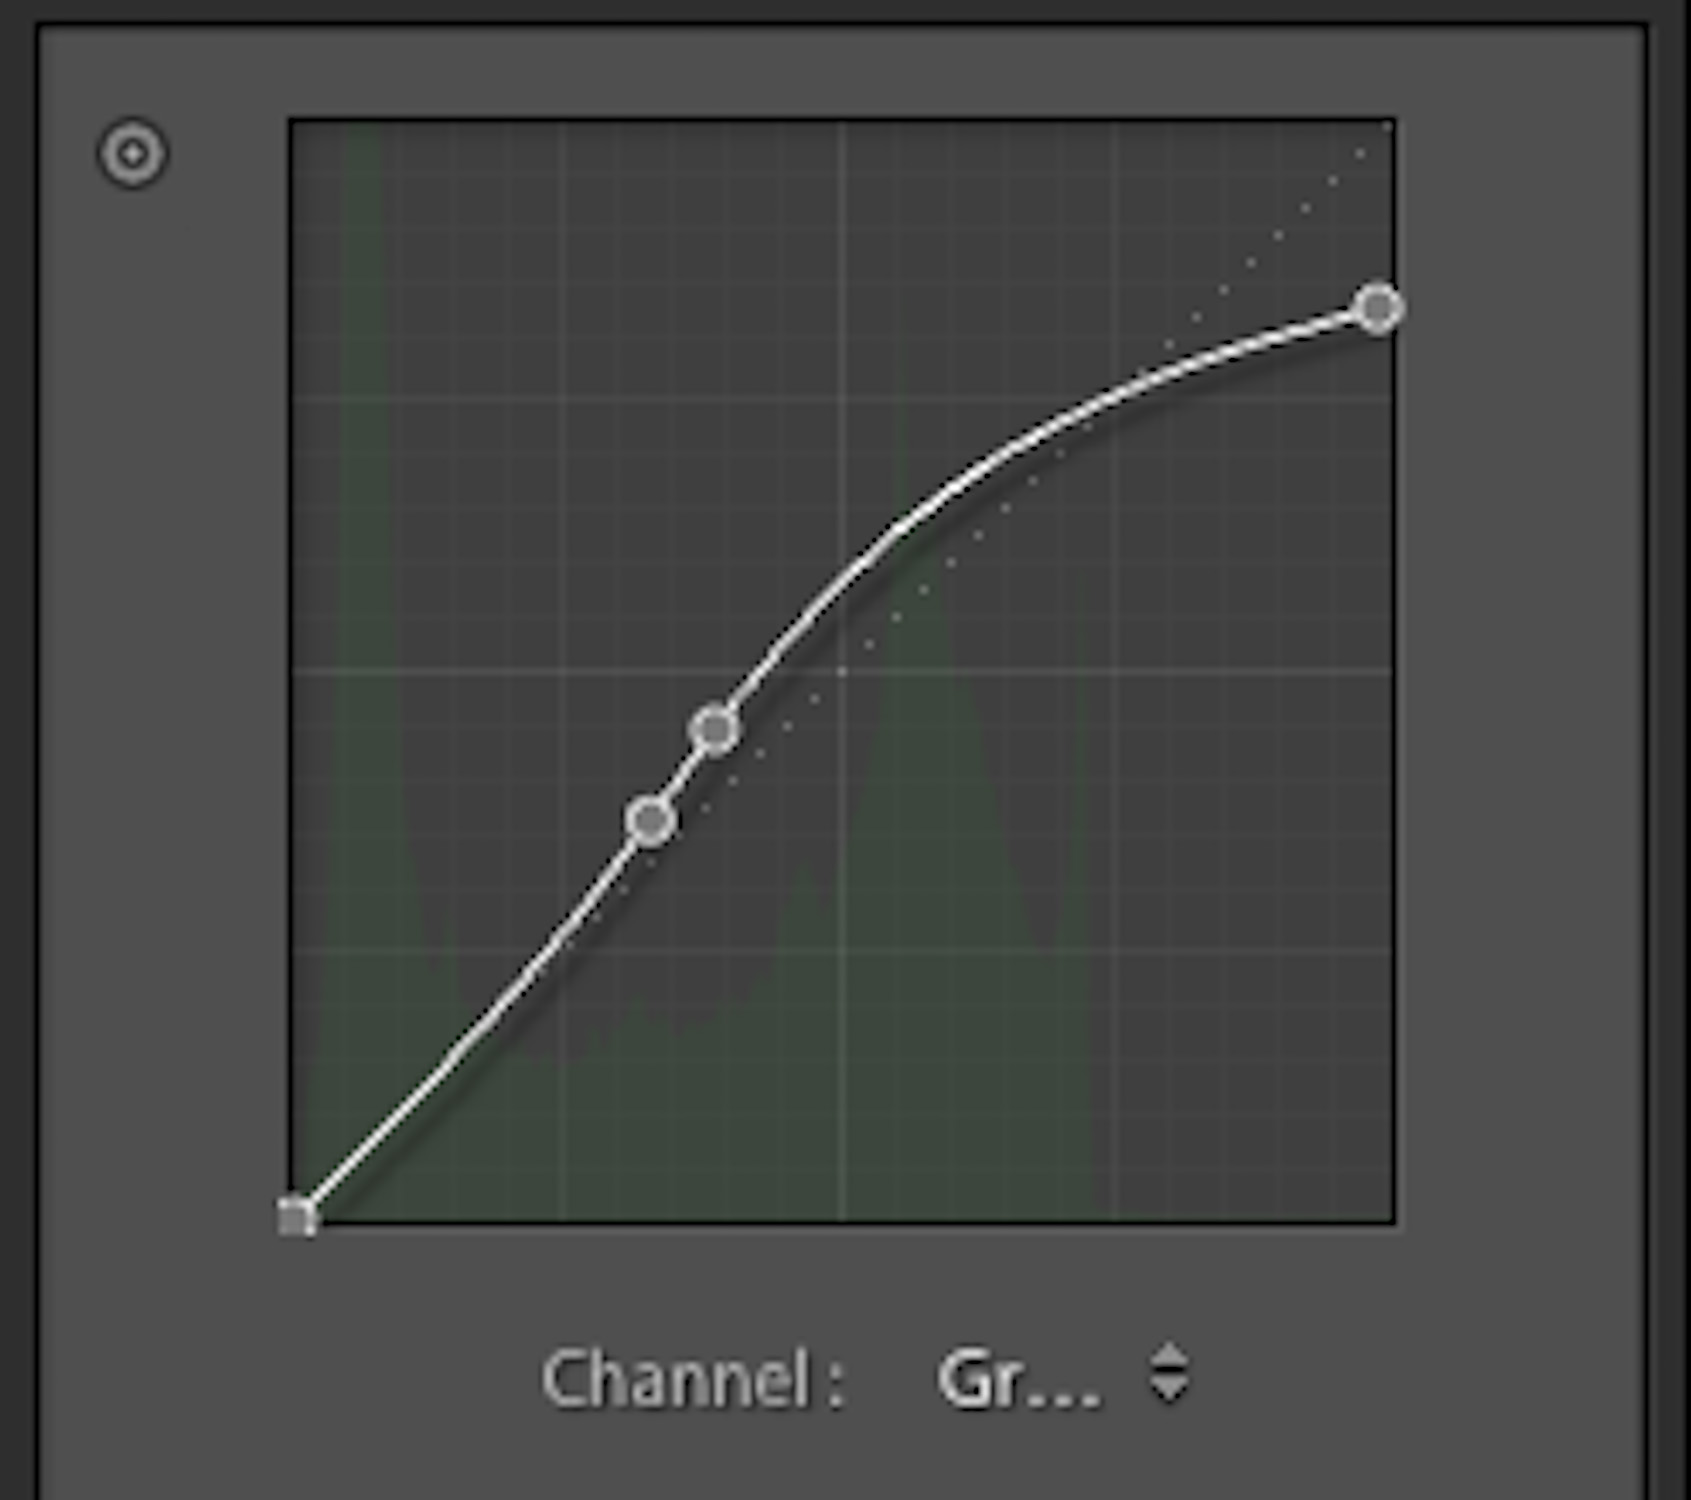
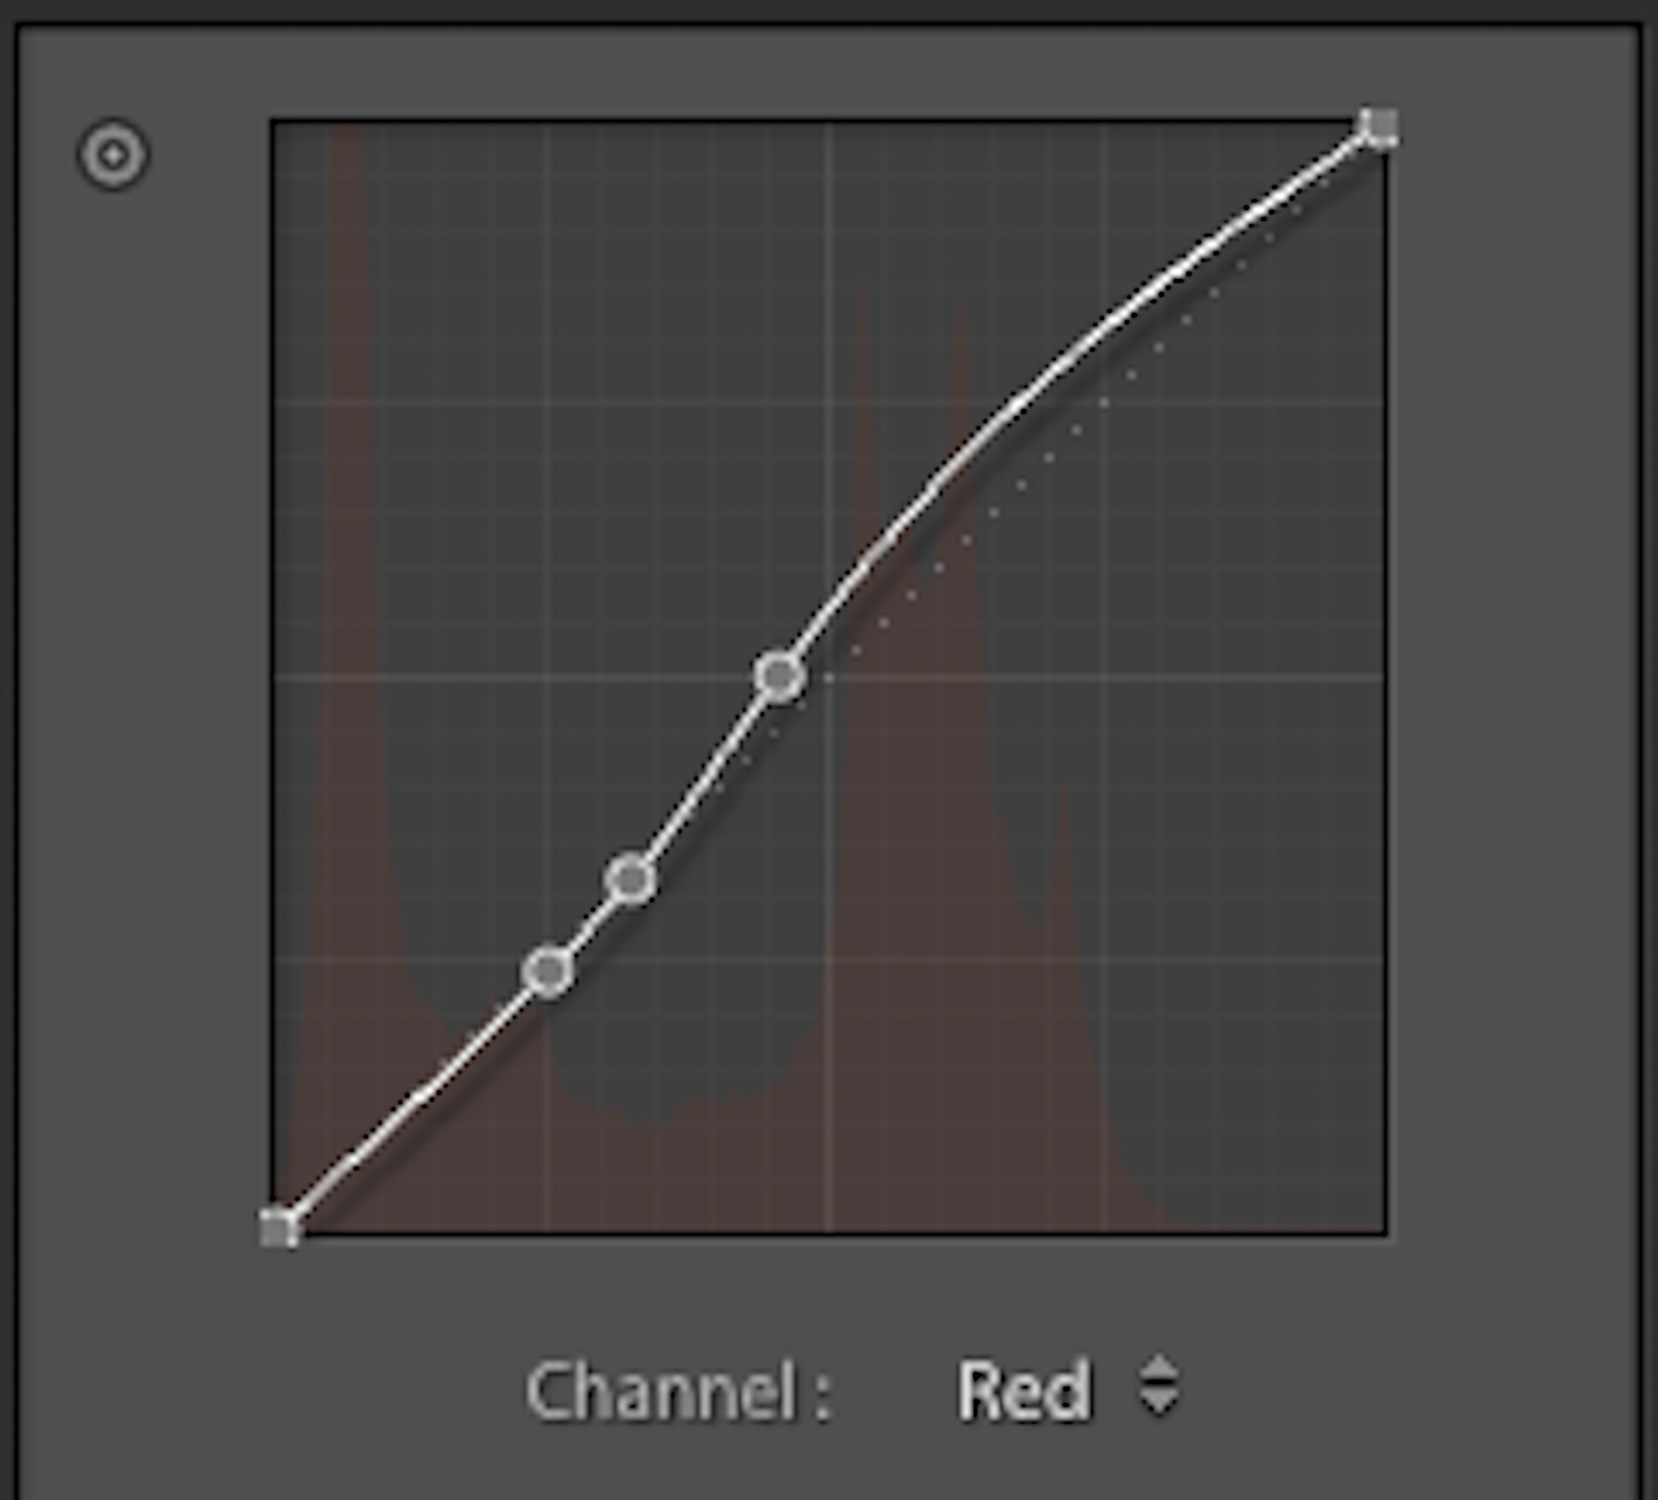
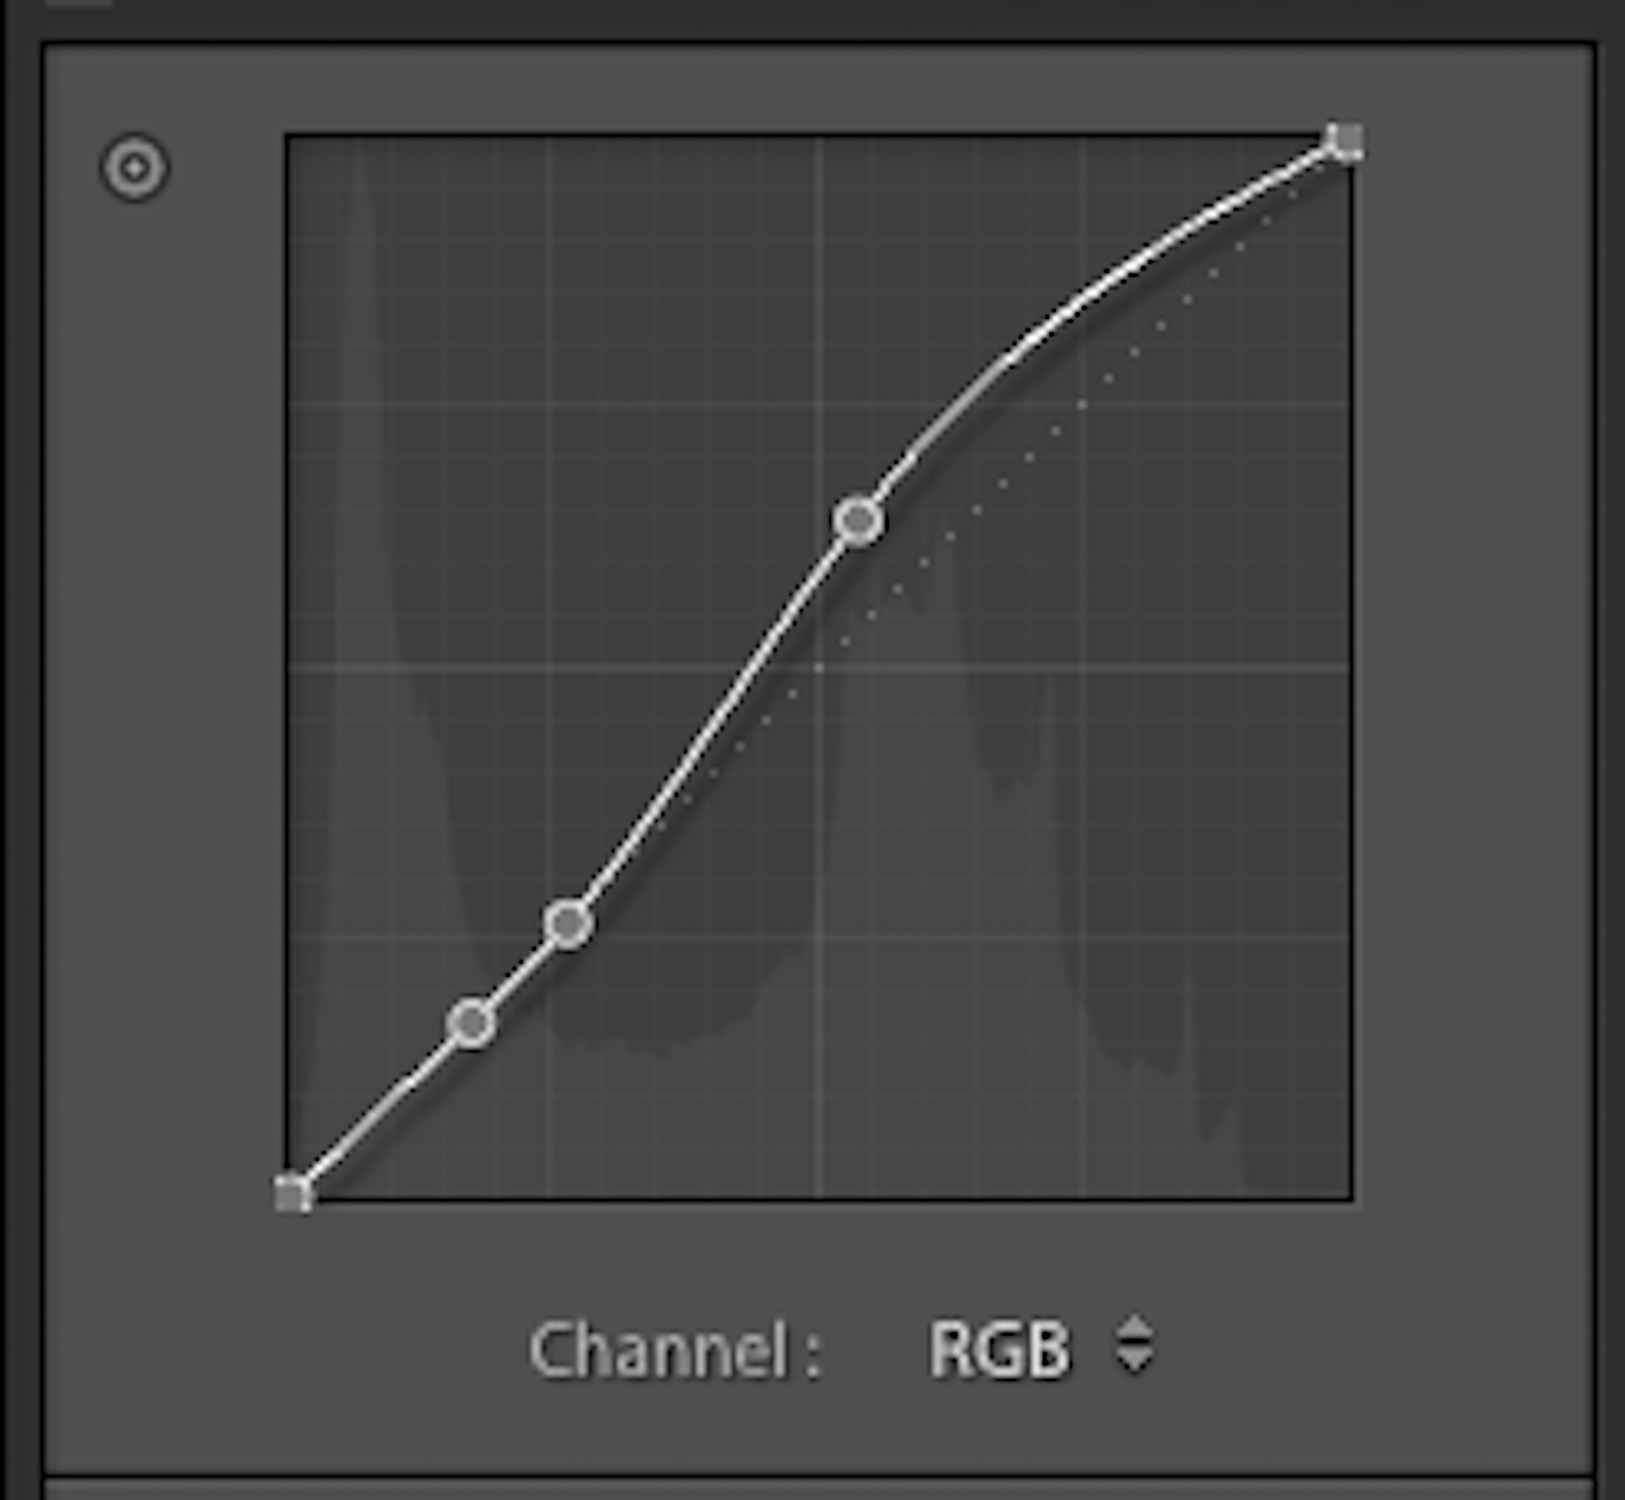
In Lightroom, Figure 14, I decided to add a warm tone to the image, by lowering the highlight points in the green and blue tones curves (which added magenta and yellow to it). Though I could’ve simply adjusted the color temperature if I wanted a warmer image, by instead lowering the highlight points of the cooler tone curves, I added warmth to the highlight portions of the image, while at the same time reducing the shininess in her skin, Figure 15.

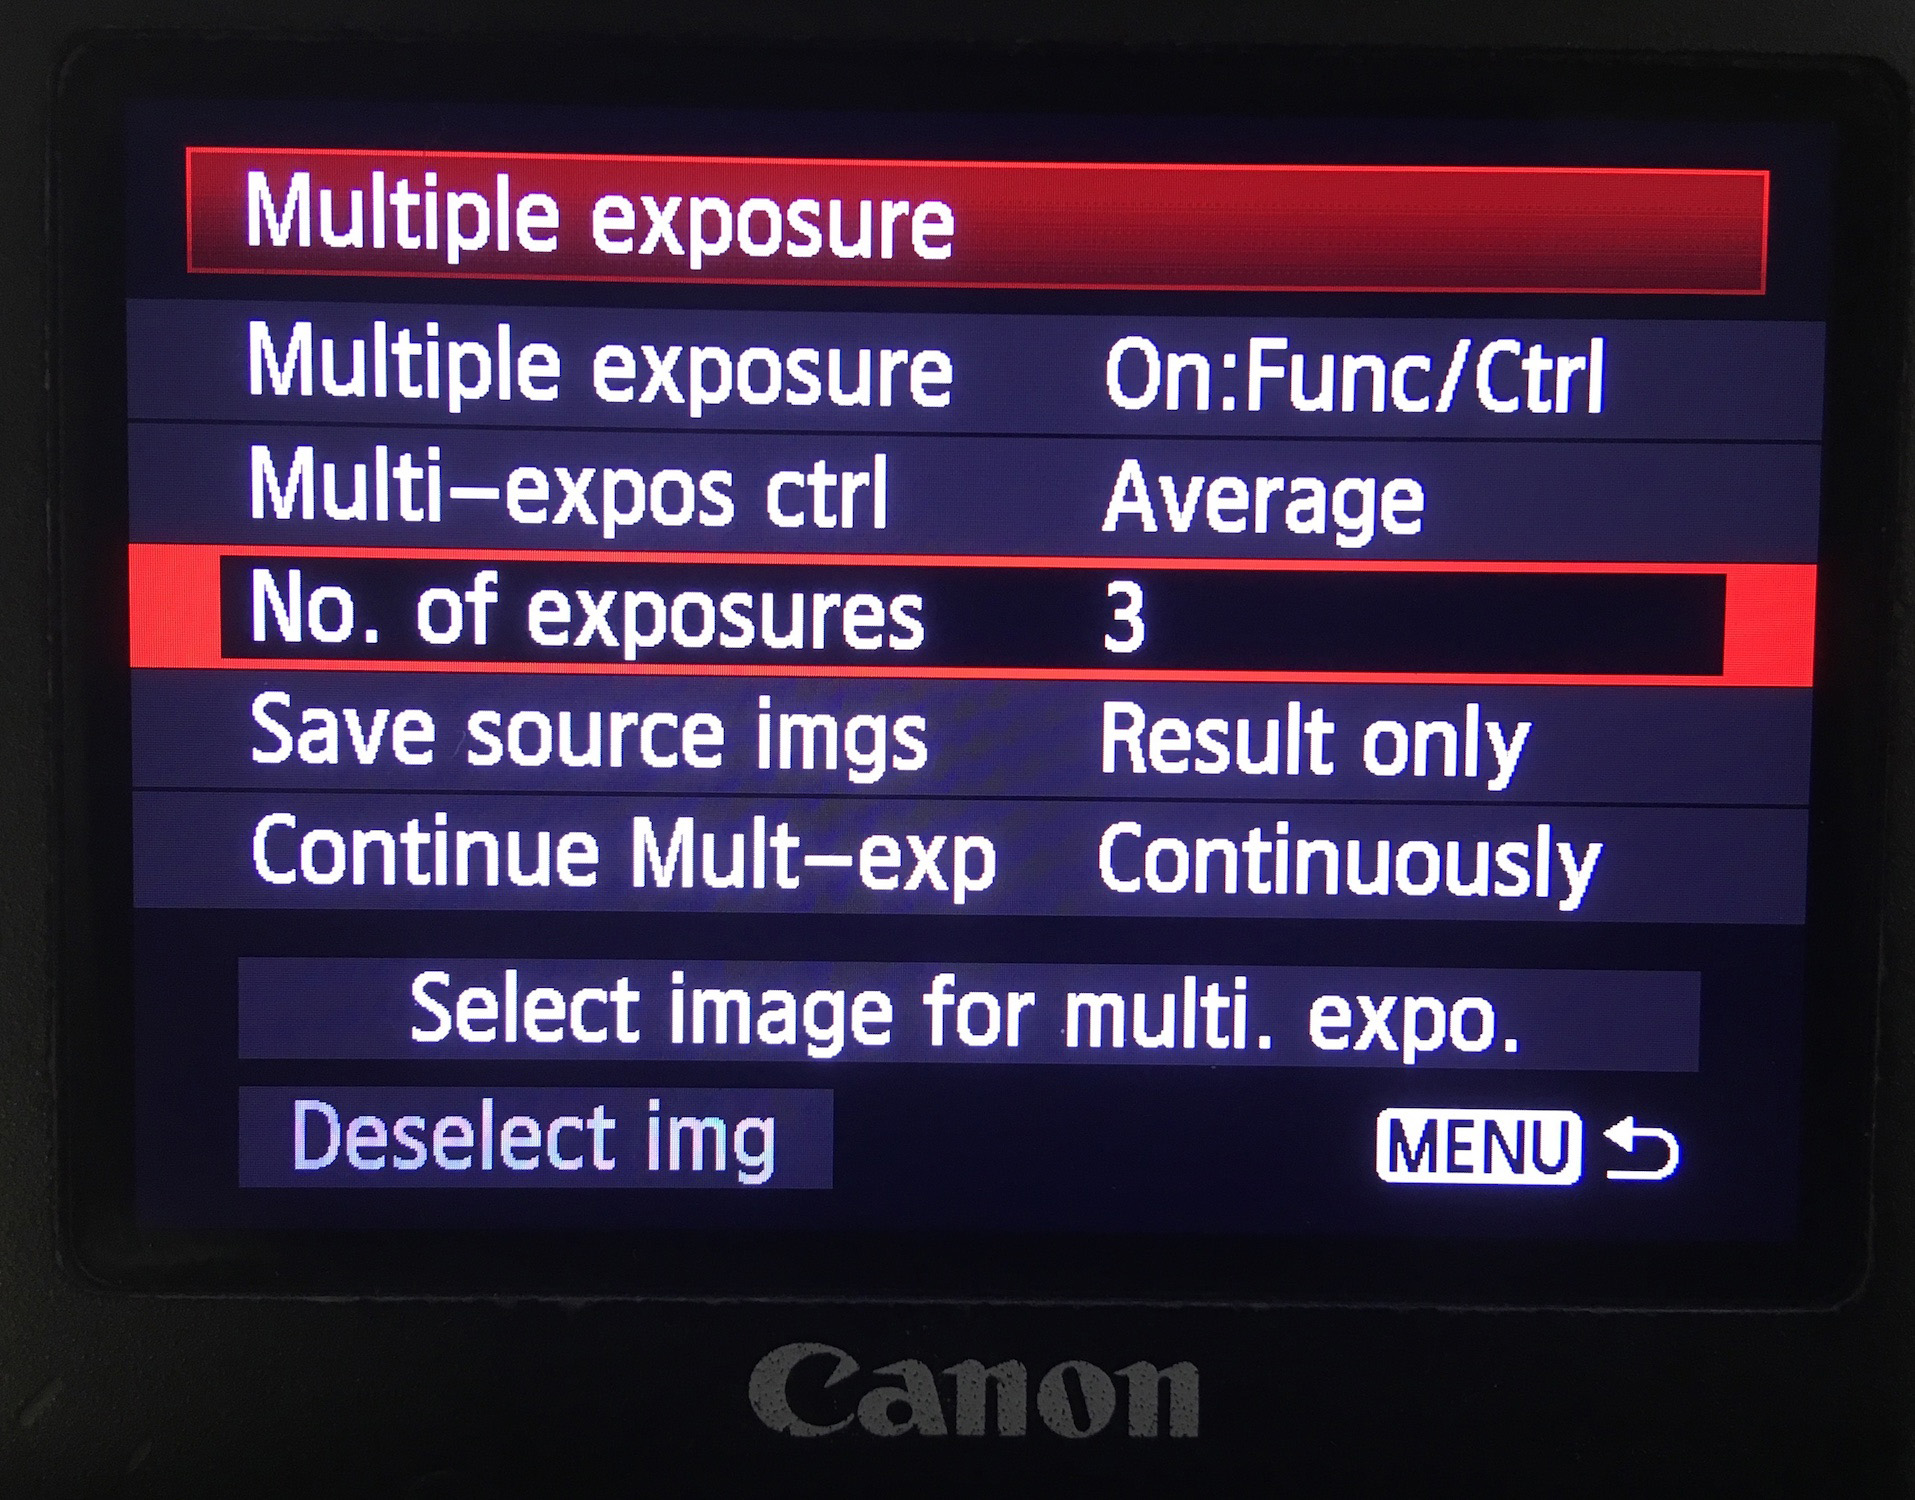
Now let’s take it step further an add an extra layer of colorful chaos. Many cameras have a multiple exposure feature. In the Canon 5DIII, there a few options to choose from before you get going. You need to select how many exposures are in one shot; if each exposure is saved or just the resulting image is saved; and how the images are blended together, Figure 16.
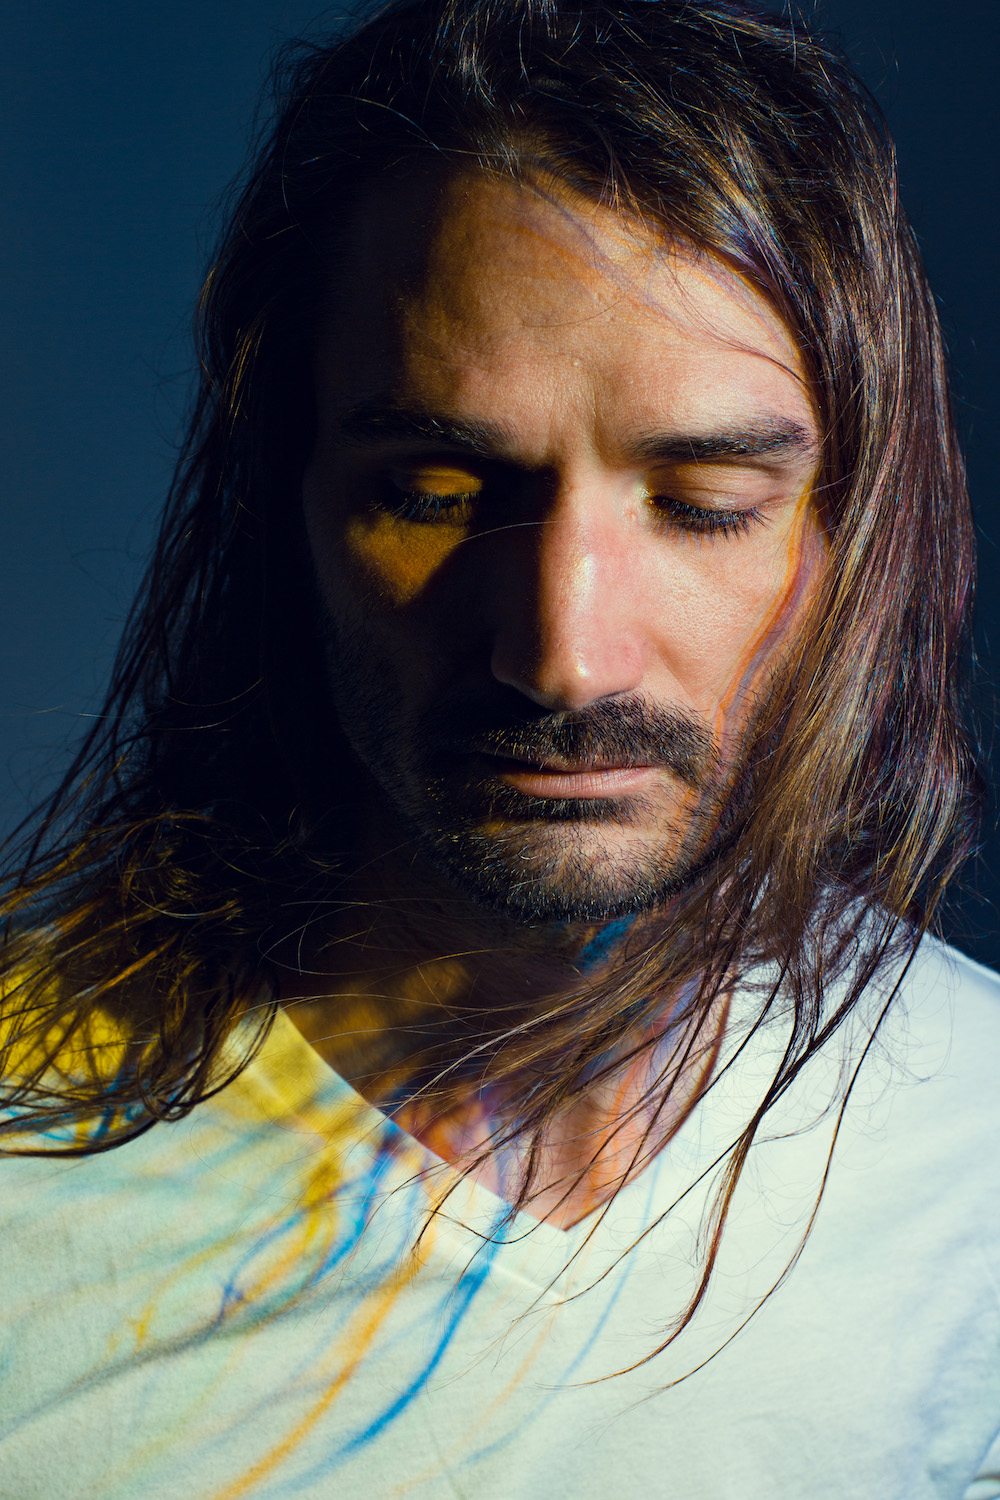
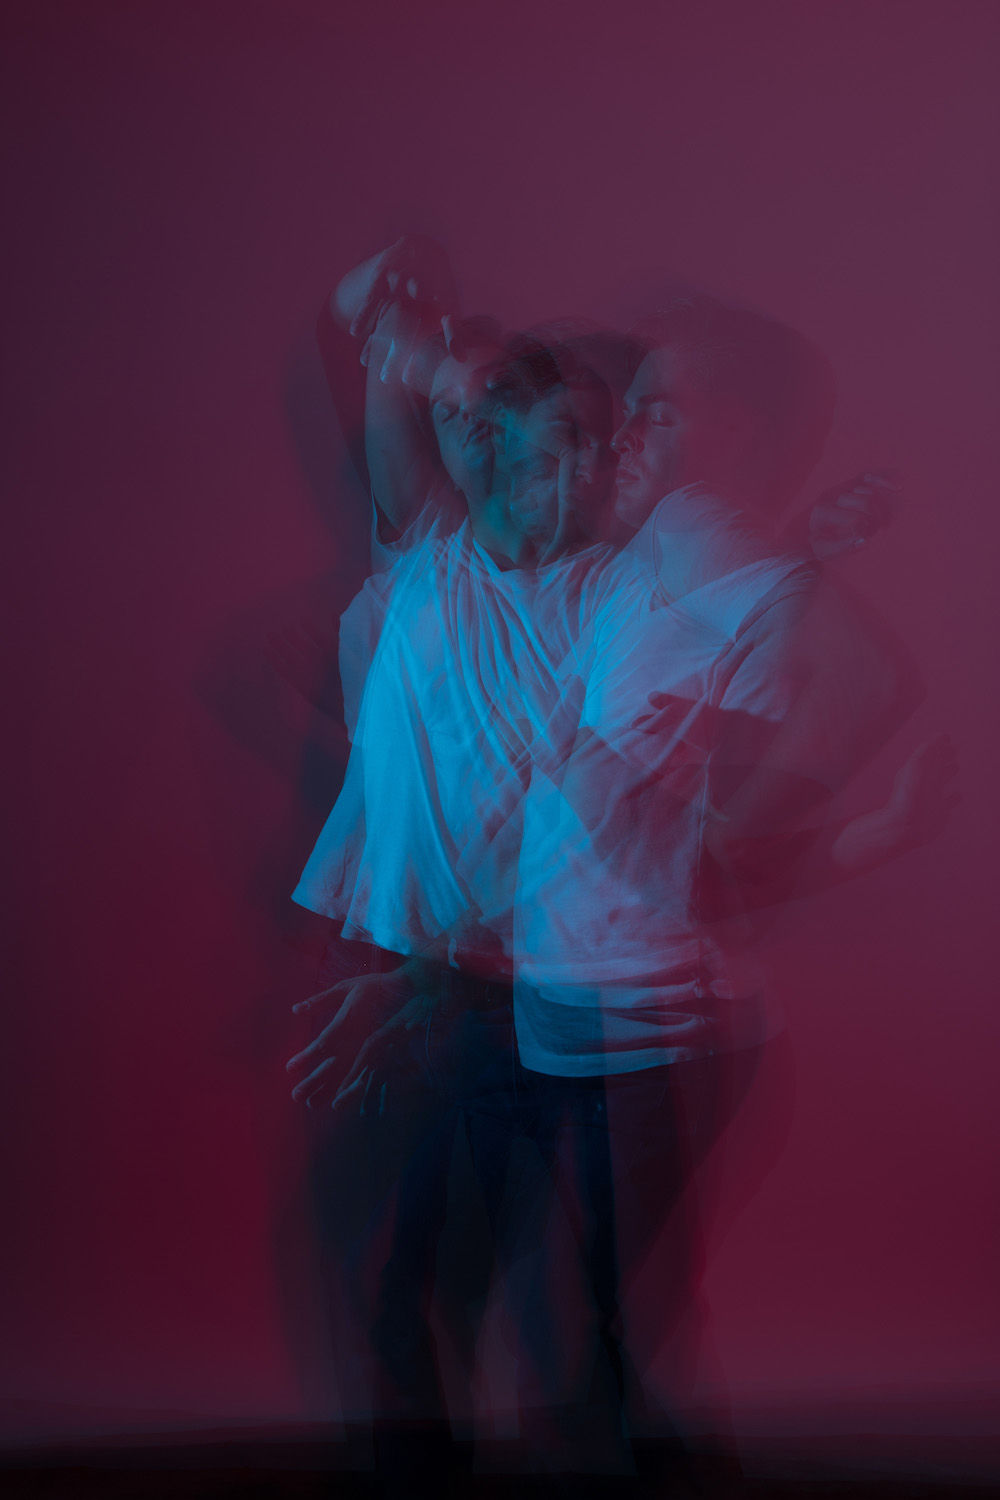
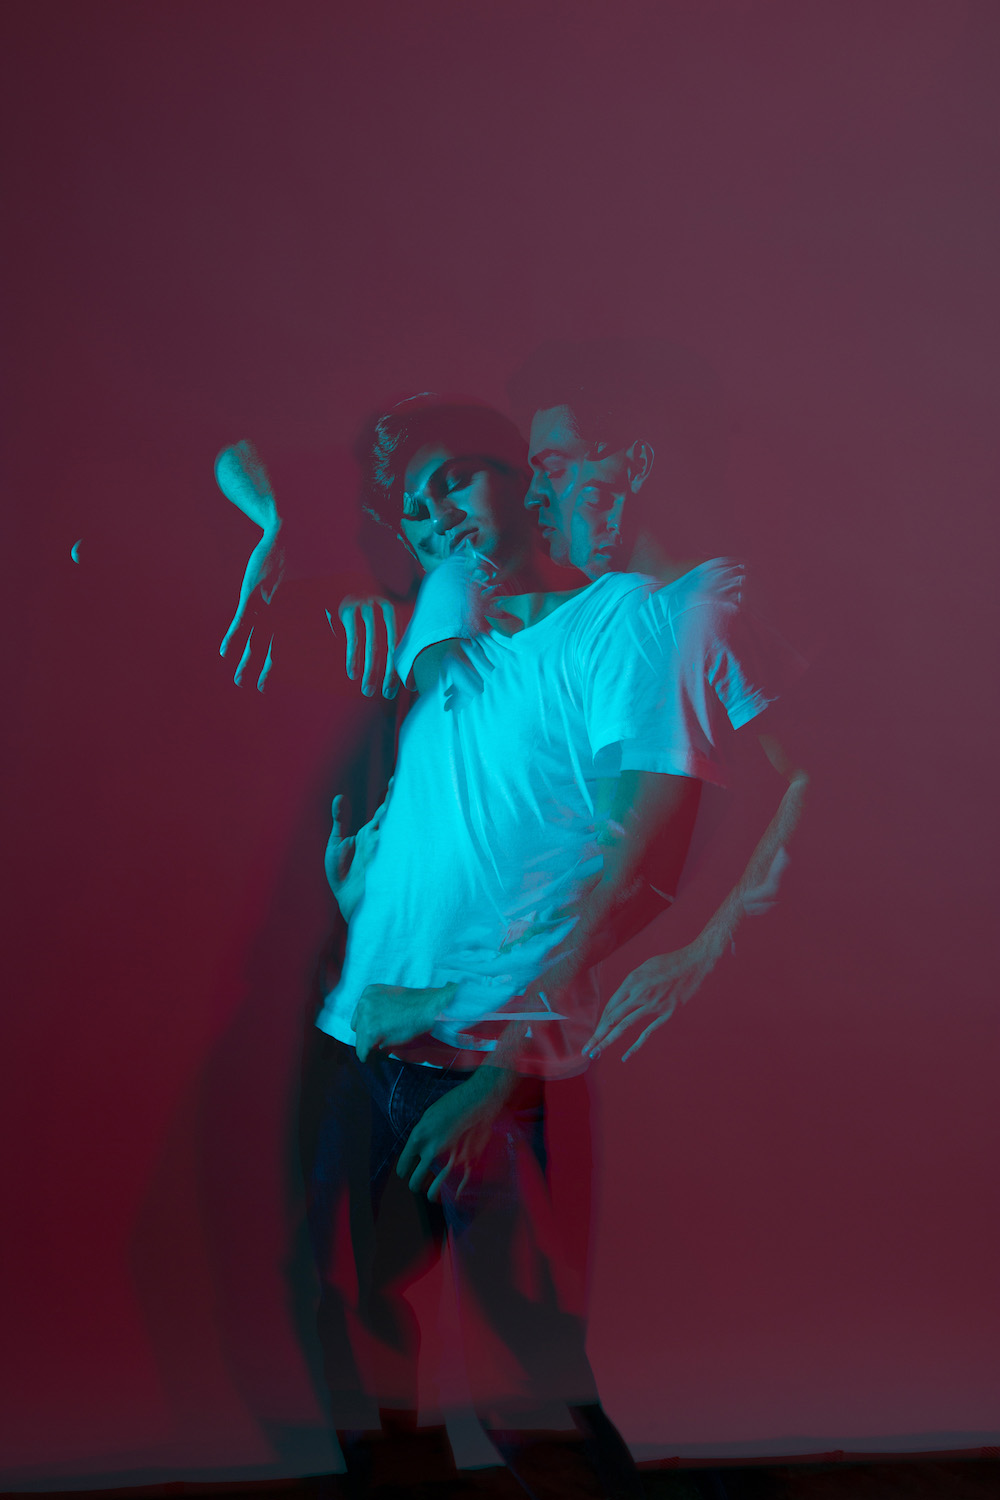
In Figure 17, you can see the colorful shadows on Curtis’ shirt, which were created by cyan/magenta/yellow light falling on his hair. As usual, I have each of the three lights on their own channel. When I make a multiple exposure, I set my camera to take three exposures with the blending mode set to “average”. For each 3-shot portrait, I start by toggling off Channels B and C, leaving on just A, and take a shot. Then I toggle off A, and turn on B and take a shot. Then the same with C, Figure 18. In the second between each exposure, as I am toggling channels on and off, my composition shifts slightly, as does my subject. This means that each colored exposure is different, Figure 19, resulting in an even more vibrant, chaotic image, Figure 20.

There are endless possibilities once you start experimenting with multiple exposures. When I am making a multiple exposure, I make sure to explain to my subject how many exposures there are in each sequence, giving them a better idea of what I’m doing and when we’ve moved on to a new shot. Sometimes I direct them to be still, while other times I invite large movements, such as having them look side to side or moving the camera dramatically between each exposure, Figure 21.

You can also experiment with using different numbers of exposures or different blending modes. You can see how dramatically different each image looks with each blending mode, Figure 22. In Figure 23 I used the same technique as I did with Curtis in Figure 20, except this time I used red, green, and blue gels, with the blending mode set to “bright”. That shot is straight out of camera. Zero editing. The resulting images makes me think of what it may look like if each colored layer of a screen print came to life and started moving on its own.


Based on the variety of techniques in this article alone, it should be clear that colored shadows can be created in a myriad of ways. Explore layering different color combinations or mixing in other techniques such as shutter drag with multiple exposures. The exploration is the best part.
You can see more of Nick’s work at NickFancher.com, follow him on Instagram, and Twitter, and check out his Chroma Workshop Tour!
Hey Nick,
Thanks for sharing, I’ve seen your work around the internet and it’s awesome! I thought this technique was all done in post production, really cool to see that it was all done in camera. Looking forward to checking out your new book.
Cheers!