

Top Four Reasons Why You Can’t Afford to Miss Kristina’s New Class
Ok everyone, it’s slowly counting down to the Holidays and one of the things on my wish list, is TIME! At this point in the year, it’s that one elusive thing that slips away through our fingers that there never seems to be enough of. Well – this mysterious thing called time isn’t just in high demand during the holidays, but always. So, when it comes to my method of teaching Photoshop and Lightroom… if the technique doesn’t save you time, then I’m not interested in teaching it.
Tip #1: TIME
As you can imagine, my new KelbyOne class does just that. Saves. You. TIME. So many people out there think it’s not possible to retouch portraits solely in Adobe Lightroom, so they take each and every portrait they shoot into
Photoshop and create layers upon layers of adjustments to fix a few problem areas on a face. To all of you, I suggest you watch my brand-spankin-new class on Retouching Portraits in Lightroom, and then come back to me if you still feel the same way. Even the classes intro has time saving value! Just listen to what this user got out of just watching the intro: “Thanks so much for an excellent set of lessons on Lightroom portrait retouching. What sets you and this class apart and above others is the intro sessions on preparing and setting the stage. I’ve been struggling with LR performance and you solved my angst in mere seconds.” – Doug Stringer
Tip #2: KILL OVER FIVE BIRDS WITH ONE STONE
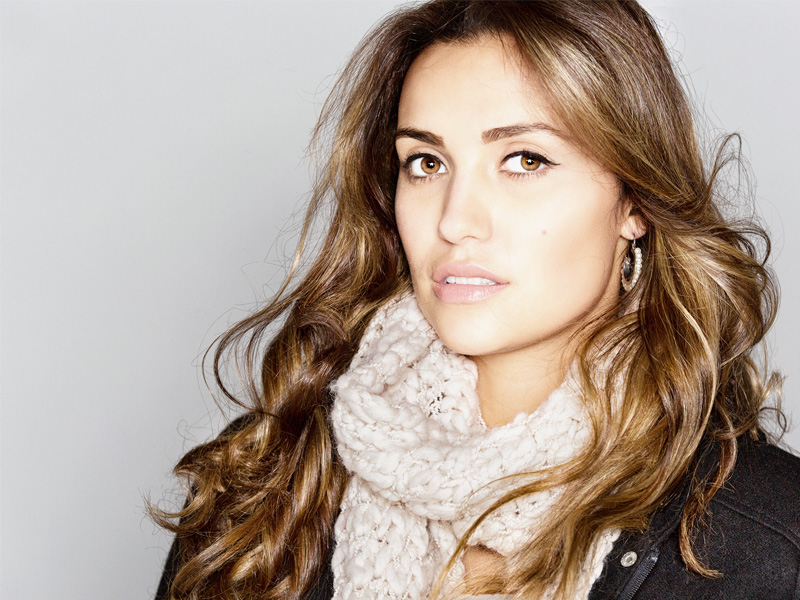
Ok, so this tip may need a little explaining… But what I mean is… Let’s say you want to make five changes to the iris of your model. So – let’s hypothetically think about how we would do that in Photoshop verses Lightroom. In Photoshop, you would have to create five different adjustment layers in order to make those changes.
1) Color Balance (make eyes more blue)
2) Saturation (make eyes more colorful)
3) Contrast (make highlights and shadows in iris more intense)
4) Sharpen (bring out detail from iris)
5) Curves (make iris brighter)
6) Place all adjustment layers in their own group, and paint the mask in where the effects are meant to be seen.
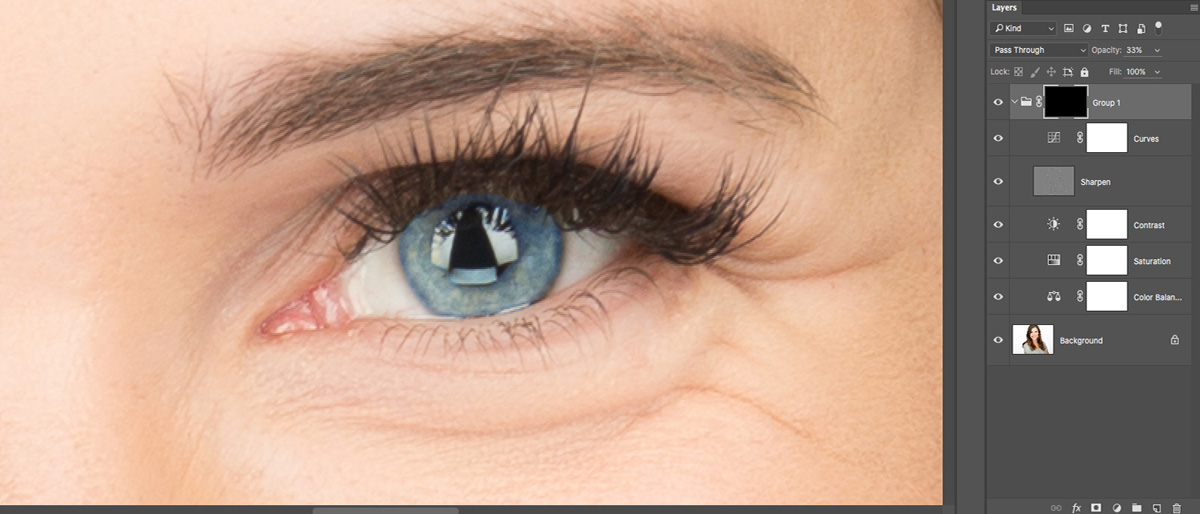
Gosh – I’m exhausted just typing all of that out! That would easily take a Photoshop newbie at least 10 minutes to do. Now… let’s think about what we would have to do to achieve the same effect in Lightroom.
1) Click on the Local Adjustment brush
2) Drag Temperature, Saturation, Contrast, Sharpness and Exposure Sliders to the desired levels.
3) Paint ONE Stroke on each eye.
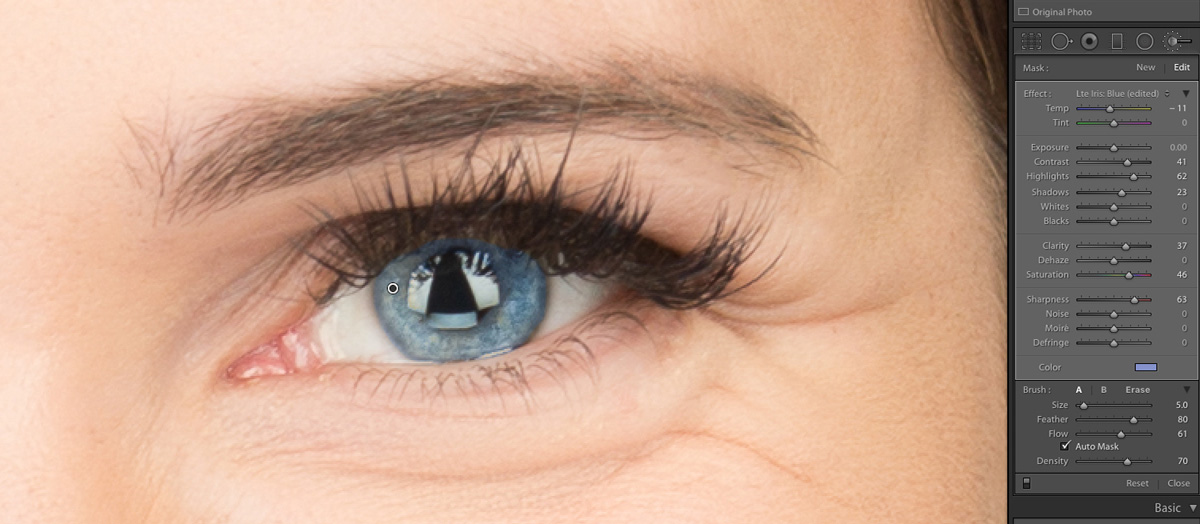
And PRESTO! You’re done! I made the same 5 changes to the iris in under 30 seconds (yes – I timed myself), with one tool! This one hypothetical scenario saved the average user nine minutes and 30 seconds! And to take this concept one step further, think about how many photos you retouch per day and you’ll immediately see the time saving benefits of this new way of thinking!
Tip #3: SYNCING IS YOUR FRIEND
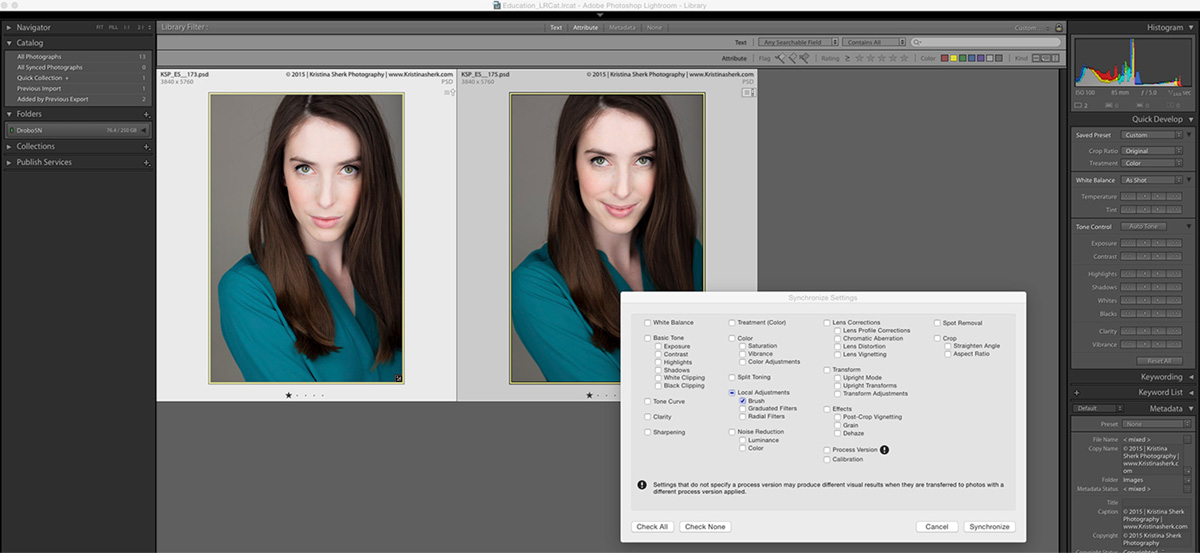
Come again, now? Yes – syncing facial portrait retouching is now possible in Lightroom CC & 6! This works on portraits where the model is in similar positions. So to accomplish this tip, you’ll need to paint in a change using Lightroom’s local adjustment brush, and then select both the image you’re working on, plus the next similar image in the batch. When you sync settings between images, make sure you tick the checkbox next to the word “Brush” under the Local Adjustments section of the sync window. And here’s your super-user tip: If the change doesn’t completely line up with the new image, then click the adjustment brush pinpoint on the new file, and then drag it to re-align the adjustment with the new image! Did I just hear someone’s brain explode? Because mine did, when I first found out that little tip-nugget. Check out Lesson 11 for more on this tip.
Tip #4 FREE IS KING
If you’ve seen any of my other KelbyOne classes, then you know that you never leave a SharkPixel class without some sort of beneficial downloadable freebie! And this class is no exception! Stick around to the end of my class, and you’ll be rewarded with some amazing downloadable brushes to kick start your Lightroom portrait retouching!
Happy Holidays… and happy retouching!
You can see more of Kristina’s work at KristinaSherk.com and SharkPixel.com, and follow her on Twitter, Facebook, YouTube, and Instagram.
Can’t wait to see this class!!!
I can recommend this class. The free adjustment brush presets from SharkPixel are awesome. To be honest I didn’t even know you can create adjustment brush presets and since watching this I’ve created some of my own. Thanks again for an awesome class!