Let me start by thanking Scott for giving me his blogspace for today, I will try to leave it the way I found it :)
My name is Frank Doorhof and I’m a Dutch fashion and sometimes glamour photographer. In our business we made a quite drastic move into teaching workshops instead of aiming for the magazines. I still shoot for magazines and advertising of course, but our main focus is on the teaching of workshops. In the last few years this has resulted in workshops worldwide and the release of 6 instructional DVDs and this year number 7 will hit the market.
So what is the thing I try to do in the workshops? In a time where you can see a lot of photography on the web and photographers who have only been shooting for three months already teaching workshops, it’s a market that is very confusing for the people just starting out with photography or simply people looking for a good workshop. What also struck me with amazement is the lack of basic knowledge in most posts you see online. One of the most asked questions for example on my shots is, “How did you light this?” In most of my work, with just the basic knowledge of light, you can clearly see how something was lit.
To make a long story short I try to start with my students on square one. Don’t, however, think that I only focus on how you should put the lens on the camera. That’s something I skip completely. What I do teach however, is understanding (and I mean really understanding) what light does. Too many photographers are just placing their lightsources in the trusted setup they have used for many years or which they know will work because they copied it from someone else who is successful. The problem with this is that when you don’t understand what you are doing you will one day run into big problems when a situation occurs where you have to improvise, and those situations are the ones where you can get customers for life.
By understanding what light does and how it behaves you can get a good shot in almost any situation, whether it’s with natural light, strobes or bounced light. Because even this blog space is not long enough to explain everything in detail I will give you some very quick tips which I hope will trigger you to search further on the net or maybe visit one of the workshops I teach :) Also please look into one of the greatest teachers ever – Dean Collins.
Why fake it when you can create it?
Most questions you see online are about recreating a certain style. The funny thing is that after seeing pages of people trying to recreate that style, most fail. The reason why most fail is very simple – they use different light setups. In the old days of photography everyone knew that light was the most important thing in a photograph. When your light was wrong, the picture would not come out correct. However, somehow in this day and age with Photoshop, most photographers seem to think that there is a filter for everything and they can just shoot a bad picture and the magic filter will transform it into art….. Well, I’ve seen some amazing things done with Photoshop (just visit Scott’s seminars), but even the best Photoshop users can’t make a bad picture really shine….. That instant killer shot filter still doesn’t exists….. or does it ?
Your viewfinder is your Photoshop
It depends on what you see as filter. For me the viewfinder of my camera is the first and most important step. Learn to look through the viewfinder, and I don’t mean look through the viewfinder to see the subject and shoot, but REALLY look through the viewfinder. Find the right composition, look for factors you don’t like and look for your shadows. Too often I hear the expression, “I’ll will fix that in post.” Remember that, often, fixing it right away will take you seconds while fixing it in post can ruin your picture or take you forever. If you load a picture into Photoshop that’s already almost perfect, then there are some stunning things you can do and really finish that shot into art. But remember, the shot has to be there. In fact, the raw file should already be the finished product. Photoshop should only be used for the finishing touches, or in some cases to create the real art that was envisioned.
Metering is everything
You don’t want to know the discussions I had about using a light meter. According to some the light meter is something from the past and should not be used anymore. “Just use the histogram” is the well known expression. Well think about this… When you look at your models and you look at their skin tones, are they all equal? ?I don’t think so, so when you are shooting on a histogram how do you know when you nailed the exposure? Exactly – you don’t. You can get close, but how about reshooting the same model a week or two later? Can you make a 100% accurate series? With the meter you can, and it’s lighting fast, just use the incident metering, aim towards the light source and you have your exposure. But also invest in a meter that can do spot metering. When using the spot meter function you can very quickly calculate the white or black backgrounds.?Let’s look a bit more into that very quickly.
It’s all in the numbers
To understand the method to calculate backgrounds, it’s important to first understand that 18% gray is seen as middle gray, or in fact a spike in the histogram in the center of it. (Some people claim it’s 12% but I’m more in the 18% gray camp). When you know that one stop of light is double the amount of light it’s very easy with a reflective meter to calculate the backgrounds, but also to see if a dress still holds detail in the shadow areas or highlights.
Let’s start by making a white background really white. When we start out with a measurement of our model on F8 (incident) and we want the background to turn white we can very quickly calculate how that should work. We switch to reflective reading metering and measure the background. For this example it’s also measuring F8 (to make it easier). If we shoot now, our model should be correct and the background should be 18% gray. But we wanted it to be white…… Well it’s not as hard as it seems. Every stop is double the amount of light so one can calculate white at 2.5 stops over. 18% is middle, 1 stop higher is 36%, one stop higher is 72% and add a bit more and you are at app 100, so we normally can say it’s app 2.5 stops over. For black it works the same way. 18% is middle, 1 stop less is 9%, 1 stop less is 4.5%, 1 stop less is 2.2%, 1 stop less is 1.1% so we normally put black at 4.5 stops under.
With this knowledge you can measure incredibly fast if a scene holds its detail (perfect for wedding photographers). However with the new cameras and growing dynamic range it can happen that the numbers will change slightly, so test this with your own camera, but for most cameras this technique will work flawless. When mastering this techique you will know exactly when to use fill in flash or when to just take away light.
Ok, a meter is fun but it’s not accurate?
It’s always a letdown when you buy an expensive meter and it doesn’t work the way it should. However with most light meters this is a fact. This is not the fault of the meter however, not all cameras are using a real ISO100 so you have to “calibrate” the meter to the system you are using. That sounds complicated? Well it actually isn’t. In fact you can do it within a few seconds. As mentioned before, 18% gray should render a spike in the middle of the histogram, so the proper and quick way to calibrate your light meter to your camera is to simply shoot an 18% gray card and check the spike. If it’s not in the center you can use the offset of the meter to make sure it is after the calibration. You now have an accurate tool for measuring your light setups.
Another small tip
I get a lot of mails about the high contrast shots I make, especially in the portraits. People are mailing me examples of their attempt and they don’t seem to be able to pull it off. So very fast the conclusion is drawn that it must be the expensive camera and the expensive light. In reality this is not true (luckily).
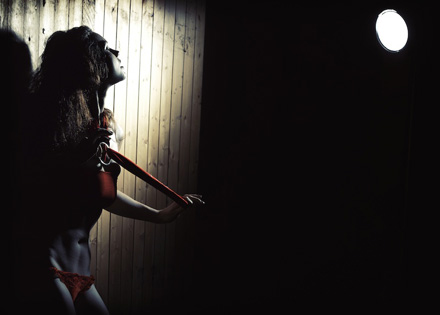
The first thing I try to teach is to start out with just one light, don’t be afraid for the shadows. They are (when properly placed) wonderful. But also understand a thing that’s called the inverse square law. The inverse square law dictates the fall off of your lights. When understanding this rule you will know that when you place a light source very close your subject the light will fall off very quickly and for a portrait this will pay back in one side of the face lit and one side of the face in darkness, and this can be done with even the largest softbox.
Understanding this rule will give you an incredible amount of power to use on location and in the studio, and the option to create every possible combination of light and shadow you have in your head.
Styling and concept
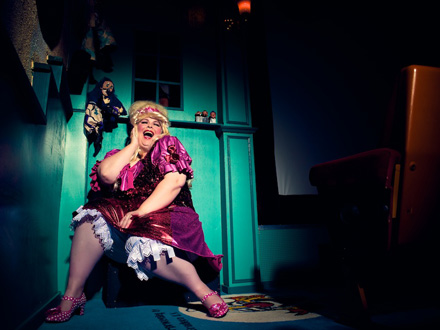
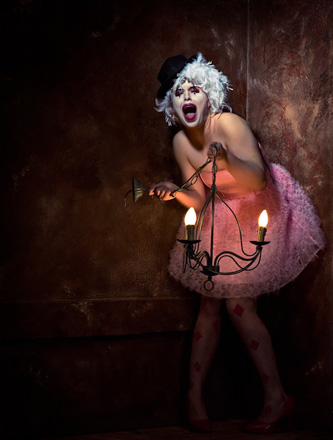
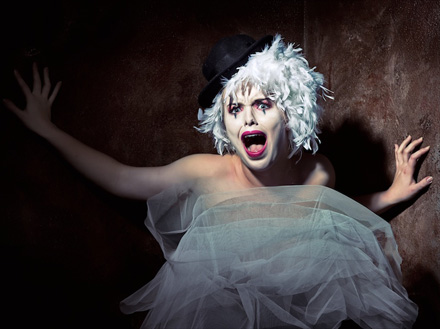
You can understand all the theory and light behavior you want, but it doesn’t guarantee a good image. Well, it will often guarantee a technically good image, but to make an image more interesting it’s very important to also invest in the styling and the model. For this a good team of creative people is vital. The best shots I see are rather simple in lighting setups but rock in styling and clothing. But I have to add that I just love over styled themes
Concluding
A blog post is always difficult to fill simply because there is limited space and so much to tell. What I hope to have triggered is a little spark into the understanding of how you can use light to your advantage. When you know what’s going on and how you can control your light, you can make your own light setups without the need to copy others. And when you learn to look through the viewfinder in a photographer’s way you, will save loads of time in Photoshop. Or in simple words, “Why fake it, when you can create it?”
Thanks so much for having me here on the Scott Kelby blog.
For more info about Frank, check out his website, follow him on Twitter, or visit his blog.


As a lot time follower of your work Frank, it’s great to see you getting further afield. Your teaching is solid, and your style excellent.
Great post Frank and very true. It’s all about the light.
And nice to see you here with Scott. You’re conquering the world :)
Grtz uit de polder
Great post! Thanks so much for the info and inspiration.
Thanks for the tips Frank , your lighting is sweet!
Thanks, if there are any questions, feel free to ask of course.
I will check the page during the day and answer what you want to know.
Hi Frank,
Thanks for the tip about making a white background really white! Great tip. Love your pictures.
Scott, great to see a Dutch photographer on your blog.
Rudi
oh, how wonderful, that Frank is blog guest at Scott place, I could just say about Frank’s work that is the one who learnd me the most, for which I am grateful to him.
Thanks Scott for giving Frank this opportunity :P
Thanks Frank for this nice blog. I had one of the workshops at Frank before and he tells with so much passion and humor that a long day is over before you know it.
Greetz
Lairnoc
Thank you ever so much for the tips Frank. Great post. Maybe even an amateur like me now can take better portraits of my grandchildren
“I don’t think so, so when you are shooting on a histogram how do you know when you nailed the exposure? Exactly – you don’t. ”
This is how. When shooting RAW exposure is not determined at the time of image acquisition. But later in your raw converter. When taking the photo the idea is to fill up those light sensors. So you shoot so that the histogram is as far to the right as possible without blowing out any detail that you think is important in the scene. If you use a light meter, there will be scenes in which you are not capturing maximum image info (i.e., not maximizing signal to noise).
Also, I’m familiar with your technique of exposing the background using a meter. (I think I first saw it explained by Dean Collins) but whether the meter is 12% or 18% makes a difference in the math. You calculate 2.5 stops based on 18%. If it’s 12% then that would be 3 stops. What’s the point of a meter if your not minding a difference of a half a stop ? You may as well leave it at home.
Let me answer that.
The whole expose to the right may be wonderful for some applications but not in fashion.
It’s important to nail the exposure dead on, simply put because we want the skintone or the look of the fabric to be as accurate as possible.
Meaning if we would expose to the right how can we even get back to the perfect exposure if we don’t know what the skin should be ?
That’s why we use calibrated meters, with a calibrated meter you can repeat your exposure time and time again. In other words when you shoot model A on day 1 in 3 setups and three weeks later on day 2 in two more setups, she will have on ALL days exact the same skintone. When you just use the histogram it’s impossible to do this, als with expose to the right it’s impossible, it would mean that you would compensate less with scenes with lot’s of white and more with darker toned scenes, in other words it will fail to make a constant.
Going further into that, the whole expose to the right I think is not THAT necessary anymore with 14-16 bits digital sensors and RAW formats as they are now. The only reason to do it now would be to get more detail from the shadows, but to be honest when I need that I will just use light.
On the 12vs18%, I always calibrate the meter on 18%, so I don’t get your remark there. We shoot an 18% graycard and calibrate the meter in our WORKFLOW so that the spike is as close to the center as possible.
I’ve been using this technique for some time and I never touch my exposure slider in my RAW module, simply because the exposures are dead on.
So that works, I never leave my meter at home, without my meter I can shoot (don’t get me wrong) but I need a lot more work in post.
>When shooting RAW exposure is not determined at the time of image acquisition. But later in your raw converter. When taking the photo the idea is to fill up those light sensors. So you shoot so that the histogram is as far to the right as possible without blowing out any detail that you think is important in the scene.
Expose for the highlight, develop for the highlight. That’s the big difference with raw based on its encoding of the data (linear). ETTR isn’t over exposure, its optimal exposure for the raw data (which would be pretty massive over exposure for the JPEG which isn’t linear).
I’ve read some on this ettr stuff and come from having used hand held incident meter and spot metering for zone system in college way back… would a correct way to combine the methods the author was describing (eg. retain accuracy of color) be to shoot ettr on the histogram but include the gray card/macbeth as a point to set accurate white balance after the fact, and see reference colors/shades in post ?
Isn’t what you get from the ettr method is a guarantee that the most sensitive part of the sensor curve/capture (the highlight end) has more data pushed into it, so in post you have more increments of capture to manipulate ?
> would a correct way to combine the methods the author was describing (eg. retain accuracy of color) be to shoot ettr on the histogram but include the gray card/macbeth as a point to set accurate white balance after the fact, and see reference colors/shades in post ?
The author is spot on (no pun intended) in the use of light meters and understanding how they can be fooled (reflective instead of incident). The only difference here is film has a classic H&D curve, raw is linear. ETTR is about placing as much data in that first stop of highlight data you wish to render since half of all the captured data falls within that first stop. Its about minimizing the signal to noise ratio. ETTR isn’t about “over exposing” for raw, if you blow out highlight data you wanted to render, you over exposed. Our light meters are based on film and the curve it produces OR JPEG capture which also has a classic curve. If you expose for that media, you are actually under exposing for ideal raw data capture. The meter will work as it should once you test the true ISO sensitively for your raw capture, just as we did with film. Pro’s didn’t just set the ISO based on what the film package said, we tested (bracketed), used differing developing methods and then set the ISO (and development) accordingly. So everything the authors points out here about metering applies here, the only difference is deciding if you are exposing for ideal Film, JPEG or raw capture. And ETTR is really only useful for the base, low ISO settings of the camera.
It all depends because on the way you have your workflow, for me ETTR is not an issue for the simple reason that I will blow out highlights because almost all shots will have some sort of maximum white, being it in the juwelry, clothing, eyes etc.
Take the catchlights in the eyes.
Because we have a filter in front of our eyes they should normally not render as 255.255.255 but often they are close but still contain detail in the whites, when ETTR is used you can very easily push them over and loose white.
Also when using ETTR in a fashion/beauty/studio setup you bring a lot of problems to yourself, set 1 the model has a white dress so I should not use ETTR, the next set she has a blue dress, and I can have 1 stop of playroom, but the next set she is dressed in black with a black background and I can have 1.5 stops of play.
In the end I’m giving myself a LOT of extra work and some guess work, if she moves a bit more towards the light I’m destroying that shot because I often use my lights at very small distances to give it a nice fall off.
ETTR will work for some workflows, I don’t believe however that fashion/glamour/beauty is one of them.
I do believe that in landscapes it can be a life saver in some cases.
Thanks for the tips Frank, great post. Goed gedaan jochie :)
Hello Frank,
Before anything, please let me thank you for doing this. I appreciate you taking the time to give advice to fellow photographers. :)
My question is, how do you form relationships with stylists and designers? What advice do you have for photographers to network successfully with people that will take the photos to the next step?
Thanks again,
Cesar Gallo
Hi,
As with everything in live and business your network is vital.
For me it’s using the net, I’m very active online with sharing my work and answering questions and of course participation in events.
That’s in my opinion nowadays the best way to network. And be nice to your team, no-one wants to work with some that is egocentric, so share the income from a shoot, and most of all share the creativity, give your MUA and stylist more than enough images they can use.
The most heard complaint from MUA/stylists I talk to is that they only get app 1-2 shots from a shoot that they can use, the rest does not show the makeup or clothing the way intended. I always try to make it a team effort, that means our whole team benefits from the shoot, and that will pay itself back in having the models, MUA, stylists wanting to work with you.
How can you balance your lights without a light meter? I totally agree, get it right in camera and save valuable time in post-production.
Thank you for an excellent piece.
That’s why I always say, “why fake it, when you can create it” :-)
Getting it right in the camera saves a lot of work and the end result is much better.
Wonderful tips, Frank!
Congratulations!
Another excellent post Frank. Always a joy to read your articles & watch your videos.
A great post Frank and I’m totally with you about ‘getting it right in camera’.
There’s been alot of buzz and excitement swirling around the internet lately about the upcoming release of Photoshop CS5. Now without doubt with his new release, Adobe have completely hit the ball out of the park; it’s totally awesome. However, that being said as you suggest, it’s just another tool. Sure there are going to be some incredible enhancements and tools available to us but as the old saying goes…’Garbage in, Garbage out’. If anything I see the new release being an incredible workflow enhancer enabling us to perform tasks alot quicker and simpler.
With regards lighting, I sometimes feel there’s too much eagerness from new photogs to use more than one light. So much can be done with just one light as you mention; geez we only need to look at the work of Zack Arias to see this.
Getting back to your own work Frank, I’ve only recently been introduced to it, but in that short time I can honestly say ‘I’m a fan’. Stunning, absolutely stunning so thanks for sharing.
Best wishes,
Glyn
Thanks Glyn really appreciatie this.
One light can be the only thing you need, but not always of course.
I always think in 1-2 lights and will add what I need more after that.
A big problem of many is that they start out with 10 lights and try to work it out to fit, best is always to build your lights like a painter, start with the base and start with adding accents from there, and always remember that overkill is very easily achieved with light.
I do have to add that I sometimes love to use lots of lights also :D
Great blog Frank and very clear info. Thanx.
And remind me to sign up for a workshop with you ;-)
Grtz from your hometown
Thank you Frank, for taking the time to explain your use of a light meter. I have been following the “Expose to the right” idea for quite some time, and you are spot on with the statement that it creates a lot of extra work in post. Thank you for your time!
Hi Frank,
Thanks for this super post. I’m very new to digital photography, well photography in general. My camera is a Canon 40D. You mentioned changing the offset to match the 18% grey. Are you changing the camera or the light meter? I’ll have to back and re-read that. It wasn’t clear to me. Your photos are excellent. Also, any recommendations on a light meter, and being new, do you have workshops here in the USA? Would love to attend one.
Thanks again, you really sparked my interest in doing things correctly in Camera!
Dennis
PS Thanks Scott for having Frank as a guest!
Hi,
The offset is done in the meter, for most Sekonic’s it’s pressing the two ISO buttons. If your meter can’t be calibrated, don’t panic.
You can also calibrate/adjust with the ISO, so instead of using ISO100 use ISO80 or ISO125 it will be less accurate than being able to set it in 1/10ths but in some cases it’s better than nothing.
Remember by the way that this has nothing to do with the meter not being correct, you’re simply making the two match.
Check per camera and lens.
I’m in NY teaching at the end of April, see http://www.frankdoorhof.com/ny
I’m using the Sekonic L758 myself which I love because it has several memories and because I’m using different cameras that’s very nice, I would advise to buy a meter that also includes a spot meter, and yes they are expensive, but worth every cent in my opinion.
Greetings,
Frank
Hi Frank!
Thanks for the info and answer to my question. It now make sense.
Also, I appreciate the info on your class and work around on the
ISO settings.
Again, great post!
Dennis
“Too often I hear the expression, “I’ll will fix that in post.” Remember that, often, fixing it right away will take you seconds while fixing it in post can ruin your picture or take you forever…”
I love this quote. I really love all the great Photoshop tips, and books – but it’s so much easier to not have to use Photoshop! [No offense, fine people of NAPP et al…]
Great post!
Frank, Great blog and tips! (gets them wheels turning). I looked at you order form on the video tutorials, can they be ordered from the USA? If so can you tell me how, I would like to try one. Thanks again for the blog, I loved it.
Scott, Will there be a World Photowalk this year (have not seen anything on it). My little group of photogs here in Spartanburg want to do one (we have about 14 or so in our group) and just trying to get organized. Thanks.
Hi,
They can be ordered from our webshop directly, please contact me for more information, don’t know if I can post direct commercial links.
Hi Frank,
Your line at the end, ” What I hope to have triggered is a little spark…” really hits home. I will play with my lighting stuff and my new light meter this weekend along with the card from the back of Scott’s Phototshop Book For Digital Photographers.
Thanks for an excellent blog.
Mike
Mike, I lost my card from the book but a very nice fellow from this blog sent me another one. I have since bought the Colorchecker Passport and it is great! I can make a prfile for every lighting condition (you may have one).
great “nuts and bolts” post, mijnheer… ;)
Hello Frank,
Fantastic post! It really hits upon several of the points you teach in your workshop. For those that don’t know, Frank teaches one-on-one workshops at his home studio in The Netherlands…I very recently had the luck of doing a one-on-one workshop with Frank.
For some people, they can pick things up very easily from looking at numbers or by sight. But i’m one of those people that needs to ‘see it in action’, but once i do see it in action, i really get it. Frank’s workshops are absolutely what i had hoped they would be. He has a very easy teaching style and you leave very inspired… We intend to exercise some of the things we learned this weekend in fact.
I’ll also be attending his NYC workshop on April 24th and 25th. I feel there is still more to learn and those locations will provide for more varied backdrops as well. For the people that are attending this workshop, you certainly have a lot cut out for you. Bring a notepad!
For the question on the DVD’s being shipped to the USA, i have all of his DVD’s. I had them all shipped to Boston, and got here in just about a week. So no worries there. And just a note on these, he teaches different things on different DVD’s. If there is a Part I and Part II i’d suggest getting both. As i learned first hand with Light II and not having Light I. :)
I’ve been a fan of his for some time and i’ve reaped many benefits from reading about his style, his setups and just his approach. I’m so happy for you Frank that you finally get a world stage for your teachings. Everyone stands to benefit greatly!
-Brendan
Thank you for your contribution — most informative. I am confused by one statement though: “…just use the incident metering, aim towards the light source and you have your exposure.” All the info I’ve studied, including Sekonic and Gossen instruction manuals, state that you should point the incident dome from the subject towards the camera lens. I would very much appreciate a clarification, thank you.
Hi,
You read that a lot and in fact it’s not correct which also puzzled me why it’s so much taught to people.
You can check this very quickly.
Setup a light source and set your camera on a tripod now take a shot with the light aimed at the model from camera position, and you will see that aimed at the lens the exposure is spot on.
Now start moving the light around the model, there is a position where the lightmeter will start to drop in exposure, however when you adjust your camera for this you will see that the skintones gets way too hot.
For example set the lightsource at the side of the model and measure towards the lens, on my setup my meter is app 2-3 stops off, meaning when I use that setting my model will be way too hot on the image.
Now there are some teachers/people that will say that if that happens one should indeed measure towards the lightsource.
I teach my students very simply to just calibrate the meter aiming towards the lightsource and KEEP doing that, your exposures will be 100% correct all the time, unless you want a certain look that needs under or over exposure.
I’ve seen an instructional DVD where the teacher claims you can best use something like a laserpointer to make sure the lightmeter really hits the middle of the lens, without putting someone down but that’s ridicilous, the dome is shaped so that the meter will pick up light under a rather wide angle, that’s also why with conventional lightsetups, like lights from the front and not too much from the side, the measuring towards the camera will probably be rather accurate, BUT when using spots, grids, fresnels and lights from the side the best way too measure is towards the lightsource.
Hope this helps and I don’t step on too many toes :D
Just try it out with the light that moves from the front to the side and you can see exactly what I mean.
But I want to add a bit too that if you don’t mind.
When looking at the theory behind it you have to remember the rule of the inverse square law, that dictates that light under a certain distance will fall off a certain amount, meaning that if light is place at 4 ft it would for example measure f8. When we move that light around the model but we keep it at 4ft there is no reason why the exposure would change on the skin of the model (remember we are not using reflective metering, but incident).
Thank you very much for a clear explanation. When I think about it, it makes perfect sense. I plan to calibrate my meters and go through the exercise. Again, I’m grateful for this “epiphany”.
Anyone tried the “camera for ipad” app?
Hey Frank.
I just became a fan. Excellent blog entry! I’ve been trying to add the use of a lightmeter to my workflow for a while now. These tips are great. I’ll definitely take a look at your site for the DVDs others have referenced.
Cheers,
-Ade
Thank you so very much.
Excellent post. Really liked the part about measuring. I’m an engineer so I prefer to measuring over experimenting. Now I need to experiment to find the REAL dynamic range of my camera in order to figure out the exposure numbers for black and white.
When doing that, also remember to do the same for print.
Hi there Frank & Scott,
Thanks for a great post. I have learned much from both of you over the years. It is great to see that a passion for teaching photography has helped build international careers for you both.
So how about some Doorhof videos on KelbyTraining.com? Just a suggestion…. : )
Ohhh i like that suggestion!
Although there is no instructional video on there but only the backstage material on http://www.youtube.com/frankdoorhof you can find some videos.
There is in fact some instructional material about the large Elinchrom Octa and the Ranger/Quadras but nothing compared to the instructional DVDs.
Great post Frank!
I have been thinking about buying a light meter, but the price really put me off as there are still so many other things to buy and so little budget for an amateur… :-)
But I see this post as a sign to save up for a light meter and a couple of your DVDs. I wanna learn more! :-D
Thanks a lot for this “food for thought” and the fact that you take the time to help so many people both on this blog as well as your own. I really appreciate it!
You’re more than welcome.
The meter is indeed very important in my opinion, you can always try to buy a used meter to start out with.
Congratulations Frank! Worldwide exposure on the website of Scott Kelby.
Succes with all your work!
Great post. I’ve been looking around for an English speaking training course on light( I live in Paris) as I feel I’m in the dark. Will look into your courses soon, even if it means driving up to the NL, sounds just what I’m after.
Cheers!
Great stuff Frank, I love the start with main and add from there school of thought, its nice to see one more person whose work I admire share that thought.
Thanks again! And Kelby, you just keep brining us the gold my friend, thank you!
Hi,
By adding lights you can really “paint”, sometimes I will start with the accents by the way when I want a more enhanced depth in a shot.
But normally I will start with the main.
Nice post, another huge winner!
Frank,
Lovely and very educational post. I’ll think that what you say is, the earlier you understand the importance of correct and good light, you will get a better photographer earlier than if you just go out and shoot. I can’t really say I’ve understand the light as you describe it (or the importance to measure it) but for somehow I practice to see how the light comes and try use it in the compose of the photo.
Anyway, thanks for the 2,5 and 4,5 figures, did not know that and will use whenever I get into such situations.
Thanks!
Hi,
What I meant with the piece is that if you really understand light (and to be honest it’s not that hard) you can do much more than when you copy setups that are created for you in for example certain workshops.
I always try to teach people to understand the basics first and build from there, it really helps for them to visualise what’s going on.
Added note:
Tomorrow we will go live from our studio in the Netherlands with a live feed during our photoshoot, it’s very basic and simple with one webcam that will be moved throughout the studio were the action is. There is a chatroom were people can ask questions during the shoot, and most of the times at the end we will show some results.
We will go live at app 10:30 CET AM, and it will probably run through 3:00PM that day.
See it at http://www.livestream.com/frankdoorhof
Hope to see some of you guys there also tomorrow.
And keep the comments and questions coming, tomorrow morning I will try answer any questions.
Frank –
Thanks for sharing your great insights and advice! Your work is the best punctuation of your message of proper (understood) lighting for the subject at hand. Beautiful and absolutely unique!
I hope we can put together that 2011 workshop date in CT!
Anyone who hasn’t seen Frank’s DVDs, they Rock! Frank is a great teacher and explains every little detail of the setups!
I picked up:
A Guide to Model Photography
Fashion & Glamour Photography (blue cover)
Fashion / Glamour Photography (headshot cover)
Controlling & Measuring “Light” Model Photography
LIGHT ll” working on location
Scott, if it is not permissible (or just uncool) please delete my link with my apologies!
The retailer:
—–
A friendly & fast outfit in the UK; fowardevents.co.uk and got a deal on the set. A caution, they play just fine in my PCs – but not in my ’07 model year DVD player as they are PAL rather than NTSC. (I’m in the US). Also, another caution; some titles deal with nudity in photography – please do not visit the site if that subject matter is offensive to you.
—–
Frank & Scott… Any possibility of a Frank Doorhof Kelby online training course?
;-)
Frank, your work inspires!
Doug
ps. Scott, is there anyone you don’t know? ;-)
Hi,
I want to add that the DVDs are not region coded and that most DVD players should play them fine on flatpanels, but they are indeed PAL and some TV’s have a problem with that. Most modern systems however are multiformat meaning they play PAL and NTSC.
On PCs/Macs you should have no problem at all, as on projectors and Plasma/LCDs with a BD player.
Nudity on the DVDs is a new thing for me, there is some lingerie but I’m very careful about nudity on the DVDs because I know some countries block them, I even have to remove the covers of two because there is too much neck on them when I send them to the middle east like Dubai.
Glad you liked them, if CT is Connecticut you can bet on it that it will work out, we would love to visit there :D
Frank!
Sorry about the confusing post above!
I was referring to the other titles – yours excluded!!! Your discs are Top Tier, beautifully executed and very well done! I personally have no issue with nudity – just wanted to ad the disclaimer regarding the Non J.A.F Doorhof titles for those that might have issue.
My DVD players are indeed older, but again they play fine in my PCs!
Yep, CT as in Connecticut! I sent you info a couple of weeks back! I’m working on it! :)
Kind Regards from toasty CT!
Doug
Quick addendum, Franks’ discs *do not* deal with nudity – however some other, unrelated titles on the site do. Sorry for the misleading comment… It’s the unexpected heat 93F on 4/7/10 in CT!
Don’t sweat it ;)
no problem at all
Nice to find you filling this blog space, reading your information makes it stick again in my head. Your picture examples are great, as always, and I like how you explain that people should try to understand light so that they can ‘read’ other pictures and create anything they imagine. It is one advice I take very seriously. Thanks for sharing your ideas, and good luck with the upcoming shoots and workshops.
Thanks Frank, brilliant post.
I have seen all of Frank’s DVD’s and they definitely get two thumbs up.
After some questions by mail I want to add this little piece on measuring the backgrounds :
Actually it’s so simple that people think it’s more difficult :D
When using a lightmeter you have to understand that the incident reading (with the dome) will give you a value which represents proper exposure for the subject right behind it.
When using the meter on reflective you point it at something and the meter will give you a reading that if entered in your camera will give you an exposure of 18% gray, middle gray.
So if your model reads f8 incident and your background reads f8 reflective the background will render as 18% gray and your model will be correct (incident vs reflective)
Now when you add lights to the background the metering for reflective will go up, let’s say it now reads f11 and the model f8.
When shooting on f8 the background will be lighter than before, because the background would be 18% gray IF you shoot it at f11, but because you’re shooting on f8 you’re actually opening up a stop.
Same goes for down.
Now when you remember that a full stop is twice the amount of light you can calculate everything very easily and will find that in MOST cases app 2.5 stops over the background will turn white and with 4.5 stops under the background will render black or very near black. It depends on a bit on the camera and ISO used so you still have to experiment but the calculations are the same.
The nice thing about using a reflective meter is that your background doesn’t matter anymore, it can be gray, white, black, purple or whatever.
If you remember this and understand this you can even store the information in EXIF and repeat the same exposed backgrounds over and over again, even after years.
For example store in EXIF, leftsh+1 and you can later on make the same lightsetup by measuring your model and adding +1 to the background. Even when your white background is not 100% white anymore it will still give the same results because it’s reflective +1.
Hope this gives a bit more information.
I’ve just come back to the photo world after 15 years off. The digitial world is exciting and interesting and a little overwhelming. And I’ve wondered what happened to the light meter. Nobody uses a light meter in any of the training courses. It was great to see that you do and to have you echo what was bouncing around in my head that the good old light meter still has a place in the process.
Thanks
I also find that very strange and curious.
On the other hand I also recently heard someone tell their students that one should overexpose the background with 2.5 stops (which is correct) however he walked to the background and used an incident meter aimed towards the lightsource…..
That’s what you see done a lot by the way, and that’s also why on most white background shots the hairs of the models are all blocky or blown away. When done correctly one should be able to see even the smaller hairs from the models neck and hair.
Somehow the rule of 2.5 stops over stuck, but they don’t know that it should be a reflective metering.
Dean Collins was a great teacher and really made people understand the system, it’s a shame he is gone I think somehow the photography world would be different if he was still around…. or maybe not.
In my workshops I try to teach the theory to make people really understand what’s going on and hopefully they will with that understanding work faster and more accurate.
Working without a lightmeter with strobes is like driving a car with your eyes closed and responding on the bumps :D
Yet another plug to the Netherlands!!
Goeie post, Frank!
Robin
Dank je wel
nice blog thank you for sharing
You’re welcome
Any chance of setting up a NAPP discount on the DVD package set?
Are there import fees when we buy them in the US?
Hi,
We have kept the pricing of the DVDs as low as possible, especially when compared to some other products out there.
The whole package of 5 DVDs is app 125.00 euros.
Import fees are normally not a problem, when you have a VAT number we even deduct the 19% VAT from the Netherlands.